Introduction
Starting any DIY or crafting project can be an exciting and rewarding experience, but it can also be daunting if you don’t have the right tools on hand. Whether you’re a seasoned DIYer or a beginner looking to tackle a new project, Gorilla Glue Pen is a versatile and easy-to-use adhesive that can help you achieve professional-looking results. In this guide, we’ll take you through everything you need to know about using Gorilla Glue Pen, from getting started to tips and tricks for a flawless finish. Let’s dive in!
What is Gorilla Glue Pen?
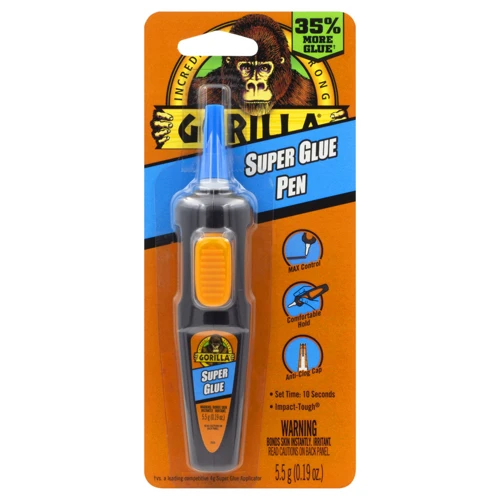
Gorilla Glue Pen is a user-friendly version of the popular Gorilla Glue product line. It’s a super strong adhesive that comes in a pen format, making it easy to apply without the mess associated with traditional liquid adhesives. Gorilla Glue Pen works well on a variety of surfaces including wood, metal, ceramic, and more. The glue is waterproof and can withstand extreme temperatures.
What sets Gorilla Glue Pen apart from other adhesives is its strength. It uses a polyurethane-based formula that creates a permanent bond. Once cured, the bond is incredibly strong and can hold up to 5.5kg (12 lbs) of weight. Gorilla Glue Pen also dries clear, making it perfect for use in crafts or repairs where appearance is important.
One key feature of Gorilla Glue Pen is its ease of use. The pen format allows for precise application and eliminates the need for additional tools or brushes. Simply shake the pen, press the tip down to dispense the glue, and apply it to the desired surface. The glue sets in just 10-20 seconds, providing a quick bonding solution.
Gorilla Glue Pen is a versatile adhesive that can be used for different purposes such as bonding wood, foam, metal, and glass to name a few. It can be used for both indoor and outdoor projects and is also heat and water resistant. The Gorilla Glue Pen has a long shelf life and can be easily stored in any toolbox or craft room.
Gorilla Glue Pen is a convenient and reliable adhesive that offers a quick, strong, and user-friendly bonding solution for a variety of surfaces. If you want to learn more about the Gorilla Glue product line, check out what is the stickiest glue in the world?.
Why Use Gorilla Glue Pen?
Using Gorilla Glue Pen can bring a lot of benefits to your craft projects. Here are a few reasons why you might consider using Gorilla Glue Pen:
- Precise application: Unlike traditional glue bottles, the pen applicator allows for precise control over where the glue is applied, making it perfect for small or intricate projects.
- Strong hold: Gorilla Glue Pen is made with the same high-quality formula as traditional Gorilla Glue, which means you can trust it to provide a strong, durable hold on a variety of surfaces.
- Quick-drying: The glue dries quickly, which means you can move on to the next step of your project sooner without worrying about the glue shifting or smudging.
- Ease of use: The pen applicator also makes the glue easy to use, even for beginners. You don’t have to worry about squeezing the right amount of glue out of a bottle or dealing with messy spills.
Gorilla Glue Pen can make your crafting experience more efficient, less messy, and more enjoyable. It’s a great choice for anyone who wants a strong hold and precise application without the hassle of traditional glue bottles. If you want to learn more about Gorilla Glue and its other products, you can read about who created Gorilla Glue 4 or find out what is stronger, Gorilla Glue or superglue for your particular project.
Getting Started

Before you start using the Gorilla Glue Pen, it’s essential to get everything ready. To ensure that your project goes smoothly, you’ll need to gather a few materials and prepare your work surface. This will help you to avoid any mishaps while you work on your project. If you’re unsure of how to get started, we recommend reading our guide on how to grow Gorilla Glue to understand the history of the glue and get a better idea of how it works. So let’s dive in and get started on using the Gorilla Glue Pen to complete your next project.
Materials You’ll Need
When it comes to using the Gorilla Glue Pen, it’s important to have all the necessary materials ready before you start. Here is a list of the materials you will need:
| Gorilla Glue Pen | The star of the show, the Gorilla Glue Pen is the main adhesive that you’ll be using. You can learn more about how good Gorilla Glue is here. |
| Surface to be glued | Whether it’s wood, plastic, metal, or any other material, make sure the surface is clean and dry before applying the glue. |
| Clamp (optional) | If you need to hold the glued surfaces in place until the glue dries, a clamp can be very helpful. We discuss when and how to use a clamp in more detail later in the article. |
| Protective gloves (optional) | Gorilla Glue is a strong adhesive and can stick to skin, so it’s a good idea to wear gloves as a precaution. You can get more tips on handling Gorilla Glue safely here. |
In addition to these materials, you may also want to have some paper towels or a damp cloth handy to clean up any excess glue. Now that you have all the necessary materials, let’s move on to preparing the work surface.
Preparing the Work Surface
Before using Gorilla Glue Pen, it is important to properly prepare the work surface. This ensures that the glue will adhere properly and provides the strongest bond possible.
Follow these steps to prepare the work surface:
- Clean the surface: Use a clean, dry cloth to wipe away any dust, dirt, or debris that may be on the surface. Any contaminants can weaken the bond, so it’s important to ensure the surface is clean.
- Roughen the surface: Using sandpaper or a wire brush, create a rough texture on the surface. This will create a better bond between the surface and the glue.
- Moisten the surface: Dampen the surface slightly with water. This will help activate the glue and ensure it cures properly.
- Protect surrounding areas: If you’re working with a delicate surface or an area that you don’t want to get glue on, use painter’s tape or masking tape to protect the area around it.
By following these steps, you ensure that the Gorilla Glue Pen will provide the strongest bond possible and reduces the risk of the glue failing.
If you’re still having issues with the glue drying too slowly, check out our article on how to make Gorilla Glue epoxy dry faster. Or, if you’re curious about how strong Gorilla Super Glue is, check out our article on how strong Gorilla Super Glue is. Additionally, consider reading our guide on which Gorilla Glue is best for rubber or how to use Clear Gorilla Glue for specific projects.
How to Use Gorilla Glue Pen
Now that you have everything set up and ready to go, it’s time to learn how to use the Gorilla Glue Pen. With its precision tip and easy-to-use design, the Gorilla Glue Pen makes applying glue a breeze. In this section, we’ll walk you through the steps for using the Gorilla Glue Pen effectively and share some tips and tricks to make the process even smoother. So grab your Gorilla Glue Pen and let’s get started!
Step 1: Shake the pen well
Before using the Gorilla Glue Pen, it is important to shake it well to ensure that the glue is properly mixed and ready for use. Here are the detailed steps to shake the pen well:
| Step 1: | Remove the cap of the Gorilla Glue Pen by twisting it counterclockwise. Make sure to hold the pen upright. |
| Step 2: | With the cap off, shake the pen vigorously for at least 20 seconds. You should hear the mixing ball inside the pen moving and rattling as you shake it. |
| Step 3: | Continue shaking the pen until the glue inside is completely mixed and has a uniform consistency. The glue should be a milky white color when properly mixed. |
| Step 4: | After shaking the pen, hold it upright and press the tip down on a piece of scrap paper until the glue comes out. This ensures that any air bubbles inside the pen are removed and the glue is ready for use. |
It is important to note that shaking the pen too vigorously or for too long can cause air bubbles to form in the glue, which can affect its effectiveness. It’s best to follow the shaking instructions carefully to ensure optimal performance of the glue.
Step 2: Press the tip to dispense the glue
Once you have shaken the Gorilla Glue Pen well, the next step is to dispense the glue. To achieve this, you need to press the tip of the pen. Here are the steps to follow:
- Remove the cap: Take off the cap of the Gorilla Glue Pen.
- Prime the pen: If this is your first time using the pen, you’ll need to prime it by pressing the tip down repeatedly until you see glue coming out. This may take a few presses.
- Press the tip: Once the pen is primed, you can begin to dispense glue by pressing the tip of the pen onto the surface where you want to apply it. Squeeze the pen gently while doing so.
- Control the amount of glue: It’s important to note that you don’t need to press hard to dispense the glue. Gorilla Glue Pen is designed to create a controlled flow of glue, so a light touch should suffice. This will help you avoid applying too much glue, which can cause a mess and make it difficult to clean up.
- Adjust the flow: If you find that too much or too little glue is coming out, you can adjust the flow by twisting the top of the pen. This will either increase or decrease the amount of glue that comes out when you press the tip of the pen.
Remember to handle the Gorilla Glue Pen with care, as the glue can bond to skin and other surfaces quickly. Wear gloves if necessary, and avoid touching the glue with your bare hands. If you do come into contact with the glue, there are ways to remove it, which we will cover in the tips and tricks section.
Step 3: Apply the glue to the surface
The next step after shaking the Gorilla Glue Pen well and pressing the tip to dispense the glue is to apply it to the surface. It is important to remember that a little goes a long way when it comes to Gorilla Glue Pen.
Do not apply too much: Applying too much Gorilla Glue Pen will result in a messy, uneven finish, and the glue may seep out of the joint when you press the surfaces together.
Work in sections: When applying the glue to large surfaces or areas, work in sections to ensure that you distribute the glue evenly.
Spread the glue: Using the tip of the pen, spread the glue in an even layer over the surface that is to be bonded.
Avoid gaps: Ensure that the entire surface is coated with a thin layer of glue, making sure to fill any gaps or crevices.
Be precise: If you need to apply Gorilla Glue Pen to a specific spot, use the precision tip to deliver the glue exactly where it needs to go. This is especially useful when working on delicate, small items.
When applying the glue to the surface, it is important to remember that Gorilla Glue Pen dries quickly, so work quickly and carefully. If you need to reposition a surface after it has been coated with Gorilla Glue Pen, do so quickly before the glue sets.
| Do | Avoid |
|---|---|
| Apply thinly and evenly | Applying too much glue |
| Spread glue with the pen tip | Leaving gaps or uneven coverage |
| Work in sections | Applying too slowly |
By following these simple tips and using Gorilla Glue Pen correctly, you can achieve a strong, durable bond that will last for a long time.
Step 4: Press the surfaces together
When it comes to using the Gorilla Glue Pen, pressing the surfaces together properly is crucial for achieving a strong and secure bond. Here are some steps to ensure that you press the surfaces together correctly:
- Align the surfaces: Before pressing the surfaces together, make sure that they are properly aligned. This will ensure that the bond is strong and that there are no gaps between the surfaces. If the surfaces are misaligned, it can weaken the bond and the glue may not work as effectively.
- Apply pressure: After aligning the surfaces, apply pressure to them to help the glue bond to the surfaces. You can use your hands to apply pressure or use a clamp to hold the surfaces in place. Applying pressure ensures that the glue forms a tight bond and helps to eliminate any gaps that may be present.
- Wipe away any excess glue: After pressing the surfaces together, wipe away any excess glue that may have oozed out from between the surfaces. This will help to prevent the glue from drying on the surfaces and making a mess.
- Be patient: It is important to give the glue time to dry and form a strong bond. Depending on the type of surface and the amount of glue applied, it may take several hours or even overnight for the glue to fully dry and cure. Avoid using or moving the bonded item until the glue has fully cured.
By following these steps, you can ensure that you press the surfaces together properly when using the Gorilla Glue Pen, resulting in a strong and sturdy bond.
Step 5: Clamp the surfaces in place (if needed)
After applying the Gorilla Glue Pen to the surfaces, it is recommended to clamp them together to ensure a strong bond. Clamping is especially important for larger or heavier objects. Here are the steps to properly clamp the surfaces:
| Step | Instructions |
|---|---|
| Step 1 | Choose the appropriate clamp size and type for the job. For larger surfaces, C-clamps or bar clamps are recommended. For smaller surfaces, spring clamps or hand-squeezed clamps work well. |
| Step 2 | Position the clamp over the glued area, making sure it is centered and in the correct location. |
| Step 3 | Turn the clamp’s screws or handles to tighten it in place. Be careful not to over-tighten the clamp, which could squeeze out excess glue and weaken the bond. |
| Step 4 | Wipe away any excess glue that squeezes out of the joint. Excess glue can be messy and can interfere with the clamp’s grip. |
| Step 5 | Leave the clamp in place for the recommended drying time, which can vary depending on the materials being glued together. |
| Step 6 | After the drying time has elapsed, carefully remove the clamp. If any excess glue remains, it can usually be sanded or scraped away. |
Tip: Be sure to read and follow all instructions on the clamp packaging to ensure safe and proper use. Be sure to wear protective gloves and goggles when using clamps and other tools.
Tips and Tricks
Now that you know how to use Gorilla Glue Pen like a pro, let’s explore some useful tips and tricks to make your experience even better. From removing excess glue to keeping the pen in top condition, these tips will help you get the most out of your Gorilla Glue Pen. So, let’s dive in and discover how to handle any potential issues you may encounter while using this powerful adhesive tool.
How to remove Gorilla Glue Pen
Removing Gorilla Glue Pen can be a bit tricky, but with the right tools and techniques, it can be done successfully. Here are the steps you need to follow to remove Gorilla Glue Pen from your work surface:
- Step 1: Identify the affected area.
- Step 2: Scrape off the excess glue.
- Step 3: Apply Acetone
- Step 4: Wipe off the glue
- Step 5: Clean the surface.
Before you start removing the Gorilla Glue Pen, make sure you know exactly which areas are affected by the glue. Use a UV light to locate the glue, especially if it’s not visible to the naked eye.
Using a plastic scraper or a butter knife, carefully scrape off any excess glue from the surface. Be careful not to scratch the surface while doing this.
Soak a cotton ball on a small amount of acetone. Make sure to wear gloves before doing so. Then carefully dab the affected areas until the glue starts to soften in texture.
Once the glue is softened, use a clean rag to carefully wipe off the glue from the surface. Be gentle and use a light hand pressure to avoid any damage to the underlying surface. If necessary, repeat this process several times until all the glue is removed.
After removing the glue, use a mild soap and water solution to clean the surface. Then dry it thoroughly before using it again.
Remember that acetone is a strong solvent and should be used with caution. It can soften some types of plastic and damage certain surfaces. Make sure to test a small, inconspicuous area of the surface before applying acetone. If the surface is discolored or deformed, you may need to try a different method.
Removing Gorilla Glue Pen may seem difficult, but with these steps, you can effectively remove it from your work surface. Just be sure to take your time, be careful, and follow the instructions.
How to clean the tip of the pen
Cleaning the tip of the Gorilla Glue Pen is essential for ensuring that it dispensing properly and efficiently. Here are the steps you should follow to clean the tip of the pen:
- Wipe the tip with a damp cloth: Firstly, take a damp cloth and gently wipe the tip of the pen. This will help to remove any excess glue that may have dried on the tip and prevent it from clogging the dispenser.
- Flush the tip with hot water: To remove any remaining glue from the tip, hold it under hot water for a few seconds. Be sure to avoid getting water inside the pen, as this can dilute the glue and affect its performance.
- Use a toothpick: If there is still glue buildup on the tip, use a toothpick to carefully scrape it away. Be careful not to damage the tip or push the glue further into the dispenser.
- Soak the tip in acetone: If the glue buildup is particularly stubborn, soak the tip of the pen in acetone for a few minutes. This should dissolve the glue and allow you to wipe it off easily.
- Dry the tip: Once you have cleaned the tip of the pen, be sure to dry it thoroughly before using it again. A wet or damp tip can affect the glue’s performance and cause it to dry out faster than usual.
By following these steps, you will be able to keep your Gorilla Glue Pen in top condition and ensure that it dispenses glue smoothly and efficiently each time you use it.
How to store Gorilla Glue Pen
Proper storage of Gorilla Glue Pen is crucial to ensure that the glue remains usable for future projects. Here are some tips on how to store Gorilla Glue Pen:
- Keep it capped: After using the pen, ensure that it is properly capped. This not only prevents the glue from drying out but also prevents spillage.
- Store in a cool and dry place: Gorilla Glue Pen should be stored in a cool, dry place away from direct sunlight and heat. Exposure to heat and sunlight can cause the glue to break down and lose its strength.
- Store upright: Make sure to store the pen upright to prevent the glue from seeping out. Keeping the pen upright also ensures that the glue is always in contact with the tip, making it ready to use for your next project.
- Do not refrigerate: While it may be tempting to store the Gorilla Glue Pen in the refrigerator, it is not recommended. The cold temperature can cause the glue to crystallize, making it unusable.
- Keep out of reach of children: As with any other adhesive, it is important to keep Gorilla Glue Pen out of reach of children and pets. Always store it in a secure location.
Following these simple tips can ensure that your Gorilla Glue Pen remains in good condition and ready to use for your next project. Remember to always use Gorilla Glue Pen in a well-ventilated area and follow the manufacturer’s instructions for best results.
Conclusion
As we wrap up this ultimate guide on how to use Gorilla Glue Pen, it’s important to take a moment to reflect on its versatility and effectiveness. From quick fixes to DIY projects, this pen has proven to be a valuable addition to any toolkit. So, let’s summarize what we’ve learned and explore some final thoughts on how Gorilla Glue Pen can benefit your crafting and repair needs.
Final thoughts on Gorilla Glue Pen
After testing out the Gorilla Glue Pen, we have some final thoughts to share. Below is a breakdown of our experience with the product:
| Pros | Cons |
|---|---|
| The pen design makes it easy to apply the glue with precision | The glue can be difficult to remove if it gets on surfaces it wasn’t intended for |
| Quick-drying formula means less wait time for the glue to set | The pen tip can sometimes clog, but it is easy to clean |
| Strong adhesive creates a bond that holds up well over time | The pen output may not be enough for larger projects and a larger container of Gorilla Glue may be necessary |
The Gorilla Glue Pen is a convenient and effective option for small-scale projects that require precision. However, it may not be the best choice for larger projects due to the amount of glue it can dispense. It is important to be cautious when using the glue and to have materials like acetone on hand in case of accidental spills or mishandling. When properly used, the Gorilla Glue Pen can provide a reliable and long-lasting hold for a variety of materials.
Frequently Asked Questions
Can Gorilla Glue Pen be used on all surfaces?
Gorilla Glue Pen can be used on most surfaces including wood, metal, ceramic, foam, glass, and more.
What is the drying time for Gorilla Glue Pen?
Gorilla Glue Pen dries in about 10-45 seconds depending on the surface and amount of glue applied.
Can I use Gorilla Glue Pen for outdoor projects?
Yes, Gorilla Glue Pen is weatherproof and ideal for outdoor projects.
Is Gorilla Glue Pen toxic?
Gorilla Glue Pen is not toxic when used as directed. However, it’s important to avoid getting the glue on your skin or in your eyes.
Can I paint over Gorilla Glue Pen?
Yes, you can paint over Gorilla Glue Pen once it has completely dried.
Can Gorilla Glue Pen be used for filling gaps?
Gorilla Glue Pen can be used to fill small gaps between surfaces, but it’s not recommended for larger gaps or voids.
How long will Gorilla Glue Pen last?
Once opened and used, Gorilla Glue Pen will last for up to 12 months if stored properly.
Can Gorilla Glue Pen be sanded or drilled?
Yes, once dried, Gorilla Glue Pen can be sanded or drilled for further finishing or modifications.
What should I do if Gorilla Glue Pen gets on my skin?
Wash the affected area with soap and water and avoid touching the glue until it has fully dried and can be peeled off.
Can I use Gorilla Glue Pen for fabric or clothing?
Gorilla Glue Pen is not recommended for fabric or clothing as it can cause staining and discoloration.