Are you struggling to open the nozzle of your Gorilla Glue bottle? Maybe you’ve just purchased a new bottle of glue, or it’s been sitting unused in your workshop for a while and the nozzle has become clogged. Whatever the case may be, it can be frustrating when you’re ready to start your project but can’t seem to get the glue flowing. Fear not, because in this article, we’ll provide you with a comprehensive guide and step-by-step instructions on how to open the Gorilla Glue nozzle. We’ll also share some tips and tricks to ensure you get the most out of your glue and keep yourself safe during the process. So, let’s get started!
Types of Gorilla Glue Nozzle
When it comes to using Gorilla Glue, one of the first things you need to know is the different types of nozzle options available. The right nozzle can make a big difference in how successful your project turns out. Let’s take a closer look at the three types of nozzles you may encounter when using Gorilla Glue: the standard nozzle, precision nozzle, and brush applicator. Understanding the differences between each nozzle type will help you choose the right one for your project.
Standard Nozzle
The standard nozzle is the most common type of nozzle that comes with Gorilla Glue. It is perfect for large areas where you need to apply a lot of glue at once. This type of nozzle has a wide opening that allows you to apply the glue evenly across the surface.
Tip: Before using the standard nozzle, make sure that the surface is clean and free from grease or oil. Any contamination can affect the bonding process.
The following table lists the features and benefits of the standard nozzle:
| Features | Benefits |
|---|---|
| Wide opening | Allows for even application |
| Ergonomic design | Easy to use and control |
| Flexible | Can be used with various materials |
| Nozzle can be cut to size | Allows for precise application |
Tip: If you need to apply the glue to a small area, you can cut the nozzle to the desired size. This will give you greater precision and control over the amount of glue you apply.
It is important to note that Gorilla Glue can expand up to three to four times its size when it dries. It is important to use it sparingly and avoid applying too much glue. You can find more information about the strength and drying time of Gorilla Glue in this article on what is Gorilla Glue.
Precision Nozzle
Precision nozzle is one of the most popular nozzle types for Gorilla Glue. It is designed for easy and precise application, which makes it ideal for small DIY projects. The precision nozzle is easy to use and can be attached to the standard Gorilla Glue bottle.
Here are some key features of the precision nozzle:
- It allows for precise control of the glue flow, which makes it ideal for intricate jobs.
- The nozzle is made of metal, which makes it durable and long-lasting.
- The tip is very thin, which allows you to apply glue in small amounts
- The precision nozzle is perfect for use on wood, metal, ceramic, foam, glass, and more.
Using the precision nozzle is fairly easy, and it can be done by following these simple steps:
1. Remove the cap from the Gorilla Glue bottle and attach the precision nozzle to the top of the bottle.
2. Squeeze the bottle gently to release a small amount of glue into a disposable surface or directly onto the project.
3. Apply the Gorilla Glue evenly to the surface by using the nozzle tip. Make sure to spread the glue uniformly.
4. Use a damp cloth or paper towel to clean the nozzle tip after use.
5. Replace the cap on the Gorilla Glue bottle and store it in a dry, cool place.
Some important tips to keep in mind:
- Be very careful while using Gorilla Glue, as it is toxic when dry.
- Store the glue in a dry and cool place to keep the adhesive properties intact.
- To use Gorilla Glue on metal, clean and dry the surface and then apply the glue. Clamp the two surfaces together for the best results.
Using the precision nozzle with Gorilla Glue makes it an ideal adhesive for small and intricate DIY projects. However, it is important to follow the instructions carefully and take all the necessary precautions while handling the glue. Understanding the features of each nozzle type can help you choose the best option for your project.
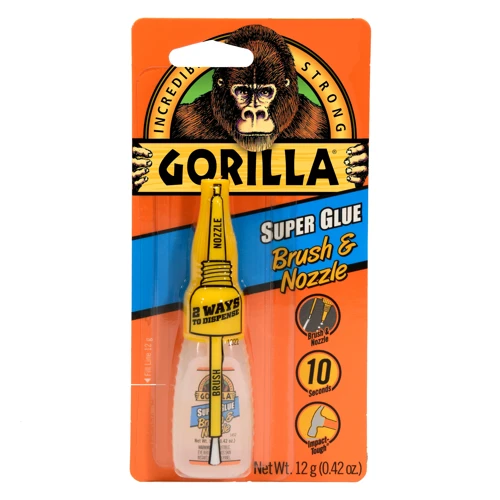
Brush Applicator
The Brush Applicator option for Gorilla Glue is a great choice for those who need a more precise application of the glue. The tool comes in handy when dealing with small, detailed projects where accuracy is key.
The Brush Applicator resembles a paint brush and can be used for a variety of materials, including wood, metal, ceramic, and more. The brush is designed to apply the glue evenly, and its bristles help reach tight spaces and crevices. Once the glue is poured out, the brush can be used to spread it around and apply it to the desired area.
One thing to keep in mind when using the Brush Applicator is that it works best with small amounts of glue. This is because using too much glue can cause it to overflow from the surfaces you are bonding. If you need to apply a larger amount of glue, it may be best to switch to the Standard Nozzle or Precision Nozzle options.
It’s important to note that Gorilla Glue is toxic when dry, so it’s essential to take proper safety precautions when handling it. Always wear gloves and eye protection when using any type of glue.
The Brush Applicator option is a great choice for those who need a more precise application of Gorilla Glue. It’s easy to use, affordable, and comes in handy for a variety of projects. If you’re looking for guidance on using Gorilla Glue on metal, be sure to check out our article on how to use Gorilla Glue on metal.
Step-by-Step Guide to Open Gorilla Glue Nozzle
Opening a Gorilla Glue nozzle may seem like an easy task, but without proper guidance, it can lead to frustration and wasted glue. In this section, we will guide you through each step on how to open your Gorilla Glue nozzle. It’s important to note that Gorilla Glue comes in various types, each with a unique nozzle design. If you’re unsure about which Gorilla Glue you have, refer to our earlier section about the Types of Gorilla Glue Nozzle. By following these steps, you can ensure a successful project with minimal hassle. Don’t forget to check out our related articles on the strength of glue or the difference between Gorilla Glue and super glue.
Step 1: Prepare Your Materials and Workspace
The first step in opening the Gorilla Glue nozzle is to get all the necessary materials and prepare your workspace. It is essential to protect your work surface with something like newspaper or a drop cloth, as Gorilla Glue can be very sticky and challenging to remove once it sets. Collect all the necessary supplies, including the glue, gloves (if preferred), a clean rag or towel, and a pair of pliers. It would also be helpful to have a small dish of water nearby to soak the nozzle and any tools used in case the glue dries on them.
To ensure optimal results from the glue, it’s essential to have a clean workspace and nozzle. This means cleaning both the surfaces you plan to bond and the nozzle of any debris or residue before using. A quick wipe down with rubbing alcohol or acetone can be helpful in removing any stubborn gunk or dirt.
In addition to preparing your workspace, it is essential to understand the type of nozzle you are working with, as different types have different methods of opening. Gorilla Glue comes with three types of nozzles: standard, precision, and brush applicator. It’s important to know the differences between these nozzles to ensure you use the correct technique to open them.
Proper preparation of the workspace and materials is crucial to opening the Gorilla Glue nozzle successfully. Not only will it ensure your safety, but it will also help create a smooth and effective bonding surface. To learn more about the strength of Gorilla Glue compared to other glue types, check out what is stronger: Gorilla Glue or superglue?
Step 2: Remove the Cap
Step 2: Removing the cap is the next crucial step in opening the Gorilla Glue nozzle. Before removing it, ensure that you have gathered the necessary materials and have a clean workspace. Using a dry cloth, wipe off any debris or dirt that has accumulated on the cap to prevent it from falling into the glue bottle. It is important to remember that Gorilla Glue has a strong bonding property that can result in messy situations if not handled correctly.
To remove the cap, grip it firmly and twist it counter-clockwise until it comes off. If the cap is tight, use a pair of pliers or a damp cloth to securely grip it while twisting. Avoid applying excessive force as this can cause the glue to come out too fast, causing a mess.
Once the cap is removed, inspect the nozzle to ensure no glue has dried on it. If there is any dried glue, use a pin or needle to carefully remove it. Alternatively, wipe it gently with a cloth soaked in warm water.
It is highly recommended that you read the instructions label that comes with the Gorilla Glue before proceeding to the next step. The label provides crucial information such as drying time, curing time, and proper storage and disposal of the glue bottle. This knowledge can help you use the glue safely and efficiently.
Tip: Did you know that Gorilla Glue is one of the strongest adhesive glues on the market? It bonds strongly to various surfaces, making it ideal for craft projects, woodworking, and even industrial use. To learn more about the strength of Gorilla Glue, click on this link for an in-depth article.
| Materials | Workspace |
|---|---|
| – Gorilla Glue bottle | – Clean and dry surface |
| – Dry cloth | – Protective gear (gloves and goggles) |
| – Pliers or damp cloth (optional) | – Label instructions |
| – Pin or needle (optional) |
By following these steps carefully, removing the cap will be a breeze, and you’ll be ready to use Gorilla Glue in no time!
Step 3: Clear the Tip
Once the cap is removed, the next step is to clear the tip of any dried glue. This is a crucial step for ensuring the smooth flow of the glue. If the glue has been used before and has been left for a while, the tip is likely to be clogged. To clear the tip, use a sharp object such as a needle or a pin to gently remove any dried-up glue. Be sure to do this carefully to avoid damaging the tip or injuring yourself. It’s important to wear gloves to protect your skin from the glue.
Pro Tip: If the glue has dried in a hard lump inside the tip, try soaking it in warm water for a few minutes. This will help to loosen the glue and make it easier to remove with a pin.
Once the glue has been cleared from the tip, you can test the flow by gently squeezing the bottle. If the glue comes out smoothly, you’re ready to move on to the next step. If not, clear the tip again until you’re satisfied with the flow. It’s important to ensure that the tip is completely clear before moving on to the next step to avoid any interruptions during the gluing process.
Note: In some cases, depending on the type of nozzle you’re using, you may need to cut the tip of the nozzle for better flow. This is typically done with the precision nozzle. If you’re unsure about whether or not to cut the tip, refer to the manufacturer’s instructions.
Now that the tip is clear, you’re ready to start using the glue. But before you do, it’s important to keep in mind some safety precautions. Gorilla Glue can be harmful to the skin and eyes, so it’s important to take the necessary precautionary measures. Wear gloves and safety glasses, and make sure to work in a well-ventilated area.
Pro Tip: If you accidentally get Gorilla Glue on your skin, refer to our article on how to use Gorilla Super Glue Gel to learn how to safely remove it.
By following these steps and precautions, you’ll be able to open the Gorilla Glue nozzle and use it safely and effectively for your projects.
Step 4: Twist the Nozzle
Once you have cleared the glue tip, it’s time to twist the nozzle. This step is crucial in opening the Gorilla Glue nozzle. You need to twist the nozzle counterclockwise to open it. If the nozzle is too tight, you can use pliers to loosen it. However, be careful not to damage it.
Some people might get confused about which way to turn the nozzle to open it. It’s important to remember that the nozzle needs to be twisted counterclockwise to open it. Turning it clockwise will only tighten it more, making it difficult to open.
Keep in mind the type of nozzle you are dealing with as well, as each one may have a slightly different opening mechanism. The standard nozzle, for example, is opened by twisting it counterclockwise, whereas the brush applicator is opened by pulling the brush out of the container.
Once you have opened the Gorilla Glue nozzle, you can proceed to apply the glue. Be sure to follow the instructions on the packaging for best results. In the next step, we will cover how to apply the glue properly.
It’s essential to handle Gorilla Glue with care as it can cause harm if it comes in contact with skin or eyes. If you accidentally get Gorilla Glue on your skin, you can find useful information on how to remove it at /how-to-use-gorilla-wood-glue/.
After using the glue, it’s crucial to store it properly to ensure it stays effective for future uses. You can find tips on how to do so at /who-invented-gorilla-glue/.
Finally, remember to use Gorilla Glue in a well-ventilated area. Inhaling its fumes can cause irritation to the respiratory system. If you need to use clear Gorilla Glue, you can find helpful tips on how to do so properly at /how-to-use-clear-gorilla-glue/.
Now that you know the steps to open a Gorilla Glue nozzle, you can confidently use this adhesive in your projects. Remember to follow the instructions carefully and take safety precautions when handling the glue. If you are curious about what color Gorilla Glue dries, you can find the answer at /what-color-does-gorilla-glue-dry/.
Step 5: Apply Glue
Once the nozzle of the Gorilla Glue is open, it’s time to apply the adhesive. But before that, it’s essential to understand the type of glue you’re handling. Gorilla Glue comes in various forms, such as Original, Super, and Wood Glue. Each type of glue has a different consistency and can be used for different purposes.
Step 5: Applying the Glue
| Step | Description |
|---|---|
| 1 | Apply the glue to one surface of the material. Note that Gorilla Glue expands when it dries, so apply only a small amount to prevent overflowing and wasting the adhesive. |
| 2 | Press the surfaces to be bonded together firmly. Hold them together for at least 10-15 seconds to allow the glue to set in. |
| 3 | If using the Precision Nozzle, apply the glue with a slow and steady hand. The glue comes out of the nozzle in a thin stream, allowing for precise application. Be sure to clean the nozzle after use to prevent clogging. |
| 4 | If using the Brush Applicator, apply the glue evenly on the surface using light strokes. The brush applicator is perfect for larger areas that require a thin and even distribution of glue. Clean the brush after use to avoid hardening of the glue. |
Remember, Gorilla Glue takes around 24 hours to fully set and harden. Avoid disturbing the bonded surfaces during this time, as it can cause the glue to lose its effectiveness. Once it is dry, you can sand, paint, or stain it according to your requirements.
Step 6: Clean the Nozzle
Now that you have used the Gorilla Glue and successfully applied it onto your desired surface, it’s important to clean the nozzle to prevent it from clogging and locking in the glue. Here is a detailed guide on how to clean the Gorilla Glue nozzle effectively:
| Materials Needed: | Steps: |
|---|---|
| Acetone | 1. Remove the cap once you have finished using the glue. |
| Cotton Swabs | 2. Take a clean cotton swab and remove as much excess glue as you can from the nozzle. |
| Paper Towels | 3. Dampen another clean cotton swab with acetone and gently rub the outside of the nozzle to dissolve any remaining glue. |
| 4. Repeat the dampening process with another clean cotton swab if needed. | |
| 5. Use a paper towel to wipe away any excess acetone and leftover glue. | |
| 6. Recap the Gorilla Glue and store it in a cool and dry place for future use. |
It’s important to note that acetone can be harmful to certain surfaces, so be sure to use it with caution and make sure to wear gloves and work in a well-ventilated area. Additionally, be sure to avoid skin or eye contact with both the glue and the acetone.
Cleaning your Gorilla Glue nozzle after every use will ensure that it remains in good condition and is ready for future use. Following these simple steps will ensure that your nozzle stays clean and functional for longer, saving you time and money in the long run.
Tips and Tricks
Now that you know how to open the nozzle of your Gorilla Glue, it’s time to share some tips and tricks to make sure you use the glue safely and effectively. Gorilla Glue is a powerful adhesive that can be extremely useful, but it can also be dangerous if not handled properly. Below are some important tips to keep in mind when using Gorilla Glue to make sure you get the most out of the adhesive while also ensuring your safety. Remember, practice caution at all times and take necessary precautions to avoid mishaps.
Be Careful of Skin or Eye Contact
When handling Gorilla Glue, it is essential to practice caution to avoid skin or eye contact with the adhesive. Gorilla Glue is known for its powerful bonding capabilities. As a result, it can cause skin irritation when it comes into contact with the skin. Here are some essential safety measures you should take to protect your skin and eyes from exposure to Gorilla Glue:
- Wear Protective Gloves: Always wear protective gloves when handling Gorilla Glue, as skincare products such as soap and water may not be enough to remove glue residue once it adheres to your skin.
- Avoid Skin Contact: Be careful not to let the glue come into contact with your skin. If you accidentally get Gorilla Glue on your skin, immediately rinse it off with water.
- Protect Your Eyes: Because Gorilla Glue can cause severe eye irritation if it comes into contact with your eyes, it is important to wear protective eyewear, such as safety goggles.
- Seek Medical Attention: If the glue accidentally gets into your eyes, seek medical attention right away. This can help reduce the risk of permanent eye damage.
By following these safety measures, you can protect yourself from the potentially harmful effects of Gorilla Glue. Always keep in mind that prevention is better than cure, so always stay vigilant when working with any adhesives.
Store Properly
When it comes to storing Gorilla Glue, proper storage is crucial in ensuring that it remains effective and can be used for future projects. Here are some tips on how to store Gorilla Glue properly:
| Tip | Explanation |
|---|---|
| Keep in a cool, dry place | Gorilla Glue should be stored in an area with a temperature range of 50-90°F (10-32°C). Humidity can affect the glue’s potency, so it’s important to keep it in a cool, dry area. |
| Avoid direct sunlight | Ultraviolet light can react with the glue and cause it to cure, rendering it unusable. Keep the glue in a dark area or in its original packaging if possible. |
| Close the cap tightly | Gorilla Glue is moisture activated, so if air gets in, it can cause the glue to harden and become unusable. Make sure to close the cap tightly after each use to prevent air from getting in. |
| Use within a year of purchase | Gorilla Glue has a shelf life of one year from the date of purchase. After that time, the potency of the glue may decrease, making it ineffective for use in projects. |
By following these tips, you can ensure that your Gorilla Glue stays effective and ready for use when you need it. Proper storage not only extends the life of the glue but also ensures that it’s always available to use for all your future projects.
Use in a Well-Ventilated Area
When using Gorilla Glue, it is important to work in a well-ventilated area. The fumes from the glue can be harmful if inhaled in large quantities. Proper ventilation is crucial to your health and safety, so be sure to open windows or work outside if possible. Here are some specific tips to help you use Gorilla Glue in a safe and well-ventilated area:
- Choose a properly ventilated space: When selecting an area to work with Gorilla Glue, choose a space that is open and well-ventilated. This can be outside or in a well-ventilated room. Avoid working in small, enclosed spaces with poor airflow.
- Use a respirator mask: If you are working with Gorilla Glue for an extended period of time or in a poorly ventilated area, consider wearing a respirator mask. This will help filter out any harmful fumes from the glue and protect your lungs.
- Avoid overexposure: Overexposure to Gorilla Glue can cause respiratory problems and other health issues. Be sure to take breaks and work in short intervals to avoid prolonged exposure. If you start feeling dizzy, lightheaded, or experience any other symptoms, stop using the glue immediately and seek fresh air.
By following these tips, you can safely use Gorilla Glue in a well-ventilated area and protect yourself from any harmful fumes. Remember, it is always better to be safe than sorry, so take the necessary precautions before starting your next project.
Conclusion
As we come to the end of this comprehensive guide on how to open Gorilla Glue nozzles, it’s important to remember that safety is paramount when using any type of glue. Always wear protective gear such as gloves and goggles to prevent skin and eye contact.
In conclusion, we have provided you with a step-by-step guide on how to open the three types of Gorilla Glue nozzles- standard nozzle, precision nozzle, and brush applicator. Follow the instructions carefully and you will be able to open the nozzle with ease.
Remember to store the glue properly in a cool, dry place and use it in a well-ventilated area to prevent respiratory issues. Additionally, with these tips and tricks in mind, you can use your Gorilla Glue like a pro and tackle a wide range of DIY and craft projects.
So go ahead and put your newly acquired knowledge into practice, whether you’re fixing a broken vase or creating a masterpiece using different materials. With Gorilla Glue, the possibilities are truly endless. Happy crafting!
Frequently Asked Questions
What is Gorilla Glue and how does it work?
Gorilla Glue is an industrial-strength adhesive that creates a strong, solid bond between surfaces. It works by creating a chemical reaction when the glue is exposed to moisture, which causes it to expand and create a strong seal.
Can Gorilla Glue be used on all surfaces?
Gorilla Glue can be used on many surfaces, including wood, metal, ceramic, stone, and more. However, it may not be suitable for use on certain plastics or surfaces that are especially smooth or greasy.
Is Gorilla Glue waterproof?
Yes, Gorilla Glue is waterproof once it has cured. It is also resistant to extreme temperatures, making it ideal for use in a variety of settings.
How long does it take for Gorilla Glue to dry?
Gorilla Glue requires about 24 hours to fully dry and cure. However, it should begin to set and build strength within about 10-20 minutes of application.
What should I do if Gorilla Glue gets on my skin?
If Gorilla Glue gets on your skin, it is important to wash it off immediately with soap and water. Do not try to pull it off your skin, as this can cause further irritation.
Can I use Gorilla Glue on food-related items?
No, Gorilla Glue is not recommended for use on items that will come into contact with food or drink, as it is not safe for consumption.
Can I use Gorilla Glue for outdoor projects?
Yes, Gorilla Glue is ideal for outdoor projects as it is resistant to water and extreme temperatures. However, it’s important to follow all instructions and ensure that the glue is completely dry before exposing it to the elements.
What is the best way to store Gorilla Glue?
Gorilla Glue should be stored in a cool, dry place away from direct sunlight. It should also be kept in an airtight container to prevent moisture from getting inside.
Can I use a hairdryer to speed up the drying process?
No, it is not recommended to use a hairdryer or any other external source of heat to speed up the drying process. This can cause the glue to dry too quickly and may weaken the bond.
What should I do if the Gorilla Glue nozzle becomes clogged?
If the nozzle becomes clogged, it can be easily cleaned by wiping it with a damp cloth or using a pin to clear the tip. It’s important to avoid using too much pressure or force, as this can damage the nozzle and prevent it from working properly.