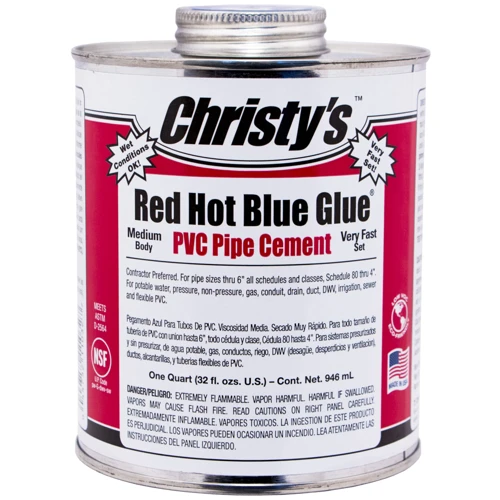
As you embark on your latest PVC project, you are eager to get started; however, when you go to open your Christy’s PVC glue, you find yourself struggling. The cap won’t budge, and you’re unsure how to properly remove the seal. Don’t worry; you’re not alone in this predicament. Opening PVC glue can be a frustrating experience, especially if you’re not familiar with the process. But fear not! In this guide, we will walk you through the steps on how to open Christy’s PVC Glue, ensuring a smooth and effortless experience for your next project. So, let’s dive in!
Why is it Important to Know How to Open Christy’s PVC Glue?
Understanding how to open Christy’s PVC Glue is crucial for anyone working with PVC pipes and fittings. Failure to properly open and use the glue can result in wasted glue, damaged materials, and potential safety hazards. Not to mention, knowing how to handle Christy’s PVC Glue is a must-have skill for anyone who wants to properly layer PVC adhesive. This knowledge can help avoid failures, which can lead to additional expenses. Whether it is used in plumbing, electrical, irrigation, or any other critical work, it is important to know how to open and use it correctly.
Ensures Safety
Ensuring safety is one of the most important reasons why learning how to open Christy’s PVC glue is crucial. Failure to take the necessary safety precautions when handling PVC glue can result in serious injuries. It is necessary to follow the right steps to prevent accidents.
When preparing to use the Christy’s PVC glue, it is important to ensure that the working area is well-ventilated. This is because the glue gives off fumes that are harmful when inhaled. Make sure you are in an open area or you can use an exhaust fan or a respirator mask. You should wear protective gear, including gloves and safety glasses, to protect your skin and eyes from the glue.
You need to ensure that the glue is not contaminated or expired before using it. Using contaminated or expired glue may result in poor adhesion or may even cause the materials to break apart. Always check the label for the expiry date before purchasing or using PVC glue.
Using the right technique to open the glue can also ensure your safety. Avoid using excessive force or tools that may cause harm, such as pliers or scissors. Instead, follow the simple steps provided in this guide to ensure that you open the glue safely and without any damages.
By ensuring safety when handling PVC glue, you will minimize the risks of accidents or injuries while using the product. Now that we have looked at the importance of safety, let’s move on to the next section to discuss the benefits of learning to open Christy’s PVC glue to avoid wasting glue.
What is the strongest PVC glue?
Avoids Wasting Glue
Knowing how to properly open Christy’s PVC glue can also help you avoid wasting glue. By being able to access the glue easily, you can control the amount you’re using and minimize the risk of accidentally spilling or wasting it.
Here are some ways that opening the glue properly can help you avoid wasting it:
| Problem: | Solution: |
|---|---|
| Tight cap makes it difficult to open | Follow the step-by-step guide to properly remove the cap without damaging it |
| Can’t access the glue because of a stuck cap | Use the right tools, such as pliers or a wrench, to loosen the cap. |
| Accidental spillage caused by improper opening | By avoiding spills, you can save money and prevent unwanted contact with the skin or eyes. |
| Difficulty in controlling the amount of glue applied | By opening the glue easily, you can control the flow of the glue, which helps to prevent wastage. |
By opening the PVC glue correctly, you can save money on wasted glue and reduce the risks associated with using it.
Remember to always store the PVC glue in an upright position and keep it away from children and pets. If you need more information about how to use PVC glue, you can check out our article on how to glue PVC pipe or our guide on what glue to use on inflatables.
What You Need
Before starting the process of opening Christy’s PVC Glue, it is important to make sure you have all the necessary items. This will help you avoid any mishaps during the process and ensure that opening the glue is done correctly. Here is a list of the materials and tools you will need:
Materials
To successfully open Christy’s PVC glue, you’ll need a few materials. These items will ensure that you can pierce the seal on the glue container without damaging it or injuring yourself.
Here are the essential materials you’ll need to open Christy’s PVC glue:
| Materials | Description |
| PVC glue container | The Christy’s PVC glue that you want to open. |
| Clean cloth | Use this to clean the nozzle of the container before replacing the cap. |
Note that you don’t need many materials to open Christy’s PVC glue. The key is to be gentle with the seal-piercing process. Trying to use too much force or the wrong tools may result in breaking the seal or damaging the container.
Now that you have an idea of the materials you’ll need, let’s move on to the tools.
Tools
To open Christy’s PVC glue, you will only need a few basic tools that you probably already have at home. These tools are used to ensure that you can break the seal and open the glue without causing any damage.
| Tools | Description |
|---|---|
| Utility knife | A sharp blade is used to pierce through the seal on the glue cap. |
| Pliers | If the cap is too tight, pliers can be used to grip and twist it open. |
| Sandpaper | Sandpaper can be used to smooth any rough edges on the cap or top of the glue container. This is important for easy opening and closing of the glue container. |
Remember to use these tools carefully and according to their intended purposes to avoid any injuries or damage to the glue container. If you don’t have these tools at home, they can easily be found in your local hardware store.
You can also find many articles on the internet that provide guides on how to use these tools for various purposes. For example, if you want to learn how to break PVC glue, you might find this article helpful. Alternatively, if you’re trying to glue Traxxas tires, this guide might be more useful. However, in this article, we’ll focus only on how to open Christy’s PVC glue.
Step-by-Step Guide
Now that you have gathered all the necessary tools and materials, it’s time to start opening Christy’s PVC glue. Follow these step-by-step instructions carefully to avoid any accidents and ensure a successful outcome. If you need any assistance with melting PVC glue, take a look at this article “How to Melt PVC Glue: A Quick Guide”. Let’s get started!
Step 1: Prepare the Glue and Surface
Before opening the Christy’s PVC glue, it is essential to prepare both the glue and the surface to ensure a proper connection. Following the right preparation, you can ensure that the glue will work correctly, and your PVC pipe will remain sealed for an extended period.
Step 1: Clean the Surface
Ensure that the surface you want to glue is clean and free from any dust, grease, or dirt. Clean it with a dry cloth or use sandpaper to remove any rough or uneven spots. This will help the glue to stick to the surface better and create a strong bond.
Step 2: Cut the Pipe to the Required Length
Measure the length of the PVC pipe that you want to join and cut it accordingly. You can use a hacksaw to cut it to the desired length.
Step 3: Sand the Edges of the Pipe
Using sandpaper, smoothen the edges of the PVC pipe that you have cut. This will remove any burrs or sharp edges and help the glue to adhere to the surface of the pipe effectively.
Step 4: Apply Primer
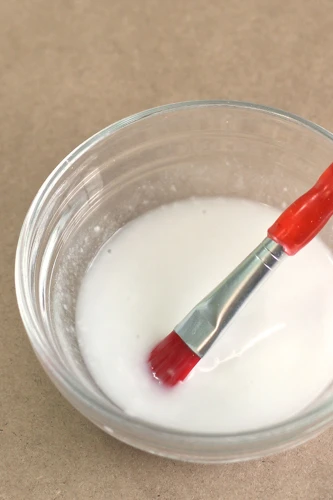
Apply the PVC primer on the surface of the PVC pipe using a brush. The primer will clean and etch the surface of the PVC pipe, allowing the glue to stick to it better.
Step 5: Apply Glue
Apply the Christy’s PVC glue to the surface of the pipe immediately after applying the primer. Apply it evenly and quickly before the primer dries.
Following these steps will prepare the glue and the surface to ensure that the Christy’s PVC glue will work effectively. Now that the surface and glue are ready, you can proceed to the next step of opening the glue and applying it to the surface.
If you want to learn more about how to glue PVC pipes, check out how to connect PVC pipe without glue article.
Step 2: Remove the Cap of the Christy’s PVC Glue
Once you have gathered the materials and tools outlined in the previous section, you’re now ready to begin the process of opening Christy’s PVC Glue.
The first step to opening the glue is to make sure the cap is tight and secure. This is important to prevent any leakage or drying out of the glue.
To remove the cap, hold the jar firmly with one hand and use your other hand to twist off the cap in a counterclockwise direction. This may require some force, especially if the glue hasn’t been used in a while and the cap has tightened. If you’re having difficulty, you can try tapping the cap gently with a rubber mallet to loosen it.
Once the cap is off, set it aside but do not discard it as you will need to recap the glue after use to prevent it from drying out.
It is important to note that Christy’s PVC Glue should only be used in well-ventilated areas and should not come into contact with your skin or eyes. Before proceeding to the next step, make sure you are working in a well-ventilated space and, if necessary, wear gloves to prevent any accidental contact with the glue.
Now that you have removed the cap, you’re ready to move on to the next step, which is to pierce the seal.
Step 3: Pierce the Seal
After you have removed the cap from the container, locate the seal inside. The seal is a thin layer that prevents the glue from drying out too quickly and also prevents any leakage. In order to use the glue, you will need to pierce through this seal.
Step 3: Pierce the Seal
To pierce the seal, you will need to use a sharp tool such as a screwdriver or a nail. Make sure that the tool you use is clean and free of any dirt or debris. If the tool is not clean, it could contaminate the glue and affect how well it bonds.
Take the tool and insert it carefully through the center of the seal. Be sure not to go too deep, as you do not want to damage the opening of the container. Make a small hole, and then remove the tool.
Once you have pierced the seal, you can replace the cap on the container. Make sure that the cap is on tightly, as you do not want any air to get in and dry out the glue.
It is important to note that you should only pierce the seal when you are ready to use the glue. If you pierce the seal and then leave the glue for an extended period of time, it may dry out or become less effective.
Now you’re ready to use Christy’s PVC Glue for your project. If you need tips on how to glue PVC repair coupling, check out our article “How to Glue a PVC Repair Coupling”. And if you’re wondering what the best super glue for wood is, read our article titled “What Is the Best Super Glue for Wood?”. Need to know how to glue acrylic to PVC? Check out this article: “How to Glue Acrylic to PVC”.
Step 4: Recap the Glue after Use
Once you’re finished with using the Christy’s PVC Glue, it’s essential to recap it properly, so it doesn’t dry out. Follow these steps to ensure the glue stays usable:
- Take the cap and place it securely back on the nozzle of the glue tube.
- Press the cap down firmly to ensure it’s tightly sealed.
- Make sure to wipe off any excess glue around the nozzle with a clean cloth or tissue. This will prevent the glue from drying and will keep the tube clean for future use.
- Store the tube upright in a dry and cool place, away from direct sunlight and heat sources. For example, a cabinet or drawer in a workshop or garage is ideal.
Recapping the Christy’s PVC Glue correctly is crucial in keeping the adhesive fresh and ready to use for your next project. Taking the time to make sure the cap is secure and wiping off any excess glue will also help prevent any mess and keep your workplace clean. Proper storage will ensure that the glue won’t dry out and will maintain its quality. By following these steps, you can be sure that Christy’s PVC Glue will be ready and waiting for your next project whenever you need it.
Tips and Tricks
When dealing with Christy’s PVC glue, there are some tips and tricks that can help you make the most out of its use. The proper handling and storage of this type of glue can ensure its effectiveness and longevity. Here are some useful pointers that you can keep in mind to make your use of Christy’s PVC glue a success.
Use Gloves
It’s important to keep yourself safe when handling Christy’s PVC glue, which is why it’s recommended to wear gloves. Here are some reasons why using gloves is important:
- Protects Your Skin: PVC glue contains chemicals that can irritate or harm your skin if you come into direct contact with it. Gloves work as a barrier between your skin and the glue, protecting you from any potential harm.
- Prevents Allergic Reactions: Some people may be allergic to the chemicals present in the PVC glue. Wearing gloves will reduce the chance of an allergic reaction and keep you safe from any harmful side effects.
- Hygiene: Wearing gloves is a hygienic practice as it prevents any germs or bacteria from transferring from your hands to the glue and vice versa. It’s always a good idea to keep your work area clean and sterile.
When selecting gloves for this task, use gloves that are chemical resistant and made of nitrile or latex material. Avoid using gloves made of cotton or other porous materials as they won’t provide sufficient protection.
Remember to dispose of gloves properly after use and wash your hands thoroughly with soap and water. By wearing gloves when handling PVC glue, you will ensure your safety and make your project a success.
Store the Glue Properly
Proper storage of Christy’s PVC glue is essential to maintain its quality and effectiveness. Here are some important tips for storing the glue correctly:
- Store in a Cool and Dry Place: It is recommended to store the glue in a cool and dry place, away from direct sunlight. Exposure to heat or moisture can degrade the quality of the glue, and it might not work as effectively as it should.
- Keep the Container Tightly Sealed: Ensure that the cap is tightly sealed after use. Any exposure to air could cause the glue to dry out and become unusable.
- Store Away from Children or Pets: PVC glue is harmful if ingested or inhaled, and it’s essential to keep it away from children and pets. Store it in a high place or locked cabinet for added safety.
- Do Not Store in Extreme Temperatures: Avoid storing the glue in areas with extreme temperatures, such as near a heater or in the freezer. Extreme temperatures can cause the glue to separate and compromise its quality.
- Check the Expiry Date: Always check the expiry date of the glue before using it or storing it. Expired glue might not work effectively and could cause damage to the material you’re using it on.
- Keep the Original Container: It’s advisable to keep the glue in its original container. Using a different container might cause the glue to react differently and might cause spills or accidents.
By following these tips, you can ensure that your Christy’s PVC glue remains in the best condition possible and lasts for a longer time.
Do Not Over-Pierce the Seal
It is crucial to be careful when piercing the seal of the Christy’s PVC glue. Over-piercing the seal can lead to various problems, including wastage of glue and even accidents. It is important to follow the manufacturer’s guidelines for piercing the seal.
What happens if the seal is over-pierced?
If you over-pierce the seal, the glue will start to leak out quickly. This is because the pressure inside the container changes when the seal is broken. The glue may also thicken over time, making it harder to use. Over-piercing the seal can make it difficult to recap the container, which can cause the glue to dry out or harden.
How to avoid over-piercing the seal?
The best way to avoid over-piercing the seal of the Christy’s PVC glue is to use a sharp object, such as a piercing tool or a pointed stick. Gently insert the tool into the seal, making sure not to push it too far in. Once the tool is in, hold it steady and twist it slowly to create a small hole. This should be enough to allow the glue to flow out smoothly without over-piercing the seal.
What to do if you over-pierce the seal?
If you accidentally over-pierce the seal, don’t worry. You can still use the glue, but you will need to be extra careful. Use the glue as quickly as possible to prevent it from drying out or hardening. Additionally, place the container in a plastic bag to prevent the glue from leaking out.
Piercing the seal of the Christy’s PVC glue is an important step in using the product. It is important to avoid over-piercing the seal to prevent wastage of the glue and accidents. Using a sharp object and being careful during the piercing process can help you avoid this issue.
Conclusion
After following the step-by-step guide mentioned above, you must have successfully learned how to open Christy’s PVC glue. By doing so, you can prevent any accidents caused by not knowing the proper procedures in opening the glue. Ensuring your safety and avoiding any unintentional waste of the glue should be a top priority. Remember to always wear gloves when handling the glue and store it properly to avoid it from going bad. Over-piercing the seal should also be avoided to keep the glue from drying out. With these tips and tricks in mind, you can make the most out of your Christy’s PVC glue without any unexpected incidents. And that’s it for our guide on how to open Christy’s PVC glue!
Frequently Asked Questions
What is Christy’s PVC Glue?
Christy’s PVC Glue is a solvent-based adhesive designed for bonding PVC pipes and fittings.
Is Christy’s PVC Glue safe to use?
Yes, Christy’s PVC Glue is safe to use when handled according to the product’s instructions.
What types of surfaces should Christy’s PVC Glue be used on?
Christy’s PVC Glue is specifically designed for use on PVC surfaces and should not be used on other types of materials.
Can I use Christy’s PVC Glue to bond different pipe sizes together?
Yes, Christy’s PVC Glue can be used to bond different sizes of PVC pipes and fittings together.
What is the drying time for Christy’s PVC Glue?
Christy’s PVC Glue usually sets within a few minutes and is fully dry within 24 hours.
Can I use Christy’s PVC Glue in humid conditions?
While it is possible to use Christy’s PVC Glue in humid conditions, it may take longer to dry and cure properly.
How do I clean up any excess glue after use?
Excess glue can be removed using a cloth soaked in solvent or warm soapy water.
What is the shelf life of Christy’s PVC Glue?
Christy’s PVC Glue has a shelf life of approximately 2 years if stored properly in a cool, dry place.
Can I use Christy’s PVC Glue for potable water applications?
No, Christy’s PVC Glue should not be used for potable water applications as it is not safe for human consumption.
Can I reuse the brush that comes with the glue?
No, it is not recommended to reuse the brush that comes with the glue as it can lead to contamination and potentially compromise the effectiveness of the adhesive.