Have you ever had difficulty with glue spilling over or drying out too quickly? Or have you ever found yourself with empty glue bottles and no backup plan? Well, fear not! There is a simple solution to all your glue-related struggles: glue sponges. That’s right! With just a few materials and tools, you can create your own glue sponges that will make glueing a breeze. In this guide, we’ll take you through each step of the process, from mixing your glue to assembling your sponge. So, let’s dive in and learn how to make glue sponges that will transform the way you approach crafting and DIY projects.
What You’ll Need
Gathering the necessary supplies is the first step in making your own glue sponges. Don’t worry, you won’t need anything too fancy – just a few simple materials and tools. Here is a list of what you’ll need to get started on creating your very own glue sponges. No need to visit your local hardware store or craft shop, you may already have everything on hand. So, grab your glue and let’s get started! If you’re looking for more projects after this one, you can check out our articles on how to glue wallpaper on the wall or what glue to use for basing miniatures.
Materials
When it comes to making glue sponges, the materials you’ll need are fairly simple and easy to find. Here’s a breakdown of what you’ll need:
| Material | Description |
|---|---|
| Sponges | You can use any kind of sponge, but it’s best to use ones that are a little porous so they can soak up the glue without getting too saturated. Make sure they’re clean and free of any debris or soap residue. |
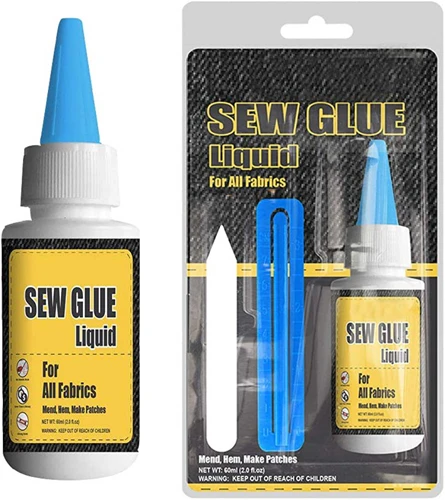
| Glue | You can use any kind of white glue for this project, but some popular options include Elmer’s glue and school glue. Avoid using toxic glues or ones that are not meant for crafting. |
| Container | You’ll need a container that can hold your sponges and glue mixture. A plastic container with a tight lid works well and is easy to store. |
| Water | You’ll use water to thin out the glue and create your mixture. Make sure it’s clean and room temperature. |
Having trouble finding the right type of glue for your project? Check out our article on who sells E6000 glue or what glue to use on poster board. Or maybe you’re interested in learning more about different types of glue for various crafting projects like bookbinding or embossing powder. Whatever your glue needs may be, we can help.
Tools
When it comes to making glue sponges, having the right tools is crucial to ensure a successful outcome. Here are the tools you’ll need to make your own glue sponges:
| Tools: | Description: |
| Scissors | A pair of scissors will be necessary to cut the sponges to the desired size |
| Gloves | Wearing gloves is optional but recommended, especially if using non-toxic glue |
| Bowl or Container for Mixing | A bowl or container will be needed to mix the glue with water |
| Spoon or Stirrer | A spoon or stirrer will be used to mix the glue and water |
| Sponges | You will need a pack of sponges to make the glue sponges |
| Non-Toxic Glue | You will need non-toxic glue and depending on how many sponges you want to create, you may need more than one bottle of glue. If you don’t know how to make non-toxic glue, you can learn from this article. |
It is important to note that some crafters prefer using a particular type of glue known as methyl cellulose glue as it is versatile and creates a strong bond. Some even believe it is the perfect glue for making glue sponges. You can learn how to make methyl cellulose glue in this article.
Instructions
Now that you have gathered all of your materials and tools, it’s time to dive into making your own glue sponges! This step-by-step guide will walk you through the process so you can create your own convenient, mess-free, and easy-to-use glue sponges. Follow each step closely to ensure the best results. By the end of this tutorial, you’ll be able to easily assemble and use your own glue sponge for your next crafting project.
Don’t forget, if you’re new to crafting, you might want to learn more about what a new-hire glue ticket is or how long does Citadel glue take to dry, as those topics may come in handy later on.
Step 1: Prepare Your Materials
Before beginning the process of creating your glue sponge, it’s important to prepare all of your materials. The following is a list of materials you will need:
- Glue (white school glue or clear drying liquid glue)
- Sponges (make sure they are not pre-treated with soap or cleaner)
- Airtight container (such as a plastic container with a lid)
- Water
- Optional: food coloring
Here’s a closer look at each item:
The type of glue you choose is up to you, but it’s important to use one that will dry clear. White school glue or clear-drying liquid glue both work well for this project. Avoid using glues that are quick-drying or have a strong smell. For more information on different types of glue, check out our guide.
Choose sponges that are new and have not been pre-treated with soap or cleaner. They should also be soft and porous. You can use any shape or size of sponge you like, as long as it fits inside your container.
The container you choose should be airtight so that your glue sponge doesn’t dry out. A plastic container with a lid works well, but you could also use a glass jar with a screw-top lid.
You will need water to thin out your glue and create the right consistency for your glue sponge.
If you want to add some color to your glue sponge, you can use food coloring. Just be careful not to add too much, as it can affect the consistency of the glue.
Once you have gathered all of your materials, you are ready to move on to the next step: mixing your glue. But before that, it’s worth noting that different types of glue might have different drying times. For example, if you use Citadel glue, you might be interested in finding out how long it takes to dry. Keeping this information in mind can help you plan your project more effectively.
Step 2: Mix Your Glue
Mixing your glue is an important step in creating your glue sponges. Follow these easy steps to mix your glue properly:
- Step 1: Measure out the glue. You will need a small amount of glue to create your sponge, around 1/4 cup. Make sure you use a non-toxic glue to avoid any harm.
- Step 2: Add a small amount of water. You want to thin the glue out slightly so it soaks easily into the sponge. A ratio of 1:1 is best, but adjust as needed.
- Step 3: Mix the glue and water together. Gently stir them together until fully mixed. Avoid over-stirring, as this can cause air bubbles in the glue mixture.
If you want colored glue sponges, this is also the step where you can add food coloring or liquid watercolor to the mixture before stirring. However, keep in mind that the more color you add, the more it may stain surfaces. Make sure to use gloves or have a barrier on your workspace.
Once you have mixed your glue, it’s time to move on to the next step: preparing your sponges and container.
Step 3: Prep Your Sponges and Container
Before getting to the exciting part of creating your glue sponges, it’s essential to prep your sponges and container properly. These are crucial steps that can make a difference in the effectiveness and lifespan of your glue sponges. Here are a few essential steps that you need to follow to prepare your sponges and container:
Step 1: Choose your container
First, choose a container that’s the perfect size for your sponges. It should be tall and wide enough to hold the sponges comfortably. Remember that if you’re using several sponges, the container should hold them perfectly, leaving no space for movement.
Step 2: Cut your sponges
Next, cut your sponges to fit your container. Cut them into small squares that will fit snugly inside your container. Make sure the sponges are big enough to hold your fingers without getting glue all over them.
Step 3: Soak your sponges
Soak the sponge pieces in water for a while. This will help expand them and make them softer.
Step 4: Squeeze out excess water
After soaking, gently squeeze out any remaining water from the sponges. They should be moist but not dripping wet.
Step 5: Fill container with sponges
Fill the container with your sponge pieces. Arrange them tightly to ensure there’s no space between them.
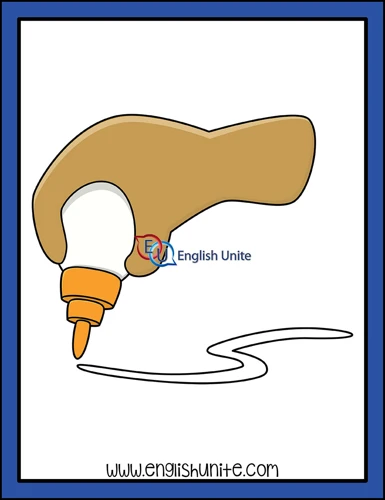
Step 6: Add glue
Add glue to the sponges. Dab your glue bottle’s tip onto each sponge evenly. It’s best to use a non-toxic glue to avoid any harm to your skin.
Step 7: Close the container
Finally, close your container and give it a good shake. This will help distribute the glue evenly and enable it to saturate each sponge.
Completing these steps properly will help prep your sponges and container for the next step of assembling the glue sponge.
Step 4: Assemble Your Glue Sponge
Assembling your glue sponge is the next step in making this useful and fun tool. Here’s how to do it:
| Step 1: | Take your container with the wet sponge and pour in enough glue to saturate it. You don’t want the sponge to be dripping with glue, but you also don’t want it to be too dry to be effective. |
| Step 2: | Use a paint brush or spatula to smooth the glue over the sponge and ensure it is evenly distributed. |
| Step 3: | Place the dry sponge on top of the glue-covered sponge. |
| Step 4: | Press the two sponges together, making sure the glue is distributed evenly between them. You can use your hands or a heavy object to do this. Some ideas for heavy objects include books, small weights, or even a paperweight. |
| Step 5: | Let the sponge sit for a few hours or overnight to ensure the glue has fully soaked into both sponges. |
Remember, the glue sponge can be used for a variety of projects and is a great alternative to traditional liquid glue. The next step is to use your glue sponge and see how effective it is!
Step 5: Use Your Glue Sponge!
Congratulations! You have made your very own glue sponge. Now it’s time to put it to use. Here’s how you can use your glue sponge:
- Dab method: Simply press the item you want to glue onto the sponge and press down. The sponge will leave a thin layer of glue on the item, which will instantly stick to whatever surface you wish to attach it to. This method is perfect for smaller, flatter items.
- Rolling method: This method is best for larger items. First, apply the glue directly onto the desired surface. Then, simply roll the item over the sponge, and the glue will be absorbed by the item. This ensures even glue distribution, and a secure hold. This method is also great for objects with uneven surfaces.
- Custom shapes: One of the best things about glue sponges is that you can customise them to fit your needs. You can make smaller or larger sponges, or even cut them into different shapes. You can also use different types/flexibilities of sponges for your projects.
Remember, when using your glue sponge, it’s important not to oversaturate the sponge with glue. This can cause the glue to clump up and not adhere properly. Use a light touch, and if you notice the sponge getting too dry, simply add more glue. With a little practice, you’ll soon discover how easy and versatile glue sponges can be!
Tips and Tricks
Now that you’ve learned how to make glue sponges, it’s time to explore some of the most useful tips and tricks to make the most out of your crafting experience. In the following sections, we’ve put together some important advice on how to best use and store your glue sponges, as well as how to get creative with different shapes and sizes. By following these tips, you’ll be able to take your crafting game to the next level and create beautiful projects with ease. Let’s dive in!
Tip 1: Use Non-Toxic Glue
When making glue sponges, it is important to consider the safety of the users, especially if they are children. Thus, using non-toxic glue is highly recommended. Non-toxic glue is usually made of natural materials, making it safe for kids to handle. Here are some of the reasons why non-toxic glue is the best option for creating glue sponges:
- It is safe for children: Non-toxic glue is free from harmful chemicals such as formaldehyde and phthalates that can be dangerous to children. Using this type of glue ensures that kids can play and explore without any health risks.
- It is environmentally friendly: Non-toxic glue is made of natural materials, making it eco-friendly. It is also biodegradable, hence, reducing waste and pollution if accidentally spilled.
- It is easier to clean up: Non-toxic glue is water-soluble, making it easier to clean up. This is a plus for parents and teachers who do not have to spend a lot of time scrubbing and removing glue stains.
- It dries clear: Non-toxic glue dries clear, leaving no stains or blemishes on the surfaces it has been applied to. This ensures that the sponges look great and professional.
Using non-toxic glue in making glue sponges is highly recommended. Not only is it safe and environmentally friendly, but it is also easier to clean up and dries clear.
Tip 2: Store Your Sponges Correctly
Proper storage of your glue sponges is crucial for their longevity and effectiveness. Here are some tips on how to store them correctly:
- Keep them in a sealed container: Store your glue sponges in an airtight container to prevent them from drying out. An empty margarine or yogurt container with a lid works great for this.
- Place them in a cool and dry place: Avoid storing your glue sponges in a hot or humid area, as this can cause them to mold or become slimy. Keep them in a cool and dry place away from direct sunlight.
- Label your container: Make sure to label your container with the date and type of glue used for the sponges, especially if you use different types of glue for different sponges. This will help you stay organized and avoid confusion.
- Replace them when necessary: Glue sponges can last for several months if stored correctly and used frequently. However, if you notice any signs of mold or the sponges have become hard and unusable, it’s time to replace them.
By following these storage tips, your glue sponges will stay soft and moist, making them ready for use whenever you need them.
Tip 3: Use Different Shapes and Sizes
One of the great things about making your own glue sponges is that you can customize them to fit your specific needs. One way to do this is by using different shapes and sizes of sponges. Here are some options to consider:
- Large sponges: These are great for bigger projects or for covering large areas quickly. You can cut them down to smaller sizes if needed.
- Small sponges: These are perfect for tiny hands or for more intricate projects that require more control.
- Cut-out shapes: Another fun option is to cut out sponges in different shapes like hearts, stars, or even animals. Kids will love using them for unique art projects!
Using different shapes and sizes of sponges can also add a visual element to your projects. You can create patterns or use them to add texture to your work. Play around with different options to find what works best for you.
Another benefit of using different shapes and sizes of sponges is that you can use them for different types of glue. For example, a larger sponge may work better for thicker glue, while a smaller sponge may work better for a thinner, more watery glue.
Using different shapes and sizes of sponges can help make your glue sponge experience more customizable and fun. Don’t be afraid to experiment and see what works for you!
Conclusion
In conclusion, making glue sponges can be a fun and easy DIY project that can save time and mess when crafting or creating with children. With just a few simple materials and tools, including non-toxic glue, sponges, and a container, anyone can create their own glue sponges in just a few easy steps.
By following the step-by-step instructions and tips provided in this guide, you can easily create your own glue sponges that are perfect for use in a variety of crafting and artistic projects. Not only will these sponges help to reduce mess and waste, but they can also be customized to suit your needs with different shapes and sizes.
Remember to store your glue sponges correctly and to use non-toxic glue to ensure safe and effective use. With these tips and tricks, you can take your crafting to the next level and enjoy the ease and convenience of using a glue sponge. So why not give it a try and see for yourself just how easy and fun it can be to make your own glue sponges today?
Frequently Asked Questions
Can glue sponges be used for different types of projects?
Yes! Glue sponges are versatile and can be used for a variety of projects like card-making, scrapbooking, and even art projects.
Do I need any special type of glue to make glue sponges?
No, you can use any type of white school glue or craft glue for your glue sponges.
Can I make my glue sponges in different shapes and sizes?
Yes, definitely! You can make glue sponges in any shape and size to fit your specific needs.
Can I reuse my glue sponge after it dries out?
Unfortunately, once your glue sponge dries out, it cannot be reused and will need to be replaced.
Are glue sponges safe to use for children?
Yes, as long as you use non-toxic glue and supervise young children while they are using the glue sponges, they are safe to use.
Can I use glue sponges for home repairs?
No, glue sponges are not recommended for home repairs as they are not strong enough to hold heavy materials like wood or metal.
Is it easy to assemble the glue sponges?
Yes, assembling the glue sponges is very easy and can be done in just a few simple steps.
How do I know when it’s time to replace my glue sponge?
You will know it’s time to replace your glue sponge when it becomes too dry or dirty to use effectively.
Can I make multiple glue sponges at once?
Yes, you can make as many glue sponges as you need at one time using this step-by-step guide.
What is the benefit of using a glue sponge instead of a traditional glue bottle?
The benefit of using a glue sponge is that it reduces waste and mess compared to traditional glue bottles. It also allows for controlled and even distribution of glue, which can be particularly useful for smaller, intricate projects.