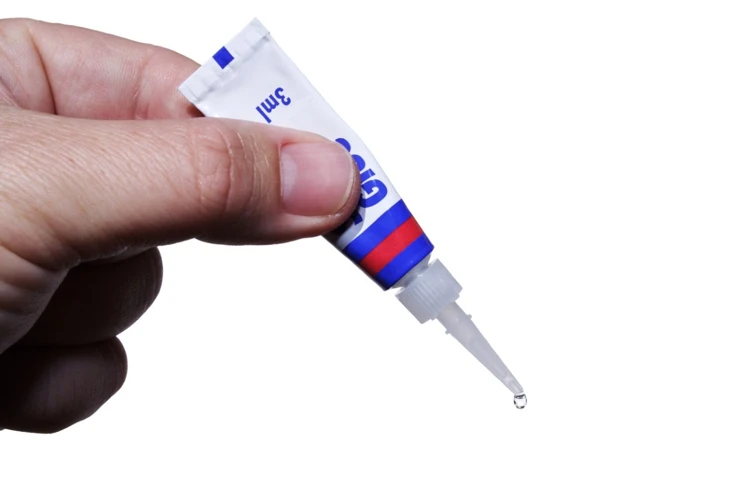
When it comes to home improvement, laminate flooring can be a great way to add a touch of style and durability to your space. But in order to ensure that your laminate flooring stays in place and withstands the test of time, it’s essential to properly secure it to the wooden surface beneath it. This can seem like a daunting task for those who have never tackled it before. To ease any uncertainty, we’ve put together a comprehensive guide on how to glue laminate to wood, including all the necessary materials and step-by-step instructions to make the process as easy as possible. So let’s get started and transform your floors with a beautiful and secure laminate finish.
Materials Needed
Before diving into the process of gluing laminate to wood, it’s important to gather all the necessary materials for the job. Some of these materials include laminate sheets, wood surface, glue, sandpaper, brushes or rollers, measuring tape, and a saw . The quality of the materials used will determine the longevity and look of the final product. It’s essential to choose the right glue option for this task amongst so many choices, such as glue options for linoleum, flooring, drywall, concrete, tiles, paneling, outdoor carpet, vinyl plank flooring, shower pan liner, formica, and carpet tiles. Selecting the proper glue type will ensure the laminate sticks firmly to the wooden surface, withstanding wear and tear for years to come.
Glue Options
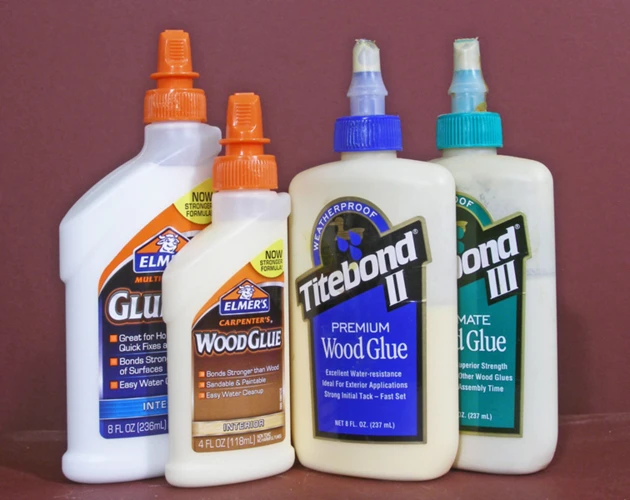
When it comes to gluing laminate to wood, selecting the right adhesive is crucial to achieving a long-lasting and secure bond. There are several glue options available, each with its own unique properties and application methods. Below is a table comparing the most common types of glue used for laminating wood and their respective benefits.
| Glue Type | Benefits |
|---|---|
| PVA (polyvinyl acetate) glue | Easy to apply, dries clear, water-soluble for easy cleanup. Great for bonding large surface areas. |
| contact cement | Forms an instant, strong bond that requires no clamping. Ideal for curved or irregular surfaces. Not recommended for inexperienced users. |
| epoxy | Dries to a very strong, hard, and durable bond, resistant to water and extreme temperatures. Suitable for both indoor and outdoor use. |
| cyanoacrylate glue (super glue) | Dries quickly and forms a strong, permanent bond. Ideal for small, precise areas. Not recommended for porous materials. |
It is important to note that not all glues are created equal and that different projects may require different types of adhesive. If you are unsure which glue to use, consult with a professional or do some research to determine the best option for your specific project.
Tools Needed
To successfully install laminate to wood, there are some tools needed that are essential for this task. Here is a list of tools that you’ll need to complete this project:
- Circular saw or handsaw for cutting laminate to the proper size
- Table saw for cutting the wood to the right size if needed
- Measuring tape and ruler to take accurate measurements and ensure precise cuts
- Sandpaper and sanding block or electric sander to roughen the surface of the wood for better adhesion
- Brush or roller to apply glue evenly on the laminate and wood surface
- Utility knife to trim excess laminate
- Roller or heavy weight to press down the laminate and remove any air pockets
- Painter’s tape to mark the areas where you need to glue laminate
Each of these tools plays a crucial role in making sure that your laminate securely bonds to the wood surface. If you don’t have these tools on hand, you can find them at your local hardware store or online.
Before starting to install laminate, make sure to have all the necessary tools at your fingertips. Otherwise, not having the proper tools can significantly slow down the process and may lead to unsatisfactory results.
Preparing the Surface
Once you have gathered all the required materials, it’s time to prepare the surface for the lamination process. Proper surface preparation is critical for the adhesion of the laminate to the wood, and it can also help improve the overall durability and lifespan of the finished product. Whether you are looking to glue laminate to a floor, or you need to know how to glue paneling to walls, this section applies to all types of surface materials. Following these steps will help you achieve a smooth and even surface, ready for the adhesive process.
Clean and Sand
Before applying the glue, it’s crucial to prepare the surface properly. The surface should be clean and smooth to ensure that the adhesive creates a strong bond. To clean the surface, wipe it down with a damp cloth to remove any dust or debris. Then, use a mild soap and water to remove any stains and dirt. Avoid using harsh chemicals that can damage the surface.
Once the surface is clean, sand it using a fine-grit sandpaper. Sanding creates a textured surface that helps the glue stick better. Use a circular motion when sanding, and be careful not to oversand. After sanding, wipe off any dust with a clean cloth.
Pro tip: If you are gluing laminate to a floor, make sure to follow our guide on how to glue flooring properly.
| Clean and Sand | Materials Needed |
|---|---|
| 1. Wipe surface with a damp cloth. | 1. Damp cloth 2. Mild soap 3. Water |
| 2. Use mild soap and water to remove any stains or dirt. | |
| 3. Avoid using harsh chemicals that can damage the surface. | |
| 4. Sand surface using fine-grit sandpaper. | 1. Fine-grit sandpaper 2. Sanding block or tool |
| 5. Use circular motion when sanding. | |
| 6. Wipe off any dust with a clean cloth. | 1. Clean cloth |
Pro tip: Sanding is also important when gluing drywall to concrete. Check out our guide on how to glue drywall to concrete for more information on the process.
No matter what surface you’re working with, proper cleaning and sanding will help ensure a strong bond between the laminate and wood.
Measure and Cut Laminate
Measuring and cutting the laminate is the next crucial step in the process of gluing laminate to wood. Firstly, make sure to measure the surface of the wood accurately and add a few centimeters of excess laminate to all sides. This additional length will allow you to trim and file the edges neatly.
Before cutting, place the laminate sheet on top of the wood surface where you want it to go. Use a pencil or marker to trace the outline of the wood onto the back of the laminate sheet. Then, use a straight edge to trace a line about 1/8 inch inside the outline. Cut along the inner tracing line using a circular saw, but make sure to use a blade with fine teeth to avoid rough cuts.
It’s crucial to ensure that the laminate sheet is cut with accuracy; even the slightest deviation can cause issues while gluing the laminate to wood surface, so it’s best to double-check the measurements before proceeding.
Once you’ve cut the laminate, use a fine-grit sandpaper to smooth the edges. Make sure there are no rough or jagged edges on the laminate sheet. Ensure the edge of the laminate is uniform and smooth edges will allow the laminate to sit flush on the wood surface, resulting in a seamless finish.
By following these steps, you will have a perfectly sized laminate sheet that is ready for the next stage of the gluing process.
In the next section, we’ll discuss how to properly apply glue to the wood surface and laminate sheet before bonding them together. Learn more about what is the best glue for outdoor carpet.
Applying the Glue
When it comes to gluing laminate to wood, selecting the right glue and applying it correctly is crucial for a lasting bond. There are a variety of glue options available, and the method of application can make a big difference in the final result. In this section, we’ll dive into the process of applying the glue to your wood surface, ensuring that you’re on the right track towards a successful project. Whether you’re gluing shower pan liner or carpet tiles, these tips will be helpful.
Brush or Roller
When it comes to applying glue to laminate, there are two main techniques – using a brush or a roller. Both of these methods have their benefits, so it’s up to you to decide which one to use. However, it’s worth noting that the type of glue you choose may make one method more suitable than the other.
Using a brush is the most common method of applying laminate glue. It allows for more control over the amount of glue applied and gives you the opportunity to ensure all areas are covered. To use a brush, simply dip it into the glue container and apply a thin, even layer to the back of the laminate. Be sure to apply glue to any edges or corners, as these areas tend to lift the most.
A roller can be a good option if you’re working with a large surface area or need to apply a thicker layer of glue. It can also help to remove any air bubbles or wrinkles that may appear during the application process. To use a roller, pour the glue onto the surface and spread it evenly with the roller. It’s essential to use a smooth, consistent motion to avoid any bumps or ridges.
Pro tip: Whichever method you choose, be sure to work quickly to avoid the glue drying before you’re finished applying it.
Remember, choosing the right glue and method of application is crucial to ensure a long-lasting bond. For more information on gluing different materials or surfaces, check out our other guides on how to glue tiles, how to glue paneling to walls, and how to repair glue down vinyl plank flooring.
Application Tips
When it comes to applying the glue to the laminate and wood surfaces, there are a few tips that can make the process easier and ensure the best results. These tips include:
| Tip #1: | Apply glue in a thin, even layer on both the laminate and wood surfaces. Using too much glue can cause the material to warp or create gaps in the finished product. |
| Tip #2: | Use a notched trowel to spread the glue evenly. This will create grooves in the glue that allow air to escape during the bonding process and will ensure a consistent layer of glue between the surfaces. |
| Tip #3: | Start at one end of the surface and work your way to the other end, applying glue in sections. This will prevent the glue from drying out before you have a chance to apply the laminate. |
| Tip #4: | Wipe away any excess glue that may squeeze out during the bonding process. A damp cloth or sponge can be used for this. |
| Tip #5: | Allow the glue to tack up for a few minutes before applying the laminate. This can help with alignment and prevent the laminate from sliding around. |
| Tip #6: | Be sure to press firmly on the laminate surface to ensure a strong bond with the wood. You can use a roller or apply pressure with a clean cloth or board. |
Following these tips can help make the application process smooth and effective, resulting in a high-quality finished product. Now that the laminate is attached to the wood, the next step will be allowing time for drying and curing.
If you’re interested in learning how to glue other types of materials, check out our articles on how to glue a shower pan liner to subfloor, how to glue Formica to plywood, and how to glue carpet tiles to concrete.
Attaching the Laminate
As you’ve prepared the surface and applied glue to the wood, the next step is attaching the laminate. This process can be a bit tricky, but with patience and a steady hand, you can achieve a seamless and durable bond between the laminate and wood. It’s important to take your time during this stage to ensure that everything is installed correctly. Let’s dive into the nitty-gritty details of attaching the laminate to your wood surface.
Align and Press
When it comes to attaching the laminate to the wood, aligning and pressing is a critical step. Here’s what you need to do:
Step 1: Lay the Laminate
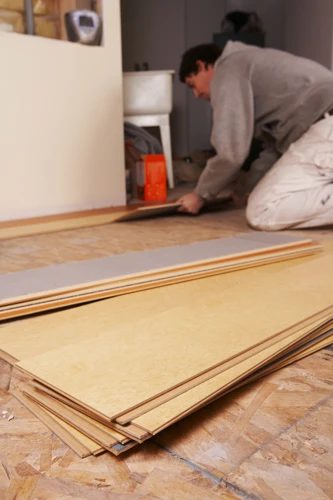
Begin by laying the laminate flat on top of the wood, making sure it is flat against the surface and it is positioned correctly. Leave a small amount of overhang on all sides to trim off later.
Step 2: Align the Laminate
Check to make sure that the laminate is straight and aligned with the edge of the wood. Use a carpenter’s square to ensure it is at a perfect 90-degree angle if necessary.
Step 3: Apply Pressure Evenly
Once the laminate is properly aligned, you’ll need to start pressing it down onto the wood. Use a laminate roller to apply even pressure across the surface, starting from the center and working your way out towards the edges.
Step 4: Smooth Out Air Bubbles
As you apply pressure and the glue begins to cure, air bubbles may appear between the laminate and wood surface. To smooth out these bubbles, use a flat edge (like a credit card) to press the air out towards the edges of the laminate.
Step 5: Trim the Overhang
After you’ve successfully aligned and pressed the laminate, use a jig saw or router to trim off the excess overhang from the edges of the wood to match the laminate.
It’s important to keep in mind that although the glue may feel secure after pressing the laminate onto the wood, the drying and curing process is necessary to fully bond the two surfaces together.
Cut and Smooth
Once the laminate is attached to the surface, it is time to cut off any excess and smooth out the edges. This step requires a certain level of precision in order to achieve a flawless finish.
To cut the excess laminate, use a jigsaw or laminate trimmer. Carefully follow the edge of the wood, using a straight edge as a guide. Make sure to wear safety goggles and a mask to protect yourself from the dust.
Once the excess laminate is removed, it is time to smooth out the edges. Use a router with a flush-trim bit to bring the edges of the laminate flush with the wood. Take your time and make sure to keep the router flat against the surface to avoid any nicks or gouges.
After routing the edges, use fine grit sandpaper to smooth out any rough spots and create a seamless transition between the laminate and the wood. Make sure to sand in the same direction as the wood grain to avoid any scratches.
Tip: If you are cutting a curved edge, use a sanding block wrapped in sandpaper to carefully shape the laminate and achieve a smooth finish.
| Materials Needed | Tools Needed |
|---|---|
| Laminate | Jigsaw or laminate trimmer |
| Safety goggles | Straight edge |
| Dust mask | Router with flush-trim bit |
| Router | Fine grit sandpaper |
| Sanding block |
Cutting and smoothing the laminate may seem like a daunting task, but with the right tools and techniques, it can be done quickly and easily. Taking the time to do it right will ensure a professional-looking finish for your project.
Allowing Time for Drying and Curing
Now that you have successfully attached the laminate to wood, the next crucial step is to allow adequate time for the glue to dry and cure. Rushing this process will lead to a subpar end result that will ultimately compromise the durability and longevity of your project. It is important to note that drying and curing are two different processes, each with its own set of timelines to follow. In this section, we will discuss the importance of giving your project enough time to dry and cure, as well as how to properly prepare and finish the surface for best results. So, let’s dive into the details below.
Drying Time
After applying the laminate on the wood surface, you need to allow time for the glue to dry and cure properly. This process is crucial as rushing it can compromise the adhesion of the laminate to the wood surface. The drying time for the glue depends on the type of glue you used and the environmental conditions.
Here’s a table that shows the drying time for the most common types of laminating glue:
| Glue Type | Drying Time |
|---|---|
| PVA (white glue) | 1-2 hours |
| Cyanoacrylate (super glue) | 10-30 seconds |
| Epoxy | 24-48 hours |
| Polyurethane | 4-6 hours |
Note: The drying time in the table above is just an estimation. Always check the manufacturer’s instructions for the recommended drying time.
It’s essential to wait for the glue to dry completely before proceeding with any further steps as this will ensure that the bond between the laminate and the wood surface is strong and long-lasting. Rushing the process can result in a weak bond that can easily break or peel off.
Once the glue has dried completely, you can move on to the next steps in the process of gluing laminate to wood. Patience is key in this process, so resist the urge to rush and let the glue dry and cure properly.
Curing Time
Curing time is the amount of time it takes for the glue to fully set and harden. The curing time for laminate glue depends on several factors, including the type of glue used, the temperature and humidity of the environment, and the thickness of the glue layer. As a general rule, most laminate glue manufacturers recommend allowing the glue to cure for at least 24 hours before subjecting it to any stress or strain.
During the curing process, the glue undergoes a chemical reaction that causes it to harden and bond with the wood and laminate. It is important to note that the glue will continue to dry and cure over time, reaching its full strength at around 7 to 10 days after application.
To ensure that the glue achieves maximum strength, it is important to avoid moving or stressing the surface for at least the first 24 hours after application. This includes avoiding heavy traffic on a newly laminated floor and refraining from placing heavy objects on a newly laminated surface.
One helpful tip during the curing process is to apply weight evenly across the entire surface, using something like heavy books or clamps to help the bond set completely. This can help to prevent any warping or buckling of the laminate as the glue dries.
It’s also important to monitor the environment during the curing process, keeping the temperature and humidity levels constant and within the recommended range for the type of glue used. This can help to ensure that the glue dries evenly and properly.
Remember: Giving the glue enough curing time is crucial to the success of your project, so be patient and avoid rushing to use the surface too soon.
Clean-Up and Finishing Touches
As you put the finishing touches on your newly laminated project, it’s important to take the time to clean up any mess and ensure everything looks neat and tidy. In this final step, you’ll need to grab a few basic cleaning supplies and pay attention to any small details that will make your project stand out. Let’s dive into the clean-up and finishing touches process so you can achieve the best possible results.
Clean-Up
Now that you have successfully glued the laminate to the wood, the next step is to clean up any glue residue that may have accumulated during the process. Proper clean-up will ensure that your woodwork looks neat and professional. Here are some tips on how to do it:
- Remove Excess Glue: Scrape off any excess glue from the surface of the laminate using a putty knife or scraper. Be careful not to damage the surface if you are using a sharp tool.
- Use Mineral Spirits: Dampen a soft cloth with mineral spirits or a suitable solvent to remove the remaining glue. Gently rub the solvent on the glue to dissolve it. You can also use a cotton swab to reach tight spaces.
- Clean with Warm Water and Soap: Use warm water and mild soap to clean the surface of the laminate. Dip a soft cloth in the water, wring it out, and then gently scrub the surface. Don’t use harsh detergents or abrasive scouring pads as they may scratch the surface.
- Dry with a Clean Cloth: Dry the surface with a clean, dry cloth. You can also let it air dry if you have time to spare.
Remember, proper clean-up is essential to achieve a neat and professional finish. Leaving glue residue can ruin your hard work and hamper the durability of the finished product. Take your time to clean up properly, and your finished project will look as good as new for years to come.
Final Touches
After completing the process of gluing laminate to wood, there are a few final touches you can add to make the laminate look clean and professional.
First, you may want to use a wood filler to fill in any gaps or spaces between the laminate and the wood. This will give the surface a seamless look and prevent debris from getting inside those gaps. There are various types of wood filler available in the market, but you should choose one that best matches the color of the laminate and the wood.
Note: Before applying wood filler, make sure the glue has completely dried and cured.
Once you have applied the wood filler, use a putty knife to level it out and allow it to dry completely based on the manufacturer’s instructions. After it has dried, use a fine-grit sandpaper to sand the surface of the wood filler until it becomes smooth and level with the rest of the surface.
Next, you can apply a sealant to the surface to protect the laminate and wood from water damage, scratches, and any other forms of physical damage. You can choose from different types of sealants, including polyurethane, epoxy, and lacquer. Before applying the sealant, make sure the surface is clean and dry.
Note: Read the manufacturer’s instructions to know the right amount of sealant to apply.
Use a brush or roller to apply a thin coat of sealant, making sure to apply it evenly across the surface. Allow the sealant to dry for the appropriate amount of time, as recommended by the manufacturer. After the first coat has dried, you can apply another coat if needed.
Finally, after the sealant has dried, you can add any additional decorative touches to the laminate surface. This can include painting or adding decals or stickers to the surface. However, make sure to choose a type of paint or adhesive that is appropriate for use on laminate material.
By following these final touches, you can ensure that your laminate surface remains protected and visually appealing for a long time.
| Final Touches |
|---|
| Fill gaps with wood filler |
| Seal the surface with polyurethane, epoxy, or lacquer |
| Add decorative touches, such as painting or decals |
Conclusion
In conclusion, gluing laminate to wood can be a simple and straightforward process when following the right steps and using the right materials. It is important to select the correct glue for your project and prepare the surface properly. Clean and sand the surface to ensure a smooth and even application. Measuring and cutting the laminate to fit precisely will also make the process easier.
When applying the glue, use a brush or roller and follow any additional tips provided with the adhesive. Removing any air bubbles and ensuring the laminate is aligned and pressed firmly into place is crucial for a successful outcome. Once it is in place, it may be necessary to trim and smooth any excess laminate.
Allowing sufficient time for drying and curing is important to ensure the bond is strong and long-lasting. Depending on the type of glue used, drying and curing times may vary.
When the project is complete, clean-up any excess glue promptly and add any final touches necessary to achieve the desired look. With these steps in mind, you can successfully glue laminate to wood and create a beautiful and durable finish for your project.
Frequently Asked Questions
Can I glue laminate to any type of wood?
Most wooden surfaces are appropriate for gluing laminate, but it’s important to ensure that the surface is clean, dry, and solid enough to hold the laminate.
What thickness of laminate should I use?
The thickness of the laminate depends on the surface area being covered. For smaller surfaces, a thickness of 0.5 mm to 1 mm is sufficient. For larger surfaces, a thickness of 1.5 mm or more is ideal.
Are there any special precautions I need to take when gluing laminate to a curved surface?
Yes, curved surfaces require specially designed laminate that will bend and conform to the shape. Additionally, it’s important to make precise cuts and use a good quality glue.
How long should I let the glue dry?
Generally, glue takes around 24 hours to dry. However, drying time can vary based on humidity levels, applied thickness, and the type of glue used.
Can I use contact cement as my glue?
Yes, contact cement is an effective glue for laminating to wood surfaces. Just be sure to follow the manufacturer’s instructions and use appropriate safety measures.
Do I need to sand the wood surface before gluing on laminate?
Yes, sanding the surface is an important step as it helps the glue to adhere better and provides a smooth surface for the laminate to stick to.
Should I clean the surface before gluing the laminate?
Absolutely, you should clean the surface thoroughly to remove any dirt or grime that may prevent the glue from adhering properly.
Can I remove bubbles in the laminate after it has been glued on?
It’s difficult to remove bubbles in the laminate once it has been glued on. However, you can prevent bubbles from forming by applying even pressure as you lay the laminate down.
Why is it important to apply even pressure when laying down the laminate?
Applying even pressure is crucial as it helps to prevent air pockets and bubbles from forming under the laminate, which can weaken the bond between the laminate and the wood.
How can I ensure that the laminate is cut to the perfect size?
To cut the laminate to the perfect size, measure the surface area precisely and add an extra half-inch on each side. Then, use a straight edge and a sharp blade to cut along the lines, ensuring that the edges are perfectly straight.
