Embarking on a bathroom renovation project can be an exciting yet daunting task, especially when it comes to waterproofing. The shower pan liner is a critical component that ensures your shower remains leak-free for years to come.
Understanding the Importance of a Properly Installed Shower Liner
A robust shower pan liner is essential for preventing water damage to the subfloor and surrounding areas. Without proper installation, moisture can seep into the structure of your home, causing mold, rot, and a host of other issues.
Tools and Materials Needed for Installing a Shower Liner
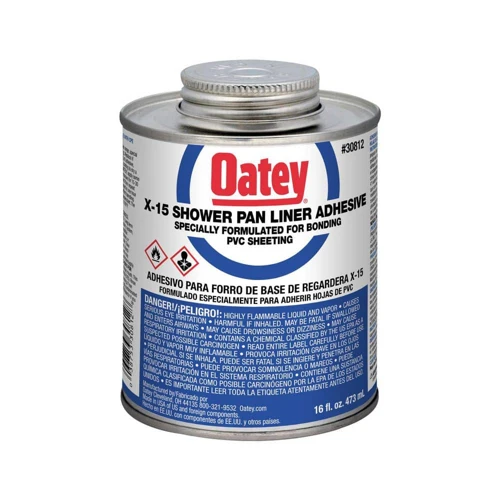
Before you begin, make sure you have the following: PVC or CPE shower pan liner, Oatey shower pan liner glue, a tape measure, utility knife, a trowel, caulk, and a sealant. These tools will help you achieve a professional-grade shower pan liner install.
Preparing the Shower Area
Preparation is key to ensuring the longevity of your bathroom features. A well-prepared shower area serves as the foundation for the shower pan liner.
Installing the Drain Base
The drain base should be installed first, ensuring it is level and securely in place. This component is crucial as it directs water away from the shower and into the plumbing system.
Creating the Pre-Slope Foundation
A pre-slope is necessary to guide water towards the drain. Use a mixture of sand and cement to create a gentle slope from the walls to the drain, then allow it to cure before proceeding.
Measuring and Cutting the Shower Pan Liner
Accuracy is paramount when preparing the shower pan liner. An ill-fitting liner can result in water seepage and costly damages.
Calculating Dimensions for the Shower Pan Liner
Measure the shower area, adding extra width and length to account for the walls and curb. This ensures that the liner covers the entire surface and up the walls to prevent leaks.
How to Measure and Cut the Pan Liner Accurately
Lay the liner on a flat surface and mark your measurements. Then, using a straight edge, cut the liner with a utility knife. Be careful to cut straight lines to avoid any potential for leaks.
Installing the Shower Pan Liner

With the liner precisely measured and cut, you’re ready to move on to the installation phase.
Step-by-Step Guide to Laying the Shower Pan Liner
- Start by laying the liner into the shower pan, pressing it into the corners and against the walls.
- Smooth out any folds or air pockets, working from the drain outwards.
- Temporarily secure the liner in place with tacks or adhesive strips.
Oatey Shower Pan Liner Installation Tips
Oatey recommends ensuring that the liner is free of tension, laying flat and smooth before sealing it into place. This will reduce the risk of tears or leaks.
Gluing the Shower Pan Liner
Now comes the most crucial step: securing the liner in place. Using the right adhesive makes all the difference in creating a watertight seal.
How to Glue Shower Pan Liner to Concrete
Apply the oatey shower pan liner glue to the concrete, spreading it evenly with a trowel. Carefully place the liner over the glue, pressing firmly to ensure a strong bond.
Using Oatey Shower Pan Liner Glue for Secure Installation
Oatey’s glue is specially formulated for PVC and CPE liners, providing the durability and hold necessary for a successful shower pan liner install.
Securing and Sealing the Liner

With the liner glued down, it’s time to focus on detail work to prevent any future water issues.
Folding Corners and Attaching Liner to Framing
Fold the corners neatly, avoiding any cuts or punctures. Then, attach the top edge of the liner to the framing using fasteners, ensuring it stays above the level of the shower curb.
Adhering the Pan Liner to the Shower Curb
Apply a bead of caulk along the top of the shower curb before pressing the liner into place. This creates a seal and secures the liner.
Installing Dam Corners for a Watertight Seal
Use pre-formed dam corners to reinforce the areas where the liner folds over the curb. Glue these in place for an added layer of protection against leaks.
Finalizing the Shower Pan Liner Install

With the liner firmly in place, you’re almost ready to enjoy your new shower. However, a few more steps are required to ensure everything is watertight.
Performing a Leak Test
Fill the base of the shower with water and leave it for 24 hours. Check for any signs of leakage. If the water level drops, you’ll need to locate and seal any leaks before proceeding.
Finishing Touches and Preparing for Tiling
Once you’re confident in the seal, trim any excess liner and prepare the surface for tiling. Ensure the area is clean and smooth for the best results.
Troubleshooting Common Installation Issues

Even with careful planning, issues can arise. Knowing how to address them is key to a successful installation.
Addressing Potential Problems During and After Installation
If you encounter any bubbles or wrinkles, smooth them out before the glue sets. If leaks are found during the leak test, apply additional sealant as needed.
Ensuring Longevity of Your Shower Pan Liner
Regularly check the liner for any signs of wear or damage. Promptly address any issues to maintain the integrity of your shower liner.
Conclusion
Successfully installing a shower liner requires precision, patience, and the right materials.
Recap of Shower Pan Liner Installation Process
From preparing the area to performing a leak test, these steps are critical to a leak-free shower. Use quality products like Oatey shower pan liner and glue for optimal performance.
When undertaking a DIY project, knowing the proper techniques for gluing different materials is essential for a successful outcome. While you’re exploring how to glue a shower pan liner, you might also be interested in related tasks that require a strong, lasting bond. For helpful tips and step-by-step guides, take a look at our tutorials on how to glue boat carpet, which could give you insights into working with other types of liners and carpets. Additionally, our guide on how to glue foam board can provide valuable information for projects that involve insulation or crafting. And if you’re tackling kitchen improvements, our instructions on how to glue a countertop might just be the resource you need to complete your renovation with confidence.
Maintenance Tips for Your Newly Installed Shower Liner
Regular maintenance will prolong the life of your shower liner. Inspect it periodically and keep it clean to ensure it remains in top condition.