Have you ever wondered how to achieve a long and voluminous ponytail, but your natural hair just isn’t cutting it? The secret is in gluing in a weave ponytail! This hairstyle not only adds length and thickness to your ponytail, but it also looks sleek and polished. However, the process might seem intimidating at first, especially if it’s your first time. But don’t worry, with the right tools and some know-how, you can achieve this glamorous hairstyle in no time! In this step-by-step guide, we will walk you through the process of gluing in a weave ponytail, as well as provide some tips and tricks to make the process easier and more effective. So, let’s get started!
What You’ll Need
Are you ready to create a stunning weave ponytail? Before we dive into the step-by-step guide, here’s a list of essential items you’ll need to make the process smoother and easier. Make sure to have hair extensions that match your natural hair color and texture, a high-quality glue that will hold the hair in place, and a pair of scissors to trim any excess wefts. If you need any additional tips on glue application, check out our article on how to glue hair on a wig cap.
1. Hair extensions
Hair extensions are a key element in achieving a natural and beautiful ponytail. When choosing hair extensions, there are a few things to keep in mind. First, make sure to select hair extensions that match the texture and color of your natural hair. This will ensure that your ponytail looks seamless and blends in well with your hair. You can also opt for extensions that are a slightly lighter shade than your natural hair if you plan on coloring your hair or adding highlights.
Secondly, consider the length and thickness of the extensions. If you have thin hair, you may want to choose extensions that are thicker to add volume to your ponytail. On the other hand, if you have thick hair, you can choose thinner extensions for a more natural look. You can find hair extensions in various lengths, from short to long, to create the desired length of your ponytail.
Lastly, decide on the type of hair extensions you want to use. You can choose between synthetic and natural human hair extensions. Human hair extensions tend to be more expensive but are of higher quality and can be styled and colored just like your natural hair. Synthetic hair extensions are more affordable but may not look as natural or be as durable as human hair extensions.
Depending on the type of extensions you choose, there may be specific care instructions to follow to ensure their longevity. You can also refer to our guide on How Long Does a Lace Frontal Sew-in Last Without Glue for more information on caring for your hair extensions. To summarize, when selecting hair extensions for your weave ponytail, choose the right color, thickness, and type that will match your natural hair, and make sure to follow the care instructions.
2. Glue
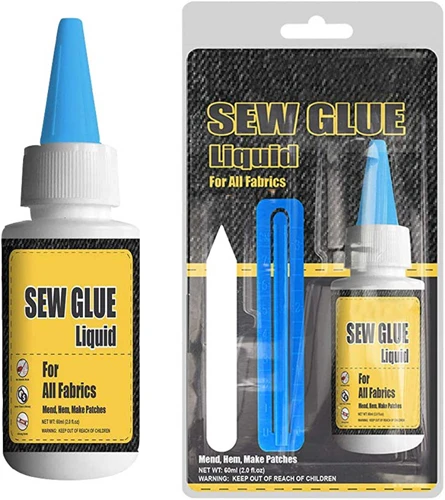
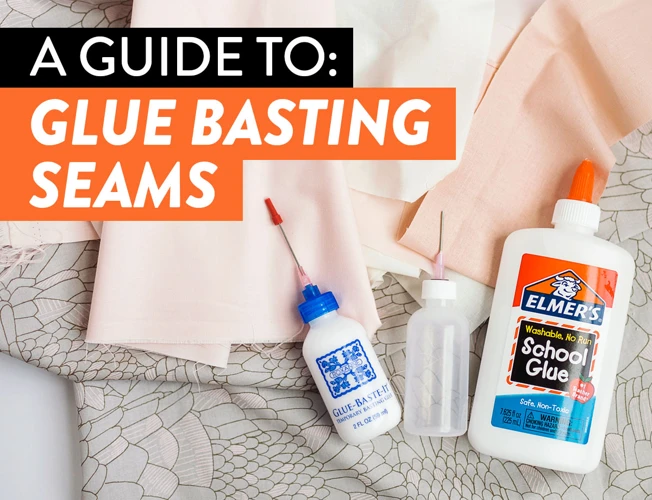
When it comes to gluing in a weave ponytail, choosing the right glue is crucial. You don’t want to use a glue that will damage your natural hair or cause an allergic reaction on your scalp. There are different types of glue available on the market, but not all of them are suitable for hair extension.
Here are some options to consider for the best glue to use for your weave ponytail:
- **Hair extension glue** – This type of glue is specifically designed for use with hair extensions. It dries clear, allowing for a seamless blend between your natural hair and the extensions. We recommend using a hair extension glue with a non-toxic formula to avoid skin irritation or scalp damage.
- **Got2b Glued Blasting Freeze Spray** – A popular alternative to traditional hair extension glue, this spray adhesive provides a strong hold for your weave ponytail. It’s easy to apply and can be found at most drugstores. However, it can be challenging to remove and may cause damage to your natural hair if not used properly.
- **Wig glue** – Designed for use with wigs, this adhesive can also be used for a weave ponytail. It provides a secure hold and dries clear. However, it can be difficult to remove and may cause skin irritation if not handled correctly.
Remember to spot test any glue you plan to use before applying it to your scalp. This can help you avoid an allergic reaction. Additionally, always follow the manufacturer’s instructions for use to ensure that you get the best possible results.
Want to learn more about gluing hairstyles? Check out this article on how to glue a wig.
3. Scissors
One of the necessary items you will need for gluing in a weave ponytail is scissors. Scissors are important for cutting the wefts to the appropriate size for the ponytail and trimming any excess hair. You don’t need anything fancy, just your typical hair scissors will do the job.
It’s important to make sure your scissors are sharp and clean before starting the gluing process. Dull scissors could result in uneven cuts and potentially damage the hair. So, if needed, sharpen your scissors before using them.
Additionally, make sure to only cut the wefts when absolutely necessary and avoid trimming the actual hair extensions. This is to preserve the original hair length and avoid creating any unevenness in the final look.
If you’re new to hair extensions and aren’t sure how to cut the wefts, you can search online for tutorials on how to do it properly. Just make sure to follow a trusted source, such as how to make a wig with glue, how to glue weave on a stocking cap, how to install a wig without glue, etc. Remember, practicing is the key to success when it comes to gluing in a weave ponytail!
Step-by-Step Guide
Now comes the fun part: gluing in your weave ponytail! This step-by-step guide will walk you through the process so you can achieve a flawless look. Make sure to gather all the necessary supplies and follow each step carefully to ensure the best results. If you need assistance with attaching hair with glue, check out our article on how to glue hair on a doll or learn about alternative methods in our guides on how to put in hair extensions without clips or glue and how to put tracks in hair without glue. Now, let’s get started!
1. Prepare your hair
Before you start gluing in a weave ponytail, it’s crucial to prepare your natural hair. Proper preparation ensures that the weave stays in place, remains flat against your head, and looks more natural.
Here are the steps to prepare your hair:
- Wash: Clean your hair with a clarifying shampoo to remove any excess oils or product buildup. This creates a clean surface for the glue to adhere properly.
- Condition: After shampooing, apply a deep conditioner to your hair to keep it moisturized. This is important because the glue can cause dryness, which leads to breakage.
- Dry: Make sure your hair is thoroughly dry before you begin the gluing process. Any moisture can weaken the glue’s hold and cause the weave to slip or slide.
- Style: Choose a hairstyle that works well with your weave, so it blends seamlessly. It’s recommended to straighten your hair if you’re using straight extensions, or curl your hair if you’re using curly extensions.
By following these steps, you create a strong foundation for your weave ponytail to be attached to. Neglecting to prepare your hair properly can lead to the weave slipping out of place or causing damage to your natural hair. Now that your natural hair is prepared, you can move on to creating a secure base for your weave ponytail to be attached to.
If you’re unsure about what type of glue to use, check out our article on what the best wig glue is.
2. Create the base
Creating a solid base for the weave ponytail is important as it helps to ensure that the ponytail stays in place. This involves sectioning off the hair where the ponytail will be attached and braiding it in a circular direction to form a base. Here is a step-by-step guide on how to create the base for your weave ponytail:
Step 1: First, detangle your hair and create a parting where the ponytail will be attached. Use a rat-tail comb for a precise parting.
Step 2: Divide the hair in the parted section into two parts. Take one part and secure it away from the other with a clip.
Step 3: Begin braiding the other part of the hair in a circular direction close to the scalp. Use three strands and add in hair from the section as you braid. This will help to create a sturdy base for the ponytail.
Step 4: Continue braiding in a circular direction, adding in hair as you go, until you reach the end of the section. Secure with a hair tie.
Step 5: Repeat steps 2-4 with the other part of the hair. You will now have two circular braids.
Step 6: Take the two circular braids and join them together at the back of the head using bobby pins. This will create one solid base for the ponytail.
To make it clearer, here is an HTML table summarizing the steps:
| Step 1: | Detangle hair and create a parting |
| Step 2: | Divide hair into two parts |
| Step 3: | Braid one part of the hair in a circular direction, adding in hair as you go |
| Step 4: | Continue braiding until the end and secure with a hair tie |
| Step 5: | Repeat steps 2-4 with the other part of the hair |
| Step 6: | Join the two circular braids together at the back of the head using bobby pins to create one solid base for the ponytail |
Creating a secure base is essential for a long-lasting and natural-looking weave ponytail. Once the base is done, you can move on to gluing the wefts and attaching the ponytail.
3. Glue the wefts
Once you have prepared your hair and created the base, it’s time to glue in the wefts.
To start, take one of your hair extension wefts and apply a small amount of glue along the top edge. Use a toothpick or a small brush to spread the glue evenly along the weft. Be careful not to use too much glue, as this can make the weft hard and uncomfortable to wear.
Next, carefully place the weft onto the base you have created and press it firmly into place. Hold it for a few seconds to allow the glue to dry and set. Repeat this process, working your way up the back of your head until you reach the crown.
Here is a helpful table summarizing the steps to glue in the wefts:
| Step | Action |
|---|---|
| 1 | Apply a small amount of glue along the top edge of the weft. |
| 2 | Spread the glue evenly along the weft. |
| 3 | Place the weft onto the base and press it firmly into place. |
| 4 | Hold the weft for a few seconds to allow the glue to dry and set. |
| 5 | Repeat the process until all desired wefts are glued in. |
Remember: it’s important to work slowly and carefully when gluing in the wefts to avoid any mistakes or uneven application. Also, be sure to leave enough space between the wefts to allow for natural movement of the hair and prevent any discomfort or pulling.
4. Attach the ponytail
Now that you have glued in the wefts and created a base for the ponytail, it’s time to attach the ponytail itself. Here’s how to do it:
- Gather your hair: Gather your natural hair and the base of the wefts into a ponytail.
- Secure the ponytail: Use a hair tie to secure the ponytail in place.
- Attach the extension ponytail: Take the extension ponytail and clip or tie it securely over your natural ponytail.
- Blend the hair: Use a comb or your fingers to blend the extension hair with your natural hair. This will make your ponytail look seamless and natural.
- Arrange the ponytail: Arrange the ponytail in whatever style you desire. You can wrap a piece of hair around the hair tie to hide it and create a polished finish.
Make sure to use bobby pins to secure any loose pieces. You can also use hair spray to hold the style in place. A perfectly attached ponytail will look great for any occasion.
Tips and Tricks
When gluing in a weave ponytail, there are a few tips and tricks that can take your look from good to great. These small details can make all the difference in how natural and seamless your ponytail looks. Here are some helpful pointers to ensure your glued-in weave ponytail looks flawless. Keep reading to discover the secrets to achieving stunning results with these handy tips and tricks.
1. Choose the right glue
When it comes to gluing in a weave ponytail, choosing the right glue is crucial for a successful and long-lasting style. Here are some tips to help you choose the right glue:
- Read the labels: When shopping for hair extension glue, make sure to carefully read the labels and instructions. Look for a glue that is specifically designed for hair extensions and is safe for use on your scalp.
- Avoid superglue: While superglue may seem like a quick fix for your hair extensions, it can cause damage to your natural hair and scalp. Stick to specially-formulated hair extension glues that are gentler and safer for your hair.
- Consider your hair type: Different glues work better for different hair types. For example, a strong glue may be necessary for thick hair, while a lighter glue may work well for fine hair. Consider the texture and thickness of your hair when selecting a glue.
- Opt for a water-based glue: Water-based glues are typically gentler on your scalp and easier to remove, while oil-based glues can be more difficult to wash out and may cause irritation.
- Test it out: Before applying the glue to your entire head, do a patch test to make sure you’re not allergic or sensitive to the glue. Apply a small amount of glue to a small area of your scalp and wait 24 hours before proceeding with the full application.
By taking the time to choose the right glue for your hair extensions, you can ensure a comfortable and secure style that will last for weeks. remember, safety should be your top priority when it comes to hair extensions.
2. Use a hair net
When gluing in a weave ponytail, it’s important to keep the braids and extensions in place for as long as possible. One way to ensure the longevity of your weave is to use a hair net.
A hair net is a small cap that covers your hair and extensions, keeping them firmly in place. Not only does it prevent your hair from frizzing and tangling, but it also protects it from external factors like wind and humidity.
To use a hair net, follow these steps:
| Step | Instructions |
|---|---|
| 1 | Place the hair net over your head, starting from the front and pulling it back towards the nape of your neck. |
| 2 | Tuck all of your hair underneath the hair net, including your braids and extensions. |
| 3 | Secure the hair net in place with bobby pins or hair clips. |
Using a hair net not only prolongs the life of your weave, but it also gives a more natural look. It keeps the hair extensions in place and ensures that they blend well with your natural hair.
Keep in mind that not all hair nets are created equal. When choosing a hair net, make sure it’s the right size for your head and it’s made of a breathable material. A hair net that’s too tight or made of a non-breathable material can cause discomfort, itchiness, and even lead to hair breakage.
In addition to using a hair net, it’s essential to take care of your weave by keeping it moisturized and washing it regularly. By following these tips and tricks, you’ll be able to enjoy your weave ponytail for weeks to come.
3. Blend your hair extensions
Once you’ve securely attached your weave ponytail using glue, it’s important to blend your hair extensions with your natural hair to create a seamless and natural look. Here are some tips for blending your hair extensions:
- Trim the ends: Take a small section of your natural hair and a section of the extensions and cut the ends so that they blend together. This will help to remove any harsh lines between your natural hair and the extensions.
- Use a blending tool: A blending tool is specially designed to help blend hair extensions with your natural hair. Simply use the tool to comb through your hair, starting at the roots and working your way to the ends.
- Style your hair: Styling your hair can also help to blend your extensions. Use a curling iron or flat iron to create waves or straighten your hair, depending on the look you’re going for.
- Use hair products: Applying hair products like serum or oil can help to blend your natural hair and hair extensions. These products will help to control frizz and add shine to your hair, making it appear more natural.
Blending your hair extensions is an essential step to creating a stunning and natural-looking hairstyle. Don’t rush this step and take your time to ensure that your extensions are properly blended with your natural hair.
How Long Does it Last?
After going through the whole process of gluing in a weave ponytail, you must be curious to know how long it will last. Well, the answer is that it depends on several factors.
The quality of your hair and extensions is one of the most significant factors that determine how long your weave ponytail will last. If you invest in high-quality extensions and take good care of your hair, the weave ponytail can last for up to six weeks. On the other hand, if you use low-quality extensions and don’t take care of them, you might have to remove the ponytail in just a few days.
Another factor that can impact the longevity of your weave ponytail is how you take care of it. If you wash and condition your hair regularly, and use good quality products, your weave will last longer. On the other hand, if you neglect your hair and don’t take care of it properly, the weave might start to loosen and fall out sooner than expected.
It’s also important to be gentle with your hair and not tug or pull on your ponytail too much, as this can cause your wefts to loosen and end up falling out. You should also avoid sleeping with wet hair and try to keep your hair dry as much as possible. Protecting your hair while sleeping can help extend the life of your weave ponytail.
A well-maintained weave ponytail using high-quality extensions can last up to six weeks, while low-quality extensions with improper care and maintenance may need to be removed after just a few days. It is important to invest in good quality extensions and take care of them properly if you want your weave ponytail to last longer.
Conclusion
In conclusion, gluing in a weave ponytail can be a great way to achieve a stylish and sophisticated look. However, it is important to follow the step-by-step guide carefully to ensure a seamless, natural-looking result. By preparing your hair properly, creating a strong base, choosing the right glue and blending your hair extensions, you can achieve a ponytail that stays put and looks amazing.
Remember, always be careful when using glue near your hair or scalp. If you experience any discomfort or irritation, remove the ponytail immediately. It’s also important to take good care of your hair extensions to prevent damage or tangling.
With a bit of care and attention, you can enjoy a beautiful and long-lasting ponytail that will turn heads and make you feel confident and gorgeous. So why not give gluing in a weave ponytail a try and see the amazing results for yourself? Good luck!
Frequently Asked Questions
1. Can I use any type of hair extensions for a weave ponytail?
It is recommended to use wefted hair extensions as they are easier to glue and hold better.
2. How much hair extensions will I need?
It depends on the thickness and length of the ponytail you wish to achieve. You may need anywhere from two to five wefts.
3. Can I do a glue-in weave ponytail on short hair?
It is possible, but you may need to add more wefts to achieve the desired length and thickness.
4. Can I remove the glue-in weave ponytail by myself?
It is not recommended as removing glue can be damaging to your natural hair. It is best to seek the help of a professional stylist.
5. How do I know if I am allergic to the glue?
You can do a patch test by applying a small amount of glue to your skin and waiting 24 hours for any allergic reactions.
6. Is there a specific way to cut the wefts for the base?
Cut the wefts in smaller sections and make sure they are slightly smaller than the width of your head to prevent bulges and bumps.
7. How long should I wait before washing my hair with the glue-in weave ponytail?
It is recommended to wait at least 24 hours before washing your hair to allow the glue to dry and set properly.
8. Can I style my glued-in weave ponytail with hot tools?
Yes, you can style your ponytail with hot tools just like you would with your natural hair. However, be careful not to apply too much heat directly onto the glue.
9. Can I go swimming with a glue-in weave ponytail?
It is not recommended to go swimming with a glue-in weave ponytail as water can weaken the glue and cause it to loosen.
10. How long can I keep the glue-in weave ponytail in?
A glue-in weave ponytail can last anywhere from 2 to 6 weeks depending on how well it was applied and how well it was taken care of.