Embarking on a DIY doll hair journey can transform an ordinary doll into a unique keepsake. Whether you’re passionate about doll makeover or you’re diving into the world of doll repair, understanding how to properly glue hair onto a doll can be incredibly rewarding. This doll hair gluing guide will walk you through the process, ensuring your doll receives a fresh and vibrant new look.
Understanding Doll Makeover and Doll Repair
Doll makeover isn’t just about aesthetics; it’s an art that breathes new life into cherished playthings. Doll repair, on the other hand, often involves more intricate work to restore a doll’s original beauty. Both require patience, creativity, and a steady hand. Now, let’s dive into the world of attaching hair to dolls.
Preparing for Doll Hair Gluing
Before beginning your doll customization project, it’s essential to lay the groundwork for a successful doll wig application. This preparation involves selecting the right adhesive for doll hair and gathering all necessary materials.
Choosing the Right Adhesive for Doll Hair
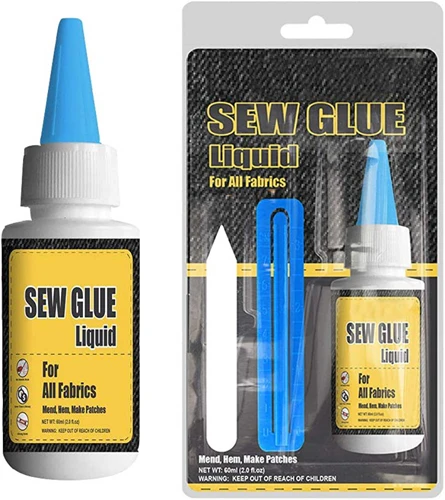
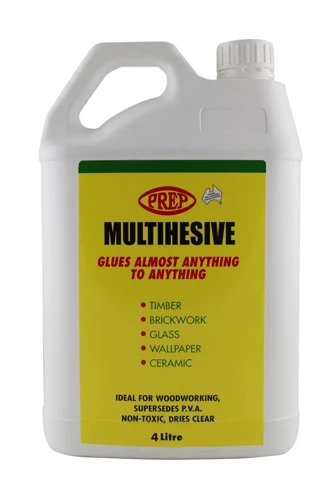
The key to a seamless synthetic hair attachment lies in using the appropriate adhesive. A strong, clear-drying glue specifically designed for doll hair is crucial as it ensures a long-lasting hold without damaging the doll or hair.
Gathering Materials for Doll Wig Application
Assemble your toolkit with the following items: the chosen adhesive, synthetic hair or a pre-made wig, scissors, a fine-tooth comb, tweezers, and a disposable container for glue. Having everything on hand will streamline the DIY doll hair process.
Crafting Doll Hair: A Step-by-Step Guide
Ready to craft doll hair? This step-by-step guide will help you achieve a professional-looking result. Follow each phase carefully, and you’ll be rewarded with a beautifully customized doll.
Step 1: Making a Wig Cap
Begin by creating a wig cap that fits snugly on the doll’s head. Use a stretchy fabric like nylon and cut it to size. Then, apply a thin layer of glue to secure the cap in place, allowing it to dry completely before proceeding.
Step 2: Preparing Synthetic Hair for Attachment
Measure and cut the synthetic hair to the desired length. If you’re using a pre-made wig, ensure it fits the cap properly. For loose strands, lay them out in the order you’ll attach them, from bottom to top.
Step 3: Applying Adhesive and Attaching Hair to Dolls
Apply a thin layer of adhesive to a small section of the wig cap. Then, gently press the synthetic hair onto the glue, starting from the bottom and working your way up to the crown. Use tweezers for precision.
Step 4: Styling and Customizing the Doll Hair
Once the glue is dry, style the hair as desired. You can cut, braid, or curl the hair for a personalized touch. Remember to be gentle to avoid loosening the hair from the cap.
Advanced Techniques in Doll Customization
For those who wish to take their doll customization to the next level, there are advanced techniques that can create even more realistic and detailed results.
Creating Realistic Partings and Hairlines
To create a natural-looking hairline or parting, carefully apply individual strands of hair using fine tweezers. This meticulous process can mimic the appearance of real hair growth patterns.
Attaching Hair for Different Doll Styles
Different dolls require different hair styles. Whether you’re aiming for a classic look or something more modern, consider the doll’s overall style when attaching hair. This attention to detail will make your creation stand out.
Finishing Touches and Doll Wig Application
As you near the completion of your DIY doll hair project, it’s time to add the finishing touches and ensure the wig is securely in place.
Securing Loose Ends and Ensuring Durability
Inspect the wig for any loose strands and secure them with a dab of glue. Also, check the overall attachment to make sure the wig will withstand handling and play.
Final Styling Tips for Your DIY Doll Hair
Give your doll a final hairstyle, keeping in mind the shape of the face and the doll’s character. Use accessories like ribbons or clips to add an extra flourish to your masterpiece.
Caring for Your Doll’s New Hair
Proper maintenance is key to keeping your doll’s hair looking fresh. Avoid direct sunlight and keep the hair clean and detangled to maintain its appearance.
Maintenance and Cleaning Tips
- Use a soft-bristled brush or comb to gently detangle the hair.
- Clean the hair with a mild shampoo if it becomes dirty, being careful not to soak the wig cap.
- Allow the hair to air dry completely before styling.
Troubleshooting Common Issues
Even with the best preparation, you may encounter challenges when attaching hair to dolls. Here’s how to address some common issues:
Addressing Problems with Synthetic Hair Attachment
If hair starts to detach, reapply adhesive to the affected area and press the hair back into place. For stubborn sections, consider using a different type of adhesive or technique.
Conclusion
Reflecting on your doll makeover journey can be as fulfilling as the process itself. Each step you’ve taken has contributed to the transformation of a simple doll into a personalized creation. With patience and practice, your skills in DIY doll hair and doll customization will continue to grow.
Reflecting on Your Doll Makeover Journey
Take a moment to admire your work and the effort you’ve put into learning a new craft. Every stitch, every strand of hair, and every drop of glue has contributed to your doll’s story — and to your own as a craftsperson.
FAQ: Doll Hair Gluing Guide
Have questions about doll hair gluing? This FAQ section aims to answer the most common queries to assist you on your journey.
What You’ll Need: A Checklist
To ensure you have everything you need for your doll hair gluing project, here’s a handy checklist:
- Adhesive for doll hair
- Synthetic hair or pre-made wig
- Scissors
- Fine-tooth comb
- Tweezers
- Disposable container for glue
- Stretchy fabric for wig cap
If you’re delving into the world of creating or refurbishing dolls and are curious about how to apply hair flawlessly, you’ll definitely want to explore our step-by-step guides. For those looking to attach hair directly to a doll’s cap, our tutorial on how to glue hair on a cap is an excellent resource. If you’re working with a wig cap, you may find our guide on how to glue hair on a wig cap to be incredibly helpful. And for general advice on securing wigs effectively, don’t miss out on our comprehensive article about how to glue a wig. Each piece is designed to support your crafting journey, ensuring your doll’s hair looks natural and holds up over time.
Further Reading and Resources
If you’re interested in delving deeper into the world of doll hair gluing and customization, there are numerous resources available. Look for books, online forums, and workshops to expand your knowledge and skills.


