As much as we love changing up our hairstyles, sometimes our natural hair just doesn’t cut it. That’s where wigs come in! Wigs offer a quick and easy way to switch up your look without committing to a drastic cut or color. However, for a truly seamless look, you’ll need to know how to properly secure your wig in place. Glueing a wig may seem daunting, but with the right tools and techniques, you can achieve a secure and natural-looking hold that will have you feeling confident all day long. In this guide, we’ll walk you through the steps on how to glue a wig and share tips and tricks for maintaining a secure hold.
Why Glueing a Wig Is Important?

When it comes to wearing wigs, having a secure hold is crucial for ensuring your wig stays in place all day long. That’s where glueing your wig comes in. Glueing your wig provides a stronger and more long-lasting hold than other methods like clips or combs, which can come loose or shift throughout the day. In this section, we’ll delve into the benefits of glueing your wig, how to choose the right glue, and when and when not to use it. Plus, we’ll provide step-by-step tips and tricks for getting a secure hold and removing the glue when you’re ready to take off your wig.
Benefits of Glueing a Wig
Glueing a wig has several benefits for those who wear wigs regularly. Here are a few of the reasons why using glue can be beneficial:
| Benefit | Description |
|---|---|
| Secure hold | Using glue can provide a much more secure hold than other types of wig attachment methods, such as clips or combs. This is particularly important for people who are active or participate in sports or other physical activities. |
| Natural look | When applied correctly, glue can help to create a more natural-looking hairline by seamlessly blending the wig with the wearer’s scalp. This can help to enhance the overall appearance of the wig and make it look more like natural hair. |
| Long-lasting | Glue can provide a long-lasting hold, which means that the wig is less likely to shift or move throughout the day. This can help to make the wig more comfortable to wear, as well as reduce the need for frequent adjustments or touch-ups. |
| Customizable | One of the benefits of using glue is that it can be customized to the wearer’s unique needs and preferences. For example, some types of glue are designed for stronger holds, while others are gentler on the scalp. This allows for greater flexibility and control over the wig attachment process. |
| Cost-effective | While the initial cost of purchasing glue may be higher than other types of wig attachment methods, it can be more cost-effective in the long run. This is because glue can help to extend the life of the wig by reducing the need for frequent replacement or repair. |
Using the right type of glue is key to achieving these benefits. To learn more about how to choose the right glue for your needs, see our article on what is the best wig glue.
How to Choose the Right Glue?
Choosing the right glue is crucial for a secure and safe hold of your wig. There are a variety of wig adhesives on the market, but not all of them are created equal. It is important to choose a high-quality adhesive that is safe for use on your skin and suitable for the type of wig you are wearing. To help you make an informed decision, here are some factors to consider when choosing the right glue for your wig:
| Factor | Consideration |
|---|---|
| Type of Wear | Decide whether you want a temporary or permanent hold. Some glues are designed for short-term wear and can be easily removed, while others offer a long-lasting hold that can only be removed with a specialized solvent. |
| Sensitivity | If you have sensitive skin, look for a glue that is specially designed for sensitive skin. Avoid using an adhesive that contains harsh chemicals or irritants that can cause skin irritation or allergic reactions. |
| Application Method | Decide on the application method: brush-on, spray, or tape. Brush-on and spray adhesives are ideal for covering large areas of the scalp, while tape is great for adding extra hold in areas that tend to lift. |
| Climate | If you live in a hot and humid climate, choose an adhesive that is heat-resistant. This will help the glue maintain its hold, even under extreme weather conditions. |
| Wig Type | Consider the type of wig you are wearing. For lace front wigs, it is recommended to use a lace adhesive to avoid any damage to the delicate lace material. For non-lace wigs, a regular wig adhesive can be used. |
Make sure to do your research, read reviews and ask for recommendations from your stylist or other wig wearers before choosing a glue. It’s important to select a high-quality glue to ensure a secure and safe hold for your wig. If you’re unsure about which glue to choose or have any concerns about skin sensitivity, it’s always best to consult with a professional before use.
When Not to Use Glue?
When Not to Use Glue?
While glueing a wig can be a great way to secure it in place, there are some situations where it’s not recommended. Here are some scenarios where you may want to avoid using glue:
| Situation | Reason |
|---|---|
| Allergic Reactions | If you’re allergic to the chemicals in the glue, it can cause irritation, rashes, and even blisters. It’s important to do a patch test before using the glue on a larger area. |
| Sensitive Skin | If you have sensitive skin, you may experience discomfort, itching, and redness after using the glue. |
| Recent Hair Treatments | If you’ve recently treated your hair with chemicals like relaxers or hair dye, you may want to avoid using glue. This is because the chemicals can weaken the bond between the glue and your skin. |
| Excessive Sweating | If you tend to sweat a lot, the moisture can loosen the glue and cause the wig to slip. In this case, you may want to consider using a wig tape or alternative wig cap method. (1) |
| Non-Lace Wigs | If you have a non-lace wig, using glue may not be the best option. This is because the glue can damage the wig and create a sticky residue that’s difficult to remove. (2) |
It’s always important to consider your skin type, hair, and overall health before using any hair products. If you’re not sure whether or not you should use glue, it’s always a good idea to consult with a stylist or dermatologist. Additionally, there are alternative wig cap methods that don’t require glue if you would like to explore those options. (3)
Prepping Your Wig & Skin
Before applying glue to your wig, it is important to prepare both the wig and your skin to ensure a secure and comfortable fit. Proper preparation can also help to prevent any potential damage to your natural hair and scalp. In this section, we will discuss the steps you need to take to prep your wig and skin for gluing. Following these steps will help you achieve a flawless look and maintain your wig’s longevity. And if you’re curious about how much it costs to get glue-in extensions, you can check out our article “How much are glue-in extensions?” for more information.
Clean the Wig & Skin Thoroughly
One of the most important steps to ensure a secure hold for your wig is to clean the wig and skin thoroughly before applying any glue. This helps to remove any dirt, oil, or residue that may prevent the glue from sticking properly.
To clean the wig, start by filling a sink or basin with cold water and a small amount of wig shampoo. Gently swish the wig in the water, taking care not to rub or scrub the hair as this can cause tangling and damage. Rinse the wig thoroughly with cold water until all the shampoo is removed.
Next, use a towel to gently blot the excess water from the wig. Avoid rubbing the hair as this can cause damage.
To clean the skin, use a gentle cleanser to remove any dirt or oil. Be sure to use a cleanser that is gentle enough for the face and won’t dry out the skin. Rinse the skin with lukewarm water and pat it dry with a clean towel.
Once the wig and skin are clean, allow them to dry completely before applying any glue. You can use a towel to gently blot excess water from the wig, but avoid using a hairdryer as this can damage the hair.
By ensuring that both the wig and skin are cleaned thoroughly before applying glue, you can help to ensure a secure hold that will last all day. If you’re looking for more tips on wig application, check out our article on how to glue in weave.
Dry the Wig & Skin Completely
One crucial step in applying a wig with glue is ensuring that both the wig and your skin are completely dry. This ensures a secure hold and prevents any bacteria or fungal growth. If either the wig or skin is damp, it can compromise the effectiveness of the glue and increase the risk of irritation or infection.
To dry the wig and skin thoroughly, you can follow these simple steps:
| Step 1: | After washing the wig, gently pat it dry with a clean towel. Do not rub the wig vigorously, as this can damage the fibers. |
| Step 2: | Leave the wig to air dry completely before applying any glue. Do not use a hairdryer or any other heat source to speed up the drying process, as this can also damage the wig. |
| Step 3: | Meanwhile, prep your skin by washing it with a gentle cleanser, and then pat it dry with a clean towel. Avoid using any moisturizer, oil, or lotion on your skin as this can compromise the hold of the glue. |
| Step 4: | Wait until your skin is completely dry before applying any glue or adhesive. You can use a fan or blow-dryer on a cool setting to speed up the drying process, but make sure not to over-dry or dehydrate your skin. |
By taking the time to dry your wig and skin completely, you can make sure that the glue adheres well, and your wig stays in place throughout the day. Remember, If you are unsure which products suit your skin and wig type, consult a professional hairstylist or wig expert.
Need more information on how to make a wig cap with glue? Check out our detailed guide.
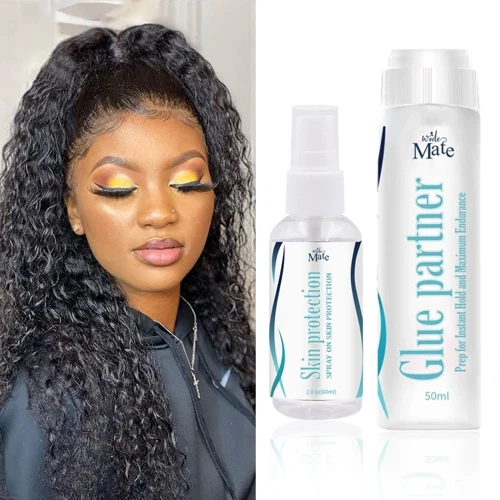
Protect Your Skin with Barrier Cream
When gluing a wig, it is important to protect your skin to avoid any allergic reactions or irritation caused by the glue. This is where a barrier cream comes in. A barrier cream is a protective cream that acts as a barrier between your skin and the glue. This cream will help to prevent any type of irritation or damage to your skin by creating a shield between the skin and the glue.
How to Apply Barrier Cream:
To apply the barrier cream, follow these simple steps:
| Step 1: | Choose a high-quality barrier cream that is specifically designed for wig gluing. |
| Step 2: | Take a small amount of cream and apply it onto your forehead, temples around ears along your hairline and nape of your neck. Massage it gently onto your skin until it is fully absorbed. |
| Step 3: | Wait for a few minutes, or until the cream is completely absorbed, before applying the glue. |
By applying the barrier cream, you will create a buffer between the glue and your skin, allowing you to wear the wig with confidence and comfort. Barrier cream is an essential step to take for anyone who plans to wear a wig regularly or for an extended period of time.
It’s worth noting that it’s essential to choose a high-quality barrier cream and always follow the manufacturer’s instructions carefully. With the right barrier cream applied to your skin, you can be sure that your skin will remain protected throughout the wig installation process.
If you want to learn other ways to wear a wig with glue or want to learn about different wig cap types, check out our articles on invisible part glue-in, gluing hair to your face, weave on a stocking cap and making a wig cap with glue.
Position the Wig on Your Head
Before applying glue to your wig, you need to position it correctly on your head. This step is crucial to ensure that your wig will fit seamlessly and feel comfortable on your scalp. Here are some tips on how to position your wig:
1. Find the front of the wig. Look for the tag or label that says “front” or “top” to identify where the front of the wig is. If you can’t find it, the general rule is that the front of the wig has a natural hairline and the back has a straight edge.
2. Align the wig with your natural hairline. To achieve a natural look, position the wig so that its front hairline matches your natural hairline. Use a handheld mirror to check the alignment from different angles. You can use a wig cap to keep your hair in place and make it easier to position the wig.
3. Adjust the fit. Most wigs have adjustable straps or hooks at the back to adjust the size. You can also use clips or bobby pins to secure the wig in place. Make sure the wig feels snug but not too tight on your head.
4. Check for gaps or bulges. Use your fingers to smooth out any bumps or gaps between the wig and your scalp. If you have long hair, tuck it underneath the wig cap. You can also use a rat tail comb to adjust the hair around your face and create a more natural look.
By following these steps, you can position your wig properly and ensure a comfortable and secure fit. Remember to take your time and make adjustments as needed before moving on to applying the glue.
Applying the Glue

Now that you have prepped your wig and skin, it’s time to apply the glue. This step can be intimidating for beginners, but with the right technique, it’s easy to achieve a secure hold. Follow these simple steps to ensure your wig stays in place all day. Remember, a little bit of glue goes a long way, so take your time and apply in small sections to avoid any mishaps.
Apply the Glue in Small Sections
When applying the glue to your wig, it is important to do it in small sections. This allows for better control and precision, ensuring a more secure hold. To apply the glue in small sections, follow these steps:
- Start at the front: Begin by applying a small amount of glue to your skin, close to your hairline. Use your finger or a small brush to spread the glue evenly.
- Work in sections: Move onto the next section of your head, applying a small amount of glue at a time. Use a comb to separate the hair and apply the glue in small, even strokes.
- Be patient: Take your time when applying the glue, making sure each section is evenly coated. Rushing through this step can result in an uneven and less secure hold.
- Avoid excess: Do not apply too much glue to any one section, as this can lead to a bumpy and uncomfortable finish.
- Allow to dry: Once you have applied glue to the entire perimeter of your wig, allow it to dry for a few minutes or until tacky to the touch.
By applying the glue in small sections, you can ensure a secure and comfortable fit for your wig. It also allows for more flexibility in styling and manipulating your wig, without fear of it falling off or shifting. Remember to be patient, take your time, and avoid excess glue for the best results.
Wait for the Glue to Become Tacky
Once you have applied the glue to your scalp and wig, it’s important to let it become tacky before attaching the wig. This step is crucial to ensure a secure hold. Applying the wig before the glue has become tacky can result in a weaker hold, and the wig may not stay in place as well as you’d like.
Here are the steps to follow while waiting for the glue to become tacky:
- Set a timer for the recommended time frame listed on your glue product. This can typically range from 30 seconds to a few minutes.
- Avoid checking the glue too frequently, as this can disrupt the tackiness process and prolong the wait time.
- Use a fan or cool blow dryer on a low setting to speed up the drying process. However, be careful not to use too much heat, as this can cause the glue to dry too quickly and result in a weaker hold.
- Check the tackiness of the glue by lightly tapping it with your finger. If the glue sticks to your finger and feels slightly sticky or tacky, then it’s ready to attach the wig.
- If the glue is not tacky yet, wait a little longer and continue to check periodically. Once the glue has become tacky, proceed to attach the wig.
Remember, waiting for the glue to become tacky before attaching the wig is an important step to ensure a secure hold. Don’t rush this process, as it can impact the longevity and stability of your wig. By following these tips, you can ensure that your wig stays in place and looks natural throughout the day.
Press the Wig onto Your Head
After applying the glue to your skin and wig, it’s time to press the wig onto your head for a secure hold. This step is crucial for ensuring that the wig stays in place throughout the day. Here are the steps to follow:
| Step 1: | Line up the front of the wig with your natural hairline, making sure that the wig is centered on your head. |
| Step 2: | Starting at the center of your forehead, use the pads of your fingers to press the wig down onto your skin. Work from the center of your forehead outwards, pressing firmly but gently. |
| Step 3: | Once you’ve pressed the wig down onto your forehead, move to the sides of your head and press the wig down onto your skin there as well. Again, work from the center outwards. |
| Step 4: | Lastly, press the back of the wig down onto your nape. Make sure that it’s sitting snugly against the back of your neck. |
Tip: If you’re having trouble getting the wig to sit flat against your head, use a hair dryer on the cool setting to blow air onto the wig. This can help to set the glue and make the wig adhere more firmly to your skin.
It’s important to be gentle when pressing the wig onto your head, as too much pressure can cause the glue to shift and the wig to become misaligned. Take your time and work slowly to ensure a smooth, secure hold.
Smooth Out Any Bumps or Bubbles
After pressing the wig onto your head, it’s essential to make sure it’s smoothed out without any bumps or bubbles. These imperfections can not only ruin the appearance of your wig but also create a less secure hold. Here are some tips for smoothing out your wig:
| Tip | Instructions |
|---|---|
| Work in Small Sections | Separate the wig into smaller sections and use a fine-toothed comb to gently smooth out each section. Be sure to use a light touch to avoid causing damage to the wig or scalp. |
| Use a Blow Dryer and Brush | If you still notice bumps or bubbles, use a blow dryer on a low, cool setting to flatten the hair. Gently brush the hair in the desired direction as you use the blow dryer. |
| Apply Pressure with Hands | If there are still areas that need smoothing, apply gentle pressure to the area with your hands and hold for a few seconds. This will help the glue adhere better and create a more secure hold. |
| Check for Loose Edges | After smoothing out your wig, check for any loose edges. If you notice any, apply more glue and press firmly to secure the wig in place. |
Remember, it’s crucial to take your time and be gentle when smoothing out your wig to avoid causing any damage to the wig or your scalp. By following these tips, you’ll achieve a natural, secure hold for your wig.
Tips for a Secure Hold
Ensuring a secure hold for your wig is crucial to avoid any mishaps while wearing it. If you want to keep your wig in place throughout the day, there are a few tips and tricks that you can try. By implementing these methods, you can feel confident that your wig will stay put no matter what you’re doing. Here are some helpful tips to achieve a secure hold for your wig.
Avoid Touching the Wig or Scratching the Scalp
One of the most important things to keep in mind when gluing a wig is to avoid touching it too much or scratching your scalp. This might seem like common sense, but it’s important to remember in order to ensure a secure hold.
Here are a few reasons why:
- Touching the wig too much can cause the glue to loosen over time. The oils from your hands can break down the adhesive and weaken the bond between the wig and your scalp.
- Scratching your scalp can also cause the glue to loosen or even come off altogether. It’s important to resist the urge to scratch, even if you’re experiencing some itchiness or irritation.
- If you do need to adjust the wig or touch it for any reason, try to use as light a touch as possible and only do so when absolutely necessary.
Here are some tips to help you avoid touching the wig or scratching your scalp:
- Try to stay as still as possible after you’ve glued the wig down. Avoid excessive movement, especially in the first few hours after application. This will help the glue set properly and reduce the risk of accidentally dislodging the wig.
- If you do need to adjust the wig, use the pads of your fingers or the back of your nails instead of the tips of your fingers. This will reduce the amount of oil and residue left behind on the wig.
- If you’re experiencing itchiness or irritation on your scalp, try using a scalp-cooling product beforehand. This can help to reduce the discomfort and make it less tempting to scratch.
Remember, the key to a secure and long-lasting hold is to be as gentle as possible with your wig and scalp. By following these tips and being mindful of your movements, you can ensure that your wig stays in place and looks great for as long as possible.
Use a Wig Cap for Extra Security
To ensure your wig has extra security, it is highly recommended to use a wig cap. A wig cap not only provides a barrier between your scalp and the wig, but it also keeps the wig in place and prevents it from slipping or shifting throughout the day.
- Choose the right wig cap: There are different types of wig caps available, such as nylon, mesh, and cotton. Choose a cap that feels comfortable on your scalp and fits securely. Nylon caps are the most popular as they are lightweight and breathable, while mesh caps can be more comfortable for those with sensitive scalps.
- Put your hair in a wig cap: If you have long hair, it is important to put your hair in a wig cap before placing the wig. This not only helps with the wear and tear of the wig, but it also stops your hair from poking through the cap and ruining your wig look.
- Secure the wig cap: Once the wig cap is in place, be sure to secure it by using bobby pins. This will keep the wig cap from slipping, and also keep the wig in place on top of it without moving.
- Adjust the Wig on top of the wig cap: Once the wig cap is securely in place, adjust the wig on top of it. Make sure your wig is centered on your head and easy to wear for a long period of time.
Using a wig cap can also extend the life of your wig as it prevents oil from your scalp or hair from transferring onto the wig. However, ensure your wig cap is clean as it can also accumulate oil and sweat from your scalp. It is recommended to wash your wig cap after each use for optimal hygiene and wig preservation.
Consider Using Wig Tape for Added Hold
For added security when gluing a wig, you may want to consider using wig tape. Wig tape is a double-sided adhesive tape that can be placed in between your scalp and the wig to provide extra hold.
Here are some benefits of using wig tape:
- It is easy to apply and remove.
- It is waterproof, so it can hold up even in humid or rainy weather conditions.
- It is transparent and skin-safe, making it a good option for those with sensitive skin.
- It can be used in conjunction with wig glue for added security.
If you decide to use wig tape, make sure to clean and dry your skin thoroughly before application. Cut the tape into the desired size and shape, then carefully place it onto your scalp. Press the wig firmly onto the tape, smoothing out any bumps or bubbles.
As with wig glue, be careful not to place the tape too close to your hairline or temples, as this can cause irritation or damage to your natural hair.
Here are some tips for using wig tape:
- Choose a tape that is specifically designed for use with wigs.
- Experiment with different tape sizes and shapes to find the best fit for your wig and scalp.
- Use multiple pieces of tape for added hold, if needed.
- Always have extra tape on hand in case you need to reapply or make adjustments throughout the day.
Wig tape can be a great option for those looking for added security when gluing their wigs. However, it is important to use it correctly and in conjunction with proper skin and wig prep to avoid any potential damage or irritation.
Keep a Spare Bottle of Glue on Hand
It’s always a good idea to have a backup plan, especially in case of emergencies. That’s why when it comes to gluing a wig, it’s crucial to keep a spare bottle of glue on hand. Running out of glue in the middle of an event can be nerve-wracking, but having a backup bottle can give you peace of mind.
Why Should You Keep a Spare Bottle of Glue?
Having a spare bottle of glue can save you from a hair emergency. If the original bottle of glue runs out, you won’t have to run to the store to buy a new one. Also, the spare bottle can be useful in situations where you need to touch up your wig while out and about.
What Type of Glue Should You Keep?
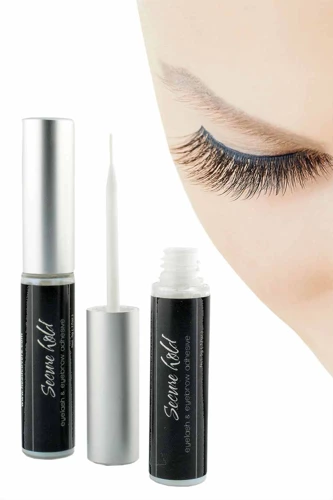
When keeping a spare bottle of glue on hand, it’s essential to choose the right type of glue. You want to ensure that the glue is reliable and works well with your wig and skin. Some popular types of wig glue include:
| Glue Type | Description |
|---|---|
| Synthetic Wig Glue | Designed specifically for synthetic wigs. Provides an extra-strong hold. |
| Lace Wig Glue | Perfect for lace front wigs. Has a clear color and waterproof formula. |
| Skin-Safe Adhesive | Gentle on the skin and ideal for those with sensitive skin. Provides a strong hold. |
It’s important to choose a glue that suits your needs and preferences. Consider your skin type, the type of wig you’re wearing, and the duration of wear when picking a glue.
Where should You Store Your Spare Bottle of Glue?
When it comes to storing a spare bottle of glue, you want to make sure it’s stored in the right place. Glue exposed to heat, humidity, or sunlight can lose its potency or even spoil. That’s why it’s best to store the glue in a cool, dry, and dark place. A good place to keep glue is in a small bag or container, away from direct sunlight or heat.
Having a spare bottle of glue on hand can be a lifesaver. With the right type of glue and proper storage, you can ensure that you’re always prepared for any hair emergency. Remember to check the expiry date of the glue, and replace the spare bottle as needed.
Removing the Glue & Wig
As much as we love our wigs, there comes a time when we have to remove them. Removing a glued wig can be a daunting task, especially if you don’t know the proper technique. But don’t worry, we’ve got you covered. In this section, we’ll walk you through the steps to safely remove both the wig and the glue. So sit back and relax, and let’s get started.
Apply a Wig Adhesive Remover
When it comes time to remove your wig, it’s important to do so carefully and gently in order to avoid damaging the wig or your scalp. Using a wig adhesive remover is a safe and effective way to dissolve the glue and release the wig from your skin.
To apply the wig adhesive remover, follow these steps:
| Step 1: | Begin by applying a small amount of the adhesive remover to the perimeter of the wig near the hairline. Use a cotton swab or a soft brush to apply the remover, being careful not to get it in your eyes or mouth. |
| Step 2: | Allow the adhesive remover to sit for a few minutes, until it begins to dissolve the glue. You may notice the wig starting to lift away from your skin at this point. |
| Step 3: | Once the glue has been dissolved, gently lift the wig away from your skin using your fingers or a wig removal tool. Be careful not to pull too hard or too quickly, as this can damage the wig or your scalp. |
| Step 4: | If there are any sections of glue that are particularly stubborn, you can apply more adhesive remover and let it sit for a few more minutes before attempting to remove the wig again. |
| Step 5: | After the wig has been completely removed, use a clean, damp cloth to gently wipe away any remaining glue residue. Be sure to also clean your scalp thoroughly to remove any adhesive residue or buildup. |
By following these steps and using a wig adhesive remover, you can safely and easily remove your wig without causing any damage to your skin or the wig itself. Remember to always be gentle and take your time, and your wig will last you for many wears to come.
Gently Lift the Wig Away from Your Skin
One of the final steps to removing a glued wig is to gently lift it away from your skin. This can be a delicate process, as you don’t want to damage either the wig or your natural hair. Follow these steps to ensure a smooth wig removal process:
| Step | Description |
|---|---|
| 1 | Start by loosening the edges of the wig. Apply a wig adhesive remover around the perimeter of the wig where the glue was applied. |
| 2 | Use your fingers or a comb to gently lift the wig away from your scalp. Start at the back of your head and work your way forward. |
| 3 | Apply more wig adhesive remover to stubborn areas where the glue is still holding on. |
| 4 | Do NOT pull or tug on the wig to remove it. This can cause damage to both your scalp and the wig material. |
| 5 | Continue to gently lift and loosen the wig until it is completely removed from your scalp. |
After the wig is removed, cleanse your scalp and wig thoroughly to remove any remaining glue or residue. Properly storing your wig will also help maintain its quality for future use. Remember to always be gentle when removing your wig to ensure the longevity of both your natural hair and your favorite wig.
Clean the Wig & Scalp Thoroughly
When it comes to removing the wig and glue, it is crucial to clean both the wig and scalp thoroughly. This will ensure that the wig remains in good condition and that your scalp is not irritated. Here are the steps you should follow:
| Step | Instruction |
|---|---|
| Step 1: | Remove the wig from your head and place it on a wig stand. |
| Step 2: | Gently comb or brush any remaining glue out of the wig. Start from the ends and work your way towards the base. |
| Step 3: | Fill a sink or basin with lukewarm water and add a small amount of shampoo. |
| Step 4: | Place the wig in the water, and gently swirl it around for a few minutes to ensure that the shampoo reaches all parts of the wig. |
| Step 5: | Rinse the wig thoroughly under running water until all the soap is removed. |
| Step 6: | Gently squeeze out any excess water from the wig, but do not rub or wring it out. |
| Step 7: | Place the wig on a dry towel and gently pat it to remove any remaining water. |
| Step 8: | Hang the wig on a stand and allow it to air dry completely. |
| Step 9: | Clean your scalp using a gentle shampoo to remove any remaining glue or residue. Be sure to rinse thoroughly. |
| Step 10: | Apply a scalp conditioner or moisturizer to soothe and hydrate your scalp. |
Cleaning and taking care of your wig and scalp are essential for prolonging the life of your wig and ensuring your scalp remains healthy. By following these steps, you can be certain that your wig is clean and ready to use again as soon as possible.
Store the Wig Properly
Properly storing your wig after use is important for maintaining its quality and prolonging its lifespan. Incorrect storage can lead to tangling, matting, and damage to the wig fibers. Here are some tips to help you store your wig properly:
| Tip | Description |
|---|---|
| Keep it clean | Before storing your wig, make sure it is clean and free of any styling products or adhesives. Use a wig brush to gently remove any tangles or knots and then wash and condition your wig according to the manufacturer’s instructions. |
| Use a wig stand | A wig stand is the best way to store your wig, as it helps to maintain its shape and prevents tangles. Place the wig on the stand, making sure it is secure and not sliding off the stand. |
| Avoid direct sunlight | Sunlight can cause the wig fibers to fade, so it is best to store your wig in a cool, dry place, away from direct sunlight. |
| Avoid high heat | Heat can also damage the wig fibers, so store your wig away from any heat sources such as radiators, hair dryers, or heaters. |
| Use a wig box for travel | If you need to take your wig with you, use a wig box or a wig bag to protect it during transit. Make sure the box or bag is large enough to allow the wig to keep its shape. |
| Check it regularly | Regularly check your wig for any signs of damage or tangling. If you notice any issues, address them immediately to help prolong the life of your wig. |
By following these tips, you can help ensure that your wig remains in good condition for longer, saving you money in the long run and keeping you looking your best. Take the time to store your wig properly after each use and it will reward you with long-lasting wear.
Conclusion
In conclusion, gluing a wig can be a game-changer when it comes to achieving a flawless, natural-looking hairstyle. The right glue, coupled with proper prepping and application techniques, can give you a secure hold that lasts for days on end.
However, it’s important to remember that glueing a wig is not for everyone. If you have sensitive skin or are prone to allergic reactions, it’s best to avoid using adhesives altogether. Always patch test any new products before applying them to your scalp and hairline.
When choosing a glue, it’s important to opt for a product that is specifically formulated for wigs and hairpieces. Never use super glue or household adhesives, as they can be damaging to both your wig and scalp.
Additionally, taking proper care of your wig and scalp is key to maintaining a healthy and comfortable hold. Always clean and dry your scalp and wig thoroughly before and after each use. Use a barrier cream to protect your skin, and consider using a wig cap or tape for extra security.
Overall, gluing a wig requires a bit of patience, practice, and knowledge of the right techniques. By following the tips and tricks outlined in this article, you can achieve a secure and natural-looking hold that will have everyone wondering if it’s your real hair. So, go ahead and give gluing a wig a try – you might just love the results!
Frequently Asked Questions
How long does the glue hold the wig in place?
The duration of the hold depends on the type of glue used and individual factors such as scalp type, humidity, and physical activity. Generally, a high-quality glue can hold the wig in place for 1-2 weeks.
Can I swim or shower with a glued wig?
No, it is recommended to avoid getting the wig wet while it is glued to your head. This can compromise the hold of the glue and cause the wig to lift or become loose.
Is it safe to glue a wig onto my skin?
As long as the instructions are followed and a safe, high-quality adhesive is used, gluing a wig onto your skin is generally safe. However, it is important to watch for any signs of irritation or allergic reaction.
Can I reuse a wig that has been glued on?
Yes, a wig that has been glued on can be reused. However, it is important to properly remove the glue and clean the wig and scalp before reapplying the adhesive.
How do I know if I am allergic to wig glue?
Before applying the glue, it is recommended to perform a patch test on a small area of your scalp. If there is no reaction within 24 hours, it is safe to assume you are not allergic to the glue.
Is it necessary to use a barrier cream?
While it is not necessary, using a barrier cream can help protect your skin from irritation and make the glue removal process easier.
Should I blow dry the glue to make it dry faster?
No, it is not recommended to use heat to dry the glue faster. This can compromise the hold and potentially cause damage to the wig or scalp.
What should I do if the wig starts to lift or become loose?
If the wig starts to lift or become loose, it is recommended to remove it and reapply with fresh adhesive. Trying to adjust or reposition the wig while it is still glued may cause further lifting or damage.
Can wig glue damage my natural hair?
No, wig glue is designed to be applied to the scalp and not the hair itself. However, it is important to be gentle when removing the wig and glue to avoid any potential damage to the natural hair.
Do I need to use a specific type of glue for synthetic versus human hair wigs?
Yes, it is important to use a glue specifically designed for the type of wig you are wearing. Synthetic hair requires a different type of adhesive than human hair to ensure a secure hold and avoid damage to the wig.