Have you ever wondered how to glue Depron foam in the most effective way possible? As easy as it seems to stick together, getting the perfect attachment can be a challenging task without the right information and approach. In this complete guide, we’ll be delving into various practical and creative ways of gluing Depron with different adhesives and clamping techniques. Whether you’re a novice or an experienced builder, this guide is a comprehensive resource to help you achieve a professional quality and everlasting bond for your Depron projects. Let’s dive in!
Why Depron?
Why should you consider using Depron foam? This lightweight closed-cell foam is an excellent choice for various purposes, especially in the model airplane industry. Depron foam can be easily cut, shaped, and glued, making it ideal for constructing model planes, as well as other hobby projects. In this article, we will give you a complete guide on how to glue Depron foam together using different adhesives and techniques. Whether you are new to working with Depron foam or an experienced hobbyist, keep reading to learn how to achieve the best results when gluing Depron foam.
What is Depron?
Depron is a foam material that is often used in hobbies, particularly for model building and even as insulation. This foam made of expanded polystyrene (EPS) is typically white and lightweight, with a smooth and glossy surface. It is known for being easily carved and shaped with a sharp knife, as well as being durable enough to create detailed designs.
Depron is widely used for various reasons:
| Advantages | Disadvantages |
|---|---|
| Lightweight | Not very resistant to impact |
| Durable and can withstand heat | Not waterproof and can be damaged by water |
| Easy to cut and shape according to desired design | Can be expensive |
| Excellent insulation properties | May not be available in local stores |
| Flexible and can bend to some extent while retaining its shape |
As a result of its lightweight and insulating characteristics, Depron is ideal for making models like airplanes, boats, cars, and even architectural models. However, it does have its limitations, with impact resistance and water damage being its most significant drawbacks. It is crucial to use the right adhesive to ensure that Depron stays together and remains durable.
Advantages of Depron
Depron foam has many advantages that make it a popular choice among hobbyists and professionals alike.
1. Lightweight: Depron foam is an extremely lightweight material, making it perfect for use in model building and other applications where a light material is desired.
2. Easy to Cut and Shape: Depron foam is easy to cut and shape, allowing for precise cuts and detailed designs. It also takes well to sanding, making it easy to smooth out rough edges and surfaces.
3. Durable: Despite its lightweight nature, Depron foam is surprisingly durable. It can withstand a fair amount of wear and tear, making it ideal for projects that will be handled frequently.
4. Insulating Properties: Depron foam has excellent insulating properties, making it great for projects where insulation is needed, such as in model airplanes or insulated wall panels.
5. Versatile: Depron foam can be used for a variety of applications, ranging from model building to insulation. Its versatility makes it a popular choice among hobbyists and professionals alike.
6. Easy to Glue: Another advantage of Depron foam is its ease of gluing. When using the right adhesive, it can bond quickly and securely to a variety of surfaces, including wood, plastic, and more.
Depron foam is a versatile, lightweight, and durable material that is easy to work with and has a wide range of applications. Whether you’re building model airplanes, creating wall panels, or any other project, Depron foam is sure to impress.
Disadvantages of Depron
Depron is a popular foam material for building sleek and lightweight models, but it does have some disadvantages to consider. Here is a table highlighting these disadvantages:
| Disadvantages of Depron | |
| Brittleness: | Depron is a relatively brittle foam material, meaning it can crack easily if subjected to impact or high stress. |
| Water Resistance: | Depron is not very water-resistant and can absorb moisture, which can affect its structural integrity and cause warping or deformation. |
| UV Sensitivity: | Depron is sensitive to UV radiation, which can cause it to break down and become brittle over time. |
| Difficulty in Painting: | Depron can be difficult to paint, and the paint may not adhere well to the foam surface. Priming the surface beforehand can help with this issue. |
Despite these disadvantages, Depron remains a popular choice for model builders due to its lightweight nature and ease of use. However, it’s important to consider these factors before deciding to use Depron in your project. If you are looking for other adhesive options besides the ones mentioned in this article, you may find useful information in our article on PVA glue and epoxy glue.
Types of Adhesives
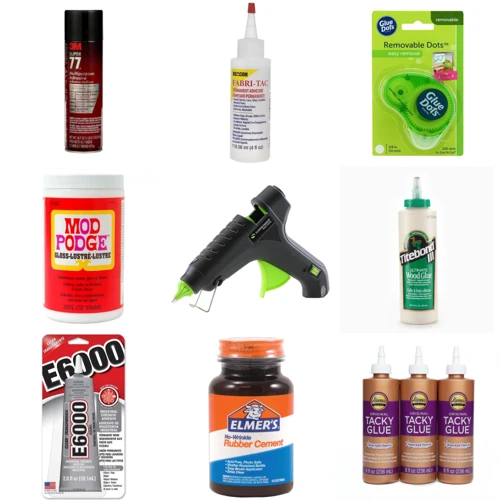
When it comes to gluing Depron, there are several types of adhesives that you can choose from. The type of adhesive that you use will depend on the task at hand, as well as the materials that you are working with. Here are some of the most common adhesives used for Depron, along with their strengths and weaknesses. It’s important to choose the right adhesive, as it can make or break your project. Let’s explore the different types of adhesives and find out which one is best for your project!
CA Glue
CA glue, or cyanoacrylate adhesive, is a popular choice when it comes to bonding Depron. It is a quick-setting adhesive that works well on many surfaces, including foam. However, it is important to note that not all CA glues are suitable for Depron. Make sure to choose a foam-safe CA glue.
| Advantages | Disadvantages |
|---|---|
| Quick drying | Brittle when dry |
| Forms strong bond | Not suitable for high-stress areas |
| Easy to apply | Can be messy |
When using CA glue, it is important to follow some basic guidelines. Ensure that the surface is clean and dry, and that you have properly trimmed and sanded the Depron before applying the glue. Apply the glue sparingly, as a little goes a long way. Too much glue can cause the foam to melt or warp, so be careful.
It is also a good idea to use a foam-safe accelerator with CA glue. This can speed up the drying time and help to create a stronger bond. However, be careful when using an accelerator, as it can cause the glue to dry too quickly and create a weaker bond.
Once you have applied the glue, clamp the foam in place until the glue is fully dried. This typically takes a few minutes. Keep in mind that while CA glue dries quickly, it may take longer to fully cure. You can speed up the curing process by using a hair dryer, but be careful not to overheat the foam.
CA glue is a great option for bonding Depron. It is quick-drying, easy to apply, and forms a strong bond. However, it is important to use a foam-safe version, and to follow the proper guidelines for application. By doing so, you can ensure that your Depron project will hold together well.
Epoxy
Epoxy is a popular adhesive for bonding Depron foam due to its strength and durability. It is a two-part adhesive that must be mixed before application. When mixed, epoxy creates a strong chemical bond that is resistant to water and most chemicals. Epoxy also has a longer drying time compared to other adhesives, which gives the user more time to make adjustments before it fully sets.
Here’s a step-by-step guide on how to apply epoxy to Depron foam:
- First, gather all necessary tools and materials: epoxy adhesive, mixing cups, mixing sticks, gloves, and a clean workspace.
- Measure equal parts of the epoxy resin and hardener using the mixing cups.
- Thoroughly mix the epoxy with the mixing stick for approximately two to three minutes until it is an even consistency.
- Apply the epoxy to one side of the Depron foam using the mixing stick.
- Place the other piece of foam onto the epoxy-coated side and press down firmly to make sure the two pieces adhere evenly.
- Wipe off any excess epoxy with a clean cloth or paper towel.
- Clamp the Depron foam together for at least 24 hours for the epoxy to fully cure.
It’s important to note that before using epoxy on Depron foam, the foam should be roughened or sanded to allow for better adhesion. Also, the workspace should be well-ventilated and gloves should be worn when handling epoxy.
In addition to bonding Depron foam, epoxy can be used for a variety of other applications such as bonding plastic, wood, and fiberglass. If you’re interested in learning more about how to use epoxy on plastic or wood, check out these guides on using epoxy on plastic and gluing wood to fiberglass.
Hot Glue
Hot glue is a commonly used adhesive in crafts and works well with Depron foam due to its strong and fast-grabbing properties. However, it is important to take certain precautions when using hot glue with Depron foam to avoid damaging or melting the foam.
Here are the steps to using hot glue with Depron:
- First, make sure you have a hot glue gun and hot glue sticks on hand.
- Plug in the hot glue gun and wait for it to heat up.
- Once hot, apply the hot glue onto the surface where you want to attach the Depron foam.
- Press the Depron foam gently onto the hot glue, making sure to position it correctly before the glue cools and hardens.
- Hold the foam in place until the glue cools completely to ensure a strong hold.
It is important to note that hot glue can easily melt the Depron foam if applied too hot or held in place for too long. To avoid this, use a lower temperature setting on the hot glue gun and apply the glue in small amounts rather than large blobs. Additionally, make sure the foam is fully cooled before handling it again.
One more thing to keep in mind: if you plan to paint the Depron foam, do not use hot glue as it may cause the paint to bubble or peel.
If you are interested in learning about other types of glue, check out our article on using E6000 glue on wood or what mastic glue is used for.
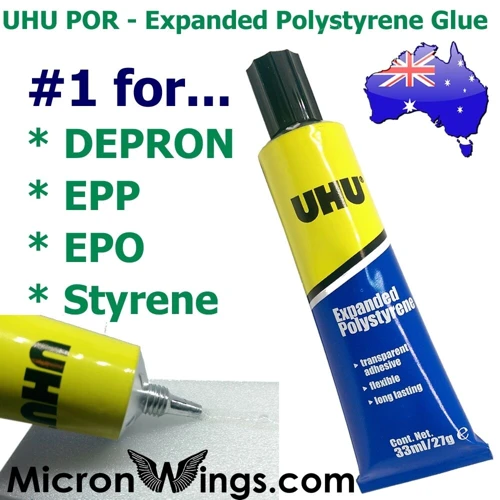
UHU Por
When it comes to gluing Depron foam board, UHU Por offers an excellent alternative to other types of adhesives. UHU Por is a type of glue that is specifically designed to bond foam materials, making it ideal for Depron foam boards. This glue is also great for attaching lightweight materials such as balsa wood, paper, and cardboard to the foam surface.
One of the benefits of UHU Por is that it dries clear and flexible, which means it won’t affect the appearance or flexibility of your Depron plane or project. Another advantage is that it is easy to apply with its precision applicator tip, giving you control over the amount of glue you use. Unlike some other types of glues, UHU Por doesn’t produce any noxious fumes or hazardous chemicals.
To apply UHU Por glue, you should first prepare the foam surface by cleaning it and removing any debris that may decrease the effectiveness of the glue bond. After the surface is ready, you can apply the glue thinly and evenly using the precision applicator tip. You should then press the two surfaces together and hold them in place for a few minutes.
Once applied, UHU Por requires around 30 minutes to dry fully. During this time, it is important not to disturb the glued surfaces. It’s advisable to use clamps or other types of pressure to ensure that the foam board is held together firmly during the drying process. After this time, the bond should be strong and long-lasting.
UHU Por offers a great solution for bonding Depron foam boards. With its strong adhesive properties, precision applicator, and clear and flexible finish, it can help you achieve a seamless and sturdy bond on your foam plane or project.
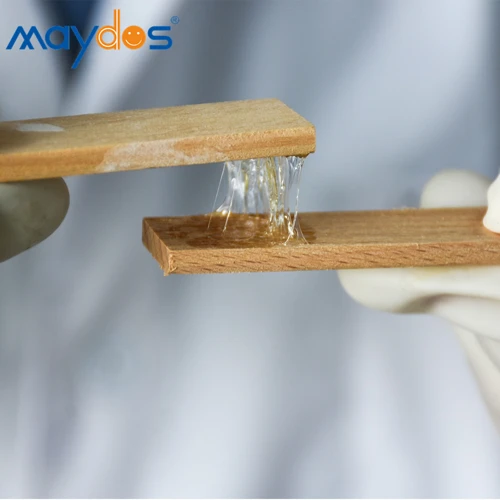
Contact Cement
Using contact cement is one of the most popular methods for gluing Depron. It is a versatile glue that can form strong bonds between a wide range of surfaces. Contact cement can be used on porous and non-porous surfaces, including metal, wood, plastic, and rubber. Here’s how to use it for gluing Depron:
- Prepare the surface: The surfaces being bonded should be clean, dry, and free of any dust, oil, or other contaminants. Use a damp cloth to clean the surface and let it dry completely.
- Apply contact cement: Apply a thin and even layer of contact cement to both the surface and the Depron using a brush or applicator. Make sure to apply the glue only to the areas where bonding is needed.
- Allow the glue to dry: The glue should dry for about 10-15 minutes until it becomes tacky to the touch. It is important to wait until it is completely dry before proceeding to the next step.
- Press the surfaces together: Once the glue has become tacky, carefully press the Depron onto the surface. Make sure to align the edges properly before pressing them together. Use a roller or clamp to apply pressure evenly and firmly.
- Wait for the bond to set: The bond should be left to set for at least 24 hours before any stress or load is applied to it. Avoid moving or using the glued object until the bond is completely set.
Using contact cement for gluing Depron is an effective method for creating strong and long-lasting bonds. However, it is important to use it in a well-ventilated area and to follow the manufacturer’s instructions carefully. If you need to glue Depron to non-porous surfaces, you may also want to consider using epoxy or other specialized adhesives.
For more information on gluing other materials, such as rocks or cracked glass, check out our articles on how to glue Java fern to rock and how to glue cracked glass. Additionally, if you are wondering whether super glue is waterproof when dry, read our article on is super glue waterproof when dry.
Double Sided Tape
Double-sided tape is a popular option for those who want a quick and easy way to glue Depron foam. This type of tape is commonly used in everyday applications and can be found at most hardware and craft stores. One advantage of using double-sided tape is that it eliminates the need for clamping and drying time.
Advantages of Double Sided Tape:
- Quick and easy application
- No clamping required
- No drying time needed
- Minimal mess
To use double-sided tape, first, make sure the Depron foam and the surface to which it will be glued are clean and free from debris. Next, cut the tape into the desired length and apply it to the back of the foam. Then, remove the protective backing from the tape and carefully place the foam onto the surface. Using a roller or your hand, apply pressure to ensure the foam adheres properly.
Disadvantages of Double Sided Tape:
- Not strong enough for heavy-duty applications
- May not adhere well to some surfaces
- Not water-resistant
While double-sided tape is a good option for lightweight projects or temporary applications, it may not be the best choice for heavier or permanent projects. Double-sided tape may not hold up well in outdoor or high-temperature environments, as heat can cause it to lose its adhesive properties.
If you need a stronger adhesive for your Depron foam project, you may want to consider other options such as CA glue or epoxy. To learn more about these adhesives, check out our articles on how to glue ABS or how to glue lava rock together.
Choosing the Right Adhesive
When it comes to choosing the right adhesive for Depron, there are a few options to consider. Each adhesive has its own strengths and weaknesses, and the decision ultimately depends on the specific project and personal preference. Here is a breakdown of each adhesive to help in making an informed decision:
| Adhesive | Description | Pros | Cons |
|---|---|---|---|
| CA Glue | Also known as superglue, this fast-acting adhesive dries clear and bonds quickly. | -Quick drying -Strong bond -Good for small parts |
-Can be brittle -Not good for large surface areas -Can’t be sanded |
| Epoxy | A two-part adhesive that takes several hours to cure, providing a strong, permanent bond. | -Strong bond -Can be sanded and painted -Good for large surface areas |
-Long drying time -Can be messy to use -May require mixing and tools |
| Hot Glue | A fast-drying adhesive that can bond Depron to a variety of surfaces. | -Quick drying -Can be removed and repositioned -Good for temporary bonds |
-May not be as strong as other adhesives -May leave visible glue lines |
| UHU Por | A foam-safe adhesive specifically designed for bonding foam materials. | -Dries clear -Flexible bond -Good for foam models |
-May not bond well to other materials -Long drying time |
| Contact Cement | An industrial-strength adhesive that creates a strong bond between two surfaces. | -Strong bond -Can be used on non-porous surfaces -Good for large areas |
-May require special ventilation -Needs to be applied to both surfaces and allowed to dry before bonding |
| Double Sided Tape | A pre-cut tape with adhesive on both sides that can be used to bond Depron to other materials. | -Easy to use -Clean -Good for small parts |
-May not be as strong as other adhesives -May leave visible tape lines |
Choosing the right adhesive ultimately depends on: the specific project requirements, the materials being bonded, the size of the surface area, and the desired strength of the bond. It’s important to experiment with different adhesives to determine what works best for each individual project.
Preparing the Depron and Surface
Before applying any glue to the Depron foam, it’s important to take the necessary steps to ensure a strong bond. This involves preparing both the Depron and the surface it will be adhered to. By correctly trimming, sanding, cleaning, and taping the foam and surface, you can maximize the strength of the bond and increase the longevity of your project. In this section, we’ll explore the necessary preparations and techniques for successfully gluing Depron foam.
Trimming and Sanding the Depron
Before gluing Depron, it’s important to prepare the surface properly. Trimming and sanding the Depron is a crucial step in ensuring a flat and even surface to work with.
Trimming: Depron can be easily cut with a sharp hobby knife or a pair of scissors. However, it’s important to be patient and make slow and precise cuts. Measure twice and cut once to avoid mistakes. It’s also a good idea to make a template for each part to reduce the chances of errors.
Sanding: Sanding the edges of the Depron is important to remove any rough edges and to create a smooth surface for gluing. Use fine-grit sandpaper, like 220-grit, to sand the edges of the foam. Be gentle and don’t press too hard to avoid tearing or damaging the foam.
Table:
| Step | Instructions |
|---|---|
| 1 | Measure the Depron to the correct size |
| 2 | Use a sharp hobby knife or scissors to cut the Depron |
| 3 | Be patient and make precise cuts to avoid mistakes |
| 4 | Create a template for each part to reduce errors |
| 5 | Use fine-grit sandpaper to sand the edges of the foam |
| 6 | Be gentle and don’t press too hard to avoid tearing or damaging the foam |
By taking the time to properly trim and sand the Depron, you’ll be creating a surface that makes it easier to apply glue and to achieve a strong bond between the Depron and the surface it’s being glued to.
Cleaning the Surface
Before applying any adhesive to your Depron, it is essential to clean the surface thoroughly. Cleaning the surface ensures that there is no dust, grease, or any other contaminants that might affect the glue’s performance. In this section, we’ll show you how to clean the Depron surface effectively.
Materials you’ll need:
| Materials | Quantity |
| Isopropyl alcohol | 1 small bottle |
| Clean rags | 2 |
| Clean water | 1 small bucket or bowl |
1. First, take your clean rags and gently wipe the Depron surface to remove any loose dirt or debris.
2. Next, pour some isopropyl alcohol into a clean rag and gently apply it to the Depron surface. Be sure to cover the entire surface area, including the edges.
3. Allow the alcohol to evaporate completely before proceeding to the next step.
4. Once the alcohol has evaporated, take a clean rag and damp it in clean water. Use this rag to wipe the Depron surface again, removing any remaining alcohol residue.
5. After wiping the surface with water, let it air dry completely. Ensure there is no moisture left on the surface before moving to the next step.
By following these steps, your Depron surface will be clean and ready for gluing!
Applying Masking Tape
Before gluing your Depron, it is essential to prepare the surface to be as smooth and clean as possible. Applying masking tape is one of the easiest ways to protect the surfaces and ensure that the glue only goes where it’s needed. Below are the steps for proper application of masking tape:
Step 1: Using a clean cloth, wipe away any dust or debris from the surface where you will apply the tape. Make sure the surface is completely dry before you begin.
Step 2: Measure and cut the desired length of masking tape using a pair of scissors.
Step 3: Gently apply the masking tape to the edge of the Depron. Be sure to apply even pressure along the length of the tape to prevent air pockets.
Step 4: Use a plastic scraper or a credit card to burnish the tape onto the surface. This will help to ensure that it adheres firmly and that there are no air pockets.
Step 5: Use a sharp utility knife to cut around the edge of the Depron to remove any excess tape.
After completing this process, you can continue with gluing your Depron safely and securely. It is important to note that the correct application of masking tape can significantly improve the overall quality of your finished product and prevent any unwanted mess or damage.
Applying the Glue
Now that you have your Depron and surface prepared, it’s time to move on to the crucial step of applying the glue. The type of adhesive you choose will depend on your material and personal preference. Whether you prefer the quick-drying CA glue or the strong bond of epoxy, we’ll guide you through the step-by-step process of applying each type. Read on to learn the proper techniques for applying glue to ensure a secure and lasting bond.
Applying CA Glue
To apply CA glue to Depron foam, follow these steps:
- Prepare the area: Place the Depron on a clean, flat surface and make sure it is free from dust and debris.
- Apply the glue: Apply a small amount of CA glue to one of the surfaces you wish to bond. Use a toothpick or a small brush to apply the glue, making sure not to use too much as this can create a mess.
- Press surfaces together: Carefully and firmly press the surfaces together and hold them in place for a few seconds.
- Avoid glue on hands: Be sure to avoid getting the glue on your hands, as it can bond to skin quickly.
- Use accelerator (optional): If you want to speed up the bonding process, you can use an accelerator. Simply apply a small amount of accelerator to the other surface before bonding.
- Give time to cure: Allow the glue to cure fully before handling the bonded surface, which usually takes around 30 seconds to 1 minute.
It’s important to note that CA glue can create a strong bond, but it can also be brittle. This makes it less ideal for applications where the foam will be subjected to a lot of stress or bending. If you need to fill gaps or add reinforcement to your bond, consider using a different adhesive or reinforcing with a fiberglass strip.
Applying Epoxy
When it comes to applying epoxy to Depron foam, there are a few things you need to keep in mind. Here are the steps to follow:
Step 1: Mix the epoxy
First, you need to mix the two-part epoxy according to the instructions on the packaging. Be sure to mix it thoroughly to ensure that it cures properly.
Step 2: Apply the epoxy
Using a small brush or a toothpick, apply the epoxy to the surfaces that you want to bond together. Be sure to apply it evenly and avoid getting it on your skin.
Step 3: Press the surfaces together
Once you have applied the epoxy to both surfaces, press them firmly together. Make sure the surfaces are aligned correctly before pressing them together.
Step 4: Secure with clamps
If necessary, use clamps or weights to hold the surfaces together while the epoxy cures. This will help ensure a strong bond.
Step 5: Wait for the epoxy to cure
Epoxy typically takes several hours to cure, so be patient and allow it to dry completely. Check the instructions on the packaging for specific drying times.
Step 6: Clean up excess epoxy
After the epoxy has cured, you may have excess epoxy that needs to be trimmed or sanded away. Be sure to wear gloves and a mask to protect yourself from the dust.
By following these steps, you can ensure a secure bond between your Depron foam pieces using epoxy. Just remember to take your time, follow the instructions, and be patient while waiting for the epoxy to cure.
Applying Hot Glue
When it comes to applying hot glue to Depron foam, there are a few things to keep in mind. Hot glue is a popular adhesive because it dries quickly and creates a strong bond. However, it’s important to use the right technique to avoid any damage or warping to the foam.
Here are some steps to follow when applying hot glue to Depron foam:
| Step | Description |
|---|---|
| Step 1 | Plug in the hot glue gun and allow it to heat up for a few minutes. |
| Step 2 | Hold the foam in position and apply a small amount of hot glue to the desired area. |
| Step 3 | Quickly press the item onto the foam with a slight amount of pressure. |
| Step 4 | Hold the item in place for several seconds until the glue has fully dried and cooled. |
| Step 5 | Repeat the process as necessary. |
It’s important to note that hot glue can be messy and can leave bumps or blobs of excess glue on the surface of the foam. Use a small amount of glue at first and add more as needed. It’s better to apply a few smaller dots of glue than one large glob.
Additionally, be careful not to overheat the foam with the hot glue. If the foam becomes too hot, it can warp or melt. Only use the hot glue gun for a few seconds at a time and avoid holding it in one place for too long.
Hot glue is a good option for attaching items to Depron foam. By following these steps and using the right technique, you can create a secure bond without any damage to the foam.
Applying UHU Por
UHU Por is a type of adhesive that is specially designed for foam materials like Depron. It is a popular choice among hobbyists and model builders for its ease of use and reliability. Here are the steps on how to apply UHU Por to Depron foam:
Step 1: Start by cleaning the surface of the Depron. Use a damp cloth or sponge to wipe off any dirt or debris.
Step 2: Next, apply a thin layer of UHU Por to the surface of the Depron using a small brush or spatula. Be sure to spread the adhesive evenly and avoid using too much.
Step 3: Wait for a few minutes until the adhesive becomes tacky to the touch. This will ensure maximum bonding strength.
Step 4: Carefully position and align the foam piece to the surface where you want to attach it.
Step 5: Firmly press the foam onto the surface, applying enough pressure to ensure a strong bond. You can use a roller or a block of wood to achieve an even pressure.
Step 6: Finally, let the adhesive dry completely for about 24 hours. Avoid moving or repositioning the foam piece during this time to ensure a strong and permanent bond.
When using UHU Por, it is essential to follow the manufacturer’s instructions carefully for the best results. This adhesive is known for its strong bonding strength and resistance to water, making it ideal for applications that require durability and reliability.
For more information on how to glue Depron, be sure to check out our comprehensive guide above.
Applying Contact Cement
When it comes to applying contact cement to Depron foam, there are a few things to keep in mind. First, it’s important to choose the right type of contact cement for the job. Most contact cements come in either a water-based or solvent-based formula, and each has its own advantages and disadvantages.
Water-Based Contact Cement
Water-based contact cement is a popular choice for bonding Depron foam because it is easy to clean up, dries quickly, and is relatively low in toxicity compared to solvent-based formulas. It also tends to be less flammable and produces fewer harmful fumes.
When using water-based contact cement, it’s important to apply it evenly to both surfaces using a brush or roller. Allow it to dry completely before placing the two surfaces together. Once they have been pressed firmly together, they cannot be repositioned, so it’s important to get it right the first time.
Solvent-Based Contact Cement
Solvent-based contact cement is also a popular choice for bonding Depron foam because it provides a strong, permanent bond. It’s important to note, however, that it is highly flammable and produces strong fumes, so it should only be used in a well-ventilated area.
When applying solvent-based contact cement, it’s important to wear protective gloves and eyewear to avoid any skin or eye irritation. Apply the adhesive evenly to both surfaces and allow it to dry for 10-15 minutes until it feels tacky to the touch. Then, press the two surfaces together firmly starting from one end and working your way to the other end.
To make the process of applying contact cement easier, it’s a good idea to use a small, disposable brush or roller, as well as a container to hold the adhesive. It’s important to only apply a thin, even layer of adhesive, as too much can cause the surfaces to warp or distort.
Lastly, it’s important to remember that contact cement can be difficult to remove once it has dried, so it’s important to clean up any excess adhesive immediately using a solvent or rubbing alcohol. Use caution when removing excess adhesive as it can damage the Depron foam surface.
| Water-Based Contact Cement | Solvent-Based Contact Cement |
|---|---|
| Easy to clean up | Provides a strong, permanent bond |
| Dries quickly | Highly flammable and produces strong fumes |
| Less toxic | Wear protective gear when using |
Using Double Sided Tape
When it comes to gluing Depron, double sided tape can be a quick and easy solution, especially for small and lightweight projects. Here are the steps on how to use double sided tape to glue Depron:
| Step | Description |
|---|---|
| Step 1: | Cut the double sided tape to the desired length, making sure it is slightly shorter than the piece of Depron foam you will be attaching. |
| Step 2: | Peel off one side of the tape’s protective backing and apply it to the Depron foam. |
| Step 3: | Peel off the other side of the tape’s protective backing, being careful not to touch the adhesive on the exposed side. |
| Step 4: | Carefully align the Depron foam with the surface you want to attach it to and press it firmly in place. |
Note: Double sided tape is not as strong as some of the other adhesives listed, therefore it may not be the best choice for heavier projects or projects that will experience frequent stress or movement.
Using double sided tape can be a convenient and simple method for attaching Depron foam. However, as with any adhesive, it is important to test it out on a small area before applying it to a large project to ensure it will work effectively and not damage the surface.
Clamping and Drying
As you glue the Depron foam, it’s essential to prevent it from moving or shifting during the bonding process. This is where clamping comes in. Clamping the Depron foam together ensures a secure bond, making sure it stays in place as the glue dries. In this section, we will discuss the clamping process and drying time required to achieve the perfect bond. Let’s dive into the details below!
Clamping the Foam
One of the most important steps in gluing Depron foam is clamping it properly. This ensures that the foam stays in place while the adhesive sets, and prevents any shifting or warping that can ruin your project. Here are some tips for clamping Depron foam:
- Use clamps – Clamps are a great way to hold the foam in place while the adhesive sets. They come in various shapes and sizes and are easy to use. Just place the foam in position, apply the adhesive, and then clamp the foam down firmly. The pressure from the clamps will help the adhesive bond to the foam and the surface.
- Use weights – Weights are another option for holding the foam in place. If you don’t have clamps or can’t get them to fit in the space you’re working in, you can use weights instead. Place the weights on top of the foam and leave them there until the adhesive sets. Be sure to use enough weight to keep the foam firmly in place.
- Consider elastic bands or tape – Elastic bands or tape can be a good option for holding the foam against curved surfaces. Simply wrap the elastic band or tape tightly around the foam and the surface and let it sit until the adhesive sets.
- Think outside the box – If you don’t have any clamps, weights, elastic bands, or tape on hand, get creative. Look around your workspace for any items that you can use to hold down the foam. For example, you could use a heavy book or a jar of coins to weigh down the foam.
No matter what method you use, make sure that the foam is firmly in place and won’t shift or move while the adhesive sets. This will ensure that your project looks professional and lasts for a long time.
Drying Time
After gluing Depron foam together, it’s important to let it dry completely before continuing with your project. The drying time can vary depending on the type of adhesive used. Here’s a breakdown of the estimated drying times for each type of adhesive:
- CA Glue: CA glue has a quick drying time, typically only taking a few seconds to set. However, it’s recommended to let it cure for at least 24 hours before sanding or painting the foam.
- Epoxy: Epoxy glue can take anywhere from 30 minutes to several hours to dry depending on the brand and type. It’s best to follow the manufacturer’s instructions and allow the Depron to cure for at least 24 hours before handling it.
- Hot Glue: Hot glue dries quickly, usually within a few minutes, but can take up to an hour to fully set. It’s recommended to let the Depron dry for at least 24 hours before continuing with your project.
- UHU Por: UHU Por glue has a quick drying time but still needs to cure for 12-24 hours before handling the Depron foam.
- Contact Cement: Contact cement can take up to 24 hours to completely dry. It’s important to let the glue cure fully before handling the foam to prevent it from separating.
- Double Sided Tape: Double sided tape doesn’t require any drying time, and the Depron can be used immediately after applying the tape. However, it’s recommended to still let the tape set for a few hours before handling the foam.
It’s always better to be safe than sorry when it comes to drying times. Letting your Depron foam cure for a full 24 hours, regardless of the type of adhesive used, will ensure that your project stays strong and secure. Patience is key when working with adhesives and Depron foam, and rushing the drying process can compromise the integrity of your project.
Clean-up and Finishing
After successfully applying the glue and allowing it to dry, the final step is clean-up and finishing. Paying attention to these final steps will ensure your Depron project looks professional and lasts for a long time. From removing masking tape to sanding and painting, there are a few things you should keep in mind to give your project a polished appearance. Let’s explore them together.
Removing Masking Tape
Once the adhesive has dried and the Depron has been firmly attached to the surface, it’s time to remove the masking tape used during the gluing process. Be sure to remove the tape slowly and carefully, pulling it away from the foam at a 45-degree angle to avoid damaging the newly glued joint.
If any residue is left behind from the tape, use a gentle adhesive remover to clean it off without damaging the Depron. It’s important to use a gentle adhesive remover that won’t dissolve or melt the foam. Some good options include rubbing alcohol, citrus-based cleaners, or specialty foam-safe adhesive removers.
After the debris has been removed from the surface, inspect the edges of the Depron for any remaining bits of glue or other debris. If there are any stubborn bits that won’t come free, use a fine-grit sandpaper to gently sand away any last remnants. Be sure to sand evenly and smoothly, avoiding any unwanted scratches or marks that can detract from the finished product.
Finally, if desired, the Depron can be painted or decorated as desired. With careful preparation, gluing and finishing, the Depron surface should serve as a sturdy and versatile material for a variety of projects.
Cleaning Excess Adhesive
After letting the glued Depron dry for the recommended time, it’s now time to clean up any excess adhesive that may be leftover. Cleaning excess adhesive from Depron can be a tricky task, but it’s essential to get it right, as leaving glue residue can ruin the finished look of your project. Here are some tips on how to clean excess adhesive from Depron after gluing:
- Remove clamps carefully: Start by removing the clamps that were used to secure the glued pieces together. Use a slow and steady motion while releasing each clamp to avoid damaging the foam’s surface.
- Use a scraper: A scraper or a putty knife can be a handy tool in removing excess adhesive. Carefully scrape off the glue residue from the foam’s surface. Be gentle to avoid tearing the foam apart.
- Use sandpaper: Sandpaper can also be used to remove any remaining glue residue. Use fine-grit sandpaper and sand gently, working in a circular motion. Don’t press too hard, as this can damage the foam.
- Use acetone: Acetone is a powerful solvent that can dissolve many adhesives. Dip a clean cloth in acetone and gently rub it onto the glue residue. Be sure to use acetone in a well-ventilated area as it’s a strong chemical.
- Apply rubbing alcohol: Rubbing alcohol can also be used to remove glue residue from Depron. Apply a small amount of rubbing alcohol onto a clean cloth and gently rub the glue residue in a circular motion.
- Use heat: Heat can also help remove excess adhesive. Use a hairdryer to warm up the glue residue and then scrape it off with a scraper or putty knife.
Remember to use caution when cleaning excess adhesive from Depron. Tearing or damaging the foam can compromise the structural integrity of your project. By following these steps, you can successfully remove excess adhesive and achieve a clean, professional finish for your project.
Sanding and Painting
After the adhesive has fully dried, you can sand the surface of the Depron if necessary. As Depron is a foam material, it is often not needed to sand it, but in cases where you need a smooth surface, it is important to sand it carefully.
To sand Depron, use fine sandpaper such as 320 or 400 grit. Sand gently and avoid applying too much pressure to prevent damage and tearing of the foam. Sand in a back and forth motion, making sure to get an even surface. Keep sanding until you achieve the desired smoothness.
Once you have sanded the Depron, you can start painting it. Painting Depron can be done using spray paint or brush-on acrylic paint. Make sure to use a well-ventilated area when painting Depron, as the fumes from the paint can be harmful.
Before painting, it is important to clean the surface of the Depron with a damp cloth to remove any dust or debris. You can also use a primer to improve the adhesion of the paint to the surface of the Depron.
When painting, make sure to apply multiple thin coats rather than one thick coat. This will help to prevent the paint from cracking or flaking. Allow each coat to dry completely before applying the next one. You can give a final polish to smooth out any brush marks with a fine-grit sandpaper, such as 600 or 800 grit.
Pro tip: To achieve a glossy or metallic finish, you can use a clear coat finish. This will also protect the paint from chipping or scratching.
Painting Depron can be a fun and creative way to add personality and style to your foam projects. By following these tips and taking your time, you can achieve a smooth and flawless finish that will make your project stand out.
Conclusion
In conclusion, gluing Depron foam can be a delicate process, but it is essential for building lightweight and durable models. When it comes to choosing the right adhesive, it’s important to consider the properties of the foam and the surface it will be applied to.
Balancing Strength and Flexibility
Depron’s unique properties require an adhesive that can provide a strong bond while still allowing for some flexibility. CA glue and contact cement can provide a great balance between strength and flexibility, while epoxy can be too brittle. On the other hand, hot glue and UHU Por are more flexible but may not hold up as well over time. Double-sided tape can also be a good option for lightweight applications.
Importance of Preparing the Surface
Before applying any adhesive, it’s essential to prepare the Depron foam and surface. Trimming and sanding the Depron can ensure a clean and even surface for bonding, while cleaning the surface can help remove any dirt or oil that may interfere with the bond. Applying masking tape around the edges can prevent excess adhesive from spreading and help create a clean finish.
Clamping and Drying
Once the adhesive has been applied, clamping the foam can help create a strong bond. Depending on the adhesive used, drying time can vary anywhere from a few minutes to several hours. It’s essential to follow the manufacturer’s instructions to ensure the adhesive sets properly and creates a durable bond.
Clean-up and Finishing
After the adhesive has dried, removing any masking tape and cleaning up excess adhesive can help create a clean finish. Sanding the foam can create a smooth surface for painting or covering with other materials.
Overall, gluing Depron foam requires attention to detail and careful consideration of the adhesive and preparation techniques used. With the right tools and techniques, anyone can create durable and lightweight models using this versatile material.
Frequently Asked Questions
1. Can Depron be glued with regular glue?
No, regular glue is not suitable for Depron foam. Use specialized foam adhesives for best results.
2. How long does epoxy take to dry?
Epoxy drying times vary depending on the product and manufacturer. Check the packaging for specific drying times.
3. Can I use hot glue on Depron foam?
Yes, hot glue can be used on Depron foam, but it may not provide the strongest bond.
4. Can you paint Depron foam after gluing?
Yes, Depron foam can be painted after gluing. Make sure the glue is completely dry before painting.
5. Can I use contact cement on Depron foam?
Yes, contact cement can be used on Depron foam, but it may not be the best option for large surface areas.
6. How do I know if I’ve applied enough glue?
The amount of glue needed varies depending on the adhesive and the size of the foam piece. Follow the instructions on the adhesive packaging, and apply a thin and even layer of glue to both surfaces.
7. Can I remove and reposition Depron foam after gluing?
No, once Depron foam is glued, it cannot be easily repositioned without damaging the foam.
8. Is it necessary to use clamps when gluing Depron foam?
Clamps are not always necessary when gluing Depron foam, but they can help ensure a strong bond and prevent warping. Use clamps when gluing large or complex pieces.
9. Why should I use masking tape when gluing Depron foam?
Masking tape helps prevent excess glue from spreading and provides a clean finish. It can also help hold the pieces in place while the glue dries.
10. How do I remove excess adhesive from Depron foam?
Excess adhesive can be removed with sandpaper or a sharp blade. Be careful not to damage the foam when removing excess adhesive.