Introduction: Crafting Cheap and Convincing Fake Teeth
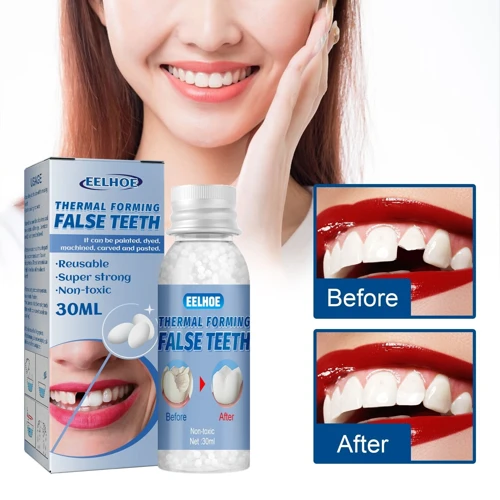
Crafting and wearing fake teeth can be loads of fun, especially during Halloween or costume parties. If you need to make fake teeth, there is no need to spend a lot of money on ready-made prosthetics. Instead, you can easily make your own fake teeth using hot glue. Yes, you read that right! Hot glue is an affordable, convenient, and versatile material that can be used for making fake teeth that look convincing. Follow our simple step-by-step guide below, and you’ll be amazed at how easy and cheap it is to create your own DIY fake teeth. So, let’s get started and make your grin shine!
If you like to craft with hot glue, you might also enjoy checking out how to make hair bows with a glue gun, or how to glue foam to wood for other fun and creative projects you can do with hot glue.
Materials You’ll Need:
Once you’ve decided to craft your own fake teeth, the first step is to gather all the necessary materials. You might be surprised at just how inexpensive and easy it is to create your DIY smile makeover. Get ready to stock up on the following items to make sure you’re well prepared for the project ahead. And if you’re looking for some more fun and creative DIY projects, check out our guide on how to glue rhinestones to wine glasses or our comparison on hotfix vs. glue.
Hot Glue Gun and Glue Sticks
One of the main materials you’ll need for making fake teeth out of hot glue is, of course, a hot glue gun and glue sticks. Many people may already have a glue gun at home, but if you don’t, they can be easily purchased at any craft store or online. A glue gun is an essential tool for many DIY projects and is very easy to use. It heats up the glue sticks until they melt, allowing you to glue things together quickly and efficiently.
When purchasing glue sticks, be sure to check the size of your glue gun to make sure you get the right size stick. Additionally, you might want to consider using colored glue sticks for a more realistic look, especially if you plan to paint the teeth when you are finished.
A hot glue gun is a versatile tool that can be used for many other projects, too. For example, have you ever wondered how strong is a glue gun? You can also use hot glue guns to create DIY crafts like glue stick bombs or to glue sand to paper. And if you don’t have a glue gun, did you know that you can still use glue sticks without a gun? Learn how to use a glue stick without a gun to complete any project. Regardless, a hot glue gun is an essential tool to have in your craft collection.
Acrylic Paint and Brush
To add color and texture to your fake teeth, you will need acrylic paint and a brush. Acrylic paint is a versatile and affordable option that can be found at most craft stores. Before painting, make sure that your hot glue teeth are completely dry and have cooled down to room temperature.
To start, choose a tooth shade that matches your natural teeth or the look you are going for. You can mix different shades of paint to achieve a more realistic look and even add darker or lighter spots to mimic the natural variations in tooth color. Use a small brush to carefully apply the paint to the teeth, gradually building up the color until you are satisfied with the result.
If you want to add extra dimension and texture to your fake teeth, you can use a dry brushing technique. Dip your brush into a small amount of white or light grey paint, and then remove most of the excess paint by wiping it on a paper towel. Lightly brush the tips and edges of the teeth with the dry brush to create a subtle whitish or translucent effect, mimicking the way that natural teeth reflect light.
Once you have finished painting your fake teeth, allow them to dry completely before handling them further. Remember that acrylic paint is water-soluble while still wet, so keep them away from water until they have fully dried to avoid ruining your hard work.
Having trouble finding the right glue for another craft? Check out What Glue to Use for Twine Balls.
Looking to use a glue gun on plastic? Learn more in our article, How to Use a Glue Gun on Plastic.
Disposable Plastic Fork or Knife
For creating fake teeth with hot glue, you will need a disposable plastic fork or knife. Here are some tips on how to use them:
- Use the fork or knife to mix the hot glue thoroughly. This ensures that the glue is hot and ready to be poured into the mold.
- After filling the mold with hot glue, use the fork or knife to smooth out any imperfections or air bubbles in the hot glue. This helps to create a more realistic looking tooth.
- When trimming and shaping the fake tooth, you can use the fork or knife to help shape the hot glue. Use the fork to create ridges that mimic natural tooth grooves, or use the knife to create a sharp edge on the tooth.
- When painting your finished fake tooth, you can use the fork or knife to hold it in place while you paint. This ensures that the paint does not smudge or smear.
Remember, when using a disposable plastic fork or knife, be careful not to burn yourself with the hot glue. Use a pair of pliers or tongs to hold the fork or knife if it becomes too hot to handle. Using these tips, you can craft realistic fake teeth that will impress your friends and family with your DIY skills.
Scissors and White Beads
When it comes to making realistic fake teeth using hot glue, using scissors and white beads can add extra detail that takes your DIY grin to the next level. Scissors are necessary for trimming and shaping the hot glue once you have filled your mold, while white beads can be added for a more natural look.
Scissors: Choose a pair of scissors that are sharp and precise. You will want to trim any excess hot glue that spills over the mold, as well as shape the hot glue to resemble the shape of teeth. It’s important to be patient and take your time when using scissors, as the hot glue can be delicate and brittle. If you’re struggling to shape the hot glue, try dipping the scissors in cool water first, which can make the glue easier to work with.
White beads: These can be used to add texture and depth to your fake teeth. To use, simply melt the beads in a microwave-safe container with a few drops of water and mix until they become a paste-like consistency. Then, use a small brush or toothpick to apply the mixture onto the hot glue teeth, focusing on the areas where natural teeth would have divots or ridges. White beads can also be used to add small imperfections or discolorations to the fake teeth, making them look even more realistic.
Here is a table summarizing the materials needed for making fake teeth with hot glue, including scissors and white beads:
| Materials: | Function: |
|---|---|
| Scissors | Trim and shape hot glue teeth |
| White beads | Add texture and depth to fake teeth |
Remember, while scissors and white beads can enhance the realism of your fake teeth, they are optional and not necessary for creating convincing results.
Water and Microwave-Safe Container
When it comes to creating fake teeth with hot glue, having a container that is both safe for the microwave and can hold water is essential. This is because hot glue needs to be melted before it can be molded into the shape of teeth, and the easiest and safest way to do this is in the microwave. Additionally, having a container that can hold water will allow you to properly heat the glue without it drying out or becoming too hot.
Here are the specific requirements for your water and microwave-safe container:
| Requirement | Explanation |
| Safe for the Microwave | The container needs to be made of a material that is safe to use in the microwave so you can melt the hot glue effectively. |
| Can Hold Water | Adding water to the container will help regulate the temperature of the glue as it melts, preventing it from getting too hot and burning your skin. |
| Wide and Shallow | You’ll want a container that is relatively wide and shallow so that it is easy to dip your teeth mold into the melted glue. |
| Easy to Clean | After you’re done using it, you’ll want to be able to quickly and easily clean out any remaining glue or residue from the container. |
To meet these requirements, you can use a variety of containers, such as microwave-safe plastic bowls or glass containers. Just make sure to avoid containers that are too deep or narrow, as they will make it difficult to dip your mold into the melted glue. And always be sure to handle the container with oven mitts or a towel, as it will be hot from the microwave. By following these guidelines, you’ll be well on your way to crafting convincing and cheap fake teeth.
Instructions:
Now that you have your materials gathered, it’s time to dive into the fun of creating your own set of fake teeth with hot glue! Follow these simple, yet detailed, step-by-step instructions to make a set of convincing, low-cost fake teeth that will make others do a double-take. With a little bit of creativity and patience, you’ll have a stunning new grin to show off in no time. So, let’s get started!
1. Make a Mold of Your Teeth
To create convincing fake teeth with hot glue, the first step is to make a mold of your teeth. This will ensure that your fake teeth fit comfortably and look realistic. Here’s how to make a mold using dental putty:
- Step 1: First, sterilize your mouth by brushing your teeth and rinsing with mouthwash or hydrogen peroxide. Dry your teeth and mouth with a paper towel.
- Step 2: Cut off a small piece of dental putty and knead it until it’s soft and pliable.
- Step 3: Roll the putty into a ball and press it onto your teeth. Make sure the putty covers the teeth you want to make a mold of.
- Step 4: Hold the putty in place for a few minutes until it hardens. Then carefully remove the mold from your teeth.
- Step 5: Repeat if necessary to get a complete mold of your teeth.
Once you have a mold of your teeth, you’re ready to move on to the next step in creating your fake teeth with hot glue. It’s important to take your time with the mold-making process to ensure that your fake teeth fit comfortably and look as realistic as possible.
2. Fill the Mold with Hot Glue
After creating a mold of your teeth, the next step is to fill it with hot glue. Hot glue works well for creating fake teeth because it hardens quickly and is easy to shape. Before filling the mold with hot glue, make sure that it is clean and dry.
Step 1: Plug in your hot glue gun and wait for it to heat up. Once it’s hot, insert a glue stick into the gun.
Step 2: Carefully squeeze the hot glue into the mold, making sure to fill all the spaces. Be sure to work quickly, as the glue will harden fast. If necessary, use a toothpick or similar object to help spread the glue evenly.
Step 3: Allow the glue to cool and harden completely before removing it from the mold. This should only take a few minutes.
Step 4: Carefully remove the hardened glue from the mold. It may take some twisting or gentle prying to get it out, but be careful not to break it.
Step 5: Use scissors to trim any excess glue from the fake teeth. Be sure to shape the teeth to your liking using the scissors.
It’s important to note that hot glue can become hot enough to cause burns, so be sure to use caution when handling it. Always wear gloves when working with hot glue to protect your skin.
Once you’ve filled your mold with hot glue and removed the finished product, it’s time to move on to the next step of trimming, shaping, and painting your fake teeth.
3. Trim, Shape, and Paint Your Fake Teeth
Once you have your hot glue teeth mold, the next step is to trim, shape, and paint them. This will help make them look more like real teeth and give them the finishing touches they need to be convincing.
Trimming: Use a pair of scissors to carefully trim any excess hot glue from around the edges of the mold. You want to make sure that your fake teeth have a smooth and even surface so they fit comfortably in your mouth.
Shaping: Once you have trimmed your fake teeth, use a disposable plastic fork or knife to carefully shape them. You can gently press the tines of the fork or the edge of the knife into the hot glue to create small indentations that will make them look more like real teeth. Be sure to shape them while they are still warm and pliable, as hot glue hardens quickly.
Painting: Once you are satisfied with the shape of your fake teeth, it’s time to paint them. Use acrylic paint and a small brush to carefully apply a thin layer of paint to the surface of your teeth. You can use a combination of white and off-white paints to create a more natural look. Be careful not to use too much paint, as it can make your fake teeth look bulky and less convincing.
To help you visualize the process, here is a table outlining the steps to trim, shape, and paint your fake teeth:
| Step | Actions |
|---|---|
| Trimming | Use scissors to trim excess hot glue |
| Shaping | Use a disposable plastic fork or knife to create indentations |
| Shape while hot glue is still warm and pliable | |
| Painting | Apply a thin layer of white/off-white acrylic paint |
| Be careful not to use too much paint |
With these simple steps, you can create convincing fake teeth that will make your DIY costume or cosplay look even more realistic.
4. Add Additional Detail with White Beads (Optional)
Adding white beads can provide additional detail to your fake teeth and make them look even more convincing. This step is optional, but can really make a difference in how realistic your fake teeth appear. Here’s how to add white beads:
1. Gather the materials: You’ll need your hot glue gun, white beads, and a pair of scissors.
2. Choose the beads: You should select white beads that are similar in size to your fake teeth. Too small or too large beads could make your teeth look disproportionate.
3. Snip the beads: To create the illusion of individual teeth, use your scissors to snip the beads in half or smaller pieces.
4. Place the beads: Using your hot glue gun, carefully place the beads along the gumline of your fake teeth. It’s important to make sure they are evenly spaced and not too crowded.
5. Secure the beads: Add a bit of hot glue over the top of each bead to secure them in place.
Tip: You can experiment with different shapes and sizes of beads to create a more custom and natural look.
| Materials | Tools Needed |
|---|---|
| White Beads | Scissors |
| Hot Glue Gun |
Tricks: If you don’t have white beads, you can also use small pieces of white eraser shavings instead. Additionally, if you want to add more detail to your fake teeth, you can use a toothpick or other small tool to create small indentations or imperfections in the hot glue before painting. This can make your teeth look more realistic, as real teeth are not perfectly smooth.
Tips and Tricks for Making Realistic Fake Teeth
Creating believable fake teeth can be a challenge, but with these helpful tips and tricks, you will have a grin that no one will suspect is fake.
Choose the Right Shade: It’s important to pick the right color for your fake teeth. Try to match the color of your natural teeth as closely as possible. If you’re unsure, ask someone for a second opinion or consult with a dentist.
Slight Imperfections: Real teeth aren’t perfectly straight, so it’s important to add slight imperfections to your fake teeth. You can use a small knife or scissors to add chips or gaps. This will make your fake teeth look more natural.
Add Stains: Real teeth are rarely perfectly white. Add some stains to your fake teeth by using acrylic paint. You can use a light brown shade to create a coffee or tea stain effect.
Texture: Use a disposable plastic fork or knife to create texture on your fake teeth. This will make them look more like natural teeth. Simply press the fork or knife gently into the hot glue.
Shape and Size: Take the time to shape and size your fake teeth to match the size and shape of your natural teeth. This will make them fit more comfortably and look more natural when you wear them.
Practice: Making fake teeth with hot glue can take some practice. Don’t be discouraged if your first attempt doesn’t turn out exactly how you wanted it to. Keep practicing until you get it right.
Following these tips and tricks will help you create realistic fake teeth that you can be proud to show off. Remember to take your time, pay attention to detail, and most importantly, have fun with the process!
Conclusion: Show Off Your DIY Grin
Now that you’ve learned how to make your own fake teeth using hot glue, it’s time to show off your DIY grin! Impress your friends and family with your budget-friendly and convincing fake teeth. Whether for a costume party, cosplay event, or just for fun, your new fake teeth will add an extra level of authenticity to your character or costume.
By following the step-by-step instructions and tips provided in this article, you can create a customized mold of your teeth and transform hot glue sticks into a set of realistic-looking fake teeth. Don’t forget to use acrylic paint to add depth and dimension to your creation, and consider adding white beads for additional detail.
One of the best things about making your own fake teeth is the cost. Instead of shelling out big bucks for expensive prosthetics, you can create your own with just a few dollars’ worth of materials. Plus, you have the added satisfaction of knowing that you made these teeth yourself.
So go ahead, show off your DIY grin with pride. Whether you’re channeling your inner vampire or playing a hilarious prank on your friends, your homemade fake teeth are sure to make a lasting impression. Have fun and get creative with your designs – the possibilities are endless!
Frequently Asked Questions
Can I use any type of glue for this project?
No, it’s important to use hot glue because it will dry hard and can be shaped and colored to look like teeth.
Can I use regular white paint instead of acrylic paint?
No, acrylic paint will adhere better to the hot glue and create a more convincing look for your fake teeth.
Can I use a metal utensil instead of a disposable plastic fork or knife?
No, using a metal utensil can damage the mold and create imperfections in your fake teeth.
Do I need to use white beads for added detail?
No, white beads are optional and can be excluded from the project if you prefer.
Do I need to use a microwave-safe container?
Yes, it’s important to use a microwave-safe container to heat up the hot glue for the project.
Can I use any type of water for this project?
Yes, any clean and clear water will work for this project.
How do I know when the hot glue is cool enough to handle?
Wait a few minutes for the hot glue to cool down and become firm before handling it.
Can I mold my teeth using any type of mold material?
Using dental putty or molding clay will work best for creating an accurate mold of your teeth.
Is it safe to put hot glue in my mouth?
No, it’s important to only use the fake teeth for cosmetic purposes and not to put them in your mouth.
How long will my fake teeth last?
If stored and handled properly, your fake teeth can last for several uses.