Introduction
Entering the world of sand art can be an exciting and fulfilling experience. Whether creating a piece as a hobby or for a project, gluing sand to paper can result in beautiful and unique artwork that will surely impress. However, before delving into this craft, it’s essential to know the tips and tricks for success. In this article, we will explore the necessary steps, including choosing the right glue, applying sand to the paper, and finishing touches. We’ll also cover essential safety tips to ensure a safe and enjoyable experience. So, let’s get started!
What You’ll Need
To get started with gluing sand to paper, you’ll need a few materials and supplies. Here’s a list of what you’ll need:
- Paper: Choose the paper that will be sturdy enough to hold the sand and the glue, such as cardstock or watercolor paper. You can also experiment with different colored paper to enhance your artwork.
- Sand: You can use any kind of sand, such as fine sand or colored sand found in craft stores or at the beach.
- Glue: There are several types of glue you can use for this project, including white school glue, mod podge, or spray adhesive. Each type of glue will have specific instructions on how to use it, so be sure to read the label carefully before you begin.
- Brush: You will need a small brush or sponge brush to apply the glue to the paper.
- Bowl: Use a small bowl to hold your sand, making it easier to sprinkle it onto the glued surface.
- Clean-up materials: Have a damp cloth or paper towel on hand to clean up any glue or sand spills that might occur.
Now that you have your supplies ready, let’s move on to preparing your workspace. If you need tips on how to glue cardboard, check out this helpful article with step-by-step instructions and safety tips: How to Glue Cardboard.
Preparing your Workspace
Now that you have gathered all the necessary supplies, it is time to prepare your workspace. This step is essential for ensuring that the gluing process goes smoothly and without interruptions. Covering your workspace is the first step to take. This will protect your work area from any glue and sand spills. You’ll also want to organize your supplies within easy reach, so you can quickly access them as needed. With a well-prepared workspace, you’re ready to move on to the next step.
For more information on safely using different types of glue, check out how to use hot glue and how to use glue sticks.
Cover Your Workspace
When working with glue and sand, it’s important to cover your workspace to protect it from any potential spills or messes. This will also make cleanup much easier once you’re finished creating your sand paper artwork. Here are some tips to help you cover your workspace:
- Use a Drop Cloth: Place a drop cloth over your work surface to protect it from any drips or spills. A plastic tablecloth or an old sheet both work well.
- Use Newspaper: Place newspaper over your drop cloth for extra protection. This is especially helpful when working with messy materials like sand and glue.
- Protect your Clothing: Wear old clothing or an apron to protect your clothes from any potential messes. It’s also a good idea to wear gloves to keep your hands clean.
By taking these precautions and covering your workspace, you can focus on creating your artwork without worrying about making a mess.
If you want to learn more about using glue for other purposes, check out our article on how to use a glue gun safely for some useful tips.
Organize Your Supplies
Before beginning the process of gluing sand to paper, it is essential to organize all the required supplies and ensure they are readily accessible. This will ensure that there is no disruption in the flow of work and the gluing process is completed smoothly.
To start with, gather all the required supplies in one place, including a bowl of sand, paper, glue, and a brush. Make sure that the glue is of good quality and suitable for paper and sand. If you are unsure about the type of glue to use, refer to the previous section, “Choosing the Right Glue” for more information.
Once all the supplies are collected, arrange them in a manner that is convenient to work with. Keep the sand in a bowl and place it in close proximity to the glue and paper. This will allow for easy access and minimize any chance of spillage.
Ensure that there is ample lighting in your workspace so that you can easily see what you are doing, and if required, make necessary adjustments. Clean the workspace so that there is no dust or debris that might interfere with the gluing process.
Pro Tip: Consider covering the workspace with an old newspaper or a cloth to protect sensitive surfaces from getting dirty.
By organizing your supplies beforehand, you save time and reduce the chances of making mistakes. With everything in one place, your focus remains on creating an amazing sand paper artwork.
Now that you have organized your supplies, it’s time to choose the right glue, which is discussed in the next section. But before that, here is an anchor link to an article on how to use glue tape.
Choosing the Right Glue
When it comes to gluing sand to paper, using the right type of glue is crucial for achieving a successful result. But with so many adhesive options available, it can be perplexing to settle on the appropriate one. It’s important to consider variables such as the texture of the sand, the type of paper, and how the finished product will be displayed or utilized. In the following sections, we will highlight the different types of glues accessible for the task of gluing sand to paper, and suggest the best glue option for this project. So, let’s get started and find out which glue will work best for your sand-paper masterpiece. And if you want to learn how to tuck using glue, check out the selected internal link for more information.
Types of Glues
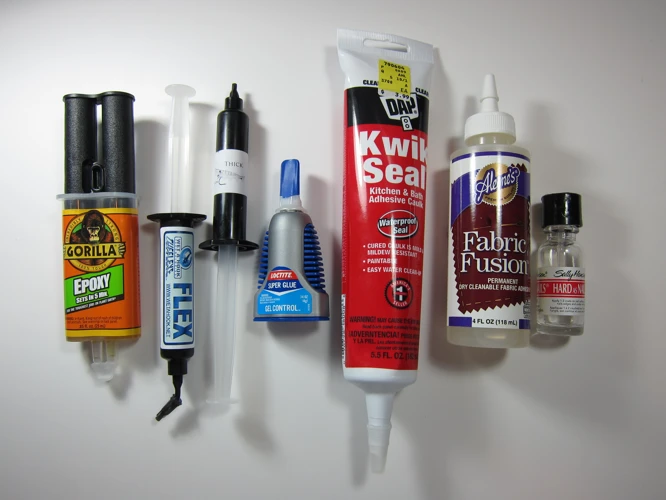
When it comes to gluing sand to paper, choosing the right glue is crucial to ensure the sand stays in place. There are several types of glues available in the market, each with its own set of advantages and disadvantages. Here are some common types of glues you can consider:
- PVA Glue: Also known as white glue, PVA glue is a popular choice for arts and crafts projects. It dries clear, is easy to clean up, and can be diluted with water for a thinner consistency.
- Mod Podge: Mod Podge is a popular all-in-one sealer, glue, and finish. It dries clear and is easy to use. It also comes in different finishes – gloss, matte, and satin.
- Hot Glue: Hot glue can work well for gluing sand to paper, especially if you want a quick-drying option. However, it can be messy and difficult to remove if you make a mistake. Check out our article on how to color hot glue and how to open glue gun to learn more about working with hot glue.
- Spray Adhesive: Spray adhesive is a type of glue that comes in aerosol cans. It creates a strong bond and dries quickly. However, it can be difficult to control the amount sprayed and can be messy to work with.
For gluing sand to paper, the best option is PVA glue or Mod Podge. They are easy to work with and have a clear finish, making them great for creating sand art. Hot glue and spray adhesive can also be used, but they can be messier and more challenging to work with. For more information on working with hot glue, check out our article on how to make shoes non-slip with hot glue.
Best Glue for Sand to Paper
When it comes to gluing sand to paper, not all glues are created equal. You need a strong glue that will hold the sand to the paper without creating a lumpy or uneven surface. Here are some tips for choosing the best glue for sand to paper:
- PVA Glue: Also known as white glue or school glue, PVA glue is a popular choice for sandpaper art. It is easy to find in most craft stores and it dries clear.
- Mod Podge: Mod Podge is another popular crafting glue that can be used for sandpaper art. It is water-based and dries clear. However, it can take longer to dry than other glues.
- Spray Adhesive: Spray adhesive is a quick and easy option for applying sand to paper. However, it can create a mess if not used carefully and it can be difficult to control the amount of glue applied.
- Double-Sided Tape: Double-sided tape can be used to attach sand to paper, but it may not be as strong as liquid glue. It is best used if you only need a small amount of sand attached to the paper.
When choosing a glue for your sandpaper art, consider the overall look you want to achieve and the amount of sand you will be using. Experiment with different types of glue to find the one that works best for your project. For best results, use a glue that dries clear and does not leave behind a residue. Additionally, make sure to test your glue on a small piece of paper and sand before starting your project, to ensure that it gives you the desired results.
If you want to learn how to glue Styrofoam, check out our article on how to glue Styrofoam.
Adding the Sand to the Paper
Now that you are equipped with the necessary supplies and have chosen the best glue for sand to paper, it is time to bring your artwork to life by adding the sand. This process requires precision and attention to detail to avoid any clumps or inconsistencies. Don’t worry, with the following steps and tips, you will be able to create a stunning sand paper artwork that will impress anyone who sees it. Let’s dive into how to add sand to the paper with ease.
Applying the Glue
To begin the process of gluing sand onto paper, the first step is to apply glue to the area where you want the sand to stick. Make sure to use a generous amount of glue, as this will ensure that the sand sticks well to the paper. You can use a brush, sponge, or even your fingers to apply the glue, depending on your preference and the size of the area you are gluing.
Be sure to work quickly once the glue is applied, as you don’t want it to dry before you’ve had a chance to add the sand. It’s also important to apply the glue evenly to prevent clumping or uneven sand distribution. A good rule of thumb is to use a thin layer of glue, making sure that it covers the entire area you want to cover with sand.
When applying the glue, be mindful of the type of glue you are using. Some types of glue, such as PVA glue, dry clear, while others, such as glue sticks, can leave residue behind. If you are using a glue that dries clear, you may find it helpful to mark the edges of the area you are gluing with a pencil or marker, so you can easily see where you’ve applied the glue.
Finally, be sure to work in a well-ventilated area when applying glue, as some types of glue can have strong fumes. If you’re unsure if the glue you’re using requires ventilation, it’s always better to err on the side of caution and work in a well-ventilated space to avoid inhaling any harmful fumes.
Adding Sand to the Glue
Once you have applied the glue to your desired section of paper, it’s time to add the sand. You want to work quickly to ensure that the glue doesn’t dry before you’ve added the sand. Here are the steps for adding the sand to the glue:
- Pour sand onto the glued area: Take your container of sand and gently pour it over the glued area. Be sure to cover the entire area with a thin layer of sand. You don’t want to have any gaps or areas without sand.
- Press down gently: Once you have added the sand, use your fingers to press it gently into the glue. This will ensure that the sand sticks and doesn’t fall off once it’s dry. Be careful not to press too hard, as you don’t want to create any unevenness in the sand.
- Add more sand if needed: If you have any areas where the glue is still visible, add a bit more sand to cover it up. Again, make sure that the sand is evenly distributed and not too thick in any one spot.
- Shake off excess sand: Once you’re happy with the amount of sand, gently shake off any excess. You can do this by tapping the paper lightly against a hard surface, or by using a soft-bristled brush to sweep away the excess sand.
Remember that once the sand is applied to the glue, you won’t be able to move it around or adjust it. Work carefully and take your time to ensure that the sand is applied exactly how you want it. By following these steps, you’ll be able to create a beautiful sand paper artwork that you can be proud of.
Shaking off Excess Sand
Once you have applied the sand to your paper, it’s important to shake off any excess sand to ensure a smooth, even finish. To do this, gently lift your paper and hold it over a piece of scrap paper or tray. Use a soft brush or your fingers to lightly tap the back of the paper and shake off any loose sand. Be sure to do this step carefully and thoroughly to avoid any lumps or unevenness in the final product.
Here are some tips for shaking off excess sand:
- Shake the paper gently to avoid causing the sand to clump.
- Use a soft-bristled brush or your fingers to lightly tap the back of the paper to release the sand.
- If you notice any areas where the sand is uneven, use a clean brush or your fingers to carefully add more glue and sand to those spots.
- Place the excess sand back in its container for future use.
By shaking off excess sand, you’ll be left with a beautifully textured and even surface for your paper art project. Take care during this step to ensure a professional-looking finish.
Drying Time
After putting in all the effort to glue sand onto paper, the last thing you want is for all that hard work to go to waste because the glue didn’t have enough time to dry. Waiting for glue to dry can be a test of patience, but it’s crucial for the success of your project. In this section, we’ll cover everything you need to know about drying time when gluing sand to paper, including how long you should wait and how to tell when it’s dry enough to move on to the next step. So sit tight and don’t rush it – good things come to those who wait.
How Long to Dry
Drying time is an essential part of the process when it comes to gluing sand to paper. The length of time it takes for the glue to dry will depend on the type of glue used, the amount applied, humidity levels, and the thickness of the glue layer. It’s important to have realistic expectations when it comes to drying time, as rushing the process can lead to a poor result.
Below is a table showing the approximate drying time for some of the most common types of glue:
| Glue Type | Average Drying Time |
|---|---|
| PVA glue | 2-4 hours |
| Mod Podge | 15-20 minutes to dry to the touch, 24 hours to fully cure |
| Spray adhesive | 1-2 hours |
| Epoxy | 24-48 hours |
When determining drying time, it’s important to follow the instructions on the glue packaging for best results. Additionally, keep in mind that thicker glue layers will require more time to dry, and high humidity levels may extend drying time. To be sure that the glue is fully dry, it’s best to wait at least a few hours before handling the paper. Remember, patience is key when it comes to drying time. Rushing the process can lead to smudging or sand falling off the paper.
How to Tell When it’s Dry
One of the most important steps when gluing sand to paper is allowing the glue to dry completely. This ensures that the sand stays firmly in place and doesn’t fall off. So how do you tell if your sand art is dry and ready for display? Here are some tips:
- Touch Test: One way to tell if the glue is dry is to gently touch the sand with your fingertips. If the sand feels firm and doesn’t stick to your fingers, the glue has most likely dried completely.
- Visual Inspection: Another way to check if your sand art is dry is to visually inspect it. Look closely at the surface of the sand and the paper. If there aren’t any wet or shiny spots, the glue has likely dried. If you’re unsure, give it a bit more time to dry.
- Time: The drying time of the glue will depend on several factors including the type of glue you used, the amount of glue applied, and the humidity in the air. As a general rule of thumb, most types of glue used for sand art will take about 24 hours to dry completely. However, it’s always a good idea to check the glue periodically to make sure it’s fully dry.
Remember, it’s important to not rush the drying process or handle the sand art before the glue is completely dry. Otherwise, you risk smudging or ruining your masterpiece. It’s always better to be patient and let the glue dry completely, even if it takes longer than anticipated.
Finishing Touches
As you complete gluing sand to paper, it’s natural to wonder what finishing touches you can add to make your artwork truly unique. Luckily, there are various ways to enhance your sandpaper art and take it to the next level. With a little bit of creativity and some simple materials, you can turn a basic, textured piece of art into a stunning masterpiece. Let’s explore some of the best ways to add the final touches to your sandpaper art.
Adding Color or Paint
One way to take your sandpaper artwork to the next level is to add color or paint. There are a few different ways you can do this, depending on the look you’re going for.
Watercolors: One option is to use watercolors to add a wash of color over the sand. This will give it a subtle, almost dream-like quality. To do this, mix your watercolors with water to create a wash, and then use a paintbrush to apply it over the sand. You can also experiment with mixing colors to create new tones and shades.
Acrylics: If you want a bolder, more vibrant look, you could try using acrylic paint. This is a great option if you want to create specific designs or patterns within the sand. Simply apply the paint with a brush, and then let it dry completely. You can also layer different colors on top of each other for a more complex look.
Decorative Paper: Another option is to use decorative paper to cover the areas around the sand. This is a great way to create contrast and add some texture to your artwork. Simply cut the paper into the desired shape and size, and then use glue to attach it to the paper around the sand.
No matter which method you choose, make sure to wait until the glue and sand are completely dry before adding any paint or paper. This will ensure that your artwork comes out looking polished and professional.
Framing Your Sand Paper Artwork
Framing your sand paper artwork is an important step to protect and display your finished piece. Here are some options for framing:
| Option | Pros | Cons |
|---|---|---|
| Float Frame | – Gives a modern and sleek look – Artwork appears to “float” in the frame – Easy to switch out artwork |
– Can be expensive – Must be custom-made for the size of your artwork |
| Matted Frame | – Protects the artwork with a paper border – Can add a pop of color with a colored mat – Easily found in standard sizes |
– Can be bulky – Requires special matting tape to attach artwork to mat – Can be time-consuming to create a custom mat |
| Shadow Box Frame | – Gives a three-dimensional effect – Can display additional items with the artwork (such as seashells or beach glass) – Protects artwork with a glass cover |
– Can be expensive – Limited to a specific depth for the artwork |
| Clip Frame | – Easy to use and change out artwork – Inexpensive |
– Not very durable – No protection from dust or damage – Limited to standard sizes |
Consider your budget, the style of your home, and the look you want to achieve when choosing a frame for your sand paper artwork. No matter which option you choose, framing your artwork will give it a finished and polished look.
Troubleshooting Tips
Running into issues while creating your sand paper art can be frustrating, but don’t worry, there are solutions! Here are some helpful tips to help troubleshoot any problems you may encounter along the way. From smudging glue to sand that won’t stick, we’ve got you covered. So, take a deep breath and let’s get to the bottom of these issues.
Glue Smudging
One potential issue with gluing sand to paper is glue smudging. This can occur when too much glue is applied, causing it to spread beyond the sand and onto other areas of the paper. To avoid glue smudging, follow these tips:
- Use a small amount of glue
When applying glue to the paper, use a small amount. Start with a thin layer and gradually add more as needed. This will help prevent the glue from spreading too much.
- Spread the glue evenly
Spread the glue evenly across the paper. Use a brush or a small spatula to ensure that the glue is distributed evenly and that there are no thick spots.
- Wait for the glue to dry a bit before adding the sand
After applying the glue, wait a few minutes before adding the sand. This will give the glue a chance to set and reduce the risk of smudging.
- Use a light touch when adding sand
When adding sand to the glue, use a light touch. Avoid pressing down too hard or using too much sand at once, which can displace the glue and cause smudging.
By following these tips, you can minimize the risk of glue smudging and achieve a clean, professional finish for your sand paper artwork.
Sand Falling Off
One common issue when gluing sand to paper is that the sand can sometimes fall off once the glue has dried. This can be frustrating after putting in the time and effort to create a piece of sand paper artwork. Fortunately, there are some tips and tricks to prevent sand from falling off your artwork.
Avoid Using Too Much Glue: One reason for sand falling off the paper can be due to using too much glue. When too much glue is applied, it can cause the sand to slide around and not adhere properly. To avoid this, apply a thin layer of glue onto the paper before adding sand.
Use the Right Type of Glue: Another factor that can cause sand to fall off is using the wrong type of glue. Make sure to choose a glue that is strong and durable, such as a clear drying glue, that will create a strong bond between the sand and paper.
Allow Proper Drying Time: If the glue is not given enough time to fully dry, the sand may fall off. Be patient and allow the glue to dry completely before handling the artwork.
Apply Sand Strategically: When applying sand to the glue, make sure to do so strategically. Instead of applying sand in large clumps, try sprinkling it on evenly over the glued area. This will ensure that the sand fully adheres to the glue and doesn’t fall off.
Seal the Artwork: To provide extra durability and prevent sand from falling off, you can apply a clear sealant over the sand paper artwork. This will also protect the artwork from moisture and dirt.
By following these tips and tricks, you can prevent sand from falling off your artwork and create a beautiful piece of sand paper art that will last for years to come.
| Reasons for Sand Falling Off | Preventative Measures |
|---|---|
| Using too much glue | Apply a thin layer of glue and avoid over application |
| Using the wrong type of glue | Choose a strong and durable glue, such as a clear drying glue |
| Insufficient drying time | Allow the glue to dry completely before handling the artwork |
| Applying sand in large clumps | Sprinkle sand on evenly over glued area |
| Lack of sealant | Apply clear sealant over the finished artwork for extra durability and protection |
Bumpy or Uneven Sand
One common issue that people face when gluing sand to paper is ending up with a bumpy or uneven surface. This can be frustrating after investing your time and effort into a beautiful sand art project. However, there are some tips and tricks that can help ensure a smooth and even finish.
1. Filling in gaps: Before applying glue to your paper, it can be helpful to fill in any gaps or spaces on the paper with a thin layer of paint or glue. This will create a more even surface for the sand to adhere to and can help prevent bumps or uneven spots.
2. Using a flat surface: When applying the glue to the paper, make sure that you are working on a flat surface. This will help ensure an even layer of glue and sand. If your workspace is not flat, consider using a ruler or other straight edge to guide your movements.
3. Using a brush: Instead of pouring the glue directly onto the paper, consider using a brush to apply a thin, even layer of glue. This will help prevent large globs of glue from forming and creating uneven bumps when sand is added.
4. Using a toothpick: If you do end up with bumps or uneven spots in your sand art, you can use a toothpick or small object to carefully push the sand around and even out the surface. However, be careful not to disturb the glue too much or you may risk pulling up the sand altogether.
5. Allowing for extra drying time: Another way to prevent bumpy or uneven sand is to allow for extra drying time between layers. If the glue is not completely dry before you add sand, the sand may shift or clump, resulting in an uneven surface. Consider waiting a few hours or even overnight before adding the next layer of sand.
By following these tips and tricks, you can achieve a smooth and even surface when gluing sand to paper for your next sand art project.
Safety Tips
When working with sand and glue, safety should always be a top priority. It’s important to take the necessary precautions to protect yourself while you’re working on your project. From general safety tips to specific warnings about the materials you’re using, we’ve got you covered. Keep reading for some helpful safety tips that will ensure you can enjoy creating your sand paper art without any accidents or injuries. Remember, it’s better to be safe than sorry!
General Safety Tips
When working with glue and sand, it is important to prioritize safety to avoid accidents or injuries. Here are some general safety tips to keep in mind:
| Tip | Description |
|---|---|
| Wear gloves | Use disposable gloves to protect your skin from any harmful chemicals in the glue. This will also prevent your hands from getting sticky. |
| Work in a well-ventilated area | Make sure the room you’re working in has proper ventilation to avoid inhaling toxic fumes from the glue. |
| Keep the glue and sand away from children | Store the glue and sand in a safe place, out of reach of children. Avoid leaving the materials unattended around kids. |
| Avoid getting glue or sand in your eyes or mouth | Be careful when handling the glue and sand to avoid getting it on your face or accidentally ingesting it. |
| Use a mask to avoid inhaling sand dust | When handling the sand, use a mask to prevent inhaling any dust. This is especially important for people with asthma or other respiratory issues. |
| Clean up spills immediately | In case of spills, clean them up immediately with a damp cloth. Do not touch the glue or sand with your bare hands. |
| Dispose of materials properly | After you finish your project, dispose of the used gloves, glue, and sand properly. Check your local guidelines for hazardous waste disposal. |
By following these general safety tips, you can ensure a safe and enjoyable experience when creating your sand paper artwork.
Avoid Inhaling or Ingesting Sand and Glue
It is important to note that while using glue and sand for artwork, it is crucial to take safety precautions. Inhaling or ingesting glue and sand particles can be hazardous to your health. Here are some steps to avoid any unwanted accidents:
- Wear a mask: When handling sand and glue, ensure that you wear a mask to prevent inhaling sand particles that may harm your lungs.
- Gloves: Protecting your hands while handling glue especially is vital. Wear gloves when using glue to avoid the glue sticking to your skin or getting into your bloodstream through the skin.
- Avoid eating or drinking: Before and while working on your project, make sure that you do not eat or drink anything. This prevents any chance of glue or sand accidentally getting into your mouth.
- Wash your hands: Once you’re done with the project, always ensure that you wash your hands thoroughly to get rid of any glue or sand particles that may have stuck to your skin.
- Control your environment: Ensure that you work in a well-ventilated area to avoid inhaling fumes from the glue and sand. Keep the area well-lit, so you can see what you’re doing, as working in dim lighting might cause you to miss crucial details while working.
Following these precautions ensures that you’re taking the necessary measures for your safety and wellbeing. It allows you to enjoy creating art without worrying about any adverse effects on your health.
Conclusion
After following these tips and tricks, you should now be able to create beautiful sandpaper artwork with ease. Remember to choose the right type of glue, prepare your workspace carefully, and add the sand to the paper with a steady hand. Allow ample drying time before adding finishing touches such as color or framing.
If you encounter any difficulties along the way, don’t worry – our troubleshooting tips can help you fix common issues such as smudging, falling sand, and uneven texture. Safety is also important when working with glue and sand, so be sure to follow our safety tips to avoid any accidents or injuries.
With a little practice, you will be able to create stunning works of art using sand and paper. Whether it’s for personal enjoyment or to share with others, your creations are sure to impress. So grab your supplies and get started on your sandpaper art masterpiece today!
Frequently Asked Questions
Can any type of glue be used to glue sand to paper?
No, not all types of glue are suitable for gluing sand to paper. Some may not adhere well or may cause the sand to fall off over time.
What type of paper is best for gluing sand?
Thick and sturdy paper such as cardstock or watercolor paper works well for gluing sand, as it can withstand the weight of the grains.
Can I apply colored sand to the paper?
Yes, colored sand can be used to create unique designs. Just make sure to use glue that dries clear to avoid any color changes.
How long does it take for the glue to dry?
Drying time can vary based on factors such as humidity and amount of glue used, but generally it takes 1-2 hours for the glue to fully dry.
Can the sand be moved or adjusted after it’s been glued?
No, once the sand has been applied to the glue it cannot be moved or adjusted without causing damage to the artwork.
What is the best way to shake off excess sand?
Gently tapping the paper over a garbage can is the best way to remove excess sand without causing damage to the artwork.
Can I use a hairdryer to speed up the drying process?
No, using a hairdryer to speed up the drying process can cause uneven drying and may cause the sand to fall off.
What is the best way to frame sand artwork?
Using a shadowbox or deep frame is the best way to showcase the texture and depth of the sand artwork. Make sure to use acid-free materials to avoid any damage to the paper.
Can I mix sand with other materials when gluing?
Yes, sand can be mixed with other materials such as glitter or small beads to create unique textures and designs.
Is it safe to work with sand and glue?
Yes, but it’s important to avoid inhaling or ingesting any of the materials and to work in a well-ventilated area.
