Have you ever found yourself in the middle of a crafting project, only to realize you’ve run out of glue? It’s a frustrating situation that can put a halt to your creativity. But fear not! With just a few simple ingredients, you can make your very own glue at home. In this comprehensive guide, we’ll walk you through the step-by-step process of creating your own Gobbledy Glue. Not only will you save money by making your own glue, but you’ll also be using a non-toxic and eco-friendly alternative to store-bought options. So roll up your sleeves, grab your apron, and let’s get started!
Why Make Your Own Glue?
It’s not uncommon to be faced with a project that requires glue, but have you ever considered making your own? The benefits of homemade glue can be surprising, from cost-effectiveness to the ability to customize it to your project’s needs. Additionally, store-bought glues may contain additives that are harmful to the environment or your health. By making your own glue, you can have peace of mind knowing exactly what goes into it. So, if you’re curious to learn more about making your own glue, keep reading! And if you’re interested in using glue for a specific project, such as decoupaging on wood with PVA glue or gluing gemstones, be sure to check out our related articles linked throughout this guide.
The Benefits of Homemade Glue
Making your own glue has a number of benefits over buying ready-made options. First and foremost, homemade glue is cost-effective. Rather than repeatedly buying small tubes or bottles of glue, you can make a larger batch of glue at home for a fraction of the cost. Additionally, homemade glue is customizable. You can adjust the recipe to make a glue with the consistency, drying time, and strength that you need for your specific project. Another benefit of homemade glue is that you have control over the ingredients. Commercially-made glues often contain harsh chemicals, whereas homemade glue can be made with non-toxic ingredients. By making your own glue, you can also reduce waste by reusing containers or making just enough glue for each project.
Furthermore, homemade glue is versatile and can be used for a variety of crafting and DIY projects. With the right recipe and application method, homemade glue can be used for decoupage (check out our guide on how to decoupage with PVA glue), bookbinding (here’s a handy article on that), candle-making (find out what glue to use for candles here), jewelry-making (here’s a helpful article on adhesive options for gemstones), and even car repairs (learn more about using glue for paintless dent repair). Homemade glue can also be used as a wood adhesive (we’ve got a guide for that) and for sealing diamond paintings (see how PVA glue can be used to seal diamond paintings).
In short, there are many advantages to making your own glue, including saving money, having control over ingredients, customizing the recipe, and using it for a variety of projects.
What is Gobbledy Glue?
Have you ever found yourself in the middle of a craft project, only to find you’ve run out of glue? Fear not, because the solution to your problem is just a few ingredients away! Gobbledy Glue is a homemade glue that’s quick and easy to make, and can be done with ingredients you already have in your kitchen. Not only is it convenient, but it’s also a great alternative to store-bought glue. In the next section, we’ll delve into the science behind Gobbledy Glue and why it’s a great option for all your crafting needs. Don’t have any glue at home? Check out our guide on how to make glue without glue!
The Science Behind Gobbledy Glue
Learning about the science behind Gobbledy Glue can provide a deeper understanding of how it works and why it is effective. This glue is made by combining the right ingredients in specific proportions to create a mixture that is both adhesive and flexible. The key components of Gobbledy Glue are flour, sugar, and vinegar.
Flour is the primary component of Gobbledy Glue, as it provides the adhesive properties. When mixed with water, flour creates a paste that dries to form a bond between two surfaces.
Sugar is another essential component of the glue mixture. It helps to keep the mixture pliable and flexible. When mixed with flour, it creates a paste that can be easily manipulated and shaped to fit the needs of the project.
Vinegar is the third key ingredient in Gobbledy Glue, and it serves multiple purposes. Firstly, the acid in vinegar reacts with the proteins in the flour to create a stronger bond. Secondly, it acts as a preservative to prolong the shelf life of the glue. Vinegar can be used to thin the glue if necessary for certain applications. (For more information on how to thin glue for crafts, check out our article on how to thin glue for crafts.)
Together, these three ingredients work in harmony to create an adhesive that is both strong and versatile. The combination of flour and sugar creates a pliable paste, while the vinegar provides the acid needed to form a strong bond between surfaces.
Understanding the science behind Gobbledy Glue allows us to appreciate its effectiveness and opens up new possibilities for its use. For example, knowing that vinegar contributes to the strength of the adhesive can help in figuring out how to dry wood glue fast for woodworking projects.
Materials Needed
To begin making your very own Gobbledy Glue, you will need the following materials:
- 1 cup of flour: This ingredient will serve as the binder and provide substance to your homemade glue.
- 1/3 cup of sugar: Sugar is a key ingredient that will provide the stickiness needed to make the glue adhesive.
- 1 1/2 cups of water: This ingredient will help to dissolve the flour and sugar mixture.
- 1 tablespoon of white vinegar: Vinegar is an essential ingredient that will help preserve your glue and prevent it from spoiling.
- Food coloring (optional): If you’d like to add some color to your Gobbledy Glue, you can use food coloring. This is optional and won’t affect the adhesive properties of your glue.
It is important to note that using the exact measurements above will yield the best results. Using too much sugar or flour, for example, can alter the consistency of your glue and affect its ability to adhere properly. Additionally, make sure to have all your materials ready and easily accessible before starting the process.
Step-by-Step Instructions
Now that you have gathered all the necessary materials, it’s time to roll up your sleeves and get started on making your very own batch of Gobbledy Glue. Don’t worry, the process is easier than you might think, and we’re here to guide you through it step-by-step. So grab your mixing bowl, measuring spoons, and saucepan, and let’s get started with the instructions.
Step 1: Mix the Flour and Sugar
To kick off the process of making your own Gobbledy Glue, the first step is to mix flour and sugar together in a container. The ratio for this mixture is one part flour to one part granulated sugar. For example, if you use one cup of flour, you should also use one cup of sugar.
It’s important to use granulated sugar instead of confectioners’ sugar, as the latter contains cornstarch which affects the texture and consistency of the glue. Once the two ingredients are in the container, stir them together until they are thoroughly combined.
Here’s a table summarizing the materials needed for this step:
| Materials Needed: | Quantity: |
|---|---|
| Flour | 1 part |
| Granulated Sugar | 1 part |
Mixing flour and sugar is the base for the Gobbledy Glue recipe. This mixture provides the necessary binding properties that hold the glue together. The combination of these two ingredients creates a sticky, pliable texture that is essential for the glue to adhere to different surfaces.
When choosing flour for this recipe, it’s best to use all-purpose flour. This type of flour is versatile and serves as a great binder. Plus, it’s easy to find in any grocery store. Using a different type of flour can result in a different texture and consistency than desired.
Now that you have successfully mixed the flour and sugar together, it’s time to move on to the next step in the process of creating Gobbledy Glue.
Step 2: Add Vinegar
After mixing the flour and sugar together, it’s time to add vinegar to the mixture. This step is crucial in creating the perfect consistency for your Gobbledy Glue.
| Materials Needed: | Amount: |
|---|---|
| Vinegar | 1 cup |
| Flour | 1/2 cup |
| Sugar | 1/3 cup |
Vinegar: Make sure to use white vinegar. This type of vinegar is strong enough to create good bonds while still being safe to use. Adding vinegar to the mixture helps to create the right consistency for the glue and also helps in preserving it.
To add vinegar, slowly pour one cup of vinegar into the mixture while stirring continuously. Make sure to stir the mixture at a consistent pace to prevent any lumps from forming. Keep stirring until the vinegar is fully incorporated into the mixture. Once the vinegar is mixed in, the mixture should be thicker than it was before.
Adding the vinegar is a critical step and should not be skipped. It helps to create the adhesive properties of the glue, making it strong and durable. The glue will also last longer if vinegar is added to the mixture.
To ensure success in making your homemade Gobbledy Glue, follow these tips:
1. Use white vinegar as it is most effective for making glue.
2. Stir the mixture constantly while adding vinegar to prevent lumps from forming.
3. Use a whisk or a spoon to stir the mixture instead of a blender or mixer. The consistency of the mixture may change using a mechanical device.
4. Make sure the mixture is not boiled for too long as it can become too thick or start to burn.
5. For colored glue, add food coloring after cooking the mixture.
6. Store the glue in an airtight container to prevent it from drying out.
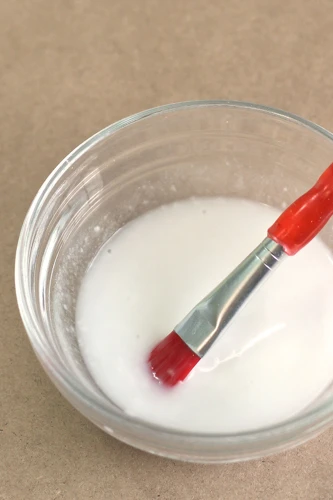
Step 3: Cook the Mixture
After adding the vinegar to the flour and sugar mixture, it’s time to cook the mixture to activate the adhesive properties of Gobbledy Glue. This step is crucial, as it determines how strong and durable your glue will be.
Here are step-by-step instructions for cooking the mixture:
| Step | Instructions | Notes |
|---|---|---|
| 1 | Place the mixture in a saucepan over medium heat. | Make sure to stir constantly to prevent burning. |
| 2 | Keep stirring until the mixture thickens and turns translucent. | This should take about 5-7 minutes. |
| 3 | Once the mixture reaches a “gluey” consistency, remove it from the heat. | If it’s too runny or thick, adjust the heat accordingly. |
It’s important to note that different stovetops have different temperatures, which can affect the cooking time and consistency of the glue. So, make sure to keep a close eye on the mixture while cooking and adjust the heat as needed.
After completing this step, you should have a smooth, thick, and translucent mixture that can be used as an adhesive for various projects. But before moving on, it’s important to let the glue cool down for a few minutes before using it. This will prevent any burns or accidents, and also allow the glue to thicken up even more.
Step 4: Add Food Coloring (optional)
Want to add some color to your Gobbledy Glue? Step 4 allows for optional food coloring to be added to the mixture. Here’s how to do it:
- Choose Your Color: Before adding any food coloring, decide on the color you want your glue to be. You can choose any color you like, from bright pink to neon green.
- Add a Few Drops: Once you have your desired color in mind, add a few drops of food coloring to the mixture. Start with a small amount, as a little goes a long way.
- Mix Well: Use a spoon or whisk to thoroughly mix the food coloring into the glue mixture. Be sure to stir until the color is evenly distributed.
- Add More (If Needed): If you find that the color isn’t as vibrant as you hoped, you can add a few more drops of food coloring and continue mixing until the desired color is achieved. Just be careful not to add too much, as it can potentially alter the consistency of the glue.
Keep in mind that adding food coloring is entirely optional, and if you prefer to have natural-looking Gobbledy Glue, then skip this step altogether. But, for those who want to add a pop of color to their homemade glue, it’s a fun and easy way to personalize the final product.
Tips for Success
Making your own homemade glue can be a fun and rewarding experience. However, there are some tips you can follow to ensure that your Gobbledy Glue turns out perfectly.
Measure Accurately: The success of your Gobbledy Glue depends on the measurements you use. Make sure to measure out the flour and sugar accurately to ensure the right consistency.
Cooking Time: Don’t rush the cooking process. Make sure the mixture has cooked for the recommended time to achieve the right viscosity and consistency.
Stir Constantly: It’s important to stir the mixture constantly while cooking to prevent it from burning or sticking to the pot. Use a whisk or wooden spoon to keep the mixture moving.
Add Food Coloring Carefully: If you choose to add food coloring, do so carefully. Adding too much can darken the color of your glue and affect its texture.
Store Properly: Once your Gobbledy Glue is made, store it in an airtight container in a cool, dry place. This will help it last longer and maintain its consistency.
Experiment: Don’t be afraid to experiment with the recipe. Try adding more or less sugar or flour to achieve the desired texture. You can also experiment with different types of vinegar or add in essential oils for a unique scent.
By following these tips, you can ensure that your Gobbledy Glue is a success and of high quality. Happy glue making!
Using Gobbledy Glue
Now that you have made your very own Gobbledy Glue, it’s time to put it to use! This versatile adhesive can be used for various crafting, DIY, and school projects. With its tacky and strong formula, Gobbledy Glue can bond materials such as paper, fabric, wood, and even some plastics. Before you begin your project, let’s dive into some tips and tricks for successfully using and storing your homemade Gobbledy Glue.
Where to Use Gobbledy Glue
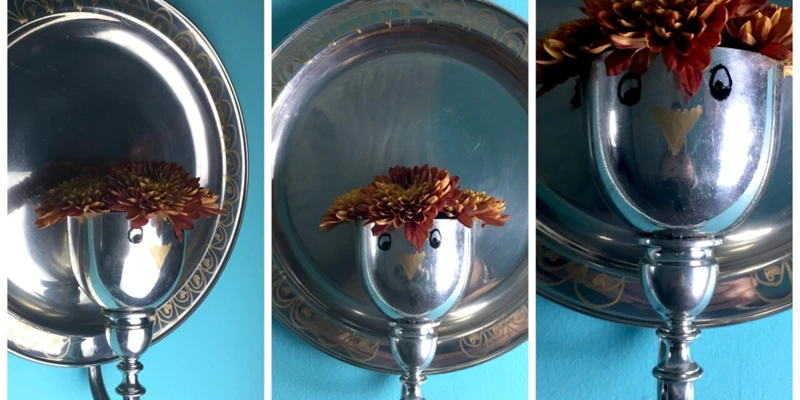
Gobbledy Glue is a versatile, homemade adhesive that can be used in a variety of crafting and DIY projects. Here are some ideas on where to use Gobbledy Glue:
| Project | Where to Use Gobbledy Glue |
|---|---|
| Scrapbooking | Gobbledy Glue is perfect for attaching paper embellishments and photos to your scrapbook pages. Its strong hold keeps everything securely in place, while still allowing you to reposition items before it dries. |
| School Projects | If you have kids, Gobbledy Glue is a great alternative to store-bought glue for school projects. It’s non-toxic and easy to make, so you can feel good about using it with your children. Plus, its strong hold means their projects will stay together even on the bus ride to school. |
| Decorations | If you’re making homemade decorations, Gobbledy Glue is the way to go. It works great for attaching ribbons, buttons, and other embellishments to wreaths, garlands, and other decorations. Its clear color also makes it perfect for attaching glitter or sequins without leaving any residue. |
| Repairing Items | Forget that store-bought glue that never seems to hold up – Gobbledy Glue can repair just about anything. Use it to fix broken pottery, ceramic figurines, or even to reattach a loose tabletop surface. Its strong and durable hold can withstand the wear and tear of daily use. |
Whether you’re a seasoned crafter or just looking for a strong and non-toxic adhesive for everyday use, Gobbledy Glue is a great choice. Try it out on your next project and see the difference it makes.
How to Store Your Homemade Glue
Once you have made your homemade Gobbledy Glue, you want to ensure that it remains in good condition for future use. The last thing you want is for it to go bad and become unusable. Here are some tips on how to store your homemade glue:
- Use airtight containers: To prevent air and moisture from getting into your glue, it is essential to keep it in an airtight container. Glass or plastic jars with tight-fitting lids work well for this purpose. Make sure that the jars are completely dry before storing the glue, as any moisture can affect the quality of the glue.
- Store in a cool, dry place: Gobbledy Glue should be stored in a cool, dry place, away from direct sunlight. Exposure to heat or sunlight can cause the glue to spoil more quickly. A cupboard or pantry is a good place to store your glue.
- Label the container: Always remember to label the container with the date you made the glue. Homemade glue usually lasts for up to one month if stored correctly. By labeling the container, you will know when to throw it away and make a new batch.
- Check for signs of spoilage: Over time, the glue may start to thicken or become discolored. Check the glue before using it to ensure that it hasn’t spoiled. If the glue has changed color or has a foul smell, it’s best to discard it and make a new batch.
- Use clean utensils: Always use clean utensils when working with your glue. Any dirt or debris can contaminate the glue, causing it to spoil more quickly.
By following these simple tips, you can ensure that your homemade Gobbledy Glue stays fresh and ready to use for all your crafting needs. Remember, if you notice any signs of spoilage, it’s best to discard the old glue and make a new batch.
Conclusion
In conclusion, making your own glue can be a fun and rewarding activity, and the gobbledy glue recipe we’ve provided offers many benefits over store-bought glues. Not only is it non-toxic and safe for children to use, but it’s also cost-effective and environmentally friendly.
By following the step-by-step instructions and helpful tips provided in this guide, you should be able to create a perfect batch of gobbledy glue every time. Remember to always use quality ingredients and follow proper cooking techniques to ensure the best results.
Once you’ve made your gobbledy glue, you’ll be amazed at how versatile it is. Whether you’re using it for school projects, crafts, or even household repairs, this homemade glue is sure to come in handy.
To maximize the life of your glue, store it properly in an airtight container in a cool, dry place. And when you’re ready to use it, simply apply a thin layer to your project and allow it to dry completely before handling.
Overall, making gobbledy glue is a great way to unleash your creativity and save money at the same time. So why not give it a try today and see just how easy and fun it can be to make your own homemade glue?
Frequently Asked Questions
Q: Can I substitute the flour in this recipe?
A: Yes, you can substitute the flour with cornstarch or tapioca starch for a gluten-free option.
Q: Is this glue safe for children to use?
A: Yes, the ingredients in Gobbledy Glue are non-toxic and safe for children to use.
Q: How long will my homemade glue last?
A: Properly stored, Gobbledy Glue can last for up to 2 weeks.
Q: Can I use Gobbledy Glue for paper mache projects?
A: Absolutely, Gobbledy Glue is a great adhesive for paper mache projects.
Q: Do I need to use a specific type of vinegar in this recipe?
A: No, you can use any type of vinegar you have on hand, including white vinegar or apple cider vinegar.
Q: Can I add glitter or other embellishments to the glue?
A: Yes, you can add glitter or other small embellishments to the glue before it sets for a fun touch.
Q: How long does it take for the glue to dry?
A: The drying time will depend on the thickness of the glue application, but generally it should dry within one to two hours.
Q: Is Gobbledy Glue waterproof?
A: No, Gobbledy Glue is not waterproof and should not be exposed to water for extended periods of time.
Q: Can I make a larger batch of the glue?
A: Yes, you can double or triple the recipe to make a larger batch of Gobbledy Glue.
Q: Is this recipe environmentally friendly?
A: Yes, Gobbledy Glue is made from natural ingredients and is therefore an environmentally friendly alternative to store-bought glues that may contain harmful chemicals.