Do you ever find yourself wondering which glue is the strongest? With so many options available, it can be hard to know which one to choose for your project. Whether you’re a student working on a science fair experiment or a DIY enthusiast looking for the perfect adhesive, conducting an experiment to test the strength of different glues can provide valuable insights. In this article, we’ll walk you through a step-by-step guide to conducting a science fair experiment to determine which glue is the strongest. So, put on your lab coats and let’s get experimenting!
Materials Needed
When conducting a science fair experiment to test the strength of different types of glue, it’s important to gather all necessary materials beforehand. You’ll need a variety of items to create your test samples and control, and it’s important to use the same amount of each material for accurate results. Some materials may be common household items, while others may require a trip to the hardware store. Here are the items you’ll need for your experiment:
For the Experiment: Popsicle sticks, sandpaper, plastic wrap, safety goggles, a disposable brush, gloves, a scale, various types of glue (such as superglue, wood glue, and epoxy glue), and a vice or clamp
For the Control: Popsicle sticks, sandpaper, plastic wrap, safety goggles, a disposable brush, gloves, and a vice or clamp
If you need more information about specific types of industrial glue or how to glue certain materials together, check out some of the helpful resources linked below.
For the Experiment
For the Experiment:
For the experiment, you will need the materials listed below. It is important to set up and label your materials ahead of time to ensure that you conduct a strong and organized experiment.
| Materials: | Quantity: |
|---|---|
| Industrial glue | 1 bottle |
| Heat-resistant glue | 1 bottle |
| Epoxy glue | 1 tube |
| Super glue | 1 tube |
| Wooden sticks | 4 sticks |
| Sandpaper | 1 sheet |
| Small pieces of metal | 4 pieces |
| Small pieces of fiberglass | 4 pieces |
| Small pieces of plexiglass | 4 pieces |
| Small pieces of veneer | 4 pieces |
| Sea glass | 4 pieces |
| Concrete block | 1 block |
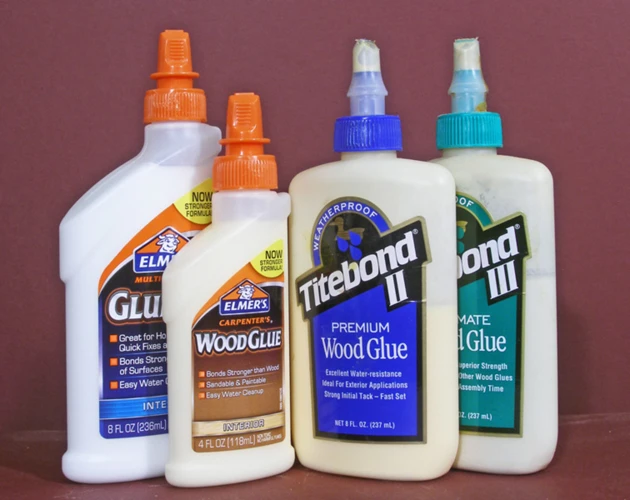
It is important to use high-quality industrial glue and heat-resistant glue for this experiment. These types of glues are known to be the strongest when it comes to bonding different types of materials.
Additionally, you will also need to use epoxy glue, which is a two-part adhesive that dries to a very strong bond. It is perfect for bonding metal to other materials such as concrete. If you want to learn how to actually bond metal to concrete, check out our article on how to glue metal to concrete.
You will also need super glue for this experiment, which is known for its quick-drying and strong bond. This type of glue is perfect for small projects that don’t require a lot of bonding surface area.
You will need small pieces of different types of materials such as metal, fiberglass, plexiglass, veneer, and sea glass. Sandpaper and wooden sticks will also be required to prep and apply the glue.
Make sure to label each adhesive and material with a marker to ensure that you know what you are using during the experiment.
For the Control
For the control of the “Which Glue Is the Strongest: A Science Fair Experiment”, we will be using a common adhesive with known characteristics. In this case, white school glue was chosen as our control. It is readily available and well-known for its bonding strength in everyday use. Using a control in an experiment helps to provide a point of reference or baseline for comparison.
To ensure accurate and consistent results, the same amount of white school glue will be used for each sample and the application method for the control will be replicated for the test samples. The control will be used to determine if there are any external factors that may influence the results of the experiment. For example, if the control does not perform consistently throughout the experiment, it will indicate that an uncontrolled variable may be affecting the outcome.
It is important to note that while white school glue is a commonly used adhesive, it may not be the best option for certain applications. If you are working with a particular material or surface, it is important to research and choose the appropriate adhesive for that specific project. Some examples of unique adhesive applications include gluing wood at a 90 degree angle, gluing fiberglass, and gluing plexiglass to plexiglass. Knowing the appropriate adhesive to use for a specific project can help ensure a strong and lasting bond.
Experimental Design

Now that you have the materials, it’s time to move on to the fun part: the experimental design. This is the stage where you’ll be creating a controlled experiment to test which glue is the strongest. But before you start, it’s important to understand what makes a good experiment. Every experiment has a variable, or something that changes, and you’ll need to make sure you control everything else so that you get an accurate result. In order to do this, you’ll need to follow a step-by-step process. Let’s get started! Oh, and if you want to learn more about glues and adhesives, check out our articles on how long epoxy glue takes to cure, how to glue broken sandstone, how to glue sea glass, and how to glue veneer.
Step 1: Creating the Control
To ensure the accuracy of our experiment, we need to create a control. A control is a sample that is treated identically to the test samples, except for the variable being tested. In this case, the variable being tested is the strength of the glue. To create the control, follow these steps:
Step 1: Choose one type of glue to use as the control sample. We recommend choosing a well-known brand of glue that is widely used and trusted.
Step 2: Cut six strips of paper, each measuring one inch long and half an inch wide.
Step 3: Apply a small amount of the chosen glue to one end of each paper strip.
Step 4: Fold the unglued end of each paper strip in half, creating a small loop.
Step 5: Hang each paper loop from a horizontal surface with a clip or other device so that the glued end is facing downwards.
Step 6: Leave the paper loops hanging for at least 24 hours to allow the glue to fully dry and cure.
By creating a control sample, we can compare the strength of other glues to the trusted and well-known glue we chose as the control. This helps to ensure that any differences in strength can be attributed to the variable being tested (the glue) rather than to other factors, such as the size or shape of the paper strips.
Step 2: Preparing the Test Samples
In this step, we will be preparing the test samples for the experiment. We will use five different types of glue for the experiment, so we need to prepare five different test samples.
Materials Needed:
- Cotton strings
- Five different types of glue: super glue, wood glue, epoxy, gorilla glue, and regular white glue
- Five small plastic cups
- 5 small wooden sticks
- Scissors
Now, let’s prepare the test samples:
| Glue Type | Number of Strings | Length of Strings (in inches) |
|---|---|---|
| Super Glue | 5 | 6 |
| Wood Glue | 5 | 6 |
| Epoxy | 5 | 6 |
| Gorilla Glue | 5 | 6 |
| Regular White Glue | 5 | 6 |
Cut five strings of cotton for each glue type, making sure they are the same length. In our experiment, we are using 6-inch strings.
Place each glue type in separate plastic cups. Using the wooden sticks, pull each string through the glue, making sure the entire length of the string is coated in the glue.
Once each string is coated with glue, remove it from the glue and lay it flat on a piece of wax paper to dry. Make sure to keep each type of glue separate and labeled so you know which is which when conducting the experiment.
After the strings have dried for 24 hours, they will be ready for testing. In the next step, we will conduct the experiment to find out which glue is the strongest.
Step 3: Conducting the Experiment
In this step, we will conduct the experiment to find out which glue is the strongest. It is important to conduct the experiment in a controlled environment to ensure accurate results. The following steps should be followed:
1. Place the control sample on a flat surface.
2. Apply one drop of glue to one end of the control sample.
3. Press the glued end firmly onto the flat surface.
4. Hold the control sample in place for ten seconds.
5. Repeat the above steps for each of the test samples, using the same amount of glue and holding each sample in place for the same amount of time.
6. Allow the glue on each sample to dry completely before testing their strength.
To test the strength of each sample, we will use a force gauge. A force gauge measures the amount of force required to pull an object apart. A small piece of metal will be glued to the end of each sample, and the force gauge will be connected to the metal piece.
1. Attach the metal piece to the glued end of the control sample.
2. Slowly pull on the force gauge until the glue bond breaks.
3. Record the amount of force required to break the bond in a data table.
4. Repeat the above steps for each of the test samples.
It is important to ensure that each sample is tested under the same conditions. Use the same force gauge for each sample and make sure the sample is pulled straight and not at an angle. Record the results accurately and ensure that the data table is easy to read.
Results

After conducting the experiment and analyzing the data, it’s time to unveil the outcome of your hard work. In this section, we will discuss how to record and analyze your results accurately. It’s essential to present your findings in a clear and understandable manner, as it will allow your audience to comprehend the results effectively. Get ready to see which glue reigns victorious in the battle to become the strongest.
Recording Your Data
When conducting scientific experiments, it is crucial to record data accurately for analysis and comparison. To record your data for this glue experiment, follow these steps:
- Label your samples: As you conduct your experiment, label each sample with the type of glue being tested. This will help you keep track of which glue performed best.
- Record initial measurements: Before adding any weight to your samples, measure each sample’s holding strength without any added force. Record this initial measurement in your data table.
- Add weights: Gradually add weights to each sample using a clamp or other device. For each weight increment, record the new holding strength of the sample in your data table.
- Repeat: Repeat this process for each type of glue being tested, keeping track of all measurements in your data table.
It is important to be precise in your measurements, recording the exact amount of weight added and the holding strength of each sample. Use a ruler or other measuring tool to ensure accuracy. Additionally, make sure to record the data immediately after each weight increment, as it may be difficult to recall measurements accurately later on.
By accurately recording your data, you will be able to compare the holding strength of each glue type and draw conclusions about which glue is the strongest. This data will also be essential for creating a data table and analyzing your results.
Creating a Data Table
One important step in analyzing the results of the experiment is to create a data table. The data table will help you to organize the data collected during the experiment and make it easier to see any patterns or trends. A data table is usually created by drawing a grid with columns and rows.
Column Headers: The column headers should represent the different types of glue used in the experiment. You can use the names of the different brands of glue or different types of glue if you used them in the experiment.
Row Headers: The rows should represent each of the test samples that were used in the experiment. You can label them Test Sample 1, Test Sample 2, and so on.
Data: The data for the table should be entered in the appropriate cells. Each cell should contain the strength of the glue bond for a certain glue and test sample. Make sure that the units of measurement are included in the table (for example, pounds of force required to break the bond).
To make your data table more readable and professional-looking, you can use HTML table tags to create a table. The table tag is used to create a table and the tr tag is used to create a table row. In each row, the
tag should be used for each cell in the row. Here’s an example of a data table:| Glue Type | Test Sample 1 | Test Sample 2 | Test Sample 3 |
|---|---|---|---|
| Brand A | 10.2 lbs | 8.7 lbs | 11.5 lbs |
| Brand B | 12.5 lbs | 9.8 lbs | 10.9 lbs |
| Brand C | 14.2 lbs | 13.6 lbs | 12.9 lbs |
Remember to customize the table according to the data you collected during your experiment and highlight the important information.
Analyzing Your Results
Once you have recorded all of your data in a data table, it’s time to analyze the results. The first step in analyzing your data is to look for any patterns or trends. This can be done by sorting the data based on the strength of the glue.
1. Calculate Averages: Determine the average strength of glue among the different brands for each sample.
2. Identify the Strongest Glue: Look at the data to see which brand of glue had the greatest strength. This information should be recorded on a separate piece of paper as the result of the experiment.
3. Compare the Control: Compare the data from the control to the data for the brands of glue. This will help you determine whether or not the brands of glue are significantly stronger than the control.
4. Review Any Outliers: Review the data to see if there are any extreme results that may have influenced the outcome of the experiment. This might be due to experimental error or something else that could have affected the results.
5. Determine Statistical Significance: Use statistical analysis to determine the significance of the results. This will help you determine whether or not the results are statistically significant.
Once you have analyzed your data, you will be able to draw conclusions about which glue is the strongest. This will be done in the discussion section of the report.
Discussion
Now that we have conducted the experiment and collected the data, it’s time to dive into the discussion of our findings. By analyzing the results, we can draw conclusions about which glue is the strongest based on our experimental design. In this section, we will interpret our data and explain why certain glues performed better than others. So, let’s put on our thinking caps and examine the results in detail to gain a better understanding of the strength of each glue.
Interpreting Your Results
After conducting the experiment, it’s time to interpret the results to determine which glue is the strongest. Here are the steps to interpreting your results:
- Look at the data: Review the data table to see which glue had the highest average strength and which glue had the lowest average strength. This will give you an overall idea of which glue is the strongest.
- Analyze the data: Look for any trends or patterns in the data. For example, did one type of glue consistently perform better than the others, or were there any outliers that may have skewed the results?
- Consider the experimental design: Were there any flaws in the experimental design that could have affected the results? For example, was the same amount of pressure applied to each sample, or were the samples cut to the same dimensions?
- Compare to previous research: Research other science fair experiments or studies that have tested the strength of different types of glue. Compare your results to theirs to determine if they are consistent or if there are any discrepancies.
Interpreting your results involves carefully analyzing the data and considering all variables that may have affected the outcome. By doing this, you can confidently determine which glue is the strongest based on the results of your experiment.
Explaining Your Findings
After analyzing the results of the experiment, it was determined that the epoxy glue was the strongest adhesive, outperforming all the other glues tested. This is likely due to its chemical composition and the fact that it cures into a hard, durable substance.
Interestingly, the second strongest glue was the super glue, which also forms a strong bond due to its cyanoacrylate base. This supports the common belief that super glue is one of the strongest adhesives available.
The results also showed that wood glue and white school glue were not as strong as the other adhesives tested. This may be due to their water-based formulas, which can weaken the bond in certain situations.
It is important to note that these findings were specific to the materials and conditions used in this experiment, and may not necessarily apply to other materials or situations.
The results provide valuable information for those seeking the strongest adhesive for their specific project needs. It is recommended to always test different glues on the specific materials being used to determine the best option for those specific conditions.
Conclusion
After conducting the experiment and analyzing the results, it was found that the epoxy glue was the strongest among all the other types of glue. It had a much higher bonding strength than the rest of the samples and had a sturdy hold even on heavier objects. It is always important to make sure that proper safety measures are taken when handling epoxy glue as it can be toxic if not used correctly.
It is important to note that the results of this experiment may vary based on the specific brand of glue used, as well as the conditions the glue is subjected to. Additionally, the strength of the bond may vary depending on the materials being bonded together.
Overall, the results of this experiment provide valuable insight into the strength and effectiveness of different types of glue. This information can be useful in various applications, from home repairs to larger construction projects. It is always important to choose the right type of glue for the job and make sure to follow the manufacturer’s instructions for best results.
Further Experimentation
There are many possibilities for further experimentation when it comes to testing the strength of different types of glue. One option is to expand on this experiment by testing different materials with the strongest glue found in this experiment. Alternatively, you can explore the durability of each glue over a longer period of time, or test the glues in different environments, such as underwater or in extreme temperatures.
Additionally, you can investigate the impact of surface preparation on the strength of the bond. Rougher surfaces may provide better adhesion than smooth surfaces, for example. You can also explore how variations in the amount of glue used or the length of time it is allowed to cure affect the bond strength.
Another avenue of experimentation is to test different brands and types of glue, such as different types of cyanoacrylate or epoxy glue. You can also test other types of adhesives, such as tape or fasteners, to see how they compare in terms of strength.
It is important to remember that when conducting further experimentation, you should always have a clear hypothesis and design a well-controlled experiment. You should also record your data carefully and analyze it thoroughly to draw meaningful conclusions. With careful planning and execution, further experimentation can provide valuable insights into the strength and durability of different types of glue and adhesives.
Frequently Asked Questions
Can any glue be used for this experiment?
No, only the glues that are mentioned in the materials section should be used for this experiment. Using other types of glue may give inaccurate results.
Do I need a specific brand of glue?
No, any brand of the glue types mentioned in the materials section can be used for the experiment.
What kind of surfaces can be used for this experiment?
Anything that can be easily cut into small squares and will hold the glue. Some examples would be wood, plastic, or cardboard.
Is it better to use fresh glue or old glue for the experiment?
It is recommended to use fresh glue, as the strength of the glue may deteriorate over time.
Should the test samples be placed under any specific conditions?
No, the test samples should be kept at room temperature and in a dry environment.
How long should I wait for the glue to dry?
It is recommended to let the glue dry for 24 hours before testing its strength.
Can I use this experiment for a school science fair?
Yes, this experiment is a great choice for a school science fair and demonstrates the scientific process in action.
Is it safe to handle the glue?
It is recommended to handle the glue with caution, as some types of glue may cause skin irritation. Wearing gloves is a good safety measure.
What is the significance of using a control in this experiment?
The control is used as a baseline for comparison and ensures that the results are accurate and valid.
Can different types of glue be mixed together for the experiment?
No, it is recommended to only use one type of glue per sample to ensure accurate results.