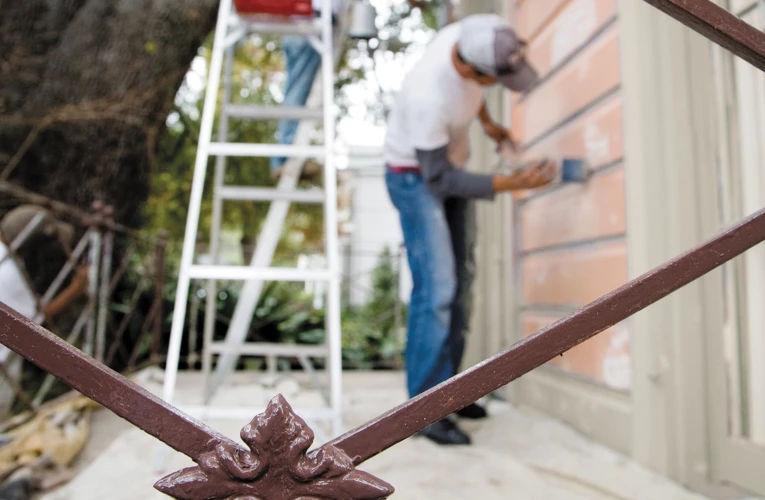
The exterior of a house is the first thing that people notice, and it’s essential to keep it looking its best. Over time, exterior surfaces can become damaged due to weather conditions or other factors. This can lead to peeling paint, cracks, and other unsightly issues. Repairing these damaged surfaces is necessary before painting can take place. However, the process can be overwhelming, especially for those who have never done it before. In this article, we will guide you through step-by-step on how to repair damaged exterior surfaces before painting. So, grab your tools and let’s get started!
Assessing the Damage
Before you start any painting project, it is crucial to assess the condition of the exterior surfaces. A thorough inspection will help you identify any damages that may affect the outcome of your painting job. Proper assessment allows you to determine the extent of the damage and decide on the necessary repairs to be carried out. In this way, you can ensure that the surface is properly prepared and that the paint will adhere properly. To assess any damage, you need to inspect the exterior surfaces, identify the type of damage, and determine the extent of the damage. Once you have carried out the assessment, you can prepare the tools and materials you will need to repair the damages before painting. Are you ready? Let’s get started! To learn about the importance of pressure washing, check out this previous article on exterior painting preparation.
Inspect the Exterior Surfaces
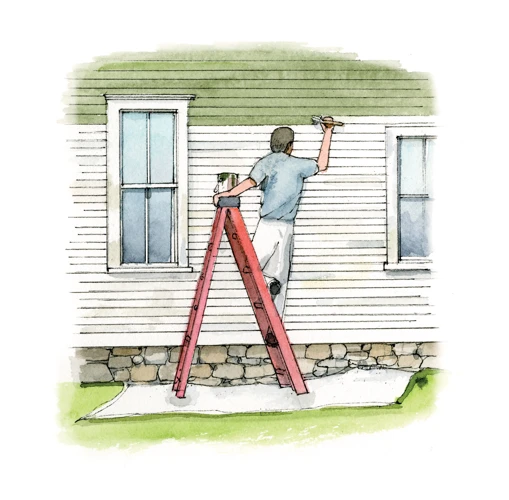
When starting a repair project, the first step is to inspect the exterior surfaces of your home. This inspection will involve a close examination of the walls, roof, and other exterior structures for any signs of damage. It is essential to perform this inspection before starting the repair process to assess the overall condition of the surfaces and identify any underlying issues that may have caused the damage.
Here is a checklist of items to consider when inspecting the exterior surfaces:
- Check for any cracks or gaps in the surfaces, including walls and roof.
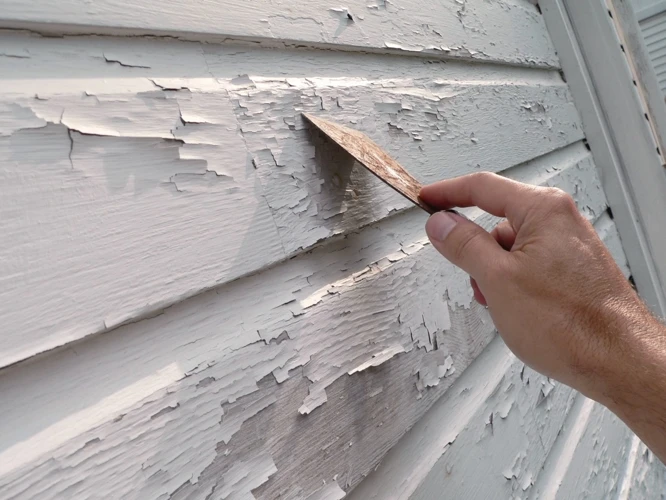
- Look for signs of moisture damage such as peeling or blistering paint, mold, or mildew growth, and water stains on the surfaces.
- Examine the walls and roof for warping, rotting, or splintering, which could be an indication of structural damage.
- Check for loose or missing siding and shingles that could compromise the integrity of your home’s exterior.
- Inspect your home’s trim and caulking for signs of wear and tear, such as cracks or gaps.
Performing a thorough inspection and identifying all the damages will help you determine the extent of necessary repairs and the tools and materials required. If you’re unsure of the extent of the damage or the repair process, consider consulting with a professional for guidance.
Once you’ve identified the damage, you can move onto the next step of your repair process. However, it is essential to remember to address any underlying issues that caused the damage in the first place. Neglecting to do so could lead to future damages, requiring more repairs and expense down the line.
Inspecting your home’s exterior surfaces is the crucial first step in any repair process. By being thorough and identifying all the necessary repairs, you can ensure that your repairs are successful and long-lasting. For more information on exterior painting, check out these helpful resources: 5 Steps to Exterior Painting Prep, Exterior Primer Tips, and The Importance of Caulking and Sealing Before Exterior Painting.
Identify the Type of Damage
When assessing the exterior surfaces, it is essential to identify the type of damage present. Here are some common types of damage you should be able to recognize:
- Cracks: These are frequently caused by temperature fluctuations, settling, or poor construction practices. Cracks can range from hairline to severe and be found in any exterior surface.
- Holes: These can be caused by a variety of issues, including pests or accidental damage, and affect a variety of building materials.
- Rot: This usually occurs in wood surfaces due to moisture retention, and can cause structural issues if left untreated.
- Warping: This describes a change in shape of a building material, usually due to moisture retention or sun exposure.
- Mold or Mildew: These typically develop in areas with excessive moisture and can be identified by a fuzzy or slimy appearance and musty odor.
It is important to identify the type of damage to take the necessary steps and choose the right materials to complete repairs effectively. So take your time and carefully examine all the damages.
Determine the Extent of the Damage
To determine the extent of the damage on the exterior surfaces, a thorough inspection needs to be conducted. Here are the steps to follow:
- Start from the Top: Begin inspecting the surface from the topmost part, such as the roof or gutters. Look for signs of wear and tear or damage caused by weather or other external circumstances.
- Check the Sidings: After checking the top parts, move to the sidings. Check for cracks or holes that may have been caused by impact or weather-related deterioration.
- Inspect the Trims: Detailing such as trims, moldings and baseboards also needs to be inspected. Check for any signs of moisture damage, rot, or insect infestation.
- Examine the Windows and Doors: Windows and doors are the weakest parts of any house’s exterior. Check if there are any gaps between the window frames and sidings or if the doors have cracks, warps, or signs of decay.
- Look for Hidden Damage: Behind the walls or underground parts of the house may also have damage that needs inspection. Look for signs of mold, leaks, or water damage.
By following these steps, it will be easier to determine the extent of the damage. It is essential to identify the specific parts that need attention to ensure that the right steps are taken to repair the damage.
Gathering the Tools and Materials
Now that you have assessed the damage to your exterior surfaces, it’s time to gather the necessary tools and materials for the repair process. You want to ensure that you have everything you need before starting the repair, so that you can work efficiently and effectively. Let’s take a closer look at the tools and materials you will need to make the necessary repairs to your exterior surfaces.
Tools Needed
To successfully repair damaged exterior surfaces before painting, you need to gather the right tools. Here is a list of essential tools that you will need to complete the job:
| Tools | Description |
| Protective gear | To protect yourself from inhaling dust and from sharp tools when necessary. |
| Putty knife | To remove loose paint, scrape off old coatings, and apply filler. |
| Sanding block or sandpaper | To smooth out rough surfaces, remove peeling paint, and prepare the surface for painting. |
| Electric sander | To speed up the sanding process and make it easier to achieve a smooth finish. |
| Caulk gun | To apply caulk, which is used to fill gaps and cracks in the surface. |
| Utility knife | To cut away damaged wood or siding before installing replacement materials. |
| Hammer and nails | To secure replacement materials or loose boards that have come loose. |
| Paint scraper | To remove old and flaking paint easily and quickly. |
| Power washer | To wash away dirt, grime, and debris before starting to repair the surface. |
| Paint brushes and rollers | To apply primer and paint to the surface. |
| Paint sprayer | To apply paint in a more efficient way or to obtain a perfectly even finish for large surfaces |
Make sure to have these tools in your arsenal before starting your exterior surface repair project.
Materials Needed
To repair damaged exterior surfaces before painting, you will need several materials to do the job right. These materials are essential for performing different aspects of the repair process. Here is a list of the necessary materials you will need to gather before starting the repair work:
| Patching Compound | This compound is ideal for filling holes and cracks in exterior surfaces. Make sure to select one that is suitable for the specific material of your surface. |
| Sanding Paper | Choose fine-grit sanding paper for smoothing out rough surfaces and removing peeling paint. |
| Putty Knife | A putty knife is a multi-functional tool for smoothing out and applying patching compound and removing old paint. |
| Caulk | Choose an exterior-grade caulk that is paintable and will remain flexible through different weather conditions. This is used for sealing gaps around windows, doors, and other exterior areas. |
| Primer | Primer is a must for preparing the surface for paint. It will ensure that the paint will adhere properly and improve its durability. |
| Paint | Select a high-quality paint that is specially designed for exterior surfaces. The paint will protect the surface from the elements and provide a fresh, new look. |
| Paintbrushes and Rollers | Bristle brushes are ideal for painting smaller areas and trim, while rollers are best for larger areas. Choose brushes and rollers that are compatible with the type of paint you have selected. |
| Painting Tape | Painting tape is a must-have for covering and protecting surrounding areas that you do not want to paint. It helps to create clean paint lines and prevent paint from splattering onto other surfaces. |
By gathering all of these materials before starting the repair process, you can ensure that the job goes smoothly and the repairs are carried out effectively. Having the right materials will help to ensure the longevity and quality of the repairs, giving you a surface that is ready for painting.
Repairing Minor Damage
When it comes to exterior surfaces, even minor damage can be unsightly and could significantly impact your home’s curb appeal. Fortunately, repairing minor damage can be a straightforward process with the right tools and materials. By following a few simple steps, you can restore your exterior surfaces to their former glory and give your home the fresh and updated look it deserves. In this section, we will guide you through the process of repairing minor exterior damages, starting with cleaning the surface and finishing with sanding the surface. So, roll up your sleeves and let’s get started!
Cleaning the Surface
Before beginning any repairs on damaged exterior surfaces, it is crucial to ensure that the surface is clean and free of debris. Cleaning the surface properly will provide a sturdy base for the repairs, and will aid in bonding the new materials to the existing ones. Here is a step-by-step guide for cleaning the surface:
| Step | Action |
|---|---|
| Step 1: | Remove loose paint, dirt, and other debris from the surface using a stiff-bristled brush or pressure washer. This will help in getting an unobstructed surface for further repairs. |
| Step 2: | Wash the surface with water and soap using a sponge, cloth or a soft-bristled brush. This will help in removing any dirt, mildew or other surface contaminants that could interfere with the bonding of new materials. |
| Step 3: | Rinse the surface thoroughly with water, ensuring that there is no soap residue remaining. Any soap residue could create a barrier between the new materials and the surface, which could cause the repairs to fail. |
| Step 4: | Allow the surface to dry completely before proceeding to the next step. Air-drying is usually the best way to ensure that there is no residual moisture left. |
By following these steps, you can have a clean and smooth surface for any repairs. A clean surface will make the rest of the process much easier, and will result in a much better end product.
Filling Holes and Cracks
To begin filling in smaller holes and cracks, start by gathering the necessary tools and materials. You will need spackling compound, a putty knife, sandpaper, and a sponge or damp cloth.
1. Clean the damaged area: Before you begin filling in the hole or crack, make sure the area is clean and free of debris. Use a damp cloth or sponge to wipe away any dust, dirt, or loose paint.
2. Apply spackling compound: Use the putty knife to apply the spackling compound to the damaged area. Be sure to spread it evenly and fill in the entire hole or crack. Allow the compound to dry completely for at least 24 hours.
3. Sand down the surface: Once the spackling compound is completely dry, use sandpaper to smooth down the area until it is flush with the surrounding surface. Be sure to sand in all directions, and use a sanding block to keep the surface even.
4. Repeat as necessary: If the hole or crack was particularly deep, you may need to repeat steps 2 and 3 to completely fill in the area. Be sure to allow the spackling compound to dry completely between each application.
Filling in small holes and cracks can be a relatively simple process as long as you properly prep the area and take your time. However, if you are dealing with larger areas of damage, you may need to use more advanced techniques to properly repair the surface before painting.
Sanding the Surface
After filling any holes and cracks on the damaged exterior surface, the next step is to sand the surface. This will smooth out any rough spots and make the surface even. Here are some steps to follow in order to sand the surface effectively:
- Clean the surface: Use a soft cloth or a vacuum cleaner to remove any debris and dust on the surface before sanding it. This will ensure that the sandpaper only contacts the surface being sanded, and not any dirt or debris that can scratch the surface.
- Choose the right sandpaper: The grit size of the sandpaper depends on the surface and the extent of the damage. For minor damages, a fine grit sandpaper with a grit number of 120 or higher is sufficient, whereas a coarse grit sandpaper with a grit number between 40 and 60 may be required for significant damage.
- Sand in a circular motion: Use a sanding block or a sanding sponge to sand the surface. Hold the sandpaper with a firm grip and sand over the damaged area with a circular motion. This will help to keep the sanded area even and prevent sanding in one direction to avoid creating curves or waiving surface.
- Do not apply too much pressure: Applying too much pressure while sanding can damage the surface and create grooves. It is essential to maintain even, gentle pressure while sanding the surface to ensure a smooth finish.
- Check the surface: After sanding, use your fingers to feel the surface for rough spots and bumps. If any issues persist, repeat the sanding process before moving to the next step.
By following these simple steps, you can effectively sand the damaged exterior surface and prepare it for the next steps in the process.
Repairing Major Damage
When faced with major damage on your exterior surfaces, it’s important to approach the repairs with caution and care. These types of damages can range from extensive cracks and holes to completely damaged areas that require replacement materials. In order to properly fix these issues, it will require a bit more effort and materials, but the end result will be a polished and updated exterior. Let’s dive into the essential steps and tools needed to tackle major damage repairs on your home.
Removing Damaged Areas
To repair major damage on your exterior surfaces before painting, sometimes you need to remove the damaged areas completely. This might involve cutting away rotting wood, rusted metal, or crumbling masonry. Here are the steps you’ll need to follow:
- Step 1: Determine the extent of the damage. If it’s a large area, you may need professional help.
- Step 2: Wear protective gear like gloves, goggles, and a dust mask.
- Step 3: Use a pry bar or chisel to remove damaged wood or stucco. Separate the damaged sections from the surrounding areas.
- Step 4: Cut away rusted metal using tin snips or a reciprocating saw. Make sure to wear gloves to protect your hands.
- Step 5: Remove crumbling masonry with a hammer and chisel.
- Step 6: Clean the area with a stiff brush or pressure washer, and let it dry completely.
Once you’ve removed the damaged areas, you’ll need to install replacement materials to bring your exterior surfaces back to their original state.
Installing Replacement Materials
One of the steps to repairing major exterior damage is the installation of replacement materials. This process can be complicated and time-consuming, but it is crucial for ensuring that the repair is seamless and long-lasting.
Step 1: Obtain the replacement materials. This may include siding, trim, or other materials depending on the type of damage.
Step 2: Measure and cut the replacement materials to the appropriate size using a saw or other cutting tool as needed. It’s important to make precise cuts to ensure a snug fit.
Step 3: Remove any damaged materials that will be replaced. This may include cutting away sections of siding, trim, or other materials using a saw or other cutting tool.
Step 4: Install the replacement materials in place of the old ones. Depending on the material, this may involve nailing, screwing, or gluing the replacement material in place.
Step 5: Seal the area where the new material meets the existing material using caulk or another appropriate sealant. This will help prevent water from seeping in and causing further damage.
Step 6: Finish the replacement material as needed. This may involve painting or staining to match the surrounding materials.
It is important to take the necessary time and care during the replacement material installation process to ensure that the repair is effective and will stand the test of time.
Sealing and Finishing
To properly repair major exterior surface damage, sealing and finishing are crucial steps. Follow these steps to ensure a smooth and long-lasting repair:
- Apply Sealant: Before installing replacement materials, ensure the surrounding area is adequately sealed. Use a waterproof sealant to close off any gaps or cracks that may allow moisture to seep in and cause further damage.
- Install Materials: Once the sealant has dried, carefully install the replacement materials. Ensure they fit snugly into place and are securely attached using the appropriate fasteners or adhesives.
- Fill Gaps: After replacing the damaged areas, fill any gaps or seams with a quality exterior-grade filler. Follow the manufacturer’s instructions for application and drying times.
- Apply a Protective Coating: To protect the repaired area and ensure a long-lasting finish, apply a high-quality exterior paint or clear coat. Apply the coating according to the manufacturer’s instructions, using multiple thin coats instead of one thick coat, which can crack or peel over time.
By properly sealing and finishing the repaired surfaces, you can ensure the longevity of the repair and the appearance of the surface.
Preparing the Surface for Painting
As you near the end of your exterior surface repair project, it’s crucial to properly prepare the surface for painting. This step is essential to achieve a professional finish and ensure the longevity of your repairs. By following these steps, you can ensure that your surface is ready for painting and that your hard work will last for years to come. Let’s dive into the necessary steps to properly prepare your surface for painting.
Sanding and Cleaning the Surface
Sanding and Cleaning the Surface
After repairing the damaged exterior surfaces, it’s important to sand and clean the surface before applying paint. This ensures that the surface is smooth and free of imperfections that could affect the final appearance of the paint job. Here are the steps for sanding and cleaning the surface:
- Begin by using a sanding block or orbital sander to smooth the surface of the repair. Start with a coarse grit sandpaper and gradually work up to a finer grit. Be sure to sand in the direction of the wood grain to avoid causing damage to the surface.
- Once the surface is smooth, wipe it down with a damp cloth or sponge to remove any dust or debris. A clean surface is crucial before painting to ensure that the paint adheres properly.
- If necessary, use a scraper or putty knife to remove any excess filler or material that extends beyond the repair area. This will help to create a flat and smooth surface that will be easier to paint.
- Inspect the repair to ensure that it is completely smooth and level. If necessary, use a fine grit sandpaper to further refine the surface. Be careful not to sand too much, as this can damage the repair and create more work.
- After the repair is sanded and cleaned, it’s important to allow it to fully dry before applying paint. Depending on the type of repair material used, this can take anywhere from a few hours to a full day.
By taking the time to properly sand and clean the surface, you’ll ensure that your paint job looks great and lasts for years to come. Don’t rush this step – a little patience and attention to detail will go a long way towards achieving a professional-looking finish.
Applying Primer
Before starting the paint job, it’s essential to apply a primer coat to the exterior surface. A primer creates an even base and ensures better adhesion of the paint.
Choosing the right primer: There are various types of primers available in the market, such as oil-based, water-based, and shellac-based. Select a primer that is compatible with the type of paint you plan to use. Also, consider the surface you’re painting; for example, a concrete surface requires a different primer than a metal surface.
Preparing the surface: Before applying the primer, make sure the surface is clean, dry, and free of debris. Sand the surface to remove any loose paint or rough spots. Then, wash the surface with soap and water or a mild cleaner. Let it dry completely before applying the primer.
Applying the primer: Begin by stirring the primer thoroughly to ensure an even consistency. Use a brush or a roller to apply the primer, depending on the surface you’re working on. Apply the primer in thin, even strokes, working in one direction. Don’t overload the brush or roller with primer as it can lead to drips and an uneven finish.
Drying time: Allow the primer coat to dry completely before applying the paint. Check the manufacturer’s instructions for the recommended drying time.
| Steps to apply primer: |
|---|
| 1. Choose the right primer compatible with the paint type and surface. |
| 2. Prepare the surface by making it clean, dry, and free of debris. |
| 3. Stir the primer thoroughly to ensure consistency. |
| 4. Use a brush or roller to apply the primer in thin, even strokes. |
| 5. Allow the primer coat to dry entirely per the manufacturer’s instructions. |
Applying primer is an essential step in repairing damaged exterior surfaces before painting. It creates a smooth base for paint and ensures long-lasting results. Take time to choose the right primer, prepare the surface correctly, and apply it carefully to achieve a flawless finish.
Checking for Imperfections
After applying the primer, it’s important to inspect the surface for imperfections. This step is crucial to achieve a flawless paint job. Here are the steps to follow when checking for imperfections:
- Step 1: Look for any visible cracks or holes. Inspect the surface carefully and mark any imperfections that you see.
- Step 2: Run your hand over the surface. Use your hand to check for any bumps or rough patches. Any uneven areas will be highlighted as you run your hand across the surface.
- Step 3: Shine a light across the surface. Use a flashlight or a work light to shine across the surface. This will help you identify any imperfections that you may have missed before. Any small bumps will cast a shadow when the light is shined across the surface.
- Step 4: Repeat the process over the entire surface. Go over the entire surface, repeating the above steps to ensure that you identify all the imperfections.
- Step 5: Address any imperfections. Once you have identified any imperfections, address them accordingly. Use patching compound to fill any holes or cracks. Sand down any bumps or uneven areas to create a smooth surface.
By carefully checking for imperfections and addressing them before painting, you can ensure that the final result is a beautiful and even paint job that will last for years to come.
Conclusion
In conclusion, repairing damaged exterior surfaces before painting is vital to ensuring a smooth and long-lasting paint job. By properly assessing the damage, gathering the necessary tools and materials, and following the appropriate method for minor or major repairs, you can effectively restore your surfaces to their original condition. Taking the time to prepare the surface for painting, including sanding, cleaning, and applying primer, will ensure a professional-looking finish.
It’s important to note that safety should always be a priority when repairing exterior surfaces, especially when working with power tools or materials such as lead paint. Be sure to wear protective gear such as gloves, eye goggles, and a dust mask.
Additionally, it’s recommended to address any underlying issues that may have caused the damage, such as moisture or structural problems, to prevent future damage and maintain the integrity of your exterior surfaces.
Finally, following these steps and techniques can help you achieve a successful outcome, but if you’re unsure about any aspect of the repair process, it’s best to consult with a professional or seek additional guidance before starting the project. Remember, a little preparation and diligence can go a long way in achieving a beautiful and long-lasting painted exterior.
Frequently Asked Questions
Can I skip repairing minor damage before painting?
No, it is important to repair any damage before painting to ensure a smooth and even finish.
How do I know if the damage is minor or major?
Minor damage includes small holes and cracks, while major damage may require replacement of entire sections of the surface.
What tools do I need for repairing exterior surfaces?
You will need a putty knife, sandpaper, a caulking gun, a paint scraper, and a power drill with mixing attachments.
What materials will I need for repairing exterior surfaces?
You will need spackle, wood putty, caulk, fiberglass mesh tape, replacement materials (if necessary), primer, and paint.
Do I need to sand the surface after filling holes and cracks?
Yes, sanding the surface after filling will ensure a smooth and even finish.
What should I use to remove damaged areas during major repairs?
You can use a circular saw, sawzall, or jigsaw to remove damaged areas.
Can I install replacement materials on my own?
It is recommended to hire a professional if you are not experienced in installing replacement materials.
What should I use to seal the replacement materials?
You can use caulk or wood filler to seal the replacement materials.
Do I need to apply primer before painting?
Yes, applying primer before painting will help the paint adhere properly and last longer.
How do I check for imperfections before painting?
You can use a light source at a low angle to check for any bumps, scratches, or other imperfections on the surface.