When it comes to transforming the exterior of your home, a fresh coat of paint can make all the difference. However, before you start envisioning your property’s new look, understanding the vital role of priming cannot be overstated. Priming is the foundation that ensures the durability and beauty of your exterior paint job.
The Importance of Primer for Your Outdoor Surfaces
Primer serves as an essential undercoat that prepares outdoor surfaces for painting. It provides a smooth, uniform base that enhances paint adhesion, ensuring your color coats won’t peel or blister over time. Furthermore, primer is designed to protect the surface from moisture, stains, and environmental elements, extending the life of your paint job.
What Is Priming in Painting: Basics Explained
So, what is priming in painting? Simply put, priming is the process of applying a preparatory coating to a surface before the paint is applied. The primer acts as an intermediary layer that allows for better adhesion of paint, blocks stains, and can even help to reduce the number of paint coats needed for full coverage.
Preparing to Prime: A Step-by-Step Guide
Before you begin priming, there are a few crucial steps to ensure the process goes smoothly. Proper preparation will not only save you time but will also contribute to a more professional-looking finish.
Assessing Your Exterior for Priming Needs
Start by carefully examining your exterior surfaces. Look for signs of damage, such as peeling paint, cracks, or mildew. These issues will need to be addressed before you apply primer. It’s also important to clean the surfaces thoroughly to remove dirt and debris that could prevent primer from adhering correctly.
Choosing the Right Primer for Your Project
Selecting the appropriate primer is crucial. Consider factors such as the material of your exterior surfaces, the current condition of the paint, and environmental conditions. There are primers specifically formulated for wood, masonry, metal, and other materials. Ensure you pick one that’s suitable for your application and compatible with the topcoat you’ll be using.
Spot Priming vs. Full Priming: What You Need to Know
The extent of priming your exterior will require can vary based on the condition of your surfaces and the goals of your project.
Identifying When Spot Priming Is Sufficient
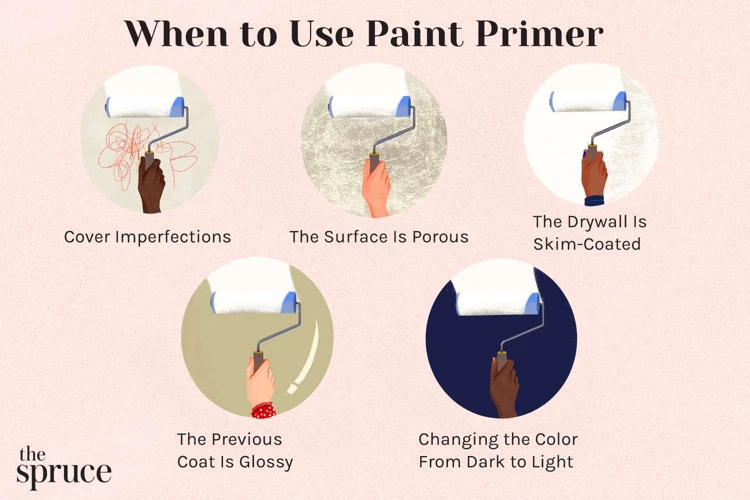
Spot priming is appropriate when you have minor imperfections or localized issues on an otherwise sound surface. This targeted approach focuses on areas that need special attention, such as bare wood or filled-in holes, and is typically followed by a complete paint job.
Circumstances That Require Full Priming
In cases where you’re dealing with extensive damage, a significant color change, or if the surface has never been painted before, full priming is necessary. This comprehensive approach ensures a consistent base for the new paint, improves durability, and can enhance the final appearance of your project.
Priming Techniques for Professional Results
To achieve a finish that looks like it was done by a seasoned pro, there are specific techniques and considerations to keep in mind during the priming phase.
Tips for Applying Primer Evenly and Effectively
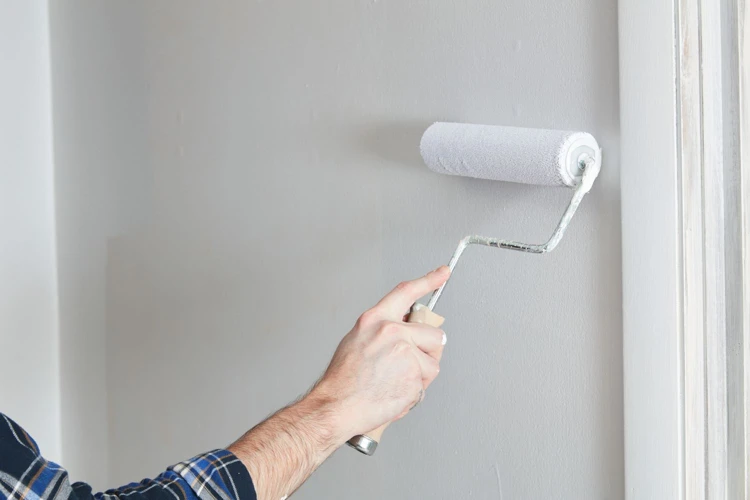
To ensure even application, start with a high-quality brush or roller designed for exterior primers. Begin at the top of your surface and work your way down to prevent drips and runs. For best results, apply primer in thin, even coats, allowing adequate drying time as specified by the manufacturer.
Common Mistakes to Avoid in Priming
- Skipping surface preparation: Never underestimate the importance of cleaning and repairing your surfaces before priming.
- Applying primer too thickly: Heavy coats can lead to sagging and extended drying times.
- Ignoring the weather: Avoid priming in extreme temperatures or when rain is expected, as this can affect the primer’s performance.
FAQs: Addressing Common Concerns About Priming
Even with a clear understanding of priming’s role in exterior painting, some questions often arise among homeowners and DIY enthusiasts. Let’s clarify two frequently asked questions.
Can You Paint Over Old Primer?
Yes, you can paint over old primer, provided it’s still in good condition. However, if the primer is peeling, cracking, or has been exposed for an extended period, it’s best to remove it and start fresh to ensure optimal results.
How Long Should Primer Dry Before Painting?
The drying time for primer varies depending on the product, environmental conditions, and the surface being primed. Generally, it’s advised to allow at least 24 hours for the primer to fully dry before applying the topcoat of paint.
Conclusion
When it comes to giving your home’s exterior a fresh coat of paint, priming is an essential step that ensures a smooth, durable finish. But the preparation doesn’t end there; proper ventilation, protecting your surroundings, and even choosing the correct methods can make all the difference. For those who like to take on projects themselves, our step-by-step guide on DIY ventilation for painting can help you maintain a safe environment. Don’t forget to check out our recommendations for the right size drop cloth for painting to keep your floors and furniture paint-free. And if you’re considering a furniture makeover, our tips on DIY spray painting furniture will help you achieve a flawless finish. Get all the information you need for a successful exterior painting project right here.
Maximizing the Lifespan of Your Exterior Paint Job Through Proper Priming
Priming is a pivotal step in the exterior painting process. By thoroughly preparing your surfaces, choosing the right primer, and applying it with care, you set the stage for a paint job that not only looks fantastic but also withstands the test of time. Remember, the effort you put into priming will pay off in the longevity and resilience of your home’s exterior finish.