Transforming a space with fresh paint can be both invigorating and aesthetically pleasing. However, the preparation process, specifically the necessity to fill holes in walls before painting, is crucial for a flawless finish. This practice not only affects the appearance but also preserves the integrity of your walls.
Why Fill Holes in Walls Before Painting
Filling holes and imperfections is the foundation of a smooth, professional-looking paint job. It ensures that the paint adheres properly and that surfaces appear even and free from unsightly blemishes. Neglecting to fill these defects can result in a subpar appearance that undermines the time and effort invested in painting.
Benefits of Filling Cracks in Exterior Wood Before Painting
Filling cracks in exterior wood before painting extends beyond aesthetics; it is critical for safeguarding the material from the elements. This preventative measure keeps moisture out, which can cause further damage and decay, and ultimately enhances the longevity and durability of the painted surface.
Choosing the Right Filler for Holes in Walls

Selecting an appropriate filler for holes in walls is a pivotal step in the wall preparation process. The choice of product can significantly affect the ease of application, drying time, and longevity of the repair.
Understanding Different Types of Wall Fillers
- Lightweight Fillers: Ideal for small, shallow repairs; they dry quickly and are easy to sand.
- Heavy-Duty Fillers: Suited for larger holes and deep cracks; they offer greater durability but may require longer drying times.
- Flexible Fillers: Perfect for areas prone to movement; they provide a resilient finish that resists cracking.
What Do You Use to Fill Holes in Walls
For most interior wall repairs, a spackling paste or joint compound is commonly used. These materials are designed to be easy to work with and sand, creating a smooth surface that is indistinguishable from the surrounding area once painted.
Step-by-Step Guide on How to Fill Holes and Cracks in Walls
Proper technique is essential when addressing wall imperfections. The right approach ensures that the filler adheres correctly and provides a seamless look after painting.
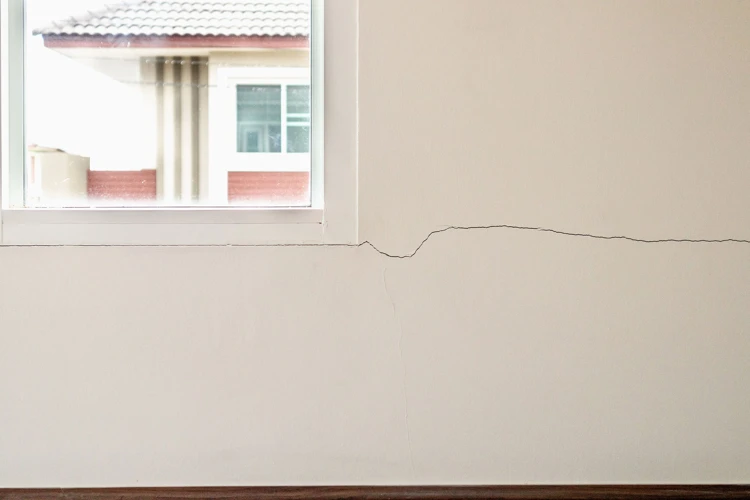
How to Repair Cracks in Walls Before Painting
- Clean the crack to remove any loose material and dust.
- Apply the filler using a flexible putty knife, ensuring the crack is completely filled.
- Smooth the surface and let the filler dry according to the manufacturer’s instructions.
How to Fix Cracks in Wood Before Painting
When addressing wood surfaces, it’s important to use a filler that is specifically designed for wood to accommodate its natural expansion and contraction. Apply the filler, smooth it out, and allow it to dry before proceeding to the next steps.
How to Fill Cracks in Walls Before Painting
Similar to repairing cracks, filling them involves a careful application of the filler, followed by smoothing and drying. For larger cracks, a second application may be necessary to ensure a level surface.
Filling Holes in Exterior Walls
For exterior applications, choose a weather-resistant filler. Clean the area, fill the hole, and then smooth the surface. Once dry, you may need to apply an additional layer to compensate for shrinkage.
Finishing Touches: Sanding and Priming Filled Areas
The final steps of sanding and priming are critical to achieving a professional finish. These processes ensure that the filled areas blend seamlessly with the surrounding surface.
Preparing the Patched Surface for Painting
Once the filler has dried completely, sand the area with fine-grit sandpaper until it is smooth to the touch. Wipe away any dust before moving on to priming.
Painting Cracks in Walls: Techniques for a Smooth Finish
Priming the repaired areas is key to ensuring that the paint color is uniform and that the filler doesn’t absorb the paint unevenly. Once primed, you can proceed with painting, using techniques that will result in a smooth, consistent finish.
Common Mistakes to Avoid When Filling Walls
Avoiding common pitfalls can make the difference between a mediocre job and a professional one. Overfilling, neglecting to clean the surface before application, and painting before the filler has dried are mistakes that can hinder the quality of your paint job.
Maintenance Tips: Preventing Future Cracks and Holes
Regular inspections and upkeep can prevent the recurrence of cracks and holes. Addressing issues as they arise, using high-quality materials, and maintaining a stable indoor environment are practices that will help preserve your walls in the long term.
FAQs on Wall Filling and Repair
How Long Should Filler Dry Before Sanding and Painting?
Drying time varies based on the type of filler and environmental conditions but typically ranges from a few hours to overnight. Always follow the manufacturer’s recommendations before proceeding with sanding or painting.
Can You Paint Over Filler Without Priming?
While it’s possible to paint directly over filler, priming is advised to ensure an even finish and prevent the paint from being absorbed unevenly.
What Is the Best Way to Apply Filler?
The best method is to use a putty knife appropriate for the size of the repair, applying the filler in thin layers and smoothing it out as you go.
Why Do Filled Cracks Sometimes Reappear?
Cracks may reappear if the filler hasn’t been applied properly, if it’s not suitable for the surface, or if there is ongoing structural movement.
When it comes to home renovations and interior design, the importance of properly filling and finishing your walls cannot be overstated. However, if you’re also considering other home improvement projects, you might be curious about their costs and processes. For instance, those looking to enhance their personal style might be interested in the cost of hair extensions, which you can learn about in our article on how much glue-in extensions are. On the other hand, homeowners may be contemplating the installation of new flooring and would benefit from our breakdown of the expenses involved in installing glue-down hardwood floors. And for those opting for vinyl options, understanding how much glue is needed for vinyl flooring can ensure a successful DIY project or help you communicate more effectively with your contractor.
When Should You Call a Professional for Wall Repairs?
If cracks are recurrent or the damage is extensive, it may be time to consult a professional who can assess the underlying issues and perform the necessary repairs to a high standard.