Have you ever looked at a plain Mason jar and wanted to add some color to it? Tinting Mason jars with Elmer’s glue is an easy and inexpensive way to brighten up any room in your home. You may be wondering how this is even possible, but don’t worry, we’ve got you covered! With just a few simple steps, you can transform ordinary Mason jars into beautiful, colorful pieces of decor. If you’re ready to learn how to tint Mason jars with Elmer’s glue, keep on reading!
Materials Needed
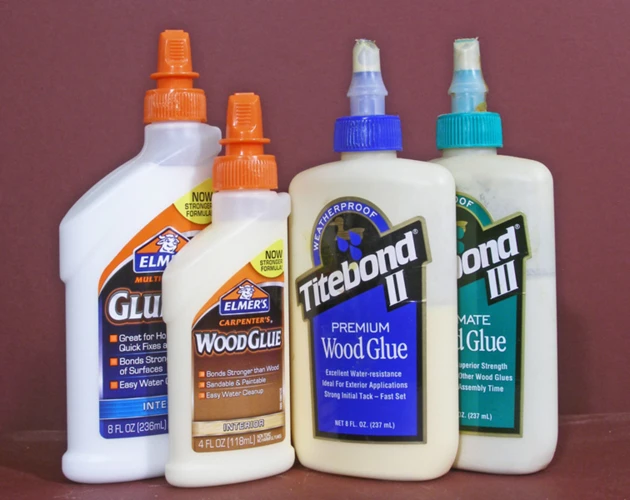
Gathering the necessary materials is the first step to successfully tinting mason jars with Elmer’s glue. For this DIY project, you will need paint, Elmer’s glue, mason jars, and some optional decorations. Fortunately, most of these materials can be found at your local craft store or online. If you’re feeling adventurous, you can even use some of the leftover glue from this project to try out some other fun DIYs, like making puffy paint or gluing pom poms onto various items. Let’s move on to the materials you’ll need for tinting mason jars.
For Tinting:
For Tinting, you will need the following materials:
- Clear, clean mason jars
- Elmer’s glue
- Water-based paint in your desired color(s)
- Bowl for mixing
- Paintbrush or sponge for application
This technique can be used with a variety of jars and bottles, so don’t be afraid to experiment with different shapes and sizes. The Elmer’s glue acts as a binding agent for the paint, creating a translucent color that still allows light to pass through. Pairing this technique with a scrapbook paper on wood craft project can make for a beautiful display.
The water-based paint ensures that the mixture will dry evenly and will not be too thick or clumpy. If you don’t have water-based paint on hand, many other types of paint should work about the same. It is important to mix the glue and paint together well so that the mixture is consistent. If you’re looking for a fun and simple project to do with kids, try making slime with glue and flour, which is a great sensory activity.
For Decoration:
For Decoration: Once your jars are tinted and dried, it’s time to add some decorative elements. There are numerous ways to decorate your mason jars, depending on the occasion or purpose. Here are a few options to consider:
- Wrap twine, ribbon, or lace around the neck of the jar and tie it into a bow for a rustic look.
- Glue on rhinestones, sequins, or glitter to add some sparkle and glamour.
- Attach faux flowers, leaves, or branches with hot glue for a natural and elegant touch.
- Paint on designs, patterns, or words with a small brush or a stencil for a custom and personalized touch.
- Layer different colored tints for an ombre effect.
- Add some charm by hanging the jars with string or wire.
These are just a few ideas to get you started. Don’t be afraid to let your creativity run wild and experiment with different materials and techniques. If you need more inspiration, you can check out other crafting projects that use glue, such as how to make slime with glue and activator only, how to make gak with glue, or how to make craft glue.
Step-by-Step Guide
Now it’s time to learn the step-by-step process of how to tint mason jars with Elmer’s glue. This process is easy to follow and will result in beautifully tinted jars that can be used as vases, candle holders, or simply as decor. Before we get started, make sure you have all the necessary materials. If you’re looking for more crafty projects, check out how to make sensory bottles with glue or how to make a bridge out of paper and glue, but for now, let’s focus on these gorgeous tinted mason jars.
Step 1: Mix Glue and Paint
To create the tint mixture, you will need to mix Elmer’s glue with paint. The amount of paint added will determine the intensity of the color of the mason jar. The recommended ratio is 1:1, meaning equal parts glue and paint. However, you may adjust the ratio according to your preference.
To properly mix the materials, follow the steps below:
| Step 1: | Squeeze a generous amount of Elmer’s glue into a mixing bowl or container. |
| Step 2: | Add an equal amount of paint to the glue. Stir the mixture thoroughly until the glue and paint are fully incorporated. You may use a paintbrush or stirring stick to ensure an even mixture. |
| Step 3: | Pour the mixture into a shallow dish or container. This will make it easier to coat the mason jar evenly. |
If you are uncertain about the color intensity, start with a small amount of paint and gradually add more until the desired color is achieved. However, be warned that adding too much paint may cause the glue to dry too quickly, making it difficult to apply to the mason jar.
Once you have achieved the desired tint, you can move on to the next step of the process. However, if you prefer a more textured finish, you may add some sand or glitter to the mixture to add some depth and sparkle to your mason jar. This step is optional but can add a unique touch to your creation.
Now that the tint mixture is ready, it’s time to apply it to the mason jar.
Step 2: Apply Mixture to Jar
Step 2: Apply the glue and paint mixture to the outside of the mason jar. Using a foam brush or a sponge brush works best for this step. You can also use a traditional paintbrush, but the finish may not be as smooth. Start at the top of the jar and work your way down to the bottom, making sure to coat the entire surface evenly.
To avoid clumps and drips, use a light hand when applying the mixture and work in small sections. You can always go back over a section that needs more coverage. Be sure to leave some clear glass visible to create a gradient effect.
If you want a more opaque look, apply a second coat after the first one has dried completely. Make sure to let the first coat dry before applying the second coat, otherwise it may cause clumps and drips.
Pro tip: If you’re having trouble getting an even coverage, try using a piece of cling wrap to smooth out any bumps or bubbles. Simply press the cling wrap onto the painted surface and then carefully remove it.
Step 3: Let Dry
After applying the mixture, it is important to let it dry completely. This typically takes around 24 hours, so make sure to plan ahead if you have a specific deadline for your project.
Here are some tips:
- Place the jar in a dry, well-ventilated area.
- Avoid touching the painted surface of the jar while it dries to prevent smudging or removing the paint.
- If you notice any bubbles or uneven spots while the glue is drying, gently press them down with a toothpick or your finger (if the glue has already started to dry).
- If you want a darker tint, you can apply a second coat of the paint and glue mixture once the first layer has dried completely.
It can be tempting to handle the jar before it is completely dry, but be patient and resist the urge to touch it or move it around. If you need to check if it’s dry, try touching a small, inconspicuous area first. Once the jar is fully dry, you can move on to the next step of your project – adding additional decorations if desired.
Step 4: Add Decoration (Optional)
If you want to take your tinted mason jars to the next level, adding decoration is a great option. Here are some ideas to get you started:
| Decoration Idea | Description |
|---|---|
| Ribbon or Twine | Tie a piece of ribbon or twine around the rim of the jar for a simple and elegant touch. |
| Glitter | Add a touch of sparkle by sprinkling glitter onto the jar while the glue is still wet. Shake off the excess and let dry. |
| Stickers or Decals | Apply stickers or decals to the jar after the glue and paint mixture has dried. This is a great option for adding a personal touch or creating a specific theme. |
| Charms or Beads | Use hot glue to attach small charms or beads to the rim or sides of the jar for extra dimension and texture. |
Remember, the decoration stage is completely optional. You may find that you prefer the simple elegance of a plain tinted jar. However, if you do choose to decorate, have fun with it and let your creativity shine. Additionally, keep in mind that some decorations may require a sealant to ensure they stay in place and last a long time.
Tips and Tricks
Now that you know how to tint mason jars with Elmer’s glue, it’s time to take your tinting skills to the next level. Here are some tips and tricks that will help you add some extra flair to your newly-tinted jars. These simple hacks will make your jars stand out and ensure that they look fantastic, no matter how you choose to use them. So, let’s dive in and learn how to take your tinting skills to the next level!
Tip 1: Use Different Colors
Using different colors is a fantastic way to make your Mason jar project stand out. Instead of using just one color, try experimenting with multiple colors to create a unique effect. For example, you can mix red and blue to create a stunning purple hue. Another unique idea is to mix different shades of the same color. For instance, you can mix different shades of blue to achieve an ombre effect.
To create a multi-colored look, you can either mix the colors together before applying them to the jar or apply one color at a time, allowing it to dry before applying the next one. You can create patterns such as stripes or geometric shapes by using tape to section off areas and painting each section with a different color.
Using different colors will make your Mason jar project more eye-catching and will add a pop of color to any room.
Here are some ideas for color combinations you can try:
- Red and yellow for a bright and cheerful look
- Pink and gray for a subtle and romantic look
- Green and blue for a calming and refreshing look
- Black and white for a classic and elegant look
Remember, the possibilities are endless when it comes to color combinations. Don’t be afraid to experiment and find what works best for you.
Tip 2: Vary the Amount of Paint in Mixture
Experimenting with different amounts of paint in your glue mixture can yield unique and beautiful results when tinting mason jars. Don’t be afraid to play around with the ratio! Depending on the color intensity you want to achieve, you may need to add more or less paint to the glue mixture.
Here are some things to keep in mind when varying the amount of paint in your mixture:
- Less is more. Adding too much paint can result in a non-transparent finish and may take longer to dry. Use a smaller amount of paint if you want a more subtle tint.
- More is less. If you want a bold and intense color, add more paint to the mixture. This will create a darker hue and may require additional drying time.
- The type of paint matters. Different paints have different consistencies and pigment levels. Consider using a high-quality acrylic paint for best results.
- Try mixing colors. By combining different colors in your glue mixture, you can create custom shades and hues. Experiment with different combinations to discover unique and beautiful tinted jars.
Remember, there is no right or wrong way to tint mason jars. Varying the amount of paint you use in your glue mixture is just one way to achieve a personalized and beautiful finished product.
Tip 3: Experiment with Different Application Techniques
When it comes to tinting mason jars with Elmer’s glue, there are several different application techniques that you can experiment with to achieve different effects. Here are some options you may want to try:
- Brushing: This is the most straightforward technique for applying the glue and paint mixture to the jar. Simply use a paintbrush to apply the mixture in long strokes, making sure to cover the entire surface evenly.
- Dabbing: To create a textured or speckled look, try dabbing the glue and paint mixture onto the jar with a sponge or a piece of crumpled-up paper. This technique can create a unique, rustic appearance.
- Layering: For a more complex design, try applying multiple layers of the glue and paint mixture in different colors. As each layer dries, add another layer on top, building up the color and texture to create a multi-dimensional effect.
- Masking: To create a design or pattern on your jar, use masking tape or stickers to cover up the areas where you don’t want the paint and glue mixture to go. Then, apply the mixture to the exposed areas and let it dry before removing the tape or stickers to reveal your design.
Remember, the more you experiment with application techniques, the more unique and personalized your colored mason jars will look. Don’t be afraid to try new things and see what works best for you.
Tip 4: Choose the Right Type of Glue
When it comes to tinting mason jars with Elmer’s glue, it’s important to choose the right type of glue to achieve the best results. Some glues may not dry clear or may not adhere well to glass, causing the paint to peel or flake off. To avoid these issues, opt for a clear-drying, strong-holding glue that is specifically designed for use on glass surfaces.
One good option is the Aleene’s Clear Gel Tacky Glue, which is a clear-drying glue that bonds quickly and securely to glass surfaces. This glue is perfect for tinting mason jars with Elmer’s glue because it provides a strong hold that will prevent the paint from peeling or flaking off. Additionally, it dries completely clear, so you won’t have to worry about any residue or streaks.
Another good choice is the E6000 Clear Industrial Strength Adhesive, which is a clear, waterproof glue that is designed to bond to a variety of surfaces, including glass. This glue is perfect for tinting mason jars because it dries clear and provides a strong, permanent hold that won’t deteriorate over time. However, it’s important to note that this glue has a strong odor and should be used in a well-ventilated area.
In addition to these glues, there are many other clear-drying, strong-holding glues on the market that can be used for tinting mason jars. When choosing a glue, look for one that is specifically designed for use on glass surfaces, has a clear finish, and provides a strong hold.
To make it easier for you to choose the right glue for tinting mason jars with Elmer’s glue, here is a table summarizing some popular options:
| Glue | Features |
|---|---|
| Aleene’s Clear Gel Tacky Glue | Clear-drying, strong-holding, bonds quickly and securely to glass surfaces |
| E6000 Clear Industrial Strength Adhesive | Clear, waterproof, strong permanent hold, designed to bond to a variety of surfaces including glass |
| Glass & Bead Glue | Clear-drying, strong-holding, specifically designed for use on glass surfaces, perfect for small projects |
| Mod Podge Clear Acrylic Sealer | Clear-drying, seals and protects painted surfaces, can be used as a glue for small decorations |
By choosing the right type of glue, you can ensure that your tinted mason jars will look beautiful and last for a long time.
Tip 5: Use a Sealant for Longevity
When it comes to tinting mason jars, you want your beautiful creations to last as long as possible. While the Elmer’s glue and paint mixture is a great way to give jars a colorful tint, it may not provide the longevity you desire. That’s where sealant comes in. A sealant is a protective coating that can help protect your jars from moisture and wear and tear over time.
There are several types of sealants available, and the right one for your project depends on a few factors. Some sealants may yellow over time, while others may dry to a glossy finish. It’s important to do your research and select a sealant that fits your needs.
To help you get started, we’ve created a table with some popular sealant options:
| Sealant Type | Finish | Drying Time |
|---|---|---|
| Mod Podge | Glossy or Matte | 15-20 minutes |
| Spray Sealant | Glossy | 30 minutes to 1 hour |
| Polyurethane | Glossy | 2-3 hours |
| Clear Nail Polish | Glossy | 10-15 minutes |
Keep in mind that each sealant may require specific application instructions and drying times. Be sure to read the labels carefully and follow the manufacturer’s instructions for best results.
Using a sealant not only helps protect your mason jars, but it can also add an extra layer of shine and polish to your finished project. So don’t skip this important step if you want your creations to last for years to come.
Conclusion
In the end, tinting Mason jars with Elmer’s Glue is an easy and creative way to add a touch of color to your home decor. It’s a fun craft that can easily be done with minimal supplies and effort. Using Elmer’s glue as the base for the paint mixture allows for a smooth and even application. Plus, it dries completely clear which gives the jar a beautiful and professional finish.
By using different colors and experimenting with application techniques, you can create a range of beautiful and unique jars that will brighten up any room in your house. Moreover, adding decorative elements such as twine, beads, or flowers can give the jars a distinct look, making them a perfect addition to your home decor or a thoughtful gift for a loved one.
Remember to always choose the right type of glue and paint that will give you the desired color, consistency, and longevity. And don’t forget to apply a sealant to ensure the longevity of your newly made decorated jars.
Now that you have learned the step-by-step guide, materials needed, and tips and tricks, it’s time to get creative and start making your very own tinted Mason jars with Elmer’s glue. Let your imagination run wild and create beautiful pieces that will add a touch of color and life to your home decor.
Frequently Asked Questions
What type of paint should I use for tinting mason jars with Elmer’s glue?
You can use any type of paint, but acrylic paint works best for this technique.
Can I use regular white glue instead of Elmer’s glue?
It is recommended to use Elmer’s glue for the best results. However, other brands of white glue may work as well.
Can I tint the jars with food coloring instead of paint?
Food coloring can be used, but it may not provide the same intensity of color as paint. It is best to experiment to find what works best for you.
How do I clean the jars before tinting?
Clean the jars with soap and water and dry them completely before starting the tinting process.
How long does it take for the glue and paint mixture to dry?
It usually takes 2-3 hours for the mixture to completely dry. However, it is best to wait overnight for the best results.
What type of decorations can I use on the jars?
You can use a variety of decorations such as twine, ribbon, flowers, or stickers. Choose decorations that complement the color of your jars.
Do I need to seal the jars after tinting?
No, it is not necessary to seal the jars. However, using a clear sealant can help prolong the life of the tinting.
Can I tint glass bottles instead of mason jars?
Yes, you can use this technique on any glass surface you like.
Can I mix glitter with the glue and paint mixture for a sparkly effect?
Yes, adding glitter is a fun way to add some sparkle and shine to your tinted jars. Just mix it in with the glue and paint mixture before applying to the jar.
Can I use this technique on plastic jars?
No, this technique only works with glass surfaces. It will not adhere well to plastic surfaces.