Introduction
As many of us have experienced, accidental spills and messes happen all the time, especially with sticky substances like Elmer’s glue. It can leave unsightly residue and be difficult to remove if not handled properly. But don’t worry, we’ve got you covered with this complete guide to removing Elmer’s glue. In this article, we will explore various methods and provide step-by-step instructions to help you effectively remove Elmer’s glue from different surfaces. So, whether it’s on your clothes or furniture, read on to learn how to tackle this pesky problem.
What is Elmer’s Glue
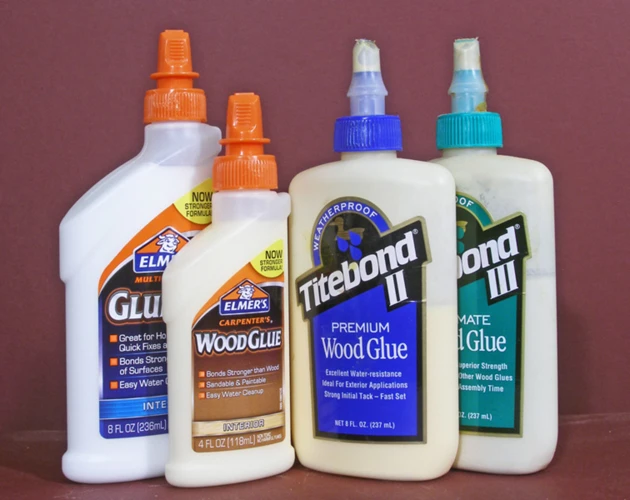
Elmer’s Glue is a popular brand of adhesive that is commonly used in school classrooms, arts and crafts, and DIY projects. Manufactured by the Borden Company, Elmer’s Glue has been in production for over seventy years and has become a household name. Elmer’s Glue is made from a mixture of water, polyvinyl acetate (PVA) and other additives that give it its unique properties. It’s known for its strong binding power and versatility in sticking different materials together. This glue comes in different forms and strengths, including school glue, glitter glue, washable glue, and more, making it suitable for a wide range of adhesive needs. Elmer’s Glue is perfect for use in paper-based projects, such as scrapbooking, bookbinding or card-making. It’s also commonly used in woodworking, such as in joinery, to glue pieces of wood together securely.
Why is it important to remove it correctly
It’s important to remove Elmer’s glue correctly to avoid damage to surfaces and prevent any potential hazards. When left unremoved, Elmer’s glue can harden and become difficult to remove, leaving behind residue and stains. Additionally, if the glue is on a surface that will come into contact with food or skin, it’s important to remove it thoroughly to avoid any potential health risks.
Improper removal methods can also cause damage to surfaces, such as scratching, discoloration, or warping. For example, using a harsh chemical solvent or scraping too aggressively can damage paint or varnish on wood surfaces. It’s important to choose the appropriate method for the surface and the type of glue, and to follow the steps correctly to avoid any damage.
Furthermore, removing Elmer’s glue correctly can save you time and money. If the glue is not removed properly, it may need to be re-done, which can result in wasted time and resources. Additionally, not following appropriate methods can lead to having to replace the damaged surface, which can be costly.
In general, it’s crucial to know the correct method for removing Elmer’s glue from different surfaces to avoid damage and ensure success.
Materials Needed
To effectively remove Elmer’s glue, you will need certain materials to make the process easy and efficient. Many of these materials can be found at home, while others may require a quick trip to the grocery or hardware store.
One of the main materials you will need is soap. Any kind of dish soap or hand soap will suffice for the removal of Elmer’s glue. Additionally, you will need warm water to mix with the soap. Water that is too hot may cause the glue to spread or stick even more, so be sure to use warm water.
Another effective material for removing Elmer’s glue is vinegar. This household item can be mixed with baking soda to create a paste that is perfect for tackling stubborn glue stains. You will also need a brush or sponge to scrub the glue away.
Rubbing alcohol is another option for removing Elmer’s glue, but it should be used with caution as it can be harsh on certain surfaces. You will need a scraper or scraper tool to help remove the glue after the rubbing alcohol has dissolved it.
Freezing is a technique that can be used to remove Elmer’s glue from surfaces as well. You will need ice or a cold pack to freeze the glue, making it easier to remove with a scraper tool.
Lastly, petroleum jelly can be used to soften the glue and make it easier to remove. This product should be applied directly to the affected area and left to sit for a few minutes before being scraped away.
Here is a list of the materials needed for removing Elmer’s glue:
– Soap and warm water
– Vinegar and baking soda
– Brush or sponge
– Rubbing alcohol
– Scraper or scraper tool
– Ice or cold pack
– Petroleum jelly
It is important to note that certain materials may work better than others depending on the surface of the glue stain. If you are unsure which material to use, do a quick Google search or refer to the manufacturer’s instructions for removing Elmer’s glue from the affected surface. For other types of glue removal, check out our articles on ‘/how-to-get-super-glue-off-dashboard/’, ‘/how-to-get-sticker-glue-off-wood/’, ‘/how-to-get-wood-glue-off-clothes/’, ‘/how-to-use-rat-glue/’, ‘/what-removes-lash-extension-glue/’, ‘/how-long-does-super-glue-last-on-skin/’, ‘/how-to-get-hot-glue-off-skin/’, ‘/petroleum-jelly-how-to-remove-super-glue-from-skin/’, and ‘/how-to-break-super-glue-bond/’.
Method 1: Soap and Water
Looking for a simple and easy way to remove Elmer’s glue? Method 1 might be your answer! With just soap and water, this method is gentle yet effective in removing the glue from various surfaces. Plus, it’s a method that most households already have the materials for. So, get ready to say goodbye to that stubborn glue stain with this step-by-step guide! And if you need to remove thread lock glue, check out our guide on how to remove thread lock glue.
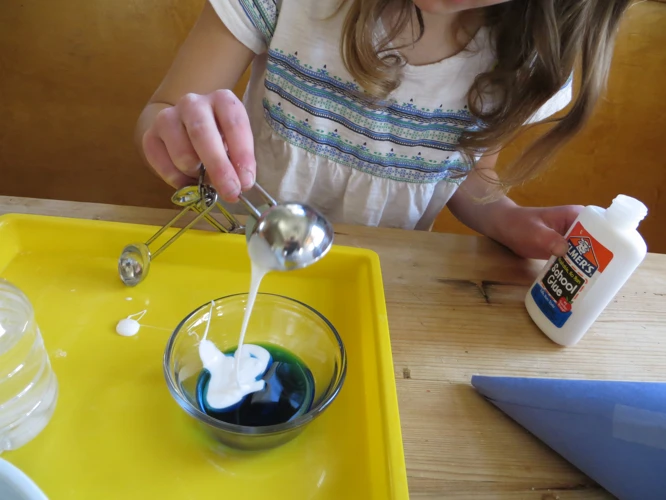
Step 1: Mix soap and warm water
To begin removing Elmer’s glue from a surface, the first step is to prepare a mixture of soap and warm water. This can be done by following these steps:
- Gather Materials: To begin with, gather all the materials required for the task, such as a bucket, warm water, liquid soap, and a scrubber or sponge.
- Fill the Bucket: Fill a bucket with warm water. Avoid using hot water as it can set the glue in place, making it harder to remove.
- Add Liquid Soap: Add liquid soap to the water and mix it until it forms suds. It is important to use a mild soap that does not contain harsh chemicals.
- Dip the Scrubber: Dip the scrubber or sponge into the soapy water mixture and wring it out until it is damp but not soaking wet.
By mixing soap and warm water, the soap acts as a powerful cleaning agent to dissolve the glue and helps to soften it, whilst the warm water makes it easier to penetrate the glue’s surface. This technique is highly effective in removing Elmer’s glue from a wide range of surfaces, from paper and fabric to wood and metal.
Step 2: Soak the area with the glue
To effectively remove Elmer’s glue from a surface, you need to start by softening the glue. One way to do this is by soaking the affected area with warm, soapy water. Follow these straightforward steps to do it right:
| Step | Action |
| 1 | Fill a bucket or container with warm water |
| 2 | Apply a generous amount of soap |
| 3 | Mix the soap and water until you have a sudsy solution |
| 4 | Submerge the affected area in the soap and water solution |
| 5 | Make sure that the area is completely covered and soaked through |
| 6 | Let the solution sit for at least 10 minutes |
Keep in mind that soaking times may vary depending on the extent of the glue residue. Be patient and give the solution enough time to work its magic. Once the glue has softened, you can proceed to the next step, which involves scrubbing the affected area with a scrubber.
Step 3: Scrub the area with a scrubber
Now that you have soaked the area with warm soapy water and let it sit for a few minutes, it’s time to start scrubbing away the Elmer’s glue. A scrubber is a tool that can help you effectively remove the glue from the surface. Here’s how to effectively scrub the area with a scrubber:
| Step | Action |
|---|---|
| Step 1 | Take a scrubber and gently rub the affected area. Be careful not to scrub too hard or too long, as this can damage the surface underneath. Use circular motions to lift and remove the glue residue. |
| Step 2 | If the glue is especially tough or sticky, add a bit more pressure to the scrubber and continue to work on the area until the glue is removed. |
| Step 3 | Remember to rinse the scrubber frequently as you work to avoid spreading the glue around or depositing it elsewhere. |
It’s important to be thorough in your scrubbing to ensure that all of the glue residue has been removed. Once you are satisfied that you have scrubbed away all of the glue, rinse the area with clean water to remove any soap residue. Finally, dry the surface with a clean towel or rag, and enjoy your newly glue-free space.
Step 4: Rinse with water
After scrubbing the Elmer’s glue with soap and a scrubber or baking soda and vinegar mixture, it’s important to rinse the area thoroughly. Here are the steps to complete this task:
- First, turn on the faucet and make sure the water is warm, not too hot or too cold.
- Hold the affected area directly under the stream of water, or use a cup or small container to pour water over the surface.
- Use your fingers or a clean cloth to spread the water over the surface.
- Continue rinsing until all foamy or soapy residue is gone.
- Dry the surface completely with a clean towel to protect it from mold and mildew growth.
Make sure you rinse all surfaces completely to avoid any residue or damage. If the soapy residue is left, it can attract dirt and dust, making the surface dirty again and potentially causing discoloration or decay over time.
Step 5: Dry the surface of remaining glue residue
Once you have rinsed off the glue and there is still some residue remaining, the next step is to ensure that the surface is completely dry. Here are the steps to follow:
- Get a clean cloth: Use a clean, dry cloth to dry the surface of any remaining residue. It’s important to use a new cloth since you don’t want to transfer any glue residue back onto the surface.
- Pat the surface: Apply gentle pressure to the surface using the cloth. Patting the surface will help to absorb any remaining moisture and remove any residue left behind.
- Let it air dry: If there is still some moisture on the surface, leave it to air dry. Be patient and wait until the surface is completely dry before using it again.
- Protect the surrounding area: Before applying the mixture, you should consider protecting the surrounding area using a plastic sheet or a clean towel. This will prevent the mixture from spreading and damaging any nearby objects or surfaces.
- Apply the mixture: Gently pour the mixture onto the affected area, making sure to cover all the glue residue. Allow the solution to penetrate the glue for a few minutes.
- Scrub the area: After the solution has had some time to react with the glue, use a brush or a sponge to scrub the area. Make sure that you use a soft-bristled brush or a non-abrasive sponge to avoid damaging the surface.
- Rinse the area: Once you have scrubbed the area thoroughly, rinse it off with warm water. Ensure that you remove all the mixture from the surface and inspect the area carefully for any remaining glue residue.
- Start scrubbing the area in circular motions.
- Apply enough pressure to lift the glue, but not too much pressure as it can damage the surface.
- If the glue is still difficult to remove, apply more of the vinegar and baking soda mixture and continue scrubbing.
- Rinse the surface with water to remove any excess mixture and glue residue.
- If there is still glue residue left, repeat the process until the surface is clean.
- It is advisable to let the alcohol sit for at least 5-10 minutes before proceeding to the next step.
- You can cover the affected area with a plastic wrap or a damp cloth to prevent the alcohol from evaporating too quickly. This will give it more time to dissolve the glue.
- For stubborn glue stains, you may have to let the alcohol sit for a longer period, say 30 minutes.
- Step 1: Wet a clean cloth or sponge with water.
- Step 2: Add a few drops of dish soap or any mild cleaning solution to the cloth/sponge.
- Step 3: Gently scrub the surface with the soapy cloth/sponge, making sure to reach any nooks and crannies where glue residue may be present.
- Step 4: Rinse the surface with clean water and wipe it dry with a towel or cloth.
- Prepare the area: Clean the area where the glue is located to ensure that there is no debris, dust, or dirt. This helps to prevent unwanted particles from freezing along with the glue.
- Freeze the glue: Place some ice or a cold pack over the glue and leave it there for about 30 minutes. This will cause the glue to become hard and brittle, making it easier to remove.
- Remove the glue: Take a scraper or something similar and gently scrape away the hardened glue. Be careful not to use any sharp objects that can damage the surface. Repeat the process if there are still glue residue or if the glue doesn’t come off easily.
- Clean the surface: Once all the glue has been removed, clean the surface with soap and water to remove any remaining glue residue or dirt.
- Step 1: Fill a bucket with warm water and add a small amount of dish soap.
- Step 2: Take a clean sponge or cloth and dip it into the soapy water.
- Step 3: Gently scrub the affected area with the sponge or cloth to remove any remaining residue from the glue.
- Step 4: Rinse the surface with clean water and a fresh cloth to remove any soap residue.
- Step 5: Dry the surface using a clean towel or allow it to air dry.
- Be patient: Depending on the amount and type of glue, it may take several minutes or even hours for the petroleum jelly to soften the glue. Do not rush this process.
- Avoid touching the affected area: The goal is to let the petroleum jelly do the work, so avoid touching or trying to scrape the glue while waiting for it to soften.
- Apply more jelly if necessary: If the petroleum jelly dries out or is not sufficiently covering the glued area, apply more jelly to keep the area moist.
- Monitor the progress: Keep an eye on the glued area to see if the glue is visibly softening. This will help you determine when it is time to move on to the next step.
- Gloves provide a physical barrier between your skin and the glue, preventing direct contact.
- Some individuals may have a sensitivity or allergy to the ingredients in the glue, and gloves can help prevent an adverse reaction.
- If you are using a method that involves the use of harsh chemicals, gloves can protect your skin from potential burns or irritation.
- Gloves can also help prevent the spread of Elmer’s glue to other surfaces or areas of your body.
- Avoid contact with your eyes and mouth when working with the glue.
- Keep the glue out of reach of children and pets.
- If the glue accidentally comes into contact with your skin, wash the affected area immediately with soap and water.
- If symptoms persist or you experience an allergic reaction, seek medical attention.
- Always read the label carefully and follow the manufacturer’s instructions.
- Wear gloves and work in a well-ventilated area.
- Test the product on a small, inconspicuous area first to make sure it won’t damage the surface.
- Apply the solvent or adhesive remover to the glue stain with a clean cloth or sponge.
- Allow the product to sit for a few minutes to give it time to work.
- Use a scraper or scrubber to gently work the solvent into the adhesive and loosen it from the surface.
- Wipe away the adhesive residue with a clean cloth or sponge.
- Clean the area with soap and water to remove any remaining residue or solvent.
Remember, it’s important to ensure that the surface is completely dry before using it again. Leaving any residual moisture could cause the glue to re-adhere to the surface, making it harder to remove in the future. By following these steps, you should be able to effectively remove any Elmer’s glue residue and have a clean, residue-free surface.
Method 2: Vinegar and Baking Soda
If you’re looking for an alternative solution to remove Elmer’s glue, the combination of vinegar and baking soda can be a viable option. This method is a natural and cost-effective way to clean up the glue residue without damaging the surface. Baking soda acts as an abrasive substance to loosen the glue while vinegar helps to dissolve it. Let’s follow the step-by-step guide to see how it works.
Step 1: Mix vinegar and baking soda
To remove Elmer’s Glue using vinegar and baking soda, you’ll need to follow a couple of steps. First, create a mixture using these two items. Here’s how:
| Step 1 | Grab a bowl and mix equal parts white vinegar and baking soda until it creates a paste. |
Vinegar is acidic and has a low pH level, while baking soda has a high pH level. When combined, they create a chemical reaction that causes fizzing, which helps break down Elmer’s Glue.
It’s essential to note that you should opt for white vinegar instead of apple cider vinegar or other types, as it’s the most effective in breaking down glue. Baking soda, also known as sodium bicarbonate, acts as an abrasive that aids in breaking the glue’s bond.
After mixing the two ingredients, the resulting mixture will obtain a thick consistency. This substance will serve as the glue dissolver, which is an affordable and eco-friendly solution for removing glue in various surfaces like wood, plastic, clothing, among others.
With vinegar and baking soda, you now have an effective DIY glue removal solution that is both cost-effective and easy to make.
Step 2: Apply the mixture on the area with glue
Once you have prepared the vinegar and baking soda mixture as explained in the previous step, you need to apply it to the area where you want to remove Elmer’s glue. Here is a detailed breakdown of this step:
By following these steps, you will be able to effectively remove Elmer’s glue from any surface using vinegar and baking soda. Remember to proceed with caution and always protect your hands and the surrounding area.
Step 3: Scrub the area with a brush or sponge
After applying the vinegar and baking soda mixture to the affected area, it’s time to scrub the surface to remove the Elmer’s glue. For this, you will need a brush or sponge.
Here are the steps to follow when scrubbing the area:
It’s important to be cautious when using a brush or sponge to avoid causing damage to the surface. It’s also important to wear gloves to protect your hands from any harsh chemicals that you may use during the process.
With patience and persistence, you can successfully remove Elmer’s glue from your surfaces using the vinegar and baking soda method.
Step 4: Rinse with water
After scrubbing the affected area, it is important to rinse it with water to ensure that all the glue and cleaning solution are removed. Follow these steps to rinse the area properly:
| Step | Action |
| Step 4.1 | Turn on the faucet and let the water flow over the affected area. |
| Step 4.2 | Use your hand or a sponge to spread the water over the surface and rinse away any residues. |
| Step 4.3 | Repeat this process several times until you are sure that the surface is clean and free of any cleaning solution or glue. |
| Step 4.4 | Dry the surface with a clean towel or cloth. |
When rinsing, make sure to use warm water as it helps to loosen and dissolve any remaining glue particles. Additionally, drying the surface of remaining glue residue using a cloth is important to ensure that the surface is completely clean and dry before attempting any further glue removal methods.
Method 3: Rubbing Alcohol
When all else fails, it’s time to bring out the big guns. Rubbing alcohol is a powerful solvent that can dissolve many types of adhesives, including Elmer’s glue. But how do you use rubbing alcohol to remove glue? The process may seem intimidating at first, but with the right tools and techniques, you can make quick work of even the most stubborn glue stains. In this section, we’ll show you how to use rubbing alcohol to remove Elmer’s glue from any surface.
Step 1: Apply rubbing alcohol on the affected area
One effective method for removing Elmer’s Glue is by using rubbing alcohol. This household item contains chemicals that can dissolve the glue, making it easier to remove. Here’s how you can use rubbing alcohol to remove Elmer’s Glue from surfaces:
| Skill Level: | Beginner |
|---|---|
| What You’ll Need: | Rubbing alcohol, Cloth or rag, Scraper or scraper tool, Soap and water |
| Time: | 10-15 minutes |
Step 1: Start by identifying the affected area and apply a generous amount of rubbing alcohol on it. You can use a cloth or rag to apply it evenly on the glue. Allow the rubbing alcohol to sit on the glue for a few minutes. This will give it enough time to start dissolving the glue, making it easier to remove.
Step 2: Next, use a scraper or scraper tool to gently remove the glue. Be careful not to apply too much pressure or force as this may damage the surface underneath. Move the scraper in a back and forth motion until the majority of the glue has been scraped off.
Step 3: Once you have removed most of the glue, use soap and water to clean the surface thoroughly. This will help to remove any remaining glue residue and ensure that the area is clean and free from any other debris or stains.
Rubbing alcohol is an effective and budget-friendly solution for removing Elmer’s Glue. Make sure to wear gloves when using this method to protect your hands. Additionally, avoid using this method on delicate or antique surfaces as it may damage them.
Step 2: Let the alcohol sit and dissolve the glue
Once you have applied rubbing alcohol on the affected area, the next step is to let it sit and work its magic in dissolving the glue. This is a crucial step in the process, and you should give it sufficient time for the alcohol to break down the glue before attempting to remove it.
Here are some tips to help with this step:
It is important to note that this step is most effective for small glue stains. In cases where you are dealing with a large amount of glue, you may have to repeat this step several times to fully dissolve the glue. Take your time and be patient, as rushing through this step can lead to unsatisfactory results.
Step 3: Use a scraper or scraper tool to remove the glue
Once you’ve let the alcohol, vinegar and baking soda, freezing agent, or petroleum jelly do its job of softening the glue, the next step is to remove it with a scraper or scraper tool. This tool is a thin, flat metal blade that is designed to scrape away glue, paint and other substances from hard surfaces without damaging them.
Here is how to use a scraper tool to remove Elmer’s glue:
| Step | Instructions |
|---|---|
| Step 1 | Hold the scraper tool at a 30-degree angle to the surface and push it firmly against the glue. |
| Step 2 | Apply even pressure and push the tool under the edge of the glue, lifting it up and away from the surface. |
| Step 3 | Use short, quick strokes to scrape away the glue, being careful not to gouge or scratch the surface. |
| Step 4 | Change the angle of the scraper tool as needed to remove glue from different parts of the surface. |
| Step 5 | Wipe away any remaining glue residue with a clean, dry cloth. |
It’s important to be gentle and patient when using a scraper tool to remove Elmer’s glue, especially on delicate surfaces such as wood, plastic, or painted walls. If you are having trouble removing the glue, reapply the solvent or adhesive remover and wait a few more minutes before trying again.
Remember, it’s always better to take your time and be careful than to rush and damage the surface. With these tips and tricks, you should be able to remove Elmer’s glue from any surface quickly and easily, leaving it looking as good as new.
Step 4: Clean the surface with soap and water
After removing the Elmer’s Glue using any of the previous methods, it is important to clean the surface thoroughly to ensure there is no sticky residue left behind. Follow these simple steps to clean the surface:
By following these steps, you can effectively remove any remaining glue and ensure that your surface is completely clean and free of any residue. It is important to clean the surface after removing the glue to prevent any damage to the surface and to maintain its appearance.
Method 4: Freezing
Sometimes, removing Elmer’s glue can be a challenging task, and the traditional methods may not work as effectively as we would like them to. This is where the method of using freezing comes in, which makes use of ice or a cold pack to make the glue brittle and easier to remove. This method works best for larger sized glue stains, and it’s a great alternative if other methods have failed. So, let’s dive into the steps and discover how to effectively remove Elmer’s glue using the freezing method.
Step 1: Freeze the area with glue using ice or a cold pack
To remove Elmer’s glue using freezing method, follow these steps:
Freezing the glue is particularly effective for larger, thicker areas of glue such as spills or drips. It works by causing the glue to freeze and become stiff, making it much easier to remove. However, it is important not to use any sharp objects to scrape the glue as this can damage the surface and create scratches. Instead, use a scraper tool or something similar that won’t scratch the surface.
Step 2: Use a scraper tool to remove the frozen glue
After freezing the Elmer’s glue with ice or a cold pack, the next step is to use a scraper tool to remove the frozen glue. Scraping the frozen glue can be more effective than attempting to remove unfrozen glue, as it will likely be hardened and less pliable.
To do this, you’ll need a scraping tool such as a putty knife or plastic scraper. Metal scrapers are not recommended as they can easily damage the surface the glue is adhered to.
Pro tip: Hold the scraper tool at an angle against the surface to prevent scratches or damage.
Using a gentle but firm pressure, begin scraping the frozen glue in a back and forth motion. You may need to apply more pressure or scrape at different angles to fully remove all the frozen glue. Be patient and avoid rushing the process to avoid causing damage to the surface.
Pro tip: If the glue is particularly stubborn and difficult to remove, consider letting it thaw slightly before continuing to scrape.
Once the frozen glue is completely removed, wipe the surface with a clean cloth or sponge to remove any remaining residue. It’s important to clean the surface thoroughly so that any remaining glue residue doesn’t dry and harden, making it even more difficult to remove in the future.
Step 3: Clean the surface with soap and water
Once you have successfully removed the Elmer’s Glue using one of the above methods, it is time to clean the surface with soap and water to ensure that all residue has been eliminated. Cleaning the surface with soap and water will help bring back its shine and prevent further buildup of dirt and grime.
To do so, follow these steps:
It is important to clean the surface thoroughly to avoid any damage or discoloration. If the surface is too delicate, use a softer brush or cloth to avoid any scratches or damage. When cleaning, avoid using harsh chemicals or abrasives that can cause further damage.
By following these simple steps, you can successfully remove Elmer’s Glue and clean the surface efficiently and safely without causing any harm. Remember to always wear gloves and use proper tools when removing glue to prevent any accidents or injury.
Method 5: Petroleum Jelly
Are you dealing with stubborn Elmer’s glue that just won’t budge? Method 5 may seem strange, but using petroleum jelly can be an effective solution. This method is especially helpful for removing glue from delicate surfaces. Keep reading to learn the step-by-step process of using petroleum jelly to remove Elmer’s glue.
Step 1: Apply petroleum jelly on the affected area
To begin removing Elmer’s glue using petroleum jelly, you’ll need to apply it to the affected area with care. Take a small amount of petroleum jelly and apply it to the glue using a spatula or scraper. Spread the petroleum jelly as evenly as you can over the glue until you have covered the entire affected area.
Ensure that you apply enough petroleum jelly to soften the glue effectively. You may need to apply more than once, depending on the size of the area and the amount of glue present. Once you apply the petroleum jelly, give it time to work; generally, five to ten minutes should suffice for the jelly to penetrate and soften the glue.
It’s important to note that the petroleum jelly works by separating the glue from the surface, so avoid rubbing the area vigorously. Wait for the petroleum jelly to work its magic, then proceed to use a scraper or scraper tool to remove the glue carefully.
Be patient while removing the glue; if it does not come off easily, reapply the petroleum jelly and wait a little longer. Repeat this process until you’ve removed all the glue. Once you’ve removed the glue, clean the surface with soap and water thoroughly to remove any residue and petroleum jelly that may be left behind.
The petroleum jelly method is an effective solution for removing Elmer’s glue from surfaces. To use this method, carefully apply petroleum jelly to the affected area, wait for it to work, and then use a scraper tool to remove the glue. Take care not to rub the area too hard to avoid damaging the surface.
Step 2: Let the jelly sit and soften the glue
After applying petroleum jelly on the affected area, it is important to let it sit and soften the glue. This is a crucial step, as impatiently trying to remove the glue can cause damage to the surface. Here are some important points to keep in mind while waiting for the jelly to work:
By following these steps, the glue should become soft and pliable, making it much easier to remove in the next step. Remember that patience is key in this process, so don’t rush and give the petroleum jelly the time it needs to work its magic.
Step 3: Use a scraper or scraper tool to remove the glue
When it comes to removing glue, using a scraper or scraper tool can be very useful. This method allows you to physically lift and remove the glue from the surface.
However, be cautious as to not damage the surface while scraping, especially if it is a delicate or soft material.
Before scraping, ensure the glue has been treated with one of the methods mentioned previously in this guide. Once the glue has softened or dissolved, take the scraper or scraper tool and gently scrape the glue in a back and forth motion.
Be patient and take your time with this process, don’t rush it as you may end up damaging the surface.
If you are unsure about using a scraper, try using your fingers to gently peel off the glue, or use a plastic putty knife to remove the softened glue.
Once the glue is removed, clean the surface thoroughly with soap and water to remove any residue. You may also want to consider using a specialized solvent or adhesive remover for tougher or stubborn glue.
To summarize, using a scraper or scraper tool can be effective for removing glue, but it must be done carefully to avoid damaging the surface. Use your fingers or a plastic putty knife if you are unsure about using a scraper. Once the glue is removed, clean the surface thoroughly to remove any remaining residue.
Step 4: Clean the surface with soap and water
After removing the Elmer’s glue using any of the above mentioned methods, it is essential to clean the surface with soap and water to remove any remaining residue.
Step 4: To clean the surface, you will need a mild soap or dishwashing liquid and warm water. Pour the soap into a container and add water to it.
Step 5: Dip a soft-bristled scrubber brush or sponge into the soapy water, and then gently scrub the surface to remove any remaining glue.
Step 6: Rinse the scrubber or sponge in clean water, and then repeat until you have removed all the glue and soap residues.
Step 7: Once you’re done scrubbing, rinse the surface with clean warm water to remove any leftover soap. Be sure to use a clean cloth or sponge and thoroughly wipe the surface to dry it off.
Remember, it is important to clean the surface only after the glue has been removed because washing the glue off with water alone won’t work. By using soap and water, you can ensure that the surface is left clean and free from any remaining sticky residue.
Below is a table summarizing the steps to follow for cleaning the surface after removing the Elmer’s glue.
| Step | Materials Needed | Action |
|---|---|---|
| Step 4 | Mild soap or dishwashing liquid | Pour soap into a container, add water |
| Step 5 | Soft-bristled scrubber brush or sponge | Dip into soapy water, gently scrub surface |
| Step 6 | Clean water | Rinse scrubber or sponge, repeat scrubbing |
| Once done, wipe down the surface with a clean cloth or sponge. | ||
By following these steps, you can easily remove Elmer’s glue from any surface and leave it clean and residue-free!
Tips and Tricks
Having trouble removing Elmer’s Glue? Don’t worry, we’ve got you covered! While the methods outlined above will go a long way in helping you achieve your desired outcome, there are always additional tips and tricks that can help make the process even easier and more effective. Here are some handy tips and tricks that you can use to help get rid of Elmer’s Glue with ease. From protecting your hands to using a scraper tool to avoid surface damage, read on to discover some useful ways to make the glue removal process a breeze.
Wear gloves to protect your hands
It is highly recommended to wear gloves when working with Elmer’s glue. This is because the glue can be difficult to remove once it dries and can adhere to your skin, potentially causing irritation or even an allergic reaction. Additionally, some of the methods for removing Elmer’s glue involve the use of strong chemicals such as rubbing alcohol, which can be harmful to your skin if it comes into contact for an extended period of time.
Here are a few reasons why wearing gloves is important:
When choosing gloves to wear, it is important to select the right type for the job. Nitrile or latex gloves are suitable options for working with Elmer’s glue. Avoid using rubber gloves as the glue can easily adhere to the surface.
Here are some additional tips when handling Elmer’s glue:
By taking the necessary precautions and wearing gloves when working with Elmer’s glue, you can help prevent any potential harm or irritation to your skin.
Use a scraper tool to avoid damaging the surface
When it comes to removing Elmer’s glue from surfaces, using a scraper tool is highly recommended. This tool can help you avoid damaging the surface you’re working on, while still allowing you to effectively remove the glue.
It’s important to choose the right kind of scraper tool for the job. A plastic scraper is ideal for delicate surfaces like glass, while a metal scraper may be more suitable for harder surfaces like wood or metal. Make sure the scraper you’re using is in good condition and free of any nicks or cracks that could cause it to scratch the surface you’re working on.
Here are some tips for using a scraper tool to remove Elmer’s glue:
| Step | Action |
| 1 | Hold the scraper tool at a 45-degree angle to the surface. |
| 2 | Gently scrape the glue away from the surface in a back-and-forth motion. |
| 3 | Be careful not to press too hard or use too much force, as this could damage the surface. |
| 4 | Continue scraping until all of the glue has been removed. |
| 5 | Clean the surface with soap and water or a mild solvent to remove any remaining residue. |
Using a scraper tool can be a great way to remove Elmer’s glue from a surface quickly and efficiently, while still protecting the surface itself. When used correctly, you can avoid damaging the material while removing the stubborn glue.
Use a mild solvent or adhesive remover for tough and stubborn glue
When dealing with tough and stubborn Elmer’s glue stains, it’s important to have some extra help on hand. One effective solution is to use a mild solvent or adhesive remover. These products are designed specifically to break down and dissolve stubborn adhesive residue.
Here are a few tips to keep in mind when using a solvent or adhesive remover:
A mild solvent or adhesive remover can be a powerful ally in the fight against stubborn Elmer’s glue stains. Just be sure to use these products with care and follow all safety precautions to avoid any damage to yourself or your belongings.
Conclusion
In conclusion, removing Elmer’s glue from various surfaces can be a daunting task, but it doesn’t have to be. With the right materials and methods, removing Elmer’s glue can become a hassle-free process. Remember to always choose the method that best suits the surface you are working on to avoid damaging the surface.
It is essential to always wear gloves to protect your hands, especially when using potent solvents or harsh chemicals like rubbing alcohol. Additionally, using a scraper tool is the most effective way of removing the glue, but one should be careful not to use a sharp or abrasive tool that can scratch or damage the surface.
If you find that the glue is stubborn and won’t come off, you can use mild solvents or adhesive removers. However, be sure to read the instructions carefully and ensure that the solvent or adhesive remover is safe for use on the surface you are working on.
Finally, always clean the surface thoroughly after removing the glue to ensure that no residue is left behind. This will also help prevent the surface from attracting dirt and other pollutants that can make it look dirty and unsightly.
In conclusion, removing Elmer’s glue is simple, but it requires patience and the right tools. By following the methods outlined in this guide, you can successfully remove Elmer’s glue from various surfaces without damaging them.
Frequently Asked Questions
1. Can I remove Elmer’s glue with just water?
Yes, you can remove Elmer’s glue with just soap and warm water. This method is best suited for small glue stains.
2. What is the best method to remove Elmer’s glue from clothing?
The best method to remove Elmer’s glue from clothing is to use rubbing alcohol. Apply rubbing alcohol to the affected area and blot with a clean cloth until the glue dissolves completely.
3. Can I remove Elmer’s glue from carpet?
Yes, you can remove Elmer’s glue from carpet by using a mixture of vinegar and baking soda. Apply the mixture to the affected area, and scrub with a brush or sponge. Rinse with water and blot dry with a clean cloth.
4. How do I remove Elmer’s glue from wood?
You can remove Elmer’s glue from wood by using a mild solvent or adhesive remover. Apply the remover to the area and let it sit for a few minutes. Then, use a scraper tool to remove the glue residue.
5. Can I use a hairdryer to remove Elmer’s glue?
Yes, you can use a hairdryer to remove Elmer’s glue from surfaces like glass or plastic. Heat the glue using the hairdryer, and then use a scraper tool to remove the glue residue. Be careful not to damage the surface.
6. Is it safe to use rubbing alcohol to remove Elmer’s glue on electronics?
No, it is not recommended to use rubbing alcohol on electronics as it can damage the surface. Instead, use a mild solvent or adhesive remover specifically designed for electronics.
7. What should I do if the Elmer’s glue stain doesn’t come off completely?
If the Elmer’s glue stain doesn’t come off completely, you can try using a mild solvent or adhesive remover specifically designed for the surface. If that doesn’t work, consult a professional for further assistance.
8. Can I prevent Elmer’s glue stains from happening?
Yes, you can prevent Elmer’s glue stains from happening by using a protective covering such as a drop cloth or plastic sheet when using Elmer’s glue. You can also wear gloves to protect your hands.
9. How long will it take to remove Elmer’s glue using the freezing method?
The freezing method can take anywhere from 30 minutes to a few hours depending on the size and thickness of the glue stain.
10. Can I use petroleum jelly to remove Elmer’s glue from my skin?
Yes, you can use petroleum jelly to remove Elmer’s glue from your skin. Apply a generous amount of petroleum jelly over the affected area and let it sit for a few minutes. Then, gently peel the glue off your skin.