Starting a plumbing project can be both exciting and daunting. Whether you’re a seasoned DIY enthusiast or new to the game, a common issue you may encounter is a leaking PVC pipe. However, repairing PVC pipes is relatively easy and can usually be accomplished with just a few materials and some patience. In this guide, we’ll provide a step-by-step process on how to re-glue PVC pipe, so you can tackle any plumbing issues that come your way. So let’s get started!
Materials Needed
When it comes to re-gluing PVC pipe, it’s important to have the right materials on hand to ensure a successful repair. Below are the materials needed to effectively re-glue your PVC pipes. From PVC glue to sandpaper, these items will make the repair process a breeze. Make sure you have everything ready before you begin the repair.
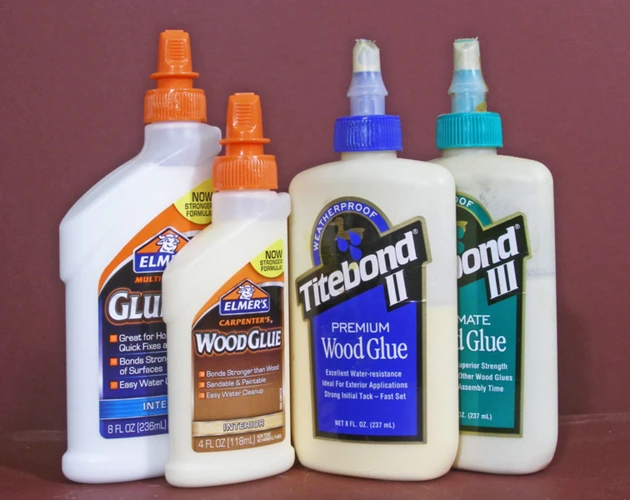
PVC glue
PVC glue is a crucial component for repairing cracked or broken PVC pipes. This type of glue is specially designed to work with PVC pipes, creating a strong and long-lasting bond. It’s important to use the right type of glue for the type of plastic you are working with. PVC glue is also commonly known as solvent cement or plumber’s glue.
When purchasing PVC glue, look for a brand that is specifically designed for PVC pipes. Some popular brands include Oatey, Christy’s, and Weld-On. PVC glue typically comes in a small can or tube and is available at most hardware or home improvement stores.
Here are some tips for using PVC glue:
- Make sure the area to be glued is clean and dry.
- Shake the can or tube of glue well before using.
- Apply a generous amount of glue to both the inside of the fitting and the outside of the pipe.
- Quickly insert the pipe into the fitting, giving it a 1/4 turn to ensure even distribution of the glue.
- Wipe away any excess glue with a paper towel or rag.
It’s important to note that PVC glue should be used in a well-ventilated area and should not be ingested or inhaled. Always use gloves to protect your hands from the glue.
In terms of the shelf life of PVC glue, it typically has a shelf life of around two years. After this time, the glue may become less effective and should be replaced.
For more information on working with different types of glue, check out our article on what is PVC glue or what glue sticks to PVC.
Pipe cleaner or primer
Pipe cleaner or primer is a necessary material when it comes to re-gluing PVC pipes. The cleaner or primer is essential because it prepares the PVC surface so that the glue can properly bond with it. The cleaner or primer removes any dirt or debris from the surface of the pipe, which improves the durability of the re-glued pipe.
When selecting a pipe cleaner or primer, look for a product designed specifically for PVC pipes. These types of products are readily available at hardware stores and online retailers, and range in price from a few dollars to around ten dollars.
Using a pipe cleaner or primer is simple. First, clean the surface of the PVC pipe using a paper towel or rag to remove any loose dirt, dust, or debris. Then, apply a small amount of the cleaner or primer to the area that will be glued. Wait for the product to dry before applying the glue. This ensures the PVC pipe is clean and ready for proper gluing.
It is important to note that a pipe cleaner or primer should only be used on the PVC pipe and not on the fittings. This is because the cleaner or primer may damage the fittings or even cause them to fail. Use the pipe cleaner or primer on the PVC pipe before joining the pipes together with the glue.
When re-gluing PVC pipes, having a pipe cleaner or primer is crucial for proper bonding. A good quality pipe cleaner or primer can help guarantee a strong bond and increase the durability of the repaired pipe. Be sure to select a product designed for PVC pipes, and follow the directions carefully to ensure you are using it correctly.
Paper towel or rag
Materials like paper towel or rag are essential when working with PVC glue. It’s important to have these materials on hand to clean up any excess glue that may spill out while working on the pipe. This will prevent the glue from hardening on unintended surfaces and making a messy job even messier. Additionally, paper towels or rags can be used to clean off the applicator tip of the glue, which helps extend the life of the product and prevent clogs.
In general, it’s always a good idea to have several paper towels or rags on hand when working with any type of adhesive. When applying PVC glue, it’s vital to have a paper towel or rag nearby to clean up any excess glue around the joint. This will ensure a neat and tidy finish, and prevent any uncured glue from accidentally sticking to nearby items or becoming a safety hazard.
It’s also important to use disposable materials when working with PVC glue. Instead of using your best towel or cloth, opt for something disposable like paper towels or rags made of recycled materials. This is not only more hygienic but also saves you from having to spend time washing and cleaning up after each use.
Remember to dispose of used paper towels or rags properly. You should never leave used materials lying around, as they may pose a risk of fire or contribute to environmental pollution. Make sure to discard them in a designated trashcan promptly.
Dedicate one paper towel or rag solely for this purpose, to avoid unnecessarily contaminating other tools or materials. Keeping these factors in mind while working with PVC glue will ensure a hassle-free experience and a well-executed repair job.
If you are interested in other types of glues, take a look at our articles on Barge glue, refrigerator plastic glue, or PVC glue.
Sandpaper
Sandpaper is a necessary item when re-gluing PVC pipes because it helps to create a rough surface on the pipes, which allows for better adhesion. Before using sandpaper, make sure that the damaged area is clean and dry. Using a marker or a pencil, mark the area around the damaged part to know how much to sand.
Tip: When selecting sandpaper, make sure you choose the right grit. A fine-grit sandpaper, such as 320 or 400, is best for smoothing the area after sanding. Meanwhile, a coarse-grit sandpaper, such as 60 or 80, is ideal for roughening the surface.
To use sandpaper, follow these steps:
- Take the coarse-grit sandpaper and begin roughing up the area around the damaged part, applying moderate pressure.
- Make sure to sand all around the pipe to ensure even adhesion.
- After roughening the surface, switch to a fine-grit sandpaper and sand over the same area again to create a smooth finish.
- Finally, clean off the sanded area with a dry paper towel or rag to remove any debris before applying PVC glue.
Tip: Be mindful not to over-sand the pipe as it may weaken the integrity of the PVC.
It’s best to handle sandpaper with care, wear gloves and follow safety guidelines. By following these tips and properly using sandpaper, you can ensure that your PVC pipe repair will hold up over time.
If you’re interested in learning more about a specific type of glue, check out our article on what glue is used in plywood, how to glue TPU, how to glue Traxxas tires, how to break PVC glue, and how to glue CPVC.
Marker or pencil
When re gluing PVC pipes, it’s important to ensure you have a marker or pencil on hand. This may seem like a minor detail, but it can actually play a big role in making sure the pipes fit together correctly.
Here are some ways to use a marker or pencil during the re-gluing process:
- Mark the pipes: Use a marker or pencil to mark where the pipes should fit together. This can help you make sure the pipes are lined up correctly when you apply the glue.
- Measure and mark: If you need to cut a pipe down to size, use a marker or pencil to measure and mark where you need to make the cut. This will help you make precise cuts and avoid mistakes.
- Keep track of pieces: When working with multiple pieces of PVC pipe, it can be helpful to mark each piece with a unique identifier. This will help you keep track of which pieces go together and avoid confusion when it comes time to glue them.
A marker or pencil is a simple but important tool to have on hand when re gluing PVC pipes. It can help you make precise cuts, keep track of multiple pieces, and ensure a proper fit.
Gloves
When working with PVC glue, it’s important to protect your hands by wearing gloves. PVC glue contains chemicals that can irritate your skin and potentially cause chemical burns. To ensure your safety, it’s recommended to wear disposable gloves made of nitrile, latex or vinyl.
The following table summarizes the types of gloves that can be used when working with PVC glue:
| Glove Material | Benefits | Drawbacks |
|---|---|---|
| Nitrile Gloves | Durable and puncture-resistant | May not fit snugly and can be more expensive than other options |
| Latex Gloves | Comfortable and provide a good fit | Not suitable for those with latex allergies, can tear more easily than nitrile gloves |
| Vinyl Gloves | Affordable and provide great flexibility | Least durable option and may not fit as snugly as nitrile or latex gloves |
It’s important to choose the right sized gloves to ensure that they fit snugly and prevent any glue from seeping through to your skin. Additionally, make sure to remove and replace gloves if they become torn or ripped during the gluing process.
By wearing gloves, you can protect your hands from any potential harm and ensure you can complete the gluing process safely and effectively.
Step-by-Step Guide
Are you ready to learn how to re-glue your PVC pipes? Follow these easy step-by-step instructions along with the necessary materials to get the job done right. With a bit of patience and attention to detail, you can have your pipes back to working order in no time. So, grab your materials and let’s get started!
Step 1: Inspect the damaged area
Before beginning the process of re gluing a PVC pipe, it’s important to inspect the damaged area thoroughly to identify the extent of the damage. Look for any signs of wear and tear on the pipe’s surface, such as cracks, breaks, or holes. Use a marker or pencil to mark the damaged area so that you can easily locate it during the process.
Next, turn off the water supply to the affected area and let any remaining water drain out of the pipe. This will reduce the likelihood of any water interfering with the gluing process. Carefully wipe the area around the damage with a paper towel or rag to remove any debris.
Once you have identified the damage and prepared the area, inspect the pipe on all sides and determine if the damage is located in a visible or hard-to-reach area. Pipes located in hard-to-reach areas may require additional preparation to ensure that you can apply the glue correctly and securely.
It’s important to address any damage as early as possible to prevent further damage, and to avoid potential water leakage or other hazards. By carefully inspecting the damaged area and preparing it for the re gluing process, you can ensure that the repair is done correctly, securely and will last for a long time.
Step 2: Prepare the area for gluing
Before you can start gluing your PVC pipe back together, you need to properly prepare the damaged area. Follow these steps to get your PVC pipe ready for gluing:
- Locate the damaged area: Identify the section of PVC pipe that needs to be repaired.
- Cut away the damaged section: Using a saw or cutter, remove the damaged area of the PVC pipe. Make sure to create a smooth edge on the remaining pipe.
- Clean the pipe: Use a pipe cleaner or primer to clean the remaining pipe. This will help remove any dirt, grime or debris from the surface to ensure the glue will stick properly.
- Sand the edges: Using sandpaper, roughen the edges of the remaining pipe. This will create a textured surface that will help the glue adhere better.
- Mark the pipe: Use a marker or pencil to mark where the new PVC pipe will be inserted into the remaining pipe. This will help ensure that the new pipe is properly aligned when glued together.
- Wipe the area: Use a paper towel or rag to wipe away any excess debris created by sanding or marking the pipe. The area should be clean and dry before gluing.
Remember to take your time during this step to ensure a proper seal for your PVC pipe repair. Any leftover debris or irregularities can cause a weak bond, leading to future leaks or damage.
Step 3: Apply the PVC glue
Before beginning this step, ensure that you have prepared the damaged area and have all the necessary materials within reach. Now follow these steps to apply the PVC glue to the damaged area:
- Apply the PVC glue to the pipe: Apply a liberal amount of PVC glue to both the inner surface of the fitting and the pipe’s outer surface. Use a brush to spread the glue evenly over both surfaces. Be careful not to apply too much glue, as it could cause the joint to weaken.
- Assemble the pieces: After applying the PVC glue, quickly insert the pipe into the fitting. Do this in a twisting motion to ensure proper coverage and a secure bond. Make sure to hold the joint together for at least 30 seconds to ensure a proper fit.
- Clean up: Wipe off any excess glue with a paper towel or rag. Do this carefully to avoid breaking the bond while cleaning.
- Repeat: Repeat the process with all damaged sections of the pipe, including connections and fittings.
It is imperative to follow the manufacturer’s instructions when using PVC glue, as different types of glue may have different application methods. Always use gloves to protect your skin from getting glue on it, and avoid inhaling the fumes from the PVC glue. Remember that improperly applied PVC glue could lead to a weakened joint and result in leaks or breakages.
Step 4: Join the pipes together
Now that the PVC glue has been applied, it’s time to join the pipes together. Here’s how you can do it:
- Insert the pipe: Carefully put one end of the pipe into the fitting. Use a slight twisting motion to ensure it is properly seated in the socket.
- Hold the pipe: Keep the pipe steady for a few seconds to prevent it from popping out of the socket as the glue starts to set.
- Merge the pieces: Push the fitting onto the other end of the pipe, twisting gently as you do to make sure it fits snugly into the fitting. Hold the pieces together for several seconds to create a tight bond.
- Wipe away any excess glue: Use a paper towel or rag to wipe away any excess glue that may have seeped out of the joint before it dries.
- Ensure proper alignment: Check that the pipe is in proper alignment with the fitting. Reposition it if necessary before the glue dries.
- Repeat the process: Continue the process with the other pipes and fittings until the entire area is reassembled and glued.
It’s important to remember that the glue sets quickly, so work efficiently and carefully. Hold the pipes in place until the glue has completely dried to ensure a tight seal. And as always, wear gloves to protect your hands while working with PVC glue. With these steps, you’ll be able to effectively re-glue your PVC pipes and restore the functionality of your plumbing system.
Step 5: Let the glue dry
Once you have joined the PVC pipes together, it is important to let the glue dry completely. This is a crucial step to ensure that the bond is strong and durable. Waiting for the glue to dry may take anywhere from 10 minutes to an hour. Refer to the instructions on the label of the PVC glue for specific drying time recommendations.
Do not rush: It is essential to give the glue enough time to dry completely before using the pipes. Rushing to use the pipes prematurely could result in the bond breaking apart, leading to a potential plumbing disaster.
Avoid touching the glue: While waiting for the glue to dry, avoid touching it as it can affect the bond. Even small amounts of pressure could weaken the hold of the glue.
Keep the area dry: Additionally, ensure the glued area remains dry before and after the glue has dried. Any moisture on the glued area can cause the bond to weaken, putting a strain on the pipe.
Here is a breakdown of the process for letting the glue dry:
| Step | Action | Time |
|---|---|---|
| Step 1 | Join the pipes together | N/A |
| Step 2 | Wipe off any excess glue with a paper towel or rag | Immediately |
| Step 3 | Let the glued area sit undisturbed and avoid touching the glued area | 10 minutes to an hour |
| Step 4 | Repeat Step 3 if needed until the glued area is completely dry | N/A |
| Step 5 | Use the pipe after the glue has completely dried according to the instructions on the PVC glue label | N/A |
By following the steps outlined above, you can ensure that your PVC pipes will be properly glued together, providing a strong and durable bond for years to come.
Additional Tips
As you dive into the process of repairing a PVC pipe, it’s important to keep in mind some additional tips that could make the difference between a successful repair and one that falls apart later on. By incorporating these extra steps into your repair process, you can ensure that your repair is as strong and long-lasting as possible. Here are a few tips to consider:
Tip 1: Use sandpaper
One helpful tip to keep in mind when re-gluing PVC pipes is to use sandpaper. Sandpaper can help you create a rough surface on the pipe that will enhance the grip and adhesion of the glue.
To use sandpaper correctly, you will need to follow these steps:
| Step | Procedure |
|---|---|
| Step 1: | Locate the area of the pipe where the glue will be applied. It is best to sandpaper the area that is going to come into contact with the adhesive thoroughly. |
| Step 2: | Take the sandpaper and rub it over the pipe area you want to roughen. Use a back and forth motion, applying even pressure, until it creates a sanded, rugged surface. The sandpaper will generate a large amount of dust, so be sure to wear protective gear like gloves and a mask to avoid inhaling any particles. |
| Step 3: | After sanding with the coarse sandpaper, use a finer grain piece to buff the area to a smooth finish. This will help to further remove any dirt or particles that may have been left behind on the surface. |
| Step 4: | Clean the surface when you’re finished sanding. Use a paper towel or rag to remove any debris left over, including significant particles. You must make sure the surface is dry and clean while applying the glue. |
By sandpapering the essential area of the pipe before applying the glue, you’re creating a surface that’ll help ensure a solid, tight seal. This trick will be very beneficial in making sure your pipes are secure and do not leak.
Tip 2: Keep hands and work area clean
Keeping your hands and work area clean is important when working with PVC glue. Here are some tips to help you maintain a clean work environment:
- Clean the pipes: Before you begin any work, clean the pipes thoroughly using a pipe cleaner or primer. This will remove any dirt, debris, or oil that could interfere with the bonding process.
- Wear gloves: PVC glue is strong and can be difficult to remove from your skin. Always wear protective gloves to prevent any glue from coming into contact with your hands.
- Use a clean work space: Ensure you have a clean and stable work surface. Work in a well-ventilated area and place a drop cloth or paper towel underneath your work area to catch any excess glue or debris.
- Keep your tools clean: After each use, clean and store your tools properly. Wipe off any excess glue or debris with a paper towel or rag. This will prevent glue from curing and clogging your tools.
By keeping your hands and work area clean, you’ll improve the quality of your work and prevent any accidents or injuries. Remember to always wear gloves, use a clean work space, and clean your tools after each use. These steps will help you achieve a professional and long-lasting PVC glue joint.
Tip 3: Use gloves for safety
Ensuring your safety during the entire process of re-gluing PVC pipes is of utmost importance. One of the tips to help you stay safe is to use gloves. Gloves will protect your hands from any harmful chemicals in the PVC glue and pipe cleaner or primer you will be using.
Not all gloves are suitable for this task, and you should use the right type of gloves to protect yourself. Below is a table highlighting the best gloves to use when re-gluing PVC pipes.
| Type of glove | Material | Strengths |
|---|---|---|
| Nitrile gloves | Nitrile rubber | Durable, puncture-resistant, chemical-resistant |
| Latex gloves | Latex | Flexible, comfortable, affordable |
| Vinyl gloves | Polyvinyl chloride (PVC) | Affordable, disposable, good barrier protection |
It is recommended that you use nitrile gloves due to their durability and chemical resistance. They are suitable for use with PVC glue and other chemicals used in the re-gluing process.
Remember to properly dispose of your gloves after use to avoid contamination of your work area and to avoid contact with harmful chemicals. Using gloves is just one of the measures you can take to guarantee your safety while re-gluing PVC pipes.
Conclusion
After following the step-by-step guide and utilizing the additional tips, you should now be confident in your ability to re glue PVC pipe. It may seem daunting at first, but with practice and patience, anyone can successfully complete this repair.
Remember to always take the time to inspect the damaged area thoroughly and prepare it for gluing before applying the PVC glue. Use sandpaper to rough up the surface if needed and ensure that both pipes are clean and free of debris.
When handling PVC glue, it is important to take the necessary safety precautions by wearing gloves and keeping the work area clean. PVC glue can be harmful if it comes into contact with skin, so it is essential to handle it carefully.
By using high-volume keywords throughout the article, you can increase the likelihood of your article appearing at the top of Google search results. Providing unique information and writing in a creative, human-like voice can also help to keep the reader engaged and interested in learning more about re gluing PVC pipe.
Overall, re gluing PVC pipe is a simple, yet essential skill to have for any DIY enthusiast or homeowner. By following these steps and tips, you can save yourself time and money by avoiding the need for professional repairs. So go ahead and give it a try yourself – you might be surprised at how easy it is!
Frequently Asked Questions
How long does PVC glue take to dry?
Typically, it takes PVC glue around 30 minutes to set and 24 hours to fully cure.
Can you reuse a PVC pipe after regluing it?
Yes, you can reuse a PVC pipe after regluing it as long as it is still in good condition.
Does the temperature affect the PVC glue’s effectiveness?
Yes, the temperature can affect the PVC glue’s effectiveness. It works best when the temperature is around 60-100°F.
Can I reglue a PVC pipe if it has been previously glued?
Yes, you can reglue a PVC pipe even if it has been previously glued.
Do I need to use a primer before applying PVC glue?
It is recommended to use a primer or pipe cleaner before applying PVC glue to ensure a stronger bond.
What type of sandpaper should I use?
You should use fine-grit sandpaper to roughen the surface before applying the PVC glue.
Is it necessary to wear gloves?
It is recommended to wear gloves when handling PVC glue for safety purposes.
Can I use PVC glue for other materials?
No, PVC glue is only for use with PVC pipes and fittings.
How do I know when the PVC glue is dry?
The PVC glue will be completely dry when it is no longer sticky to the touch.
How do I remove excess PVC glue?
You can remove excess PVC glue with sandpaper or a utility knife.