Imagine this scenario: you’re about to embark on a DIY project that requires a strong and long-lasting adhesive. You’re browsing the hardware store’s glue aisle and come across epoxy glue, but have no idea how to mix or apply it. Don’t worry! This guide will teach you everything you need to know about mixing epoxy glue like a pro. From understanding the different types of epoxy to the step-by-step process of mixing and applying it, you’ll be able to tackle any project with confidence. So, put on your DIY thinking cap and let’s dive into the world of epoxy glue!
What is Epoxy Glue?
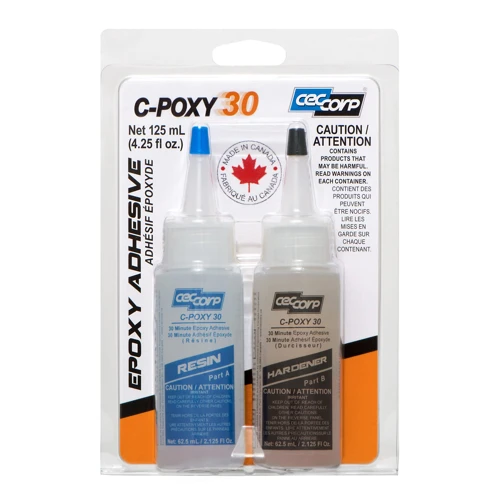
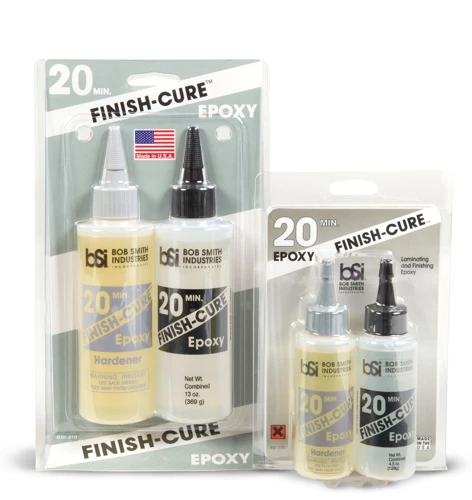
For any DIY enthusiast or professional tradesperson, epoxy glue is an essential adhesive. It is made up of two components which, when combined, create a powerful, heat-resistant, and water-resistant bond. Professional-grade epoxy glue can be used on a vast array of materials, such as metal, fiberglass, stone, and many others. In this section, we will look at the benefits of using epoxy glue and the different types available in the market. We will also discuss which types of materials are best suited to this adhesive. For more information on how to glue specific materials, check out our guides on how to glue metal to acrylic, what is the best glue for aluminum to wood, how to glue fiberglass, how to glue brass, how to glue sandstone together, how to glue reef rock together, and how to glue resin.
The Advantages of Epoxy Glue
Epoxy glue is a popular adhesive that is known for its superior strength and bonding properties. Here are some of the advantages of using epoxy glue for your projects:
- Strong Bond: Epoxy glue creates a strong, permanent bond between two surfaces. This makes it ideal for use in applications where a strong, long-lasting bond is required.
- Waterproof: Epoxy glue is highly resistant to water and moisture, making it ideal for use in wet or damp environments. It can also be used for bonding materials that will be exposed to water or other liquids.
- Heat Resistant: Epoxy glue can withstand high temperatures without degrading or breaking down. This makes it ideal for use in applications where high heat is present.
- Chemical Resistant: Epoxy glue is also highly resistant to chemicals and solvents, making it ideal for use in harsh environments where exposure to chemicals is likely.
- Easy to Apply: Epoxy glue is relatively easy to apply and can be used on a wide variety of surfaces, including metal, wood, glass, and plastic.
In addition to these advantages, epoxy glue can also be used for a variety of applications, including automotive repair, construction, and woodworking. However, it’s important to note that not all epoxy glues are created equal, and different types of epoxy glue may have different properties and applications.
If you want to learn more about other types of industrial glue, you can check out our article on what is industrial glue. Or, if you’re curious about the strength of other types of industrial glue, you can read our article on how strong is Flex Glue. Finally, if you’re wondering about the drying time of acrylic glue, check out our article on how long does acrylic glue take to dry.
The Different Types of Epoxy Glue
When it comes to epoxy glue, there are several types available on the market. Each type has its own unique characteristics and is suited for different projects. It is important to understand the differences between them to choose the right one for your project. Here are some of the most common types of epoxy glue available:
| Type of Epoxy Glue | Key Characteristics | Best Used For |
|---|---|---|
| Clear Epoxy Glue | Transparent, self-leveling, and high gloss | Crafts, jewelry making, and other projects where a clear finish is desired |
| Fast-Curing Epoxy Glue | Cures within minutes, strong and durable bond | Emergency repairs, fixing small items, and bonding materials that will not be under stress |
| Slow-Curing Epoxy Glue | Takes longer to cure, strong and lasting bond | Projects that require precision, bonding large surfaces, and materials that will be under stress |
| Steel-Reinforced Epoxy Glue | Contains steel or other metal particles for added strength | Fixing metal items, bonding metal to other materials, and heavy-duty repairs |
| Marine Epoxy Glue | Resistant to water and other harsh elements | Boat repairs, underwater projects, and other projects that require resistance to water |
Clear Epoxy Glue is a popular choice for crafts, jewelry making, and other projects where a clear finish is desired. It is transparent, self-leveling, and provides a high gloss finish. If you want to mimic the look of glass or crystal, clear epoxy glue is the perfect choice.
Fast-Curing Epoxy Glue is ideal for emergency repairs, fixing small items, and bonding materials that will not be under stress. It cures within minutes and creates a strong, durable bond. You can use it to fix a broken vase, a loose tile, or any other item that requires quick repair.
Slow-Curing Epoxy Glue takes longer to cure but creates a strong, lasting bond. It is ideal for projects that require precision, such as model making, and for bonding large surfaces and materials that will be under stress, such as furniture or construction projects.
Steel-Reinforced Epoxy Glue contains steel or other metal particles for added strength. It is perfect for fixing metal items, bonding metal to other materials, and heavy-duty repairs. If you need to fix a car part or a broken metal fence, this type of epoxy glue is the right choice.
Marine Epoxy Glue is specifically designed for boat repairs, underwater projects, and other projects that require resistance to water. It is resistant to harsh elements and can be used to fix leaks, cracks, and other problems on boats or underwater structures.
Tools and Materials
In order to successfully mix and apply epoxy glue, it’s important to have the right tools and materials on hand. Some of these items may already be in your toolkit, while others may need to be purchased specifically for this project. Let’s take a closer look at what you’ll need to get started.
What You Will Need
Before you can mix your epoxy glue, you’ll first need to make sure you have all the necessary tools and materials. Here is a list of everything you will need to get started:
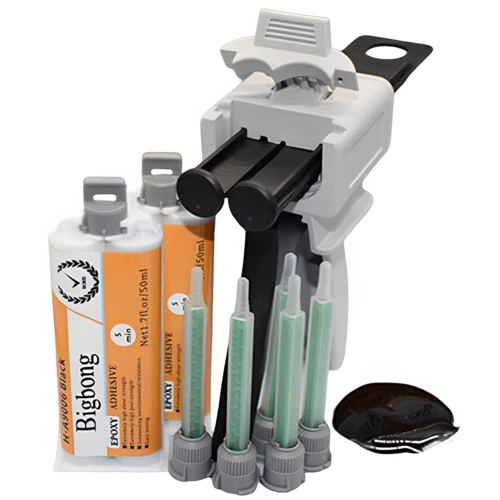
| Epoxy glue: | Make sure you have the right type of epoxy glue for your project. |
| Measuring cups: | You’ll need separate cups for the resin and hardener. |
| Stirring sticks: | These can be purchased or made from disposable materials such as popsicle sticks. |
| Spatula: | You’ll need a spatula for mixing the two parts and for applying the epoxy glue to your surface. |
| Protective gloves: | Choose gloves made from a material that is resistant to chemicals like nitrile gloves to protect your hands. |
| Protective glasses: | This will protect your eyes from any spatters or drips of epoxy during mixing. |
| Sanding paper: | You’ll need sanding paper with a fine grit for smoothing out the surface before applying the epoxy glue. |
| Cleaner: | You’ll need to clean your surface before applying the glue, so have a cleaner on hand. |
| Surface to apply epoxy: | Epoxy glue works on a variety of surfaces such as metal, wood, concrete, and plastic. |
Make sure to have all of these materials ready before starting the mixing process. It’s important to take your time and prepare everything correctly to ensure a successful project.
Mixing Epoxy Glue
When it comes to mixing epoxy glue, precision is key. The process may seem simple enough, but improper measuring and mixing can result in a weak bond or even project failure. In this section, we will break down the steps involved in mixing epoxy glue and provide helpful tips to ensure a successful adhesive bond. So, let’s dive into the nitty-gritty of epoxy glue mixing and make sure your project sticks together flawlessly.
Measurement
When it comes to mixing epoxy glue, the first step is to ensure that you have the appropriate measurements in place. Precision is key to achieving a strong and durable bond. Here are some tips for getting the measurements right:
- Use a Measuring Cup: Epoxy glue comes in two parts – resin and hardener. It is crucial that they are mixed in the exact proportions as directed by the manufacturer. This can be done accurately with the help of a measuring cup.
- Read the Instructions: Each epoxy glue product has specific measurement instructions. Be sure to read them carefully before starting the process.
- Account for Temperature: The temperature of the room can affect the viscosity of the epoxy glue and alter its mixing ratio. Consult the instructions to determine if adjustments need to be made for temperature.
- Check the Shelf Life: Epoxy glue has a limited shelf life, and using expired glue can lead to weak bonding. Always check the expiry date before measuring out the epoxy.
By following these straightforward tips, you can ensure that you have the proper measurements in place when preparing your epoxy glue mixture. Remember, taking the time to measure precisely will yield better results and a stronger bond in the end.
Mixing Ratio
The mixing ratio of epoxy glue is crucial to achieve the desired results. It’s important to follow the manufacturer’s instructions, but in general, the mixing ratio for most epoxy glue is a 1:1 ratio of resin and hardener. This means that you need to mix equal parts of resin and hardener together to activate the chemical reaction that cures the glue.
However, some types of epoxy glue may require a different mixing ratio depending on their intended use. For instance, high-performance adhesives may require a 2:1 or 3:1 ratio of resin to hardener for maximum strength and durability. Be sure to check the product label or instructions to confirm the proper ratio.
To help you with the mixing process, use a measuring tool to get accurate proportions. You can use graduated mixing cups or syringes that are marked with the proper measurement for the mixing ratio. See the table below for common mixing ratios of epoxy glue:
| Epoxy Glue Type | Mixing Ratio |
|---|---|
| Standard Epoxy Glue | 1 part resin : 1 part hardener |
| High-Performance Epoxy Glue | 2-3 parts resin : 1 part hardener |
Remember to mix the epoxy glue thoroughly and work quickly since the curing process will start shortly after mixing the resin and hardener together. Avoid mixing too much epoxy glue at once, as this may cause the mixture to overheat and harden before you can apply it.
Mixing Process
Mixing Epoxy Glue is a crucial step in achieving a strong and durable bond. Here are the steps you need to follow for a successful mixing process:
- Read the instructions: Before starting the mixing process, it is important to read the instructions carefully. This will help you understand the specific mixing ratios and curing times for the epoxy glue you are using.
- Prepare your workspace: Find a clean and well-ventilated area to work on. Also, make sure to cover your work surface with a protective layer such as wax paper or cardboard.
- Measure the components: Epoxy glue requires two components- the resin and the hardener. Measure out the exact amount of resin and hardener, as specified in the instructions.
- Mix the components: In a clean and dry container, combine the resin and hardener, using a stir stick to mix them thoroughly. It is important to make sure the mixing is even, so the glue can cure properly.
- Stirring: Stir the mixture for the recommended time mentioned in the instructions. Make sure to scrape the sides and the bottom of the mixing container to ensure an even mixture.
- Avoid air bubbles: Air bubbles can weaken your bond, so be sure to stir slowly and avoid vigorous mixing that can introduce air into the mixture.
- Apply the mixed epoxy: Once the mixing is done, apply the mixed epoxy glue to the surface using a spreader, brush or syringe, depending on the specific application.
- Clean up: Clean up your workspace and equipment using acetone or another solvent as specified by the manufacturer. Proper disposal of excess epoxy glue mixture is also essential to avoid environmental hazards.
By following these steps, you can ensure a successful mixing process and create a strong and durable epoxy glue bond. Remember to always take appropriate safety precautions and read the instructions carefully before starting any project involving epoxy glue.
Tips for Mixing Epoxy Glue
When mixing epoxy glue, there are a few tips that can help ensure that the epoxy mixture comes out smoothly and correctly. These tips can help avoid unwanted air bubbles, incorrect mixing ratios, and other common problems that can occur when working with epoxy glue. Below are some important tips to keep in mind when mixing epoxy glue.
| Tips for Mixing Epoxy Glue |
|---|
| Read the Instructions: Before beginning to mix epoxy glue, be sure to read the instructions provided on the packaging. These instructions will provide important information about the mixing ratio and other specific details that will help ensure that the epoxy glue sets properly and adheres correctly to the surface. |
| Use the Right Tools: When mixing epoxy glue, it is important to use the right tools for the job. This means using measuring cups and mixing sticks that are specifically designed for epoxy glue. Using the wrong tools can result in an incorrect mixing ratio and a less effective bond between the surfaces. |
| Mix Thoroughly: When mixing epoxy glue, it is essential to mix the two parts thoroughly. This means mixing until the mixture is consistent and even in color. Not mixing the epoxy glue enough can result in a weaker bond or an uneven surface. |
| Work Quickly: Epoxy glue has a limited working time before it begins to harden. Once the two parts have been mixed, it is important to work quickly to apply the mixture to the surface in question. Working too slowly can result in the epoxy glue hardening before it has been applied appropriately. |
| Apply Evenly: When applying epoxy glue to a surface, it is essential to apply it as evenly as possible. Using an even coat can help ensure that the surfaces bond effectively and that the final product is strong and durable. |
| Add Color: Epoxy glue can be colored with pigments to match the surface it is being applied to or to add additional decorative appeal. Be sure to add any pigment or color to the mixing cups before adding the epoxy glue to ensure an even mix. |
By following these tips and using the right tools for the job, mixing epoxy glue can be a straightforward process that results in a strong and durable bond. It is essential to read the instructions carefully and to follow the recommended guidelines to ensure the best possible outcome.
Applying Epoxy Glue
Now that you’ve mixed your epoxy glue, it’s time to apply it to your project. Applying epoxy glue can be a bit tricky, but with the right technique, you can achieve a strong bond that will last for years to come. In this section, we’ll cover everything you need to know about applying epoxy glue, from preparing the surface to the application process. So let’s dive in and get started.
Preparing the Surface
Before applying epoxy glue, it is essential to prepare the surface properly. Failure to do so may result in poor adhesion, bubbling, or other defects in the cured epoxy. Here are some steps to follow when preparing the surface:
Clean the surface: Use a clean cloth or rag to remove any dirt, debris, or dust from the surface. Any residue or contaminants left on the surface can interfere with the bonding process.
Sand the surface: Sanding the surface will create a rougher surface that will help the epoxy adhere better. Use a fine-grit sandpaper to sand the surface gently.
Clean the surface again: After sanding, clean the surface again, this time using a solvent such as acetone or isopropyl alcohol. The solvent will remove any remaining debris or contaminants and help the epoxy adhere to the surface.
De-gloss the surface if needed: Epoxy may not adhere well to glossy surfaces, so if the surface is glossy, you will need to remove the gloss before applying the epoxy. You can use a deglosser or sandpaper to remove the gloss.
Mask off any areas you don’t want to epoxy: Use masking tape or painter’s tape to mask off any areas you don’t want the epoxy to touch, such as adjacent walls or surfaces. This will ensure a clean and professional-looking finish.
Check the temperature and humidity: The temperature and humidity can affect how the epoxy cures. Make sure the temperature is within the recommended range and that the humidity is not too high, as high humidity can cause the epoxy to cure more slowly.
By following these steps to prepare the surface, you can ensure that the epoxy will adhere properly and provide a strong, durable bond that will last for years to come.
Application Process
When applying epoxy glue, it is important to follow the instructions carefully to achieve the best possible results. Below is a step-by-step guide on how to apply epoxy glue:
| Step | Description |
|---|---|
| Step 1: | Ensure that the surface to be bonded is clean and dry. Sand the surface to provide a rough texture to increase the bond strength. |
| Step 2: | Mix the epoxy glue according to the instructions provided in the mixing process section above. |
| Step 3: | Apply the mixed epoxy glue onto one surface. Use a spatula or brush to spread the glue making sure that the glue covers the entire surface evenly. |
| Step 4: | Place the second surface onto the glue-coated surface and gently press them together. |
| Step 5: | Clean up any excess glue with a clean, dry cloth or paper towel. Make sure to remove any glue that oozes out of the joint before it begins to harden. |
| Step 6: | Allow the glue to dry according to the instructions provided in the curing time section above. |
It is important to note that working time and cure time may vary depending on the type of epoxy glue used, the size of the bond, and the temperature and humidity of the work area. Always refer to the instructions provided by the manufacturer for specific information regarding the application process.
Applying epoxy glue requires a clean, dry surface, proper mixing, and even application. Following the recommended application process and allowing the glue to fully cure will result in a strong, durable bond.
Curing and Finishing
After applying epoxy glue, the curing and finishing process is crucial. Curing time and finishing techniques can impact the final strength and appearance of the epoxy bond. It is important to follow the manufacturer’s recommendations and take necessary precautions to ensure a successful outcome. Both the curing and finishing process require specific tools and techniques, and the following sections will provide all the necessary details for finishing the job in a professional and effective manner. Make sure to read through to the end, to gain insight on how to handle safety precautions throughout the process.
Curing Time
Once the epoxy has been applied to the surfaces, it’s essential to let it cure properly to ensure the bond is strong and durable. The curing time for epoxy glue mainly depends on the type of epoxy glue you’re using, the quantity you’ve applied, and the environmental conditions such as temperature and humidity.
Here are a few factors that influence the curing times:
- Type of Epoxy: Different types of epoxy have different curing times. For instance, fast-curing epoxy can dry in as little as five minutes, while slow-curing epoxy can take up to several hours or even days to dry.
- Quantity Applied: The curing time also depends on how much epoxy you’ve used. Applying too little epoxy may not cure properly, and applying too much can prolong the curing time.
- Temperature and Humidity: The ideal temperature range for curing epoxy is between 70°F to 80°F, and the humidity should be between 50% to 60%. If the temperature is too low, it can slow down the curing process, and if it’s too high, it can speed up the curing time.
Generally, epoxy glue takes 24-48 hours to cure completely, but it’s essential to follow the manufacturer’s instructions to ensure the optimal curing time. Keep in mind that applying any stress or load on the surfaces before the epoxy has fully cured can weaken the bond and affect the curing time.
Once the epoxy glue has cured, you can use sandpaper to smooth out any rough edges or excess epoxy. Additionally, you may apply a coating of paint or varnish to protect the surfaces or give them a finished appearance.
Finishing Techniques
After the epoxy glue has cured completely, there are several finishing techniques that can be employed to enhance the aesthetic appeal and functionality of the bond. Here are some techniques you can employ to properly finish your epoxy glue project:
- Sanding: After the epoxy glue has cured, sanding can be used to smooth out any rough edges or unevenness in the surface. Start with a coarse grit sandpaper and gradually work your way to finer grit sandpapers until you achieve the desired smoothness.
- Polishing: If you want your epoxy bond to have a glossy finish, you can polish the surface using a buffing wheel and polish compound. This technique is particularly useful for epoxy glue projects that serve an aesthetic purpose.
- Painting: If you desire a particular color or finish, painting over the cured epoxy glue can achieve that. However, ensure that the epoxy bond is clean and free of dust and debris before painting it.
- Apply a topcoat: To increase the bond’s durability, a topcoat can be applied over the cured epoxy glue. This technique is suitable for epoxy glue projects that will be subjected to wear and tear, such as furniture or flooring.
- Sealing: Sealing the cured epoxy bond can prevent moisture or other external elements from penetrating it. A coat of sealant can be applied using a brush or spray. This technique is particularly useful for epoxy glue projects that will be exposed to water or extreme temperatures.
The epoxy glue finishing technique you choose will depend on your project’s desired finish and the bond’s purpose. Properly finishing your epoxy glue projects not only enhances their aesthetic appeal but also increases their durability.
Safety Precautions
When working with any type of glue, it’s essential to prioritize safety to prevent any accidents or mishaps. Epoxy glue is no exception. In this section, we’ll cover some important safety precautions that you should take when working with epoxy glue. By following these guidelines, you can ensure that you and those around you remain safe and free from harm throughout the entire process. Remember, safety should always come first!
Protective Gear
When working with epoxy glue, it is important to take appropriate safety measures. The chemicals in the adhesive can cause skin irritation and respiratory problems if proper precautions are not taken. Here are some essential protective gear that you should use while working with epoxy glue:
| Protective Gear | Purpose |
|---|---|
| Gloves | To protect your skin from coming into contact with the adhesive and any potential irritants. |
| Safety glasses/goggles | To protect your eyes from the splashes of the adhesive. |
| Dust mask/respirator | To prevent inhalation of fumes or dust from the adhesive which can result in respiratory problems. |
| Apron | To protect your clothing from getting any adhesive on them. |
It is important to use gloves that are resistant to the chemicals in the adhesive. Latex gloves may not be sufficient. Nitrile gloves are recommended as they are more resistant to chemicals. Safety glasses or goggles should also be used to protect your eyes from the adhesive and any fumes or dust resulting from the adhesive.
It is recommended to use a dust mask or respirator as well as the fumes can cause respiratory problems and coughing. An apron can also be worn to keep the adhesive off your clothing, preventing any unsightly stains.
By using the appropriate protective gear, you can ensure your safety and health while working with epoxy glue. It is a small price to pay for the peace of mind that you are protected from any potential harm that may come from exposure to the chemicals in the adhesive.
Storage and Disposal
When it comes to the storage and disposal of epoxy glue, it is crucial to handle it correctly to ensure your safety and environmental protection. Here are some guidelines to follow:
Storage:
- Make sure to store your epoxy glue in a cool, dry place, away from direct sunlight and heat sources.
- Keep it in its original packaging, tightly sealed to prevent moisture from entering.
- Always check the expiration date before using the resin and hardener.
- For long-term storage, consider refrigerating the epoxy glue to extend its shelf life.
Disposal:
- Do not dispose of epoxy glue in the regular trash or down the drain as it can harm the environment.
- Check with your local waste management authority for proper disposal methods in your area.
- If you have small amounts of leftover epoxy glue, you can harden it by adding an absorbent material such as sand or sawdust, before throwing it away in the trash.
- If you have a large amount of unused epoxy glue, you may need to dispose of it through a hazardous waste disposal service.
It is important to handle epoxy glue with care and take the necessary precautions when storing and disposing of it. By following these guidelines, you can ensure your safety and contribute to a cleaner environment.
Conclusion
In conclusion, mixing and using epoxy glue requires attention to detail to achieve the best results. It is important to understand the different types of epoxy glue available and their advantages to determine the most suitable one for your specific project.
When it comes to mixing epoxy glue, accurate measurement and the correct mixing ratio are crucial for a strong and long-lasting bond. The mixing process should also be carefully followed, and any tips and tricks for mixing provided by the manufacturer should be taken into consideration.
Applying the mixed epoxy glue to a properly prepared surface is also essential for a successful outcome. Taking the time to prepare the surface and following the correct application process will ensure that the glue sets properly and forms a strong bond.
After the application process, it is important to give the epoxy glue enough time to cure properly before subjecting it to any stress or impact. Once cured, any finishing techniques can be applied to give the surface a smooth and professional finish.
Last but not least, safety precautions should always be observed when handling and using epoxy glue. Wearing protective gear and ensuring proper storage and disposal of any leftovers are critical to avoid any adverse effects on human health or the environment.
Overall, with the right tools, materials, and attention to detail, mixing and using epoxy glue can be a rewarding and effective way to bond materials together for any DIY or professional project.
Frequently Asked Questions
What is the difference between epoxy glue and regular glue?
Epoxy glue is a two-part adhesive that is known for its strength and durability. Regular glue, on the other hand, is a one-part adhesive that is less strong and not ideal for bonding certain materials.
Can epoxy glue be used on any surface?
Epoxy glue can be used on a variety of surfaces including wood, metal, plastic, and ceramics. However, it may not be suitable for use on certain types of rubber or silicone.
How long does it take for epoxy glue to cure?
The curing time for epoxy glue can vary depending on the specific product and application. Generally, most epoxy glues will fully cure within 24-48 hours.
Can I sand epoxy glue after it has cured?
Yes, you can sand epoxy glue after it has cured. However, it is important to wear protective gear and work slowly to avoid damaging the surface or creating large amounts of dust.
Is it possible to use too much epoxy glue?
Yes, using too much epoxy glue can result in a weaker bond and longer curing time. It is important to follow the instructions carefully and use only the recommended amount for your specific project.
Can epoxy glue be used for outdoor projects?
Yes, there are epoxy glues available that are specifically designed for outdoor use. These products are resistant to UV rays and moisture, making them ideal for projects that will be exposed to the elements.
Can epoxy glue be used for pottery repair?
Yes, epoxy glue can be used to repair pottery. However, it is important to choose a product that is safe for use with food or to avoid using the repaired item for food or drink.
Can epoxy glue be used for car body repair?
Yes, there are epoxy glues designed for use in car body repair. However, it is important to choose a product that is compatible with the specific materials and conditions of your car.
Is it safe to use epoxy glue without protective gear?
No, it is important to wear protective gear such as gloves and goggles when using epoxy glue. The fumes can also be harmful, so it is important to work in a well-ventilated area.
How should epoxy glue be stored?
Epoxy glue should be stored in a cool, dry place away from direct sunlight or heat sources. It is important to keep the cap tightly sealed and to avoid storing it near food or drink items.