Woodworking is a hobby that requires attention to detail and the right materials to create beautiful and long-lasting pieces. One important component of woodworking is the use of strong wood glue to bond pieces of wood together. While there are various types of wood glue available in the market, it is possible to make your own strong glue for wood with just a few simple ingredients. In this comprehensive guide, we will explore the different types of wood glue, the advantages of making your own, and provide a step-by-step guide on how to make strong glue for wood. So, roll up your sleeves, gather your ingredients, and let’s get started!
Understanding Wood Glue
Wood glue is an essential adhesive for any carpentry project. It is used to bond two pieces of wood together, creating a strong and durable joint. Understanding the characteristics of wood glue can help you choose the right type for your project, and ensure that your joint remains secure over time. There are several types of wood glue available, each with its unique properties. Additionally, making your own wood glue can be an affordable and efficient solution for your project. In this article, we will explore the different types of wood glue and the advantages of making your glue, as well as giving a step-by-step guide on how to make strong glue for wood.
Types of Wood Glue
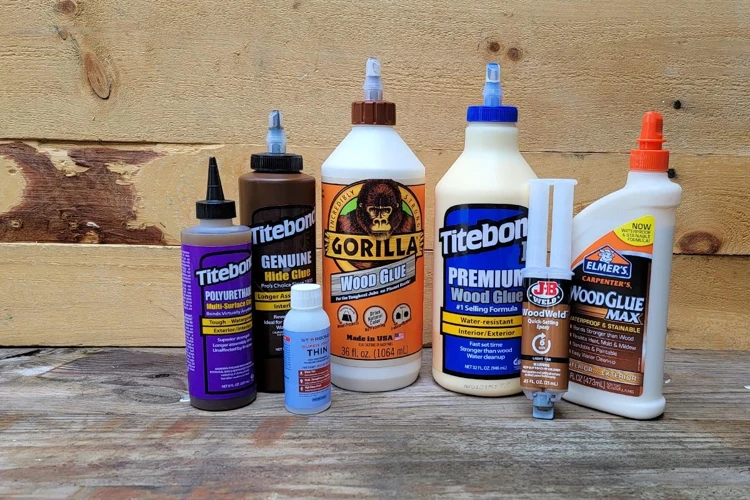
When it comes to woodworking, selecting the proper wood glue is fundamental to the success of your project. There are several types of wood glue available in the market, each possessing different properties and characteristics. Choosing the appropriate glue for your woodworking application can mean the difference between a sturdy and long-lasting joint or a failed woodworking project that will come apart easily.
To help you select the type of wood glue that best suits your project, we’ve compiled a list of the most common types of wood glue along with their properties.
| Type of Wood Glue | Property |
|---|---|
| PVA Glue | A popular choice for woodworking projects due to its high bonding strength, easy application, and fast drying time. PVA glue is perfect for general woodworking tasks. |
| Hide Glue | A traditional glue made from animal hide, hide glue is known for its exceptional bonding strength and is commonly used for musical instruments and antique furniture restoration. |
| Polyurethane Glue | A waterproof glue that bonds strongly to a wide variety of surfaces, including metal, concrete, and plastic. It’s ideal for outdoor wood projects or wood projects exposed to moisture. |
| Epoxy Glue | A two-part glue made by mixing a hardener and a resin. Epoxy glue is known for its superior bonding strength and resistance to water, heat, and chemicals. It’s an ideal choice for repairing damaged furniture. |
It’s essential to understand the different types of wood glue available in the market to make an informed decision when selecting the appropriate glue for your project. However, if you are looking for a more affordable option for your woodworking project, PVA glue is an excellent option for general woodworking tasks.
Advantages of Making Your Own Wood Glue
Advantages of Making Your Own Wood Glue
Making your own wood glue offers several advantages over buying pre-made glue from the store. To start with, homemade glue can be much stronger and more effective than store-bought glue. Homemade glue is also much cheaper than buying it from a store, and it allows you to have control over the ingredients you use.
Here are some of the advantages of making your own wood glue:
| Advantages | Explanation |
|---|---|
| Eco-friendly | You can use natural ingredients and avoid harsh chemicals, making your glue more eco-friendly. |
| Cheap | You can save money by buying ingredients in bulk and making your glue in large quantities. |
| Customizable | You can customize your glue formula to suit your needs and the type of wood you are bonding. |
| Stronger Bond | You can make a stronger bond between pieces of wood because you can control the ingredients and ratios used. |
| Faster Drying Time | Some homemade wood glue recipes dry faster than store-bought glue, reducing the amount of time your project takes. |
| Less Toxic | Homemade glue is often made with natural ingredients that are less toxic than store-bought glue. |
By understanding the advantages of making your own wood glue, you can choose to make your own the next time you need to bond pieces of wood together. Not only will you save money, but you’ll also have a great sense of satisfaction knowing that you’ve made something strong and effective with your own two hands. If you want to learn more about how to use and thin epoxy glue, check out our article “How to Thin Epoxy Glue”.
Step-by-Step Guide on How to Make Strong Glue for Wood
Now that you understand the basics of wood glue and the benefits of making your own, it’s time to dive into the step-by-step process of making strong glue for wood. With just a few ingredients, you can create a reliable adhesive that will bond your wood projects with ease. Follow these instructions closely and you’ll have a high-quality glue in no time. And if you’re interested in other types of glue or bonding materials, check out our guides on goop glue, gluing paper to metal, or bonding soapstone to name a few. But for now, let’s get started on making your own wood glue.
Step 1: Gather Your Ingredients
Gathering ingredients is the first step towards making strong glue for wood. Before moving on to the actual process of making the glue, it is important to gather all the necessary ingredients. Here is a list of ingredients that you will need to make homemade wood glue:
- 1 cup of powdered resin
- ¾ cup of water
- ¼ cup of white vinegar
It’s essential to use only high-quality ingredients in order to ensure the best possible result. It is recommended to buy the ingredients from a trusted supplier and to check the expiration date of the powdered resin before using it. If the ingredients are not fresh, there is a high chance that the glue will not be as strong as it should be.
Step 2: Mix 1 Cup of Powdered Resin with ¾ Cup of Water
To start making your own strong glue for wood, you will need to gather 1 cup of powdered resin and ¾ cup of water. The powdered resin is a common adhesive material used for bonding wood. It contains a thermosetting polymer known as urea-formaldehyde, which when mixed with water forms a strong bond. This type of glue is commonly used because it’s quick-drying, water-resistant, and has a strong bonding capability.
To mix the powdered resin and water:
| Ingredients: | Amounts: |
|---|---|
| Powdered Resin | 1 cup |
| Water | ¾ cup |
1. First, take a medium-sized mixing bowl and add a 1 cup of powdered resin to it.
2. Next, add ¾ cup of water to the bowl and use a whisk or spoon to mix the two ingredients together.
3. Continue mixing until the mixture becomes smooth and free of any lumps.
4. Make sure to mix in the water slowly to avoid splashing or spilling any of the mixture.
5. Keep mixing until the mixture becomes thick and creamy.
Tip: Mixing the powdered resin with water can be a bit tricky as the mixture may become clumpy or lumpy. However, if you find that the mixture is still lumpy, try to break them up with the back of a spoon or a whisk. Doing this should make the consistency smoother and easier to work with.
Once you have mixed your powdered resin and water together, it’s time to move on to the next step of the process.
Anchor text: If you want more information about using epoxy glue, click here.
Step 3: Add ¼ Cup of White Vinegar to the Mixture
After you have mixed the powdered resin and water, the next step is to add white vinegar to the mixture. White vinegar helps to improve the adhesive properties of the glue and also acts as a preservative to extend the shelf life of the glue. To make strong glue for wood, add ¼ cup of white vinegar to the mixture and stir well.
It is important to use white vinegar as it is less harsh and acidic compared to other types of vinegar. This ensures that the vinegar does not damage the wood fibers and affect the strength of the bond. Additionally, you should also ensure that you get the measurements correct to prevent the glue from becoming too weak or too strong.
Once you have added the vinegar to the mixture, you should continue stirring until the mixture is well combined and homogeneous. The vinegar should be evenly dispersed throughout the mixture to ensure that the adhesive properties are optimized.
In case you are wondering why vinegar is used, it is because the acidity of vinegar helps to break down the cellulose fibers present in the wood, creating a better surface for the glue to adhere to. This results in a stronger bond between the wood fibers and the glue.
After the vinegar has been added, proceed to the next step of bringing the mixture to a boil. For more tips and tricks on making strong glue for wood, check out our article on how to use epoxy glue, how to glue wood to brick, and how to glue a lawn mower seat back on.
Step 4: Bring the Mixture to a Boil
To bring the mixture to a boil, you’ll need to use a pot and a stove. Follow the steps below to successfully bring the mixture to a boil:
| Step: | Action: |
| 1 | Place the pot with the mixture onto the stove. |
| 2 | Turn the stove heat to high. |
| 3 | Stir the mixture continuously while it heats up. |
| 4 | Keep stirring until the mixture starts to boil. |
| 5 | Once the mixture is boiling, reduce the stove heat to medium-low and let it boil for 5-10 minutes. |
It’s important to stir the mixture continuously to prevent it from sticking to the pot and burning. Boiling the mixture helps to activate the resin powder, creating a strong adhesive that will bond the wood together.
Keep in mind that boiling the mixture will produce strong fumes that can be dangerous to inhale. It’s best to work in a well-ventilated area and wear a protective mask if necessary.
Once you’ve allowed the mixture to boil for 5-10 minutes, you’re ready to move on to the next step.
Step 5: Let the Mixture Cool Down
Step 5: Let the Mixture Cool Down:
After boiling the mixture, it is important to let it cool down to room temperature. This will take some time, so be patient and avoid the temptation to use the glue while it is still hot. Here are some key points to keep in mind when letting the mixture cool down:
- Be sure to remove the mixture from the heat source immediately once it has boiled. This will prevent the mixture from overcooking and producing a burnt smell or flavor.
- A good way to let the mixture cool down is to pour it into a clean container with a lid and let it sit undisturbed for a few hours or overnight. This will allow the mixture to cool down slowly and naturally.
- Don’t try to speed up the cooling process by placing the container in the fridge or freezer. This could cause the mixture to separate or solidify, making it unusable.
- While the mixture is cooling, it may develop a skin on top. Don’t worry, this is normal. You can simply remove the skin before using the glue.
Important: The glue should only be used once it has completely cooled down. Attempting to use the glue while it is still hot could result in a weak bond and could even damage your wood!
By following these simple steps, you can ensure that your homemade wood glue is strong and effective. Once the mixture has cooled down, you can move on to the final step and start bonding your wood with confidence. But first, be sure to check out our tips and tricks for making strong glue for wood.
Step 6: Use the Glue to Bond Your Wood
Now that you have successfully made your own strong glue for wood, it is time to put it to use. Follow these steps to properly bond your wood:
- Prepare the surface: Ensure that the surfaces you are bonding are clean and free of any debris. Use sandpaper to roughen the surface slightly for better adhesion.
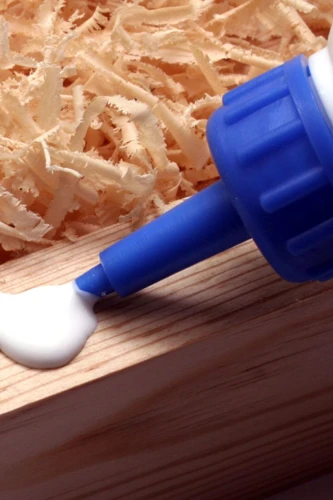
- Apply the glue: Use a brush or a dropper to apply a thin layer of glue on one of the surfaces. Be careful not to apply too much glue as it can cause the wood to warp and take longer to dry.
- Press the surfaces together: Align the two surfaces that you want to bond together and apply pressure to firmly press them together. Use clamps to hold the surfaces in place while the glue dries.
- Wipe away any excess glue: Use a damp cloth to wipe away any excess glue that may have squeezed out of the joint while pressing the surfaces together.
- Let the glue dry: Allow the glue to dry for at least 24 hours before handling the wood. The drying time may vary depending on the temperature and humidity conditions.
By following these steps, you will be able to create a strong bond between pieces of wood using the homemade glue that you have made. Remember to use caution when bonding your wood to ensure that you have a successful and long-lasting bond.
Tips and Tricks for Making Strong Glue for Wood
As with any DIY project, making your own wood glue requires some trial and error. However, by following our step-by-step guide outlined previously, you’ll be well on your way to creating the perfect adhesive for your woodworking needs. To help ensure your glue is as strong and effective as possible, we’ve compiled some tips and tricks that will take your adhesive to the next level. From using a double boiler to properly applying the glue, these tips will set you up for success and make your woodworking projects a breeze. So, let’s dive into the details and ensure your glue is the best it can be.
Use a Double Boiler If You Don’t Want to Boil the Mixture Directly
If you’re hesitant about boiling the mixture directly, no worries! There’s a solution – using a double boiler. This is a great option to ensure that your homemade wood glue doesn’t burn or overheat. A double boiler is a kitchen tool that consists of two pots placed one within the other, with water in the outer pot and the mixture to be heated in the inner pot. Here are some key benefits of using a double boiler:
- Less Risk of Burning: With a double boiler, there is less risk of burning the mixture because it is not in direct contact with the heat source.
- Better Temperature Control: A double boiler allows for better temperature control as the heat is evenly distributed. This is especially important if you are working with heat-sensitive ingredients.
- Prevents Overheating: Using a double boiler prevents overheating, which can result in the loss of some of the ingredients’ beneficial properties.
To use a double boiler for making wood glue, fill the outer pot with water and heat it until it boils. While the water is heating up, prepare the mixture as instructed in Steps 1-3. Once the water has boiled, reduce the heat to low and place the inner pot containing the mixture on top of the outer pot. Stir the mixture constantly until it comes to a boil. Then, remove the inner pot from the heat and let it cool down before using the glue to bond your wood. Using a double boiler is an excellent way to ensure that your homemade wood glue is heated correctly and won’t lose any of its beneficial properties.
Store Your Homemade Wood Glue in an Airtight Container
Keeping your homemade wood glue fresh is essential if you want it to remain effective. One way to do this is to store it in an airtight container. This will prevent air and moisture from affecting the glue’s composition, ensuring that it stays strong and sticky for future use.
Here are some tips on how to properly store your homemade wood glue in an airtight container:
- Choose the right container: Make sure to choose a container with a tight-fitting lid that seals completely, such as a glass jar or plastic container.
- Label your container: Clearly label your container with the date of creation and the type of glue you made. This will help you keep track of its freshness and ensure you use the right glue for each project you tackle.
- Keep it in a cool, dry place: Store your glue container in a cool, dry place, such as a pantry or cupboard. Avoid storing it in direct sunlight or areas with high humidity or extreme temperatures, as this could affect the glue’s composition and reduce its effectiveness.
- Store it away from children and pets: Make sure to store your homemade wood glue away from curious children and pets who could potentially ingest it.
By following these tips, you can ensure that your homemade wood glue remains fresh and effective for future woodworking projects. Remember, a well-stored glue can save you time, money, and frustration on your next project.
Don’t Apply Too Much Glue When Bonding Your Wood
When it comes to bonding wood together using homemade glue, one of the most common mistakes people make is applying too much glue. This not only makes the process messy and harder to handle, but it can also lead to weaker bonds.
Here are some tips to avoid applying too much glue:
- Measure the amount of glue needed: Before applying any glue, make sure to measure the amount you need to avoid over-application.
- Apply the glue with a brush or roller: Using a brush or roller to apply the glue can help spread it evenly and avoid using too much at once.
- Apply glue to only one surface: Instead of applying glue to both surfaces, apply it only to one surface and then press the two surfaces together. This will help prevent over-application.
- Use a glue spreader: A glue spreader can help distribute the glue evenly and prevent over-application. It can also help save on glue usage, which is great for those on a budget.
By following these tips and avoiding over-application, you can ensure strong and long-lasting bonds when bonding wood together using homemade glue.
Make Sure Your Wood Is Clean Before Applying Glue to It
One of the key factors in making strong glue for wood is ensuring that your wood is clean before applying the glue. Even the smallest amount of dirt or debris can weaken the bond and cause your project to fail. Here are some steps you can take to make sure your wood is clean before applying glue:
| Step | Action |
|---|---|
| Step 1 | Remove any loose dirt or sawdust from the surface of the wood using a soft-bristled brush or a piece of cloth. |
| Step 2 | Wipe the surface of the wood with a tack cloth to remove any remaining dust or debris. A tack cloth is a specialized type of cloth that is slightly sticky and designed specifically for removing dust and debris from surfaces. |
| Step 3 | If there is any wax or oil on the surface of the wood, use a solvent to remove it. You can use mineral spirits, denatured alcohol, or a specialized wax and oil remover. Apply the solvent with a clean cloth and then wipe it away with a separate clean cloth. |
| Step 4 | Inspect the wood for any cracks or defects. Use a putty knife to fill any cracks or gaps with wood filler. Allow the filler to dry completely before sanding it smooth. |
| Step 5 | Sand the wood to create a rough surface area which will help the glue adhere better to the surface. Use sandpaper to do this. You can start with 100-grit sandpaper and work your way up to 220-grit sandpaper for a smooth surface area. |
By following these steps, you will ensure that your wood is clean and ready to be bonded with the homemade glue created using the step-by-step guide mentioned earlier. Taking the time to properly clean the wood will increase the strength of the bond and result in a more secure and long-lasting project.
Use Clamps to Keep Your Wood in Place While the Glue Dries
When you’re bonding two pieces of wood together, it’s important to keep them in place while the glue dries. This is where clamps come in handy. Clamps are a tool used to hold two things in place while a bond is created between them. They are especially useful for woodworking projects. Here are some tips on using clamps for woodworking:
| Tip | Description |
|---|---|
| Choose the Right Size Clamp | Choose a clamp that is large enough to hold your wood in place, but not so large that it will warp the wood. Clamps come in various sizes and strengths, so make sure to choose the appropriate one. |
| Apply Even Pressure | When using clamps to hold your wood in place, make sure to apply even pressure across the entire surface. This will ensure that the bond created by the glue is strong and even. |
| Space the Clamps Out Evenly | When using multiple clamps, make sure to space them out evenly along the length of the wood. This will create an even distribution of pressure and help prevent the wood from warping. |
| Protect the Wood | When using clamps, make sure to protect the wood from damage. Use blocks of wood or scrap material between the clamp and the wood to prevent denting or damaging the wood surface. |
| Leave the Clamps in Place | Once you’ve applied the clamps, leave them in place until the glue dries completely. This will ensure that the bond is strong and secure. |
Using clamps is an important step in creating a strong bond between the two pieces of wood. Make sure to follow these tips to ensure that your woodworking project is a success.
Conclusion
In conclusion, making your own strong glue for wood can provide numerous benefits such as cost-effectiveness, customization, and reliability. By understanding the various types of wood glue available and the method to create your own, you can ensure that you have the most appropriate and effective wood glue for your project.
Using the step-by-step guide outlined above, you can quickly and easily make your own strong wood glue with just a few simple ingredients. Be sure to follow the tips and tricks provided to achieve the best results possible.
It is important to note that while making your own glue for wood can be a great option, it may not be suitable for all projects or materials. Therefore, it’s essential to consider your specific needs before deciding on the best glue to use.
Ultimately, whether you choose to make your own wood glue or go for a store-bought option, the key to success is in understanding your materials and using the appropriate bonding technique. So, choose wisely and happy crafting!
Frequently Asked Questions
What is the strongest wood glue?
The strongest wood glue is usually considered to be epoxy, which is a two-part adhesive that chemically bonds with the wood and creates a very strong and durable bond.
How do you remove wood glue?
To remove wood glue, you can use a scraper or sandpaper to scrape away the excess glue. You can also use a heat gun to soften the glue and make it easier to remove.
Can you make wood glue from scratch?
Yes, you can make wood glue from scratch using ingredients like resin and vinegar. This homemade glue can be just as strong as store-bought wood glue.
What kind of wood glue is best for outdoor use?
A waterproof wood glue like polyurethane glue or epoxy is best for outdoor use, as it can withstand exposure to water and the elements.
How long does wood glue take to dry?
The drying time for wood glue can vary depending on the type and brand of glue. Most wood glues take anywhere from 30 minutes to several hours to dry completely.
Can you use wood glue on painted wood?
No, wood glue should only be used on bare wood surfaces, as it will not adhere properly to painted surfaces.
Can you sand wood glue?
Yes, you can sand wood glue once it has dried. However, be sure to wait until the glue is completely dry before sanding, or it may gum up and clog your sandpaper.
How do you make wood glue dry faster?
You can make wood glue dry faster by applying heat to the glued area with a heat gun or hair dryer set on low heat. Be sure to keep the heat source moving to avoid scorching the wood.
Can you stain wood after using wood glue?
Yes, you can stain wood after using wood glue, but it is important to wait until the glue has completely dried and sanded smooth before applying the stain.
How do you store wood glue?
Store wood glue in a cool, dry place, preferably in an airtight container to prevent it from drying out or evaporating. It is also important to keep the glue out of reach of children and pets.