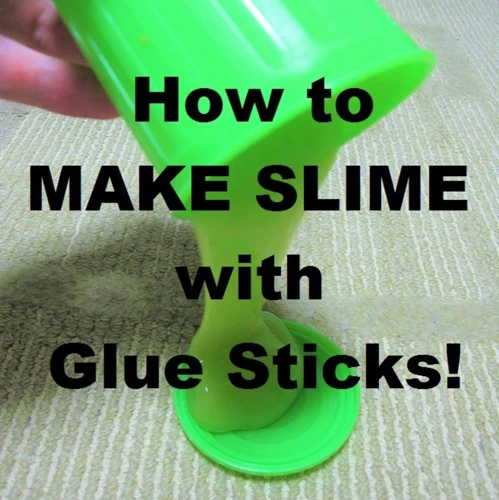
Have you ever wondered how to make slime at home? Maybe you’ve seen your friends playing with it, or you’ve stumbled upon a viral slime video on social media, and now you’re curious to try it yourself. The good news is, making slime is easy and fun! All you need are a few basic ingredients and some creativity to create your own unique slime creations. In this article, we’ll guide you through the process of making slime glue and activator step-by-step, and provide some tips and tricks for perfecting your slime-making skills. So, roll up your sleeves and get ready to dive into the world of DIY slime!
What is Slime and Why DIY?
Slime has become one of the trendiest and most entertaining do-it-yourself (DIY) projects out there. The internet is packed with videos of people playing with and making slime in various textures and colors. But, what exactly is slime, and why has it become such a big hit in the DIY community? In this section, we will explore the definition of slime and the reasons why people are looking for ways to make it at home. So, let’s dive in and explore the sticky world of slime! If you’re interested in the glue needed for making slime, check out our article on how to open Elmer’s Glue-All.
What is Slime?
Slime is a fun and popular toy among kids and adults alike. It is a viscous, gooey substance that can be stretched, squeezed, and molded as per the desire. Slime is satisfying to play with and can also be used for various activities such as stress relief, art, and science experiments. It is also an excellent tool for sensory play and can help in the development of fine motor skills.
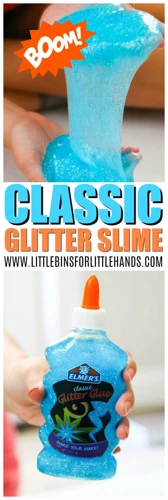
There are several types of slime available in the market, including clear slime, glitter slime, opaque slime, and more. However, making DIY slime at home can be just as fun and cost-effective as buying it in stores. Not only does it save money, but homemade slime also allows for more creativity and experimentation, as per one’s desire.
Ingredients used to make slime can vary based on the recipe and desired consistency. However, the basic ingredients for most slime recipes are glue and an activator. Glue is used as the base for slime and gives the slime its texture, while the activator helps solidify the glue molecules and turns it into slime.
There are various methods and recipes available for making slime at home. Some use contact lens solution, while others use baking soda and vinegar as an activator. Making slime can be a fun and educational activity for kids, and it can also be a bonding experience for parents and children to do together.
No matter what type of slime you choose to make, be sure to follow the recipe carefully and use the correct proportions of ingredients. Using the right type of glue and activator can make a huge difference in the quality and consistency of the slime. Always remember to double-check the ingredients before beginning the process to ensure a smooth and stress-free experience.
Slime is a fascinating toy that provides hours of entertainment and sensory play. Making slime at home using basic ingredients is easy and cost-effective. It is also an excellent way to promote creativity, sensory learning, and bonding experiences with kids. To learn more about different types of glue, check out this article on spirit glue, this article on glue sticks for Ryobi glue gun, and this article on Loctite super glue.
Why DIY?
Why DIY?
Making slime at home can be a fun and engaging activity for kids and adults alike. Not only is it a great way to spend quality time with loved ones, but it is also an economical alternative to buying pre-made slime. Making your own slime allows you to experiment with different ingredients and textures to create a truly unique slime experience.
By creating your own slime, you can avoid the potentially harmful chemicals and additives found in store-bought versions. You can also customize the consistency and color to your liking, ensuring that your slime is safe and enjoyable to play with.
DIY slime offers a great opportunity for children to learn about science and chemistry. As they mix ingredients together to create slime, they are learning about the physical properties of materials, such as viscosity and elasticity. This kind of learning can be both entertaining and instructive.
Lastly, DIY slime can spark creativity and imagination. Children can add glitter, food coloring, sequins, or beads to their slime to personalize it and express themselves. The possibilities are endless when it comes to making your own slime at home.
While there are many recipes and methods for making slime, the DIY approach gives you the flexibility to experiment and find what works best for you. So, why not give it a try and see what slime creations you can come up with? And if you’re interested in learning how to make other types of glue, check out our articles on dextrin glue and thickening glue.
Ingredients for Slime Glue
Finding the right ingredients is the first step in making a perfect slime that will keep your kids entertained for hours. You’ll need just three items for the slime glue, and chances are, you already have them in your household. To make slime glue, you have to use white glue, water, and baking soda. You can also make slime without glue, but using it ensures the right slimy consistency. If you’re into crafts, you may know how to glue vellum paper to the glass, make gobbledy glue or even seal MDF with PVA glue (internal html link). However, for now, let’s focus on how to make the slime glue and activator at home.
White Glue
When it comes to making slime at home, the most crucial ingredient is white glue. This type of glue is easily available at any craft or stationary store. It’s a water-based adhesive that is commonly used in crafting activities. White glue is perfect for slime making because it’s flexible, non-toxic, and easy to clean up.
What type of white glue should you use for slime?
The most commonly used white glue for slime making is PVA glue. PVA stands for Polyvinyl Acetate, and it’s a type of synthetic polymer. PVA glues are versatile and can bond a wide range of materials, from paper to fabric. For making slime, use a clear or white PVA glue, as it will make your slime more translucent. You can also use school glue or even Elmer’s glue, which are PVA-based and work well for slime making.
How much white glue do you need for slime?
The amount of white glue you need for making slime depends on the size of the slime you want to make. Table below can help you determine how much glue you need:
| Slime Size | Amount of White Glue |
|---|---|
| Small | 1/4 cup (60ml) |
| Medium | 1/2 cup (120ml) |
| Large | 1 cup (240ml) |
Where can you buy white glue?
White glue is easily available at any craft or stationary store. You can also find it online on websites such as Amazon or Walmart.
Making slime at home is a fun and creative activity that the whole family can enjoy. White glue is an essential ingredient in slime making and is easily available. Remember to use the right amount of glue for the size of slime you want and use PVA-based white glue for best results. So, get your hands on some white glue, and let’s start making slime!
If you want to learn how to make slime without glue, check outthis article.
Water
Water is one of the main ingredients for making slime glue. It is recommended to use warm water as it helps dissolve the glue more easily. Using the right amount of water is crucial as it affects the consistency of the slime. Too much water can result in a runny slime, while too little can make the slime hard and difficult to stretch.
To make it easier, here is a table that shows the recommended amount of water for different quantities of glue:
| Glue | Water |
|---|---|
| 1/2 cup | 1/4 cup |
| 1 cup | 1/2 cup |
| 2 cups | 1 cup |
It is important to note that the amount of water may vary depending on the brand of glue being used. If the consistency of the slime is not as desired, adjust the amount of water accordingly by adding more if it is too thick or adding more glue if it is too thin.
Using distilled water is also recommended, as tap water may contain impurities that can affect the quality of the slime. If distilled water is not available, it is advisable to boil the water and let it cool down before using it.
In addition, measuring the water and glue accurately is important for making the perfect slime. Using a measuring cup or spoon is helpful in achieving consistency and avoiding any mishaps.
For those who want to experiment with different textures and consistencies, different amounts of water can be added to create a variety of slime types. For example, more water can be added to make a fluffy and stretchy slime, while less water will result in a firmer and bouncier slime.
Internal link: How to glue vellum paper to glass.
Baking Soda
Baking soda is a crucial ingredient in making slime glue as it helps to provide its stretchy and slimy texture. It is a common household item and can be easily found in stores. The role of baking soda in slime making is to act as a slime activator, which when mixed with other ingredients, causes a chemical reaction that results in the formation of slime.
In order to make the perfect slime using baking soda, it is important to use the right amount of it. Adding too much baking soda can cause the slime to become too firm, while adding too little can result in a sticky and messy texture. The amount of baking soda needed depends on your recipe and the type of glue you use.
| Type of Glue | Baking Soda |
|---|---|
| Standard White Glue | 1/2 teaspoon |
| Clear Glue | 1 teaspoon |
| Glitter Glue | 1 1/2 teaspoons |
Apart from its use as a slime activator, baking soda can also be used for other DIY projects such as making gobbledy glue. In this craft, baking soda is added to a mixture of colored glue, glitter, and water to create a bouncy and stretchy glue that can be used as a toy or a stress ball. Another application of baking soda is for sealing MDF with PVA glue. MDF is a porous material and can easily soak up adhesives, thus undermining the strength of the join. By adding baking soda to PVA glue, a stronger and more durable bond is created.
It’s important to keep the correct amounts of baking soda in mind when using it for various DIY projects. Too much or too little can impact the final result and make the project unsuccessful. So, whether you are making slime, gobbledy glue, or sealing MDF, always use the right amount of baking soda for the best, long-lasting results.
Learn more: How to Make Gobbledy Glue
Ingredients for Slime Activator

When it comes to making slime, one of the most important ingredients is the activator. It’s what gives the slime its gooey, stretchy texture. Without an activator, the glue and other ingredients won’t form the right consistency. There are different ways to make an activator, and each one has its own advantages. So, let’s explore the different options you have for making slime activators at home using Contact Lens Solution and Baking Soda and Vinegar methods. We’ll also share some tips for ensuring you get the perfect slime every time. If you are also interested in learning how to seal MDF with PVA glue, check out our guide to the process.
Contact Lens Solution
When it comes to making slime activator, contact lens solution is a popular choice among DIY slime enthusiasts. This is because contact lens solution contains boric acid, which acts as a slime activator by creating a chemical reaction with other ingredients in the slime mixture.
To make slime activator with contact lens solution, you will need the following ingredients:
| Ingredient | Amount |
|---|---|
| Contact lens solution | 1/2 cup |
| Water | 1/2 cup |
| Table salt | 1/2 teaspoon |
Note: Before using contact lens solution as a slime activator, make sure to check the label and ensure that it contains boric acid. Not all contact lens solutions contain this ingredient, so double-check before starting.
To make the slime activator, follow these steps:
- Mix the contact lens solution and water together in a bowl.
- Add the table salt to the mixture and stir until it dissolves completely.
Once you have made the slime activator, you can use it to create your desired slime texture. Remember to use the right amount of activator based on the amount of glue you are using, as too much or too little can affect the final texture of the slime.
Using contact lens solution as a slime activator is a safe and popular choice, but be careful not to use too much, as it can cause the slime to become too stiff or rubbery. It’s always better to start with a little and gradually add more until you achieve the desired texture.
Baking Soda and Vinegar
Baking soda and vinegar is another popular DIY slime activator option. When baking soda is combined with vinegar, it creates a fizzy chemical reaction that releases carbon dioxide gas, which works as a binding agent to make the slime sticky and stretchy. Here is the recipe for making slime activator using baking soda and vinegar:
| Ingredients | Measurement |
|---|---|
| Baking Soda | 1 tablespoon |
| Vinegar | ½ cup |
To make a slime activator using baking soda and vinegar, start by pouring ½ cup of vinegar into a mixing bowl. Then, add 1 tablespoon of baking soda to the vinegar and whisk the two ingredients together until the mixture stops fizzing. Once the fizzing has stopped, the slime activator is ready to use.
It is important to note that using baking soda and vinegar as a slime activator may not be as effective as other options, such as contact lens solution. It may also produce a lower quality slime compared to other activators. However, if you are unable to get your hands on contact lens solution or other recommended slime activators, baking soda and vinegar can be a viable alternative.
Making slime at home can be a fun and exciting activity for both kids and adults. By using the right ingredients in the right amounts, you can create high-quality slime that is both colorful and stretchy.
How to Make Slime Glue and Activator

Now that we have all the necessary ingredients at hand, it’s time to combine them to make our slime. But what’s the right ratio of glue to activator? How do we ensure that the slime comes out perfect without being too sticky or hard? These are some of the questions that might come to your mind while attempting to make slime at home. But don’t worry, we have got you covered. Follow these step-by-step instructions to make slime with ease, that you and your kids can enjoy playing with.
Recipe for Slime Glue
To make slime glue at home, you will need three simple ingredients – white glue, water, and baking soda. Here is a step-by-step recipe for making slime glue:
- Mix 1 cup of white glue in a bowl.
- Add 1/2 cup of water and mix well until fully incorporated.
- Now add 1/2 teaspoon of baking soda and mix vigorously.
- Stir until the baking soda is fully dissolved and no lumps remain.
- You can use the glue for making slime right away or store it in an airtight container for later use.
Note: If you want to make a larger batch of slime glue, simply double or triple the recipe accordingly.
Making slime glue at home is super easy and budget-friendly. You can experiment with different types of glue to get the texture and consistency of slime that you desire. Always use fresh ingredients to ensure that you get the best results. Remember that the quality of your slime largely depends on the quality of the ingredients you use.
Recipe for Slime Activator
To make a slime activator at home, there are a few different methods you can use. Here are two popular options:
Method 1: Contact Lens Solution
Ingredients:
- 1/2 cup contact lens solution
- 1/2 teaspoon baking soda
Directions:
- Add the contact lens solution to a bowl.
- Stir in the baking soda until it’s completely dissolved.
- Your slime activator is now ready to use!
Many people prefer this method because it’s quick and easy. Plus, contact lens solution is easy to find at most drugstores.
Method 2: Baking Soda and Vinegar
Ingredients:
- 1/2 cup white vinegar
- 1/2 cup warm water
- 1 teaspoon baking soda
Directions:
- Mix the vinegar and warm water in a bowl.
- Add the baking soda and stir well.
- Your slime activator is now ready to use!
This method is also very effective and is a great option if you don’t have contact lens solution on hand. However, keep in mind that the vinegar smell may linger on your hands after making the slime.
No matter which method you choose, be sure to test the slime activator by adding it to a small amount of glue first. If it doesn’t activate the glue and create the desired slime consistency, you may need to adjust the amounts or try a different method.
Tips for Perfect Slime
Now that you know how to make your own slime glue and activator, it’s time to get creative and perfect your slime-making skills! However, sometimes the simplest things can be the trickiest. That’s why we’ve compiled a list of helpful tips to ensure that your slime-making process goes smoothly and results in perfect, gooey slime every time. From ingredient measurements to mixing techniques, these tips will take your slime game to the next level. So, let’s get started and make some slime!
Use the Right Amounts
When it comes to making slime, using the right amounts of each ingredient is crucial for achieving the perfect texture and consistency. Here are some tips to help you with that:
- Measure Accurately: Use measuring cups and spoons to ensure that you are adding the correct amount of each ingredient. Even small variations in measurements can affect the final product.
- Start with Small Amounts: It’s always better to start with smaller amounts of ingredients, especially if you’re new to making slime. You can always add more later if needed.
- Add Ingredients Gradually: Add the ingredients gradually, one at a time, and mix thoroughly before adding the next. This will help you to control the consistency and texture of the slime.
- Adjust to Your Liking: If your slime is too sticky, add more activator. If it’s too hard, add more glue. Adjust the amounts until you get the perfect texture. Remember, everyone’s preferences are different!
- Experiment: Don’t be afraid to experiment with different amounts and ratios of ingredients. It can be fun to try new things and see what works best for you.
By keeping these tips in mind and using the right amounts of each ingredient, you can create the perfect slime every time.
Mix Thoroughly
When it comes to making slime, mixing the ingredients thoroughly is one of the most important steps. Without proper mixing, your slime could end up too sticky, too hard, or not stretchy enough. Here are some tips to help you mix your ingredients thoroughly:
1. Use a large mixing bowl: The larger the bowl, the easier it will be to mix all of your ingredients together. It’s also important to use a non-stick mixing bowl, to ensure that your slime doesn’t stick to the sides.
2. Mix one ingredient at a time: Start by mixing your glue and water together until they are fully incorporated. Then, add your baking soda and mix again. Finally, add your slime activator and mix until your slime forms.
3. Use a mixing tool: Depending on your preference, you can use a spoon, spatula, or your hands to mix your slime. If you choose to use your hands, make sure to wash them thoroughly before and after mixing your slime.
4. Don’t rush the mixing process: It’s important to take your time and mix your ingredients thoroughly. This will help ensure that your slime is the right consistency and doesn’t have any lumps or bumps.
To make it easier to keep track of your mixing process, you can use an HTML table to list each step of the process and the time you need to devote to it. Here’s an example:
| Ingredient | Mixing Time |
|---|---|
| Glue & Water | 1-2 minutes |
| Baking Soda | 30 seconds |
| Slime Activator | 2-3 minutes |
By following these tips and keeping track of your mixing times, you can ensure that your slime comes out perfect every time.
Double Check Ingredients
One of the most important tips for making the perfect slime is to always double check your ingredients. Missing or substituting even one ingredient in your recipe can lead to a completely different texture or even a complete slime fail.
To avoid this, it’s always a good idea to list out the ingredients you need beforehand and then check and double check as you go. This is especially important if you are making multiple batches or creating a larger quantity of slime.
One way to make sure you have everything you need is to create a checklist. Write down all the ingredients you need and cross them off as you add them in. This will ensure that you don’t miss anything and give you a sense of satisfaction as you make progress.
Another important thing to keep in mind is to stick to the measurements provided in the recipe. If your recipe calls for a certain amount of glue or activator, be sure to measure it out carefully and accurately. Too much or too little of any ingredient can throw off the recipe and affect the texture and consistency of your slime.
Pro tip: If you’re a beginner, it’s always a good idea to start with a small batch before attempting a larger one. This way, you can experiment with different ingredients and ratios without wasting a lot of supplies.
Conclusion
After going through the step-by-step process of making slime glue and activator at home, you should now be able to create your very own slime that is safe and enjoyable! Making slime at home doesn’t have to be difficult or expensive, and with these simple ingredients and instructions, you can create different textures and colors of slime that will amaze your friends and family. Remember to use white glue and the right activator to achieve the perfect slime consistency, and don’t forget to mix thoroughly.
Experiment with different scents and textures to create your own unique slime creations. You can also adjust the amount of glue and activator to achieve different levels of sliminess. Whether you like your slime stretchy, gooey, or fluffy, there’s a recipe out there that’s perfect for you.
Now that you know how to make slime at home, you can skip the store-bought versions that may contain harmful chemicals. Instead, make your own with natural ingredients and have fun while doing it. Making slime can be a fun activity to do with kids, and it’s a great way to bond and laughter. So, roll up your sleeves, get your ingredients ready, and let the slimy fun begin!
Frequently Asked Questions
Can I use clear glue instead of white glue for my slime?
Yes, you can use clear glue instead of white glue for your slime. Keep in mind that the color and texture of the slime may vary depending on the type of glue used.
Can I substitute contact lens solution with borax?
Yes, you can substitute contact lens solution with a borax solution. However, this may not be suitable for people with sensitive skin or allergies.
Can I add food coloring to my slime?
Yes, you can add food coloring to your slime to make it more vibrant and colorful.
Why did my slime turn out too sticky?
Your slime may have turned out too sticky if you did not add enough activator or if you used the wrong ratios of ingredients.
How can I fix my sticky slime?
If your slime is too sticky, you can add more activator or a small amount of baking soda to balance out the stickiness.
What can I use as a substitute for baking soda?
You can use cornstarch or laundry detergent as a substitute for baking soda in your slime recipe.
How long is my slime good for?
Your slime can last for several weeks if stored in an airtight container and kept in a cool, dry place.
Can I use lotion as a substitute for activator?
No, lotion cannot be used as a substitute for activator. It may change the texture and consistency of your slime.
What if my slime is too hard?
If your slime is too hard, you may have added too much activator or not enough glue. You can try adding more glue or a small amount of water to balance out the texture.
Can I add glitter to my slime?
Yes, you can add glitter to your slime to give it some sparkle and shine.