Discovering the uses of everyday substances in uncommon ways is a delightful exploration into the world of do-it-yourself projects. One such versatile substance that has been used for centuries is casein glue, a natural adhesive derived from milk. In a time where sustainability and eco-friendliness are paramount, learning how to make casein glue offers an environmentally sound option to commercial adhesives.
Understanding Casein: The Science of Milk into Glue
The transformation of milk into glue is a fascinating chemical process. Casein, a protein found in milk, acts as the primary bonding agent. When milk is acidified, casein molecules coagulate, separating out in the form of curds. These curds can then be processed to create a strong, natural adhesive that has been used since ancient times for a variety of applications.
Casein Glue Recipe: Ingredients and Tools Needed
Ingredients for Homemade Glue from Milk
- 2 cups of skim milk
- 2 tablespoons of white vinegar or lemon juice
- 1/2 teaspoon of baking soda
- Water (as needed for consistency)
Tools and Equipment
- A heat source
- A pot for heating milk
- A strainer or cheesecloth
- A mixing bowl
- A stirring utensil
- Storage container for the finished glue
How to Make Casein Glue: Step-by-Step Guide

Step 1: Preparing the Milk
Begin by pouring the skim milk into the pot. Heat it gently to just below boiling, around 190°F (88°C). It’s important not to let the milk boil as this can affect the quality of the casein.
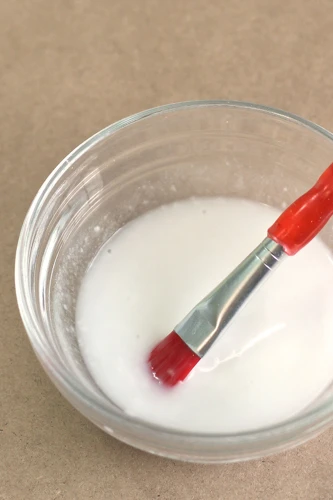
Step 2: Separating the Curds (Casein) from Whey
Once the milk is hot, add the white vinegar or lemon juice. Stir the mixture slowly as you introduce the acid. The milk will curdle, with the casein forming clumps. This is the substance that will be processed into glue.
Step 3: Processing the Casein
After the curds have formed, remove the pot from heat. Strain the mixture through a cheesecloth or strainer to separate the curds from the whey. Make sure to save the curds, as they are the key ingredient in your casein based glue.
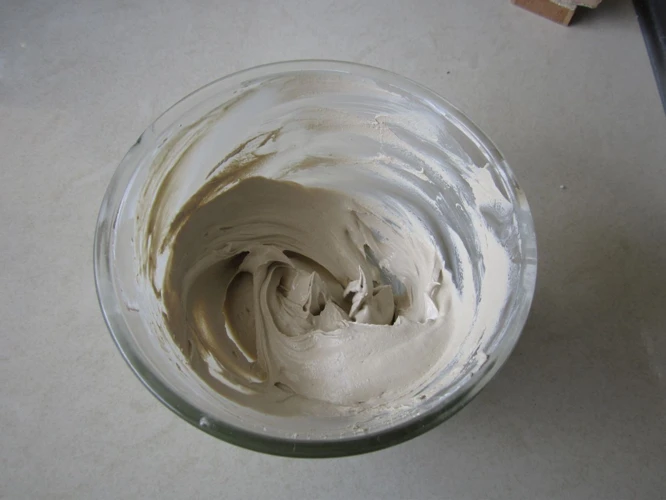
Step 4: Making the Glue
Take the curds and add them to a mixing bowl. Sprinkle the baking soda over the curds to neutralize any remaining acidity. Add a small amount of water to achieve the desired consistency for your homemade glue from milk.
Step 5: Testing the Consistency
Stir the mixture thoroughly until it reaches a smooth, homogenous texture. If the glue is too thick, add a bit more water. If it’s too runny, more curds can be added to thicken it. The goal is to have a paste-like consistency that can be easily applied to surfaces.
Step 6: Storing the Casein Glue
Once the desired consistency is reached, transfer the glue into a storage container. Seal it well to prevent drying out. The casein glue can be kept in the refrigerator to extend its shelf life.
How to Dissolve Casein for Different Applications

Depending on the application, you may need to adjust the consistency of the glue. If you need to thin out the glue, gently warm it and add small amounts of water until it reaches the required viscosity. This flexibility in how to dissolve casein allows for a range of applications from thick pastes to thinner glues.
Casein Based Glue Properties
Is Casein Glue Waterproof?
While casein glue boasts strong adhesive properties, it is not inherently waterproof. It will hold up well under light moisture but isn’t suitable for applications that require water resistance. For added protection, a sealant may be used over the glue once it’s dry.
Strength and Durability
The adhesive strength of casein glue is quite impressive, especially when used on porous materials. Its durability makes it a great choice for applications that require longevity, reinforcing why learning how to make glue from milk can be beneficial for a variety of projects.
Applications of Casein Glue
Woodworking and Crafts
In the realm of woodworking and crafts, casein based glue offers a strong, non-toxic alternative to synthetic adhesives. It’s particularly great for projects involving paper, wood, and fabric, making it a staple in many crafters’ supplies.
Educational Projects
For educators and students, creating homemade glue from milk serves as an excellent educational experience. It demonstrates chemical reactions, the properties of proteins, and the concept of turning milk into glue, all while providing a useful product for classroom projects.
Troubleshooting Common Issues with Casein Glue
Making casein glue at home can be straightforward, but occasionally you may encounter issues such as lumps or inconsistent adhesion. To resolve these, ensure you’re straining the curds properly and adjusting the pH balance with baking soda correctly. Consistent stirring and proper storage are also key in maintaining the quality of your glue.
If you’re interested in adhesives and their various applications, you might enjoy exploring our resources on different types of glues. Whether you’re looking to learn how to apply glue effectively for your projects, curious about crafting with how to make envelope glue, or even if you’re into baking and want to know about how to make icing glue for your treats, we’ve got you covered. And for those who are into DIY projects, our latest article on how to make casein glue will certainly pique your interest, providing you with a natural adhesive option.
Conclusion: The Advantages of Making Glue from Milk
The process of how to make casein glue is a valuable skill that offers numerous benefits. From its eco-friendliness to its strong adhesive properties, creating glue from milk is both a practical and educational endeavor. With the right ingredients, tools, and a bit of patience, anyone can turn a simple glass of milk into a powerful binding agent.