Have you ever found yourself struggling to keep your belongings organized and in place? Velcro is a wonderful solution, but knowing how to glue Velcro to fabric correctly can be a bit of a head-scratcher. The good news is, with a few simple steps and some basic supplies, your belongings can stay secure and in their place. In this guide, we will walk you through a step-by-step process for gluing Velcro to fabric, ensuring your items stay put and are easy to access whenever you need them. So let’s roll up our sleeves and get started!
Materials Needed
Materials Needed: Before you can begin gluing velcro to fabric, you’ll need a few items conveniently available. You’ll need some velcro, of course, and the right kind of fabric glue, which differs from typical glue. You’ll need some fabric as well. A cloth or paper towel to wipe excess glue would also come in handy. It is crucial to have all the materials ready before starting the gluing process to avoid any delays. If you’re unsure what kind of glue to use, check out what is fabric glue to find out more.
Velcro
When it comes to attaching Velcro to fabric, the quality of the Velcro you choose can make a big difference in the final result. You will want to choose a high-quality Velcro that is strong enough to hold the weight of the item it will be securing. A common type of Velcro is the self-adhesive kind, but it is not always the best option.
The two most common types of Velcro are:
| Type of Velcro | Features |
|---|---|
| Sew-on Velcro | It has small loops on one side and tiny hooks on the other. It is designed to be sewn onto fabric for long-lasting durability. This type of Velcro is perfect for heavy-duty applications like securing heavy curtains, luggage, or other items that require a strong hold. |
| Iron-on Velcro | This type of Velcro has adhesive on one side and can be attached to fabric with an iron. It is quick and easy to use, but it’s not as durable as sew-on Velcro. Iron-on Velcro is suitable for lightweight applications like children’s clothing or small craft projects. |
Internal Link: If you want to learn more about different types of glues to use for various projects, check out our article on tacky glue.
Fabric
Fabric is a material commonly used in clothes, bags, and other accessories. When choosing a fabric for your project, consider the weight, texture, and color to ensure it fits the intended use. Before starting your project, make sure that you’ve cleaned and prepped your fabric according to the instructions in the previous section.
- Weight: The weight of the fabric can affect how well the Velcro will adhere. For heavier fabrics such as denim or canvas, a stronger adhesive may be necessary. For lighter fabrics such as silk or chiffon, a lighter adhesive may be more suitable.
- Texture: The texture of the fabric can also affect how well the Velcro will adhere. Smooth fabrics such as silk or satin may require a different adhesive than rougher fabrics like burlap or wool.
- Color: Choose a fabric color that matches or complements the item it will be attached to. For example, if you’re attaching Velcro to a black bag, choose a black fabric for a seamless look.
When gluing Velcro to fabric, it’s important to use a fabric glue that can withstand the wear and tear of regular use. Using a glue that is not specifically designed for fabric can lead to the Velcro falling off or the fabric becoming damaged. For more tips on gluing different materials, check out our other guides on gluing fresh flowers, gluing fabric to cardboard, and gluing lace to glass.
Fabric Glue
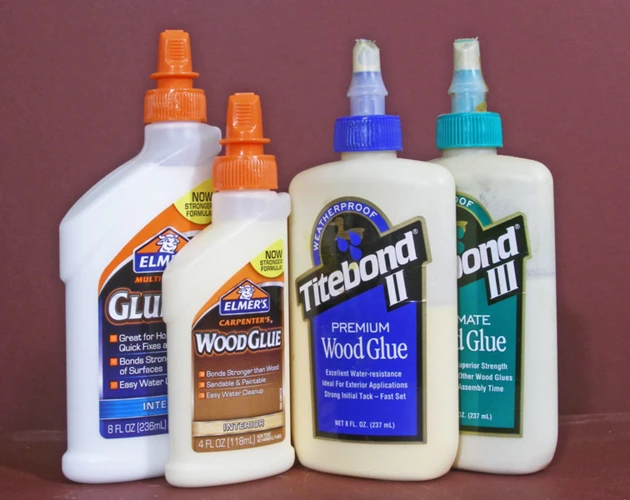
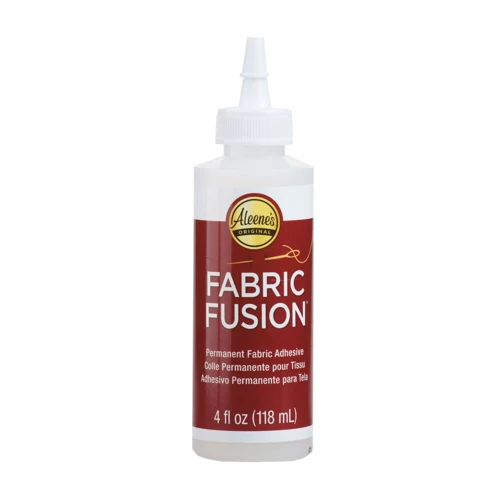
Fabric Glue: Fabric glue is a type of adhesive that is designed specifically for use on fabrics. It is a popular choice for attaching various materials to fabric, including Velcro. One important thing to keep in mind when selecting fabric glue is to make sure that it is washable, as the Velcro will need to be washed over time.
There are many different types of fabric glues available on the market, so it’s essential to choose the right one for your project. Some of the best options include Aleene’s Original Tacky Glue, E6000 Fabric Fuse, and Beacon Fabri-Tac. Each of these glues is designed to provide a strong, permanent bond between the Velcro and the fabric.
When working with fabric glue, it’s crucial to follow the manufacturer’s instructions carefully. A general rule of thumb is to apply a small amount of glue to the fabric and spread it evenly before pressing the Velcro into place. Additionally, many fabric glues require several hours or even overnight to fully dry, so be sure to plan accordingly.
If you’re uncertain about which fabric glue to use, don’t hesitate to ask for advice from a craft store associate or consult online resources. However, keep in mind that different materials may require different types of glue, so be sure to research thoroughly to get the best results.
Choosing the right fabric glue can make a big difference in the success of your Velcro attachment project. By selecting a high-quality, washable glue and following proper application techniques, you can ensure a strong bond that will last for a long time.
Absorbent Cloth or Paper Towels
When working with fabric glue, it’s essential to have absorbent cloth or paper towels on hand. These materials will come in handy if you accidentally spill or drip glue onto your work surface or fabric.
To avoid any mishaps, place a piece of absorbent cloth or paper towel underneath your fabric. This will catch any glue that may seep through the fabric, minimizing the mess. You can also use a cloth or paper towel to blot away any excess glue that may accumulate on the fabric’s surface.
If you are using a liquid fabric glue, it’s important to keep a damp cloth or paper towel nearby. This will allow you to quickly clean up any excess glue before it dries and hardens.
Remember, fabric glue can be messy, and it’s better to be prepared than to have to deal with a difficult cleanup. Ensure you have plenty of absorbent materials on hand to aid in your fabric gluing project.
If you need information on what kind of glue to use on ribbon, you can check our article “What Kind of Glue to Use on Ribbon?“. If you want to know how to glue fabric to rubber, check our article “How to Glue Fabric to Rubber“.
Clean and Prep Your Fabric
Before you start gluing your Velcro to fabric, it’s important to make sure your fabric is clean and prepped properly. This will ensure that the glue adheres properly and your Velcro stays in place. Follow these simple steps using absorbent cloth or paper towels, washing and drying, and ironing to get your fabric ready. And if you need guidance on gluing feathers to paper, gluing fabric to plastic, or general tips for gluing cloth, you can follow the links here, here, and here.
Step 1: Wash and Dry
Before you begin gluing your Velcro onto fabric, you’ll need to make sure your fabric is clean and dry. Follow these steps to prep your fabric:
| Step | Action |
|---|---|
| 1 | Fill a basin or sink with cold water and add a small amount of detergent. |
| 2 | Place your fabric into the basin and swish it around gently to agitate the water. |
| 3 | Let it soak for about 15-30 minutes, then drain the water and rinse with cold water until the soap is gone. |
| 4 | Wring out any excess water and lay the fabric flat to air dry completely. |
It’s important to avoid using hot water or high heat in the dryer, as this can shrink or damage some fabric types. Once your fabric is clean and dry, you can move on to the next step of the gluing process.
Step 2: Iron
Before you start attaching your Velcro patches, it’s essential to prepare your fabric properly. After washing and drying, the next step is ironing. Ironing your fabric will ensure that it’s flat, wrinkle-free, and ready for attachment. Here’s how to iron your fabric:
- Heat up your iron: plug in your iron and set it to the appropriate temperature based on your fabric’s care instructions. For most fabrics, the iron should be set to a medium to high temperature.
- Spray water on your fabric: fill a spray bottle with water and spritz your fabric with a light mist of water. This will help remove any stubborn creases and wrinkles in your fabric.
- Iron your fabric: place your fabric on an ironing board or another flat surface, with the side you want to attach the Velcro facing up. Starting at the top of your fabric, glide the hot iron in a back-and-forth motion, applying light pressure. If there are any stubborn wrinkles or creases, focus on those areas and apply extra pressure. Work your way down to the bottom of the fabric, making sure to iron all the way to the edges.
- Flip your fabric over: once you’ve ironed one side, flip your fabric over and iron the other side with the same back-and-forth motion. Be sure to iron all the way to the edges, so your Velcro patches will adhere evenly.
Ironing your fabric is an essential step in preparing it for Velcro patches. By following these simple steps, you’ll ensure that your fabric is flat, wrinkle-free, and ready for Velcro attachment.
Step 3: Cut Your Fabric and Velcro Pieces
Before you can start gluing your Velcro to your fabric, you need to make sure both are properly sized and cut. Here’s what you need to do:
Step 1: Measure the area where you want to apply the Velcro and cut a piece of fabric to size. Make sure it is slightly larger than the size of your Velcro piece to allow for any shrinking or movement.
Step 2: Cut your Velcro pieces to fit the size of the area on the fabric. Use a pair of scissors or a blade to make clean, straight cuts.
To make sure you have the right size of Velcro, measure the length and width of the area where you want to attach it. When attaching Velcro to garments or bags, make sure that the two pieces align perfectly. A misaligned Velcro may cause discomfort or even failure of the attachment.
In order to avoid any accidents, use a sharp pair of scissors or a blade to cut through the Velcro. A dull cutting tool may lead to frayed edges, making it difficult to attach the Velcro to the fabric.
Make sure that the Velcro pieces you cut have enough adhesive to stay attached to the fabric. If you’re unsure about how much Velcro adhesive you need, you can test it out on a scrap piece of fabric before gluing it down permanently.
Once you have your pieces cut to size, you’re ready to move on to the next step of applying glue to your fabric.
Applying Glue to Your Fabric
Now that you have prepped your fabric and velcro pieces, it’s time to apply the glue. This is a crucial step in making sure your velcro stays securely attached to your fabric. It’s important to use the right glue and technique to ensure a strong bond. In this section, we’ll cover the steps you need to take to properly apply fabric glue to your fabric and velcro. So let’s get started!
Step 1: Lay Out Your Fabric
Before beginning to apply glue to your fabric, it’s important to lay it out in a clean and flat surface. This will not only make the process easier, but it will also ensure that your Velcro adheres to the fabric correctly. Here are some things to keep in mind as you lay out your fabric:
- Make sure your fabric is laid flat, free of wrinkles, and is not bunched up.
- Choose a large, clean work surface where you can spread out your fabric completely. This will help prevent any accidental spills or stains.
- Be sure to work in a well-lit area so that you can see what you are doing and avoid mistakes.
- Take this time to double-check the size and shape of your fabric pieces, as well as your Velcro pieces, to ensure that they will match up properly when glued together.
By following these simple steps and taking the time to properly lay out your fabric, you’ll be setting yourself up for success when it comes time to apply the glue and Velcro.
Step 2: Apply the Fabric Glue
Before applying the fabric glue, ensure that your workspace is clean and dry. Any dirt or debris can affect the adhesion of the glue to your fabric. Once you’re ready, follow these steps to apply the fabric glue:
| Step | Instructions |
|---|---|
| 1 | Open the fabric glue and gently stir the contents with a toothpick or small stick. This will ensure that the glue is well mixed and ready to use. |
| 2 | Apply a thin layer of glue to one side of the Velcro piece that will be attached to the fabric. Be sure to cover the edges of the Velcro, but do not apply too much glue as it may seep through the fabric and create a mess. |
| 3 | Use a small brush or toothpick to spread the glue evenly over the Velcro. This will help to ensure that there are no lumps or bumps in the glue that might affect the adhesion of the Velcro to the fabric. |
| 4 | Repeat this process for the second piece of Velcro, making sure to apply the glue to the correct side of the Velcro (i.e. the side that will attach to the fabric). |
Remember to work quickly once you have applied glue to the Velcro pieces, as the glue can dry out fast. Once you have applied the glue, move on to the next step as quickly as possible.
Step 3: Press Your Velcro into Place
To ensure that your Velcro stays in place on your fabric, it’s important to press it down firmly. Here’s how to press your Velcro into place:
- Position Your Velcro Pieces: Carefully place your Velcro pieces on your fabric in the desired positions.
- Apply Firm Pressure: Use a strong grip to press down firmly on each Velcro piece. This will help ensure the adhesive on the back of the Velcro makes contact with the fabric and adheres properly.
- Use an Object: If needed, use an object with a flat surface, such as a book or a ruler, to apply even more pressure to the Velcro pieces. This will help ensure that the Velcro is securely in place on the fabric.
- Check for Bumps or Unevenness: After pressing your Velcro into place, carefully check for any bumps or unevenness. If you find any, adjust the Velcro as necessary, and press it down again with firm pressure.
By taking the time to press your Velcro into place, you can ensure that your adhesive sticks firmly to the fabric, and that your project will be a long-lasting success.
Step 4: Let It Dry
After pressing the Velcro into place, it’s crucial to let it dry completely. This step is essential to ensure that the Velcro adheres fully to the fabric and prevents it from peeling off. To understand how long it’ll take for the glue to dry, refer to the fabric glue manufacturer’s instructions. Typically, fabric glue takes between 24-48 hours to dry completely, but this can vary depending on the humidity and temperature in your workspace.
To keep your work area clean: To avoid getting glue on your workspace or other surfaces, place an absorbent cloth or paper towel beneath the fabric. If you have excess glue on the edge of your fabric or Velcro, gently dab it away using a dry paper towel.
Don’t be tempted to rush: To avoid any risk of ruining your hard work, resist the urge to touch or move the Velcro while it’s drying. Letting it dry for the recommended time will ensure it fully adheres to the fabric. Keep in mind that if the glue is still wet and you move or touch the Velcro, it will most likely result in uneven adhesion or even detachment, and you’ll have to start over.
Once you’ve confirmed that the glue has completely dried, gently inspect the Velcro to ensure it’s securely attached. If you notice any loose edges, gently apply more glue to the affected area and let it dry again.
While this may seem like just one step, it’s imperative to follow it closely. Skipping this step or moving the Velcro before it’s fully dry can result in a waste of time and resources as well as a poorly attached Velcro that may not work as intended.
Finishing Touches
Now that you’ve successfully applied the Velcro to your fabric using glue, it’s important to do a few finishing touches to ensure long-lasting adhesion. These steps are crucial for making sure that your Velcro stays securely in place while also allowing you to add your own personal touch to the final project. In this section, we’ll guide you through the final steps you need to take to finish off your Velcro and fabric project. So, let’s get started!
Step 1: Check for Proper Adhesion
Once the glue has fully dried, you’ll want to check for proper adhesion before using the fabric. Here’s how:
Step 1: Peel the Velcro gently off of the fabric.
Step 2: Inspect the back of the Velcro and the fabric. Look for areas where the glue didn’t fully adhere, indicated by gaps or bubbles.
Step 3: If you find any areas where the glue didn’t fully adhere, apply a small amount of fabric glue and press the Velcro back into place.
To make it easier to keep track of any areas that need touch-ups, you can create a simple table with two columns:
| Location of Adhesion Issues | Action Taken |
| Top Left Corner | Re-applied fabric glue |
| Bottom Edge | No action needed, adhesion is good |
By keeping track of any issues and the actions taken to address them, you can ensure that your Velcro will securely stay in place for whatever purpose you need it for.
Step 2: Sew Your Velcro for Added Durability (Optional)
If you want to ensure the Velcro stays securely attached to your fabric, sewing it is a great option for added durability. This step is entirely optional but can provide peace of mind if your fabric will be subject to heavy use or frequent washing.
Materials Needed:
- Sewing machine
- Matching thread
- Sewing pins
- Scissors
Step 1: Decide where you want to sew the Velcro onto your fabric. This will depend on the size and shape of your fabric and the intended purpose of the Velcro. Use sewing pins to hold the Velcro in place while you maneuver it into the desired position.
Step 2: Set up your sewing machine with matching thread and carefully sew the Velcro onto the fabric. It’s best to sew around the entire perimeter of each piece of Velcro, as this helps to ensure maximum durability. Sewing in a box shape around the edges is most effective.
Step 3: Check your stitching to ensure that it is secure and that there are no loose threads. Trim any excess thread or fabric that could get caught on something during use.
Step 4: Test your Velcro’s adhesion again to make sure the sewing hasn’t affected it. If your Velcro is still securely in place after sewing, then it’s ready to use!
While it can be tempting to skip this step, sewing the Velcro onto your fabric can make it much more durable. Plus, it only takes a few extra minutes and can make a big difference in the lifespan of your DIY project.
Conclusion
In conclusion, gluing Velcro to fabric is a simple and easy process that can be done by anyone with a bit of patience and attention to detail. By following these step-by-step instructions, you can ensure that your Velcro will adhere properly to your fabric and stay in place for a long time to come.
Remember to always start by cleaning and prepping your fabric to ensure the best adhesion possible. Use a high-quality fabric glue and let your Velcro dry completely before attempting to use it. And for added durability, consider sewing your Velcro into place.
With these tips in mind, you can successfully attach Velcro to fabric for a wide range of projects, from clothing to home decor and everything in between. So gather your materials, take your time, and enjoy creating with Velcro and fabric!
Frequently Asked Questions
Can I use any glue for attaching Velcro to fabric?
No, it’s crucial to use fabric glue, which is specially designed to bond fabric materials and offer a durable hold.
Is it essential to clean the fabric before attaching Velcro?
Yes, cleaning your fabric is crucial to ensure there’s no dirt, oils, or stains which could lessen the bond’s effectiveness.
Can Velcro be sewn to the fabric instead of glue?
Yes, sewing is always an option, and it can offer extra hold, but it takes more time and may not look as clean or be as convenient as sticking it with glue.
How do I know how much Velcro I’ll need for my project?
You can roughly estimate how much Velcro you’ll need based on the dimensions of your project areas. However, it’s always better to have extra Velcro than less, so it’s easy to trim if you need to.
Will the Velcro lose its hold if washed or dry cleaned?
It depends on the quality of the glue and how well you’ve applied it. If you’ve used high-quality glue and followed the steps correctly, it should hold up well. However, you can also sew on the Velcro for added durability.
How long does it take for the glue to dry?
It depends on the type of fabric glue you’re using, but most take about 24 hours to cure entirely. Check the glue’s label for specifics.
Can I use Velcro to attach heavier items to fabric?
It depends on the weight and surface area of the item you want to attach. For heavier objects, it’s best to sew on the Velcro for added strength.
What should I do if the Velcro isn’t sticking?
Try cleaning the fabric again and reapplying the glue or adding more glue. If all else fails, sew the Velcro onto the fabric for added hold.
Should I cut the Velcro before or after gluing it to the fabric?
You should cut the Velcro pieces before gluing them to the fabric, so they fit precisely against each other without any overlap or gaps.
What fabrics can I use with Velcro?
You can use Velcro with a variety of fabrics, including cotton, polyester, nylon, and synthetic blends. However, it’s essential to check the fabric glue’s label to see what type of materials it’s compatible with.