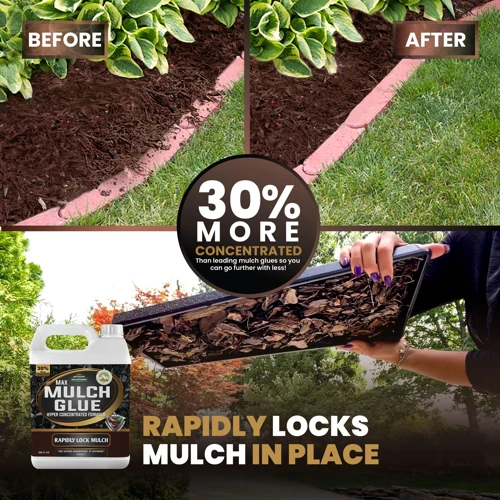
Rubber mulch is an excellent material for landscaping and playground surfaces because of its low maintenance and durability. However, often pieces of the mulch may become loose over time due to wear and tear. In these situations, gluing the rubber mulch together can restore its integrity. But how do you glue rubber mulch together effectively? In this guide, we will give you step-by-step instructions on how to glue rubber mulch together with tips and tricks to make the process successful. So, let’s dive into the world of gluing rubber mulch and explore how to make your outdoor area safe and beautiful again.
What You Will Need
Before you can start gluing your rubber mulch together, you’ll need to make sure you have all the necessary supplies. This will ensure that the gluing process goes smoothly and that you end up with a professional-looking finished product. Here’s what you’ll need:
Rubber Mulch: The first thing you’ll need is, of course, rubber mulch. You can find this at most home improvement stores or online. Make sure to get enough to cover the area you want to glue.
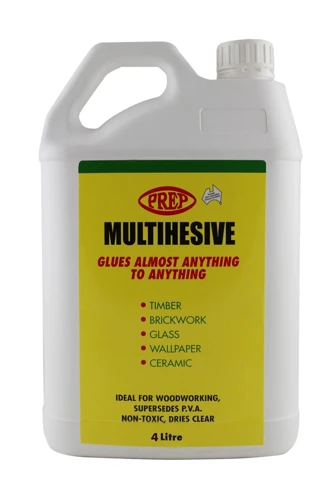
Glue: The type of glue you use is very important. You’ll need a glue that can bond to rubber and that will hold up well over time. We’ll discuss some specific types of glue in the next section.
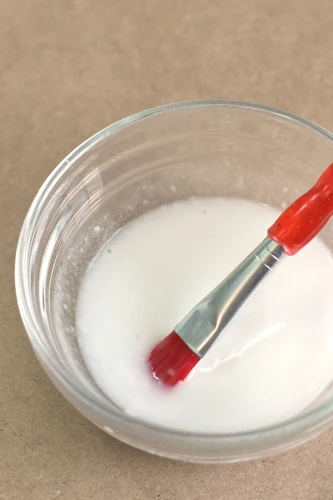
Applicator: Depending on the type of glue you choose, you may need an applicator. This could be a brush, applicator tip, or even just a plastic spatula.
Protective Gear: Lastly, it’s important to protect yourself during the gluing process. You may want to wear gloves, safety glasses, and a dust mask to avoid any accidental injuries or exposure to fumes.
Rubber Mulch
Rubber mulch is a popular mulching material that is used in landscaping projects around the world. Rubber mulch is made from recycled rubber and is an eco-friendly alternative to traditional wood mulch. It is also a highly durable product, that can last up to 10 years without needing to be replaced. Before gluing rubber mulch together, you will need to make sure you have the right amount of mulch for the space you want to cover. Measure the length and width of the area where you want to install the rubber mulch. Use these measurements to calculate the square footage of the area. Once you have that, you can then determine how much rubber mulch you will need. It’s important to note that rubber mulch usually comes in bags and the quantity of mulch per bag can vary depending on the manufacturer.
Another important consideration when it comes to using rubber mulch is ensuring that the mulch is free of debris and contaminants. Before use, you should spread the rubber mulch out in a well-ventilated area and hose it down to remove any dirt and dust. This will help to ensure that the glue has a good surface to adhere to when it comes time to bond the pieces together.
Additionally, it’s important to keep safety in mind when handling rubber mulch. Wear gloves and other protective gear to keep your skin safe from any sharp bits or particles. If you have a sensitivity to rubber, you may want to consider using a different type of mulch or consulting a doctor before handling this product.
Finally, it’s good to keep in mind that while rubber mulch is durable, it can fade in color over time due to exposure to sunlight. If you want to keep your rubber mulch looking fresh and vibrant, consider applying a UV protection spray after installation.
For those looking for other adhesive solutions for different materials, check out our guide on how to glue metal to rubber.
Glue
Choosing the right glue is crucial when it comes to effectively bonding rubber mulch together. There are several types of glue that would work for this application, including silicone adhesive, polyurethane adhesive, and epoxy adhesive. It’s important to choose a glue that is waterproof, heat-resistant, and can adhere to rubber surfaces.
Silicone adhesive is an excellent choice for bonding rubber mulch because it is highly flexible and can withstand extreme temperatures. Polyurethane adhesive is also a good option because it creates a strong and durable bond, and it can be used on a variety of surfaces. Epoxy adhesive is a popular choice for bonding rubber mulch because it is waterproof and creates a very strong bond.
Before using any type of glue, make sure to read the manufacturer’s instructions carefully and follow them closely. If you are unsure which type of glue to use, consult with a hardware store employee or a professional contractor for advice.
Internal link: How to glue fiberglass
Applicator
Applicator is an essential tool when gluing rubber mulch together. This tool helps in applying the glue evenly and precisely onto the surface. Several types of applicators are available in the market, including brushes, rollers, and sprayers. The choice of applicator depends on the type of glue and the surface where you will apply the glue.
| Applicator | Best For |
|---|---|
| Brush | Small areas and detailed work |
| Roller | Larger areas and flat surfaces |
| Sprayer | Large areas and hard-to-reach surfaces |
When using a brush, choose a smaller-sized brush to apply glue to smaller areas and detailed work. A larger brush is not recommended as it may cause wastage of glue and may make the application unnecessarily messy.
Rollers are ideal for larger areas and flat surfaces. They can be a better choice if you need to apply glue to expansive regions like your garden borders or playground. A roller with a deeper nap would be more suitable for rough surfaces, as it allows the glue to penetrate the surface and adhere better.
Sprayers are useful if you need to apply glue to large areas or hard-to-reach surfaces. They can apply glue evenly, quickly and efficiently. However, they require more preparation work and protective gear to ensure that the glue does not come into contact with your skin or eyes.
Before using any applicator, make sure it is clean to avoid any contaminants interfering with the glue’s application. If you’re still unsure which applicator to use, you can refer to the glue manufacturer’s instructions or seek advice from a professional.
In case you need to glue other materials, check out this article how to glue acrylic to glass for more information.
Protective Gear
When working with glue, it’s important to protect yourself from any potential hazards. This includes wearing the appropriate protective gear. Here’s a list of protective gear that should be considered:
- Gloves: Wear gloves to protect your hands from any potential skin irritation from the glue or any chemicals in the glue. It’s recommended to use disposable gloves to prevent cross-contamination between different surfaces.
- Safety Glasses: Protect your eyes from any splashes or accidental drips of glue. Glue can be irritating if it comes into contact with your eyes, so it’s best to wear safety glasses to protect them.
- Respirator: If you’re using a strong adhesive, consider using a respirator to protect your respiratory system from any fumes or dust particles that may be released. This is especially important if you’re using the glue in a poorly ventilated area.
- Protective Clothing: It’s recommended to wear long-sleeved shirts, long pants, and closed-toe shoes when working with glue. This offers additional protection for your skin from any potential splashes or drips of glue.
By wearing the appropriate protective gear, you can ensure that you’re staying safe while working with glue. In addition to protecting yourself, it’s also important to protect the surrounding surfaces from potential damage caused by the glue. Consider using a drop cloth or painter’s tape to protect any nearby surfaces or objects.
Remember, safety should always come first when working with glue. If you’re unsure about what protective gear to wear or which glue to use for a specific project, do some research or consult with a professional.
If you’re interested in learning how to glue metal to acrylic, check out our guide.
Preparation
Starting the process of gluing rubber mulch together requires proper preparation to ensure that the glue bonds effectively to the surface. With a few simple but crucial steps, the process can be completed with minimal effort and maximum effectiveness. Before moving on with the gluing process, take the time to gather all the necessary equipment. It is crucial to clean the surface that will be bonded and to protect surrounding areas from the glue. Follow the steps below to prepare before gluing to ensure excellent results. And don’t forget to protect yourself with the appropriate protective gear!
Clean the Surface
Before gluing the rubber mulch together, it is important to clean the surface thoroughly. A clean surface will ensure a better bond between the mulch and the glue, resulting in a longer-lasting application. Here are the steps to follow when cleaning the surface:
- Remove any debris: Before cleaning the surface, remove any dirt, dust, or debris that may be present. Use a broom, dustpan, or vacuum cleaner to remove any loose particles.
- Wash the surface: Once the debris is removed, wash the surface with soap and water. Use a sponge or rag to scrub the surface, making sure to remove any dirt or grime.
- Dry the surface: After washing the surface, dry it off with a clean, dry towel or rag.
- Check for grease or oil: If the surface is greasy or oily, use a degreaser to remove it. This will ensure that the glue adheres properly.
- Sand the surface: If the surface has a glossy or smooth finish, sand it lightly with sandpaper. This will help the glue adhere better.
By following these steps, you can ensure that the surface is clean and ready for gluing the rubber mulch together. For more information on the best type of glue to use for rubber mulch, visit which Loctite glue is the strongest.
Measure the Area
When it comes to gluing rubber mulch together, it’s important to measure the area properly to make sure you have all the supplies you need before starting. Measuring the area accurately will also help you estimate how much glue you will need for the project. Here’s how you can measure the area:
1. Use a measuring tape to measure the length and width of the surface where you plan to glue the rubber mulch together.
2. Record the measurements in a notebook or on a piece of paper so you can refer back to them later.
3. Multiply the length by the width to get the square footage of the area you will be gluing.
4. It’s a good idea to add a little extra to account for any mistakes or miscalculations in your estimation.
After you have measured the area, you will have a better idea of how much rubber mulch and glue you will need. It’s always better to have a little extra rather than running out in the middle of the project. Having all the supplies beforehand will make the gluing process smooth and efficient.
It’s also worth noting that measuring the area is an important step in many other DIY projects that involve gluing surfaces together. For example, if you’re wondering how to glue wood to aluminum, measuring the area is the first step you need to take. Similarly, if you want to glue a countertop to a cabinet, measuring the area is crucial to estimate the amount of glue you will need. And if you’re wondering how to glue an undermount sink, measuring the sink’s dimensions is a critical step.
Protect Surrounding Surfaces
Before you start gluing the rubber mulch, it’s crucial to protect the surrounding surfaces. Rubber mulch adhesive can be messy and difficult to remove from unintended areas, so taking the necessary precautions beforehand will save you time and hassle. Here are some ways to protect the surrounding surfaces:
1. Cover surrounding surfaces with plastic sheeting: Plastic sheeting is an excellent option for protecting surfaces such as decks, patios, or floors. Spread the sheeting around the area where you will be applying the adhesive and make sure it’s secured and flat. This will prevent any accidental spills from damaging the surface below.
2. Use painter’s tape: Another way to protect surfaces is by using painter’s tape. Apply painter’s tape along the edges of the surface where the rubber mulch will be placed. This will act as a barrier and prevent the adhesive from spreading to unwanted areas.
3. Apply petroleum jelly: If you’re working on a vertical surface, such as a wall or a fence, you can apply petroleum jelly to the surrounding areas. This will make it easier to remove any adhesive spills that may occur during the process.
It is important to note that protective measures may vary depending on the surface you are working on. Always consider the surface’s material and follow the recommended precautions to avoid damage. By protecting the surrounding surfaces, you ensure that the result of your project will look clean and professional.
For example: If you’re gluing rubber mulch to a stainless steel surface, take a look at what glue sticks to stainless steel to choose the right adhesive. Or if you’re gluing rubber mulch to a wooden chair leg, our article on how to glue chair legs will provide valuable tips and tricks. If you’re gluing rubber mulch onto a countertop, our guide on how to glue a countertop to a cabinet will give you the essential advice you need.
Gluing the Rubber Mulch
Now that you have prepared the area, it’s time to start gluing the rubber mulch together. This step can be a bit intimidating but with the right materials and techniques, it can be an easy process. Remember that choosing the right glue is key to ensuring a strong and long-lasting bond. In this section, we will discuss the different types of glue that work well with rubber mulch, as well as tips on how to properly apply the glue and press the mulch into it for an even distribution. Read on to learn more!
Choose the Right Glue
Selecting the right glue is crucial when it comes to gluing rubber mulch together. You need a strong, durable, and weather-resistant glue that will ensure the rubber mulch stays together for an extended period. Using the wrong glue can result in separating and dislodging of the mulch, leading to waste of time, effort, and expense.
Here are some of the best options for gluing rubber mulch:
| Name | Type | Features | Price |
|---|---|---|---|
| Loctite PL Premium Polyurethane Construction Adhesive | Polyurethane construction adhesive | Water-resistant, excellent bonding strength, dries clear, fast-setting | $$$ |
| Gorilla Super Glue Gel | Super glue | Impact-resistant, dries clear, fast-drying, weather-resistant | $$ |
| 3M Super 77 Multipurpose Adhesive | Spray adhesive | Bonds quickly, requires no clamping, water-resistant, excellent coverage | $$ |
Loctite PL Premium Polyurethane Construction Adhesive is a great choice for a strong and durable bond. It’s waterproof, fast-setting, and has excellent bonding strength with rubber materials.
Gorilla Super Glue Gel is perfect for a quick fix. It dries clear, fast-drying, weather-resistant, and has excellent impact resistance.
3M Super 77 Multipurpose Adhesive is an excellent option in terms of coverage. It sprays evenly and requires no clamping. It has excellent water resistance and dries clear.
When selecting a glue, ensure that it is compatible with rubber material and suits your project requirements. It is advisable to test the glue on a small area of the rubber mulch before committing to a large project to ensure it works well. Don’t just choose any glue; select one that is strong, flexible, and weather-resistant.
Apply the Glue
When you are ready to apply the glue to your rubber mulch, it is important to do so carefully and efficiently. Follow these steps to ensure the best result:
- Use the right applicator: Depending on the type of glue you are using, you will want to use a specific applicator to help spread the glue evenly. For instance, a paintbrush might work well for a liquid adhesive, while a caulking gun would be better suited for a construction adhesive.
- Apply the glue in sections: To avoid having the glue dry out before you have a chance to press the rubber mulch into it, apply the glue in sections at a time. This will give you the chance to work quickly and efficiently, without worrying about the glue setting too fast.
- Spread the glue evenly: Use the applicator to spread the glue evenly across the surface where you plan to glue the rubber mulch. Make sure that you cover the entire area and that there are no clumps or bumps of glue that could interfere with the bonding process.
- Be generous with the glue: It is better to have too much glue than not enough, as this will ensure that the rubber mulch adheres properly to the surface. However, don’t apply so much that it creates a mess or becomes difficult to work with.
Remember to work quickly and efficiently when applying the glue to your rubber mulch. Once you have applied the glue, you will need to press the mulch down into it before it dries out.
Press the Mulch into the Glue
To ensure proper adhesion, it’s important to press the rubber mulch firmly into the glue. Here are some steps to follow:
1. Take a small section of mulch: Work your way in small sections instead of trying to do the entire area at once.
2. Hold the rubber mulch: Using both hands, hold the rubber mulch over the glue.
3. Press it into the glue: Press the mulch firmly into the glue with your fingertips. Use a rolling motion to make sure the entire surface area of the mulch comes into contact with the glue.
4. Repeat: Repeat the process with a new section of mulch until you have covered the entire area.
5. Don’t apply too much pressure: While it’s important to press the mulch into the glue, be careful not to apply too much pressure as this can cause the mulch to deform or stretch.
By taking your time and pressing the mulch into the glue properly, you can be confident that your rubber mulch will stay in place for a long time.
Wait for the Glue to Dry
Once you have applied the glue and pressed the rubber mulch into it, the next step is to wait for the glue to dry completely. This is an essential part of the process as it ensures that the mulch stays in place and doesn’t come apart easily. Rushing this step can cause the mulch to slide or shift, resulting in a poor finish.
How long you need to wait for the glue to dry depends on the type of glue you are using and the weather conditions. Most glue manufacturers will provide guidelines on how long the glue takes to dry and cure, so it is essential to read the instructions before starting the project. On average, you can expect to wait anywhere from 24 to 48 hours for the glue to dry completely, depending on the temperature and humidity levels of your environment.
To ensure that the glue dries properly, try to keep the area as dry and dust-free as possible. This will help the glue dry faster and avoid any particles or debris from sticking to the surface. You can use a fan to improve air circulation and help the glue dry faster.
It is crucial not to disturb the mulch or the glued surface while the glue is drying. Touching the surface can cause the mulch to shift or move, which can ruin the finish. Make sure to keep children and pets away from the area and avoid walking on or touching the glued surface.
Once the glue has dried completely, you can inspect the area and ensure that the rubber mulch is firmly in place. If you notice any areas that need additional glue, you can reapply and wait for it to dry again before assessment.
Patience is key during this step. Rushing the drying process can lead to a poor finish, so take your time, let the glue dry completely, and enjoy your newly glued rubber mulch surface!
Finishing Touches
After successfully gluing the rubber mulch together, there are still some final touches to ensure a seamless and polished finish. These finishing touches will not only improve the overall appearance but also prolong the lifespan of your rubber mulch surface. Let’s take a look at some crucial steps that you can take to complete the glueing process.
Clean Up Excess Glue
After gluing the rubber mulch together, there may be excess glue that is left behind. This excess glue can be unsightly and may even harden, causing a rough and uneven surface. It’s important to clean up any excess glue to ensure the best possible final result. Here are some steps to effectively clean up any excess glue:
- Wait for the glue to dry completely.
- Once the glue has dried, use a scraper or putty knife to remove any excess glue. Be very careful when using sharp tools and make sure not to damage the mulch or the surface underneath.
- If there are small blobs of glue left behind, use sandpaper to smooth them out. Wear a mask and protective eyewear to avoid breathing in any dust.
- If the glue is still wet and has not dried yet, use a damp cloth to wipe away as much of the excess glue as possible. Be sure to use gloves to protect your skin from the chemicals in the glue.
- For any remaining glue residue, use a solvent such as rubbing alcohol or mineral spirits to soften and remove it. Remember to work in a well-ventilated area and follow the manufacturer’s instructions for handling and disposal of the solvent.
- After all excess glue has been cleaned up, go over the area with a broom or vacuum to remove any small debris or loose mulch.
It’s important to take the time to properly clean up any excess glue to ensure the best possible final result. With a little bit of effort, your glued rubber mulch surface will look great and last for years to come!
Inspect the Area
After waiting for the glue to dry completely, it’s time to inspect the area to ensure that the rubber mulch is securely adhered and there are no loose pieces. Here are some things to look for during the inspection:
- Check for loose pieces: Carefully examine the glued area to ensure that there are no loose pieces of rubber mulch.
- Inspect the edges: Make sure that all edges are securely glued down and there are no gaps or lifted sections.
- Test the adhesion: Use your hand or a tool to gently apply pressure to different areas of the glued surface. If any sections feel loose or give way under pressure, then it may require further attention.
If you do find any areas that need additional glue, simply repeat the gluing process and wait for it to dry. It’s important to avoid using the area for at least 24 hours to allow the glue to fully cure and ensure maximum adhesion. Inspecting the glued area is an important step to ensure a long-lasting and secure rubber mulch surface.
Conclusion
In conclusion, gluing rubber mulch together can be a simple and effective way to keep it in place. By following the tips and tricks outlined in this article, you can ensure that your mulch stays put and looks great for years to come. Remember to always clean and measure the area before applying glue, choose the right adhesive for your needs, and be patient as you wait for the glue to dry.
Additionally, remember to wear protective gear and take precautions to protect surrounding surfaces. By taking the time to properly prepare and execute the gluing process, you can enjoy all the benefits of this versatile and attractive landscaping material.
Whether you’re creating a playground, landscaping your backyard, or adding a decorative touch to your garden, rubber mulch offers unbeatable durability and aesthetic appeal. So why not give it a try? With just a few simple steps, you can transform any outdoor space into a beautiful and functional oasis. So get out there and start gluing!
Frequently Asked Questions
What is rubber mulch?
Rubber mulch is made from recycled tires and is commonly used as a landscaping material due to its long-lasting durability and low maintenance requirements.
Why would I need to glue rubber mulch together?
Gluing rubber mulch together can help prevent shifting or movement, particularly on steep slopes or in high-traffic areas.
Can I use any type of glue to attach rubber mulch?
No, it’s important to choose the right type of glue that is formulated specifically for use with rubber materials.
How do I clean the surface before applying the glue?
Sweep the area clean of any dirt or debris, and use a damp cloth to wipe away any remaining residue or dust.
What kind of protective gear should I wear when working with glue?
Wear gloves and goggles to prevent skin or eye irritation from the glue.
How long should I wait for the glue to dry?
Follow the manufacturer’s instructions for drying time, but typically it takes several hours for the glue to fully set.
What happens if it rains before the glue dries?
If the glue gets wet before it dries, it may not adhere properly and could result in the mulch coming apart.
Can I paint over glued rubber mulch?
It’s possible to paint over glued rubber mulch, but be sure to use a paint that is formulated for use with rubber materials.
How do I clean up excess glue?
Remove any excess glue with a scraper or putty knife, and use a cloth or paper towel dampened with water or mineral spirits to clean up any remaining residue.
Is it cost-effective to use glue on rubber mulch?
While gluing rubber mulch may require an initial investment in glue and applicators, it can ultimately save money by reducing the need for frequent maintenance and replacement of the mulch.