Have you ever tried to glue popsicle sticks together in a neat and organized pattern but found it challenging to keep them aligned? Don’t fret because there is a solution, and we’ve got you covered! In this comprehensive guide, we will show you how to properly glue popsicle sticks side by side. From preparing your sticks to picking the right glue and finally finishing your project, you’ll be an expert in no time. So, let’s dive in and explore the mesmerizing world of popsicle stick crafts!
What You’ll Need
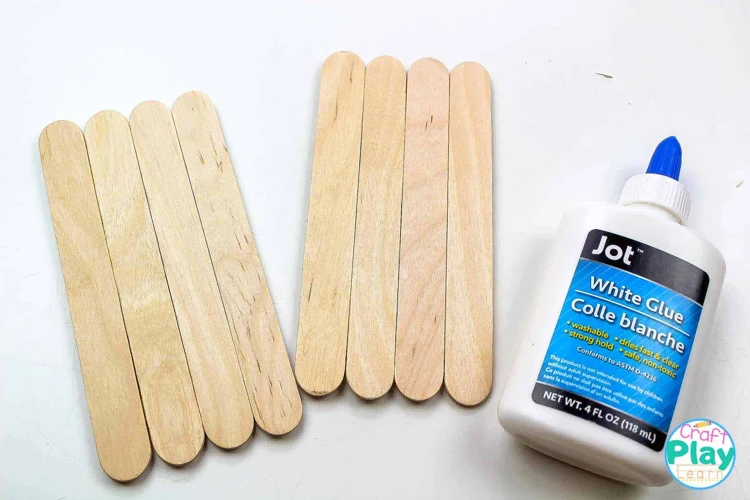
Before getting started on your popsicle stick project, it’s important to gather all the necessary materials. Don’t worry, everything you need is likely already at home! First and foremost, you will need popsicle sticks. These can be found at craft stores or ordered online in bulk. You will also need a strong glue that will hold the sticks together. Depending on the type of project, additional materials like clamps and a craft knife or scissors might be necessary. Make sure to have everything ready before beginning the project so that you can avoid interruptions and work efficiently.
Popsicle Sticks
Popsicle sticks are the primary building material for any Popsicle stick project. You will need to have a sufficient amount of sticks on-hand depending on the size of the project. You can typically find popsicle sticks at any craft store or online retailer. The sticks come in a variety of sizes, but the most common size is around 4.5 inches in length and 0.5 inches in width.
When purchasing popsicle sticks, make sure they are straight and do not have any visible defects or warping.
It is recommended to have at least 10% extra sticks on hand in case some break or are not suitable for the project. You may want to consider purchasing colored or jumbo-sized sticks to add variation to your project.
To create more complex shapes, you may also need to cut or modify popsicle sticks. A craft knife or scissors can be used for this task. However, be cautious when using sharp objects to avoid injury. If you have never worked with a craft knife before, consider consulting a tutorial before starting.
Having a sufficient supply of good quality popsicle sticks is essential for a successful project. So, be sure to stock up before starting.
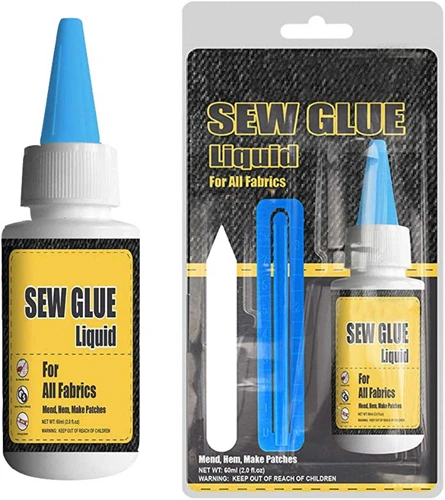
Glue
When it comes to gluing popsicle sticks side by side, the type of glue you use can make all the difference in the finished product. There are several types of glue that work well for this task, each with its own advantages and disadvantages. Here is a breakdown of the most commonly used types of glue:
| Type of Glue | Advantages | Disadvantages |
|---|---|---|
| PVA Glue | Easy to clean up with water, dries clear, and is non-toxic. | Drying time can be slow, may cause warping or curling, and can be brittle if not applied thinly. |
| Epoxy Resin | Dries quickly, creates a strong bond, and is resistant to water and heat. | Requires mixing before use, can be difficult to remove if spilled, and can be expensive. |
| Hot Glue | Bonds quickly, easy to use, and can be used on a variety of surfaces. | May not hold up well over time, can leave a visible residue, and can burn your skin if not used properly. |
PVA glue is a popular choice because it is easy to find, non-toxic, and easy to clean up. It is best applied thinly and can take some time to dry completely, so using clamps to hold your sticks in place while the glue dries is a good idea. If you want to reduce drying time, you can use a thin layer of glue on both sticks and then press them together firmly.
Epoxy resin is the most durable of the three, making it a good choice for projects that will be exposed to water or heat. It dries quickly and creates a strong bond, but requires careful mixing before use. Be sure to read the instructions carefully and work in a well-ventilated area.
Hot glue is easy to use and bonds quickly, making it ideal for small projects or for situations where you need to make adjustments quickly. However, it may not hold up over time and can leave a visible residue. Be sure to use caution when working with hot glue, as it can burn your skin if not used properly.
No matter which glue you choose to use, it’s important to always follow the manufacturer’s instructions for use and safety. Additionally, if you’re unsure whether a particular glue will work for your project, it’s always a good idea to test it on a small area first.
If you’re interested in learning more about different types of glue or how to use glue for other projects, be sure to check out our other articles on topics like how to make sticky tack with liquid glue or how to load a glue gun.
Clamps
When it comes to gluing popsicle sticks side by side, clamps are an essential tool to have. They help hold the sticks together firmly, allowing the glue to dry completely and create a strong bond. Here are a few things to keep in mind when using clamps:
- Choose clamps that are the right size for your project. Depending on the size and number of popsicle sticks you are gluing together, you may need a few different sizes of clamps.
- Place the clamps on the popsicle sticks right after applying the glue. This will help ensure that the sticks stay in the correct position as the glue dries.
- When tightening the clamps, do not overtighten them as this can cause the sticks to warp or break. Just tighten the clamps enough to hold the sticks together securely.
- Leave the clamps in place for the recommended drying time indicated on the glue packaging. This will ensure that the glue has completely dried and that the bond is strong.
One thing to note is that if you don’t have clamps on hand, you can use other items to hold the popsicle sticks together while the glue dries. Clothespins, rubber bands, or even tape can be used to hold the sticks in place.
However, it’s important to keep in mind that these alternative methods may not hold the popsicle sticks together as securely as clamps can. Thus, if you’re serious about creating a durable project, clamps are definitely worth investing in.
Now that you know just how important clamps are when it comes to gluing popsicle sticks together, it’s time to put this knowledge into practice! Head over to the next section to learn how to choose the right glue for your project. Or, if you’re interested in learning about other glue-related projects, check out our article on how to make hot glue stick to glass.
Craft Knife or Scissors
When it comes to creating crafts using popsicle sticks, having a craft knife or scissors is essential. These tools can be used for a variety of tasks, such as trimming excess glue or cutting the popsicle sticks to the desired length. It’s important to choose the right tool for the job, depending on what you’re trying to accomplish.
Craft Knife: A craft knife is a small, sharp tool that can be used to cut popsicle sticks with precision. It’s ideal for creating intricate designs or shaping the sticks to fit a specific pattern. When using a craft knife, it’s important to use caution and cut in a well-lit area to avoid injury. Always hold the knife at an angle away from your body and use light pressure while cutting.
Scissors: Scissors are another tool that can be used to cut popsicle sticks. While not as precise as a craft knife, scissors are easier to handle and can be used to quickly trim excess from your project. When using scissors, make sure they are sharp and strong enough to cut through the sticks cleanly. Dull scissors can create jagged edges and make your project look messy.
Having a craft knife or scissors on hand can make your popsicle stick projects easier to manage and create a more polished finished product. Just remember to always handle these tools with care and use them safely.
If you’re interested in other glue-related projects, check out our article on How to Glue LED Strips Together.
Preparing Your Popsicle Sticks
You cannot achieve a flawless project unless you prepare your popsicle sticks properly. Before you jump onto gluing them side by side, make sure you follow these critical steps to avoid a tacky outcome. Start by cleaning your popsicle sticks and removing any debris or splinters using sandpaper if necessary. Then, sort your popsicle sticks by shape, size, and condition to ensure they are all uniform, and get ready to choose the right glue for your project. If you’re interested in other fun projects using glue, check out how to glue pencils together.
Cleaning Your Popsicle Sticks
When it comes to preparing your popsicle sticks for gluing them together, cleaning is an essential step that shouldn’t be overlooked. Dirt and debris can interfere with the bonding process and weaken the glue’s effectiveness, resulting in a poor outcome. Fortunately, cleaning your popsicle sticks is a simple and easy process. Here are the steps you should follow:
Step 1: Take a soft, dry cloth or a piece of fine-grit sandpaper and remove any visible dust, dirt, and other debris from your popsicle sticks. This is particularly important if you have recycled them from other projects or they have been lying around for some time.
Step 2: Take a bowl or bucket of warm water and add a small amount of dish soap. Dip your popsicle sticks in the soapy water and use your hands or a soft-bristled brush to gently scrub away any stubborn dirt or debris.
Step 3: Once you have scrubbed your popsicle sticks and they look clean, rinse them thoroughly with clean water to remove any remaining soap residue.
Step 4: Lay your popsicle sticks flat on a clean, dry surface and let them air-dry completely before gluing them together. Avoid using a cloth or paper towel to dry them as this can leave behind fibers and lint.
Remember that completely drying your popsicle sticks is crucial before moving on to the gluing process as any water or moisture can affect the bonding strength. By cleaning your popsicle sticks thoroughly, you ensure that the glue can bond to the clean surface and hold the sticks together tightly.
Additionally, if you’re using colored popsicle sticks, it’s essential to confirm if the dye comes off while cleaning. If the dye is coming off, it may affect the appearance of your project, and you may want to look for alternative options.
Following these simple steps will go a long way in guaranteeing that your popsicle sticks are correctly prepared and ready for the gluing process. In the next section, we’ll go over how to choose the right glue for your project.
Making a stress ball with glue can be a fun activity, and you can use the cleaned popsicle sticks in this project.
Sorting Your Popsicle Sticks
When using popsicle sticks for a craft project, it is important to sort them first. This will make sure you have enough sticks and that they are the right size and shape for your project. Sorting your popsicle sticks also makes the gluing process go more smoothly.
To sort your popsicle sticks, start by grouping them into piles of similar size and shape. You can easily do this by eye-balling it or using a ruler if you need to be more precise. Once you have your piles, you can then decide which sticks to use for your project.
If your project requires sticks of a certain length, be sure to measure each stick before sorting them. This will ensure that the sticks you choose are the same length, resulting in a more professional-looking finished product.
If you are using colored or patterned popsicle sticks, you may also want to sort them by color or pattern. This will help you plan out your design before starting to glue the sticks together.
Sorting your popsicle sticks may seem like a small step, but it can make a big difference in the outcome of your project. It ensures that you have all the sticks you need, that they are the right size and shape, and that your design is thought out beforehand. By taking the time to sort your sticks, you will be one step closer to creating a successful and beautiful project.
If you need further inspiration for your craft projects, check out our article on how to glue tortillas together. And if you are looking for an alternative to liquid glue, be sure to read our article on how to use glue tape.
Choosing the Right Glue

When it comes to gluing popsicle sticks side by side, choosing the right glue is crucial. The adhesive you choose will determine the strength and durability of your project. Various types of glue are available, each with its own strengths and weaknesses. To make an informed decision, it’s essential to weigh your options carefully. Here, we’ll take a closer look at some of the most popular popsicle stick glues and their features to help you make the best choice for your project.
PVA Glue
PVA glue is a popular and affordable option for gluing popsicle sticks side by side. This type of glue is water-based and dries clear, making it great for crafting projects. Here are some advantages of using PVA glue for your popsicle stick projects:
- Accessible: PVA glue is widely available at craft stores and online, making it an easy option to find.
- Safe: PVA glue is non-toxic and safe for children to use, making it a great option for family crafting projects.
- Flexible: Once dried, PVA glue allows for a degree of flexibility, which can be helpful for projects that may be subject to some bending or movement.
- Easy to clean up: PVA glue can be easily cleaned up with water while it’s still wet, which makes it a convenient option for parents and teachers.
When using PVA glue for popsicle stick projects, apply a thin, even layer of glue to each stick. Press the sticks firmly together and use clamps to hold them in place while the glue dries. If excess glue seeps out from between the sticks, wipe it away with a damp cloth.
Keep in mind that PVA glue may take longer to dry than other types of glue, especially in humid environments. Be patient and allow the glue enough time to dry thoroughly before moving on to the next steps of your project.
PVA glue is a great option for gluing popsicle sticks side by side. It’s easy to use, safe, and accessible for crafters of all skill levels.
Epoxy Resin
Epoxy Resin: Epoxy resin is a two-part glue that consists of a resin and hardener. It’s known for its strong bonding capabilities and is often used in woodworking and other DIY projects. Epoxy resin works well on uneven surfaces and can fill gaps easily. It’s also water-resistant, which makes it ideal for outdoor projects. However, epoxy resin can take longer to dry compared to other types of glue, so you need to be patient and allow enough time for it to cure properly.
Advantages:
- Strong bonding capabilities
- Water-resistant
- Can fill gaps easily
- Works well on uneven surfaces
- Ideal for outdoor projects
Disadvantages:
- Longer drying time
- Can be messy
- Requires careful measuring and mixing of resin and hardener
Tips: When working with epoxy resin, make sure to wear gloves and work in a well-ventilated area. Measure and mix the resin and hardener thoroughly according to the manufacturer’s instructions, as an uneven mixture may affect the glue’s strength. Use a disposable brush or stick to apply the glue, and wipe away any excess with a cloth. If you accidentally spill epoxy resin, you can try these tips on how to clean it up. Additionally, if you want to create a glue bomb, epoxy resin can be a great option. Check out our guide on how to make a glue bomb for more information on this fun and creative project.
Hot Glue
Hot glue is a popular choice for gluing popsicle sticks, especially for those who want a quicker drying time. It comes in a gun-like applicator that melts the glue stick and dispenses it as a hot, sticky liquid. Here’s a breakdown of the pros and cons of using hot glue for your popsicle stick project:
| Pros | Cons |
|---|---|
| Quick drying time | Less strong bond compared to other glues |
| Easy to apply | Can be messy with excess glue oozing out |
| Can be used on a variety of materials | Not suitable for high-temperature environments |
If you do choose hot glue for your popsicle stick project, it’s important to keep in mind that it may not provide as strong of a bond compared to other types of glue. Because of this, it may not be the best choice for projects that will be subject to a lot of stress or weight.
When using hot glue, be sure to apply it in small dots or lines along the length of the popsicle stick to avoid excess glue dripping or oozing out. It’s also important to work quickly with hot glue as it dries very fast.
Hot glue can be a good choice for certain popsicle stick projects, especially those that require a quick drying time or are not subject to heavy stress or weight.
Gluing Your Popsicle Sticks
As you prepare to glue your popsicle sticks together, you may find yourself wondering about the best technique to use. With so many types of glues available on the market and varying ways to apply them, it’s easy to feel overwhelmed. But have no fear! With the following step-by-step instructions and helpful tips, you’ll be able to successfully glue your popsicle sticks side by side with ease and confidence. Ready to get started? Let’s dive in!
Applying Glue
Before joining your Popsicle sticks together, it’s important to properly apply the glue. This will ensure a sturdy hold and prevent your project from falling apart. Here are the steps to correctly apply glue:
| Step | Action |
|---|---|
| Step 1 | Cover your work surface: Before beginning any gluing, lay down a protective covering on your work surface to prevent glue from getting on it. |
| Step 2 | Open your glue: Depending on the type of glue you’ve chosen, follow the instructions on the packaging to open and prepare it for use. |
| Step 3 | Apply the glue: Using a small brush or the nozzle of the glue bottle, apply a small amount of glue to one of the Popsicle sticks. Be careful not to use too much glue as it can cause the sticks to slide around and create a mess. |
| Step 4 | Distribute the glue: Use the brush or nozzle to evenly distribute the glue over the entire surface of the stick. This will ensure a strong bond between the sticks. |
| Step 5 | Repeat on the other stick: Apply glue to the second stick in the same manner as the first stick. |
Ensuring that you properly apply glue is crucial to the success of your project. By following these simple steps, you’ll be able to ensure a strong and lasting bond between your Popsicle sticks.
Joining Your Sticks
Now that you have applied glue to your popsicle sticks, it’s time to join them together. Follow these steps to properly join your sticks:
- Align your sticks: Set the first stick in the desired position, and then place the second stick alongside and parallel to it. It’s important to make sure the edges are touching and aligned correctly, otherwise your project may end up lopsided.
- Press sticks together: Lightly press the sticks together so they securely stick to one another, and then hold the sticks in place for a few seconds to make sure the glue sets in.
- Repeat: Repeat this process with all the sticks necessary to complete your project.
While joining your sticks, make sure to keep checking the alignment of the sticks to ensure they are parallel and straight. It’s important to do this because any mistake in alignment can be magnified with each stick you add and can result in a crooked or uneven final product.
If you notice any misalignment, gently adjust the position of the sticks before the glue dries. But if you need to make larger adjustments, it may be better to start over with a fresh set of sticks.
Remember, practice makes perfect! Don’t worry if you make mistakes along the way. Just take your time and be patient with yourself. With enough practice, you’ll soon become an expert in joining popsicle sticks.
Using Clamps
When it comes to gluing popsicle sticks side by side, using clamps can be a helpful tool to ensure a strong and secure bond. Here’s a step-by-step guide on how to properly use clamps during the gluing process:
| Step 1: | Apply a line of glue along the edge of one popsicle stick. |
| Step 2: | Press another popsicle stick onto the glued edge, making sure the sticks are flush against each other. |
| Step 3: | Place clamps onto each end of the sticks, ensuring they are tight enough to hold the sticks firmly together. |
| Step 4: | Wipe away any excess glue from the edges using a damp cloth or paper towel. |
| Step 5: | Leave the clamps in place until the glue is completely dry. |
It’s important to note that when using clamps, it’s easy to accidentally move the popsicle sticks out of place. Make sure to double-check that the sticks are still properly aligned after clamping them down. Additionally, be cautious not to apply too much pressure, as this can cause the sticks to warp and create an uneven surface.
When the glue has dried completely and the clamps are removed, you’ll be left with a strong and secure bond between your popsicle sticks.
Trimming Excess
Once you have successfully glued your popsicle sticks, it is likely that there will be some excess sticks that need to be trimmed away. Trimming your excess sticks is a crucial final step in your project to achieve a polished, professional look.
Tools you will need:
| Craft knife or scissors |
| Sandpaper |
Step 1: Assess the excess
Before trimming any excess sticks, it is important to assess and determine which areas need to be trimmed. Examine your project carefully and identify any areas where the sticks extend beyond the desired dimensions or are uneven.
Step 2: Use a craft knife or scissors
Once you have identified the areas that need to be trimmed, use a sharp craft knife or scissors to carefully cut away the excess. Hold your craft knife or scissors at a slight angle to ensure a smooth cut and avoid any frayed edges.
Step 3: Sand the edges
After trimming your excess sticks, sand the edges using sandpaper to ensure a smooth and even finish. Use a fine-grit sandpaper and lightly sand the edges until they are flush with the rest of the project.
Step 4: Clean up
When you have finished sanding, be sure to clean up any debris or dust left on your project. A clean finish will make your project look more professional and will prevent any dust or debris from affecting the paint or varnish if you choose to apply it.
Remember, always practice caution when using a craft knife or scissors to avoid injury and to ensure a clean cut. Taking the time to trim and sand your excess sticks will give your project a sleek, professional look that is sure to impress.
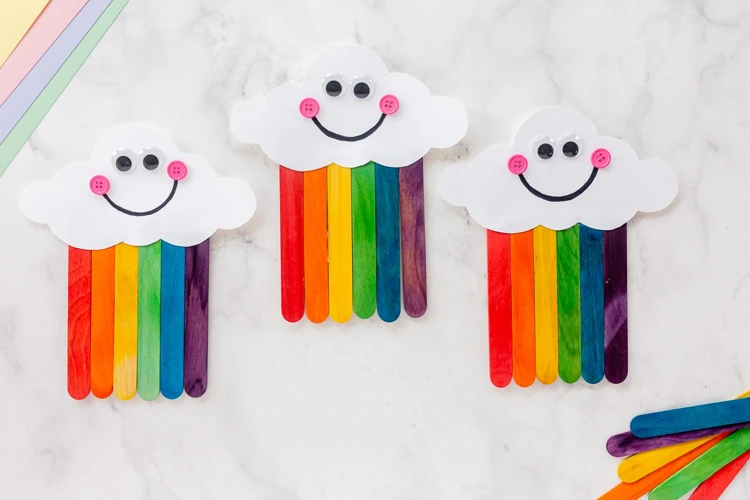
Finishing Your Project
Now that you have successfully glued your popsicle sticks side by side, it’s time to give your project a beautiful and polished finish. This is where finishing touches come into play. Depending on your project, you may want to sand and paint it, or add other decorative elements to it. In this section, we will go over some tips on how to give your project the perfect finishing touch.
Sanding Your Project
After you have glued your popsicle sticks together, you may notice rough edges and uneven surfaces. This is where sanding comes in handy to give your project a smooth finish. Here are some steps to follow when sanding your project:
- Select the right sandpaper grit: You want to start with a coarse grit sandpaper (around 80-100 grit) and work your way up to a finer grit (around 220-240 grit).
- Sand the edges: Start by sanding the edges of your project to remove any excess glue or rough spots. Use smooth, even strokes in one direction to avoid creating swirls or scratches in the wood.
- Sand the surfaces: Once the edges are smooth, move on to sanding the surfaces of your project. Again, use smooth, even strokes in one direction and work your way up to a finer grit sandpaper. You’ll want to remove any bumps or imperfections on the surface.
- Check your progress: After sanding, wipe your project clean with a damp cloth to check your progress. You should have a smooth and even surface without any rough spots.
- Repeat if necessary: If you notice any rough spots or imperfections, repeat the sanding process with a finer grit sandpaper until you’re satisfied with the smoothness of your project.
Sanding can be a tedious process, but it’s important to take your time and do it right to achieve the best results. Once you’re satisfied with the smoothness of your project, you’re ready to move on to the next step – painting!
Painting Your Project
Once you’ve successfully glued your popsicle sticks side by side, you may want to add a splash of color to your project. Here’s how to paint your project and make it stand out:
| Step 1: | Choose the type of paint you want to use. Acrylic paints are easy to work with and dry quickly, while oil paints take longer to dry but offer a more durable finish. You can also use spray paint for a fast and even coverage. |
| Step 2: | Prepare your workspace by covering it with newspaper or a drop cloth to prevent any paint spills or stains. |
| Step 3: | Sand your project lightly with fine-grit sandpaper to create a smoother surface for painting. |
| Step 4: | Apply a primer coat to your project to help the paint adhere better and last longer. Use a small brush or roller to apply a thin and even coat of primer, and let it dry completely before starting to paint. |
| Step 5: | Choose your paint colors and apply them in thin and even coats with a small brush or roller. Allow each coat to dry before adding another layer, and make sure to paint the sides and corners of your project as well. |
| Step 6: | Once you’ve achieved the desired level of coverage and color, let your project dry completely according to the paint manufacturer’s instructions. |
| Step 7: | If desired, you can add a clear topcoat to your project to protect the paint and give it a glossy or matte finish. |
With these steps, your popsicle stick project will now have a colorful and polished look. Don’t be afraid to experiment with different colors and techniques to create a unique design that reflects your personality and creativity.
Troubleshooting
Even with careful preparation and execution, gluing popsicle sticks side by side can sometimes lead to unexpected problems. Don’t worry, though. These issues are not uncommon, and there are easy solutions to fix them. In this section, we will discuss some common problems you may encounter and offer tips on how to troubleshoot and resolve them. Let’s dive in and become an expert at fixing issues that might arise when gluing popsicle sticks.
Gaps Between Sticks
One common issue you may encounter when gluing popsicle sticks side by side is the presence of gaps between them. These gaps can be unsightly and can weaken the overall structure of your project. However, with the right techniques, you can minimize or eliminate these gaps altogether.
Issue: Gaps between popsicle sticks after gluing them together.
Cause: Insufficient or uneven application of glue, or popsicle sticks that are not straight or even.
Solution: The following steps can help you prevent or address gaps in your popsicle stick projects:
| Step | Description |
|---|---|
| 1 | Apply glue liberally: When gluing popsicle sticks side by side, it is important to apply enough glue to fill the spaces between them. Use a brush or applicator to spread the glue evenly and ensure it reaches all the crevices between each stick. Avoid using too little glue, as this can result in gaps. |
| 2 | Use clamps: Clamping your popsicle sticks together can help ensure that they stay aligned while the glue dries. This can help prevent gaps caused by uneven sticks moving around during the gluing process. Make sure to use enough clamps to hold the sticks firmly in place. |
| 3 | Sand the sticks: If you notice gaps after gluing the sticks together, you can use sandpaper to smooth out the surface and remove excess glue. This can also help level out any uneven sticks, reducing the likelihood of gaps. |
| 4 | Fill gaps with more glue: If you still notice gaps after sanding, you can fill them in with a small amount of glue and let it dry before sanding again. This can help create a smoother, more seamless surface. |
By following these steps, you can minimize or eliminate gaps between your popsicle sticks and create a more professional-looking finished product. Remember to take your time and be patient when gluing your popsicle sticks together, as rushing can lead to mistakes and gaps. With a little practice and attention to detail, you can create beautiful and sturdy projects using popsicle sticks.
Glue Stains
Dealing with glue stains can be frustrating, but fortunately, there are several ways to remove them. Here are some effective methods:
| Method | Materials Needed | Instructions |
|---|---|---|
| Acetone | Acetone, cotton swabs, gloves | Put on gloves to protect your hands. Dab a cotton swab in acetone and rub it onto the glue stain. Be sure to work in a well-ventilated area to avoid inhaling the fumes. Keep rubbing until the glue stain dissolves. Wipe away the residue with a clean cloth. |
| Vinegar | White vinegar, water, clean cloth | Mix equal parts white vinegar and water in a bowl. Dip a clean cloth in the solution and apply it to the glue stain. Rub the area gently until the stain disappears. Rinse with water and dry with a clean cloth. |
| Rubbing alcohol | Rubbing alcohol, cotton swabs | Place a few drops of rubbing alcohol on a cotton swab and dab it onto the glue stain. Wait a few minutes to allow the alcohol to dissolve the glue. Once the glue has softened, use a clean cloth to wipe away the residue. |
| Warm soapy water | Warm water, dish soap, clean cloth | Mix a few drops of dish soap with warm water in a bowl. Dip a clean cloth in the solution and rub it onto the glue stain. Keep rubbing until the glue stain disappears. Rinse with water and dry the area with a clean cloth. |
Tip: Always test any cleaning solution on an inconspicuous area before applying it to the glue stain, to make sure it won’t damage the material.
Sticks Breaking Apart
If your popsicle sticks are breaking apart despite your efforts, don’t worry, there are a few things you can try to salvage your project.
1. Use stronger glue: When it comes to gluing popsicle sticks together, not all glue types are created equal. If you suspect the glue you’re using isn’t strong enough, try using a stronger adhesive such as epoxy resin.
2. Don’t apply too much pressure: Pressing too hard on your sticks while gluing them together can cause them to break. Instead, apply gentle pressure and let the glue dry fully before handling your project.
3. Check the quality of your popsicle sticks: Sometimes, popsicle sticks can be of low quality, causing them to snap when pressure is applied. Ensure that the sticks you’re using are sturdy enough for your project.
4. Let the glue dry completely: Rushing to handle your project before the glue is completely dry can cause it to break apart. Be patient and let the glue dry for the recommended time before touching your sticks.
5. Reinforce with additional sticks: If your sticks keep breaking, consider reinforcing your project with additional popsicle sticks. This can help redistribute the pressure and provide additional support.
By following these tips, you should be able to prevent your popsicle sticks from breaking apart and turn your project into a success!
Conclusion
In conclusion, gluing popsicle sticks side by side is a fun and creative way to make a variety of crafts and projects. With the right tools and techniques, you can create everything from picture frames to birdhouses and beyond.
Remember to start by preparing your popsicle sticks by cleaning and sorting them, and selecting the right type of glue for your project. PVA glue is great for basic projects, while epoxy resin is ideal for more durable items. Hot glue can also be a good option for temporary projects or for attaching more delicate decorations to your popsicle stick structure.
When it comes to actually joining your popsicle sticks together, make sure to apply the glue evenly and use clamps to hold the sticks firmly in place while the glue dries. After trimming any excess glue and sanding your project, you can choose to paint or decorate your popsicle stick creation however you like.
If you run into any issues along the way, such as gaps between sticks or glue stains, don’t worry! There are plenty of solutions to help troubleshoot these problems and ensure that your project turns out beautifully.
Overall, gluing popsicle sticks side by side can be a rewarding and relaxing activity that allows you to unleash your creativity and make something entirely unique. So why not give it a try and see what you can come up with?
Frequently Asked Questions
What is the best type of Popsicle stick to use for crafting?
The best popsicle sticks for crafting are the ones made of sturdy birchwood. They are more durable, easy to handle, and also don’t warp easily.
Can I use a hot glue gun to glue popsicle sticks together?
Yes, you can use a hot glue gun to glue popsicle sticks together. Just be sure to use it sparingly, as too much hot glue can create excess bulkiness and uneven glue lines.
How can I avoid getting glue stains on my popsicle stick project?
One way to avoid getting glue stains on your popsicle stick project is to apply glue sparingly using a toothpick or a small brush. You can also wipe off any excess glue with a damp cloth.
Why are my popsicle sticks warping after I apply glue?
This could be because you are using too much glue, causing the popsicle sticks to absorb excess moisture and warp. Try applying less glue and clamping the sticks together until the glue dries completely.
Can I paint my popsicle stick project after gluing the sticks together?
Yes, you can paint your popsicle stick project after gluing the sticks together. Just be sure to let the glue dry completely before painting.
What type of glue is best for a popsicle stick birdhouse?
Epoxy resin is the best type of glue to use for a popsicle stick birdhouse. It is strong, durable, and weather-resistant.
How do I clean popsicle sticks before gluing them together?
You can clean popsicle sticks by wiping them down with a damp cloth or soaking them in warm water for a few minutes. Be sure to let them dry completely before gluing them together.
What can I do if I accidentally glued two sticks together in the wrong position?
You can use a craft knife or scissors to carefully separate the glued sticks. Be careful not to break or damage the sticks in the process.
Why do I need to use clamps when gluing popsicle sticks together?
Clamps help to hold the popsicle sticks together while the glue dries, creating a stronger and more even bond between the sticks.
How can I prevent gaps between popsicle sticks when gluing them together?
One way to prevent gaps between popsicle sticks is to apply glue to both sides of each stick before joining them together. You can also press the sticks firmly together and wipe off any excess glue with a damp cloth or toothpick.