As a homeowner or DIY enthusiast, you may often come across the need to repair or renovate walls that have been damaged or worn out over time. One common solution is to glue plaster to the surface, providing a smooth and durable finish. However, the process of gluing plaster requires proper planning and execution to ensure the best results. In this guide, we will take you through step-by-step instructions on how to glue plaster, covering everything from preparing the surface to selecting the right glue. By the end of this article, you will be equipped with the knowledge and skills needed to confidently glue plaster and achieve a professional-looking finish. So let’s get started!
What You Will Need
Before you start gluing plaster, you will need a few materials and tools to help you do the job effectively. In this section, we’ll outline the essential items you’ll need to gather before you get started. You’ll need both materials and tools for the job, including plaster, water, sandpaper, a putty knife, primer, and glue. Make sure you have all of these items on hand before you begin. Not having the necessary supplies can cause frustration and lead to a poorly finished project. If you need to purchase any materials or tools, check out who sells e6000 glue, which is a helpful resource for buying construction supplies.
Materials
To properly glue plaster, you will need a few materials. Here is a list of what you will need:
| Plaster: | The amount of plaster you need will depend on the size of your project. Choose a high-quality plaster that is appropriate for your needs. |
| Water: | You will need clean water to mix with your plaster. |
| Paint mixer: | You can use a paint mixer attachment on a power drill to mix your plaster thoroughly. |
| Trowel: | A trowel is a tool with a flat, pointed blade that is used to apply and spread plaster on a surface. |
| Sandpaper: | You will need sandpaper to smooth out any rough areas on the surface before applying plaster. |
| Primer: | Applying primer before the plaster will help with adhesion and ensure your plaster sticks properly to the surface. |
| Glue: | You may need glue to attach the plaster to the surface, depending on the type of project you are working on. Make sure to choose the right glue for your needs. (source) |
To make sure your project goes smoothly, it’s important to gather all necessary materials before beginning. With the right materials at hand, you can confidently proceed to the next steps.
Tools
Having the right tools when gluing plaster is crucial for achieving optimal results. Here are the essential tools you’ll need to gather before starting the process:
- Trowel: A trowel is used to apply and smooth the plaster onto the surface. A 12-inch trowel usually works well for most jobs.
- Hawk: A hawk is a flat board with a handle underneath that is used to hold the plaster while you work. It’s important to choose a hawk that’s sturdy enough to hold the weight of the plaster.
- Bucket: You’ll need a bucket to mix the plaster in. A 5-gallon bucket is ideal for this purpose.
- Electric Drill with Mixing Paddle: A drill with a mixing paddle attachment can be used to quickly and thoroughly mix the plaster. This will save you time and effort and ensure that the plaster is evenly mixed.
- Waterproof Gloves: Plaster can be very harsh on your hands, so it’s important to protect them with waterproof gloves.
- Sandpaper: Sandpaper is used to smooth out the surface before applying the plaster. It’s best to use sandpaper with a 120-grit or higher.
- Primer: Applying primer to the surface before applying plaster can help the plaster stick better and last longer. Choose a primer that’s suitable for the surface you’re working on.
Having these tools at your disposal will make the gluing process smoother and more efficient. Remember to clean the tools thoroughly after use to ensure they are ready for the next project. If you need help choosing the right type of glue for your next project, check out our guide on what glue to use for ornaments.
Preparing the Surface
Preparing the surface is a crucial step when it comes to applying plaster. You want to ensure the surface is clean, smooth, and properly primed so that the plaster can properly adhere and dry evenly. Failure to properly prepare the surface can result in uneven plaster application or the plaster not sticking properly. In this section, we’ll go over the necessary steps to prepare your surface for plastering. So grab your materials and tools, and let’s get started!
Clean the Surface
Before applying plaster to any surface, it’s essential to clean it properly. The surface should be free from dirt, dust, and debris. Any loose pieces of old plaster or paint should be scraped off with a putty knife. A clean surface ensures that the plaster adheres well and lasts longer. Here are the materials you’ll need and the steps to follow for cleaning the surface.
| Materials | Tools |
|---|---|
| – Clean water | – Bucket |
| – Sponge | – Scrub brush |
| – Vinegar (optional) | – Putty knife |
| – Safety gloves |
Here’s how to clean the surface:
Step 1: Put on your safety gloves. Gloves will protect your hands from any sharp pieces of plaster or paint chips that might be left on the surface.
Step 2: Mix clean water and vinegar (optional) in a bucket. Add a few drops of vinegar to the water if the surface is very dirty. The vinegar will help to break down any stubborn dirt or grime.
Step 3: Dip a large sponge into the water and wring it out well. The sponge should be damp, but not dripping wet.
Step 4: Scrub the surface with the sponge. Use circular motions to work the water into the surface and remove any dirt or debris.
Step 5: Rinse the sponge often. Rinse the sponge in clean water frequently to remove any dirt or debris it picks up.
Step 6: Use a scrub brush for tough stains. A scrub brush can be used to remove any stubborn stains or marks on the surface.
Step 7: Let the surface dry completely. Allow the surface to air dry completely before proceeding to the next step.
It’s important to note that any residue left on the surface can compromise the adherence of the plaster to the surface. If there are any stubborn stains or marks, you can use a cleaning agent specifically designed for the type of surface you are working on. With a clean surface, you can proceed to the next step of sanding the surface.
Sand the Surface
Before applying plaster, it’s important to properly sand the surface to ensure that it is smooth and free of any bumps or rough patches. This step will also help the plaster adhere better to the surface.
| Materials | Tools |
|---|---|
| Sandpaper (medium and fine grit) | Sanding block or electric sander |
| Bucket of water | Tarp or drop cloth |
Begin by laying down a tarp or drop cloth to protect the surrounding area from any dust or debris. Then, use a medium grit sandpaper to sand the entire surface, focusing on any areas that are particularly rough or uneven. Once the surface is smooth, switch to a fine grit sandpaper and sand the surface again to create an even smoother finish. Be careful not to sand too aggressively, as this can damage the surface or create uneven patches.
After sanding, wipe the surface with a damp cloth or sponge to remove any dust or debris. It’s important to make sure that the surface is completely clean and free of any loose particles before moving on to priming.
It’s worth noting that different surfaces may require different sanding techniques or tools. For example, sanding plaster walls may require a different approach than sanding wooden surfaces. In any case, it’s important to research the specific surface and sanding techniques required for your project to ensure a successful outcome.
If you need more information about types of glue, check out our article about how to make paper glue.
Prime the Surface
Prior to applying the plaster, it is important to prime the surface to ensure the best possible adhesion of the plaster. Priming the surface creates a barrier between the surface and the plaster, allowing the plaster to properly bond and preventing it from peeling or cracking over time.
To prime the surface, you will need a primer that is specifically designed for the surface you will be working with, such as drywall, plaster, or wood. A primer labeled as “universal” is generally a safe option if you are not sure what type of primer to use.
In order to apply the primer, you will need a paintbrush or a roller, depending on the size of the surface. It’s important to properly cover the surface with primer, ensuring that there are no missed spots or thin areas.
| Materials | Tools |
|---|---|
| Primer | Paintbrush or roller |
| Cloth |
Before starting, make sure to clean the surface thoroughly and let it dry completely. This will ensure that the primer adheres properly. Use a damp cloth to wipe away any dust or debris and let the surface dry completely before starting to prime.
When applying the primer, work in small sections at a time, starting at the top of the surface and working your way down. Use long, even strokes and be sure to blend each section together to create a smooth and even surface. Allow the primer to dry completely before moving on to the next step.
By taking the time to prime the surface, you are ensuring that your plaster application will be stable and long-lasting. If you skip this step, you may find that your plaster begins to crack or peel over time. So take the time to prime your surface properly and you’ll be rewarded with a beautiful, long-lasting plaster finish.
Pro tip: If you are working with a large surface, consider using a paint sprayer to apply the primer more quickly and evenly. Just be sure to follow the manufacturer’s instructions and use protective gear to avoid inhaling the primer fumes.
Mixing the Plaster
After preparing the surface, it is time to move on to the next step: mixing the plaster. Getting the right consistency for the plaster is crucial to achieving a smooth and professional finish. Although it may seem like an easy task, there are a few key considerations to keep in mind. In this section, we will go over the necessary materials and tools, as well as step-by-step instructions for mixing plaster that will bond strongly. Whether you’re a DIY enthusiast or contractor, pay close attention to these tips to make sure you get the job done right.
Choose the Right Plaster
When it comes to choosing the right plaster, there are a few things to keep in mind to ensure that you end up with a strong and durable finish. Here are some tips to help you select the best plaster for your project:
1. Consider the setting time: Plasters can have varying setting times, so it’s essential to choose one that fits the needs of your project. If you’re working on a larger area, you may want to use a slower-setting plaster to give you more time to work with it. If you’re repairing a small crack, a faster-setting plaster may be a better choice.
2. Look for a plaster that is easy to sand: Sanding is an important step in the plastering process, as it helps to smooth out the surface and create a polished finish. It’s a good idea to choose a plaster that is easy to sand. Some plasters are designed to be smoother than others, so consider this when making your selection.
3. Check the coverage: Different plasters have different coverage areas, and it’s important to choose one that will cover the surface you need it to. It’s essential to calculate how much plaster you’ll need for your project beforehand to avoid running out in the middle of the work.
4. Ensure compatibility with your surface: Certain plasters may not work well with specific surfaces, such as wood or metal. Be sure to check the label before purchasing to ensure that the plaster you choose is compatible with the surface you’ll be working with.
By considering these factors when choosing your plaster, you will be able to ensure that your project will look the way you want it to. Remember that the right plaster is essential to achieving a smooth and seamless finish.
Internal Link: If you’re working with wood and want to know how to tell if your wood glue is bad, check out our guide on How to Tell if Wood Glue is Bad.
Measure the Plaster
When measuring the plaster, accuracy is crucial to avoid a mix that is too thick or too runny. Most bags of plaster will have instructions on the recommended mixing ratio. However, before adding water, it is important to accurately measure the dry plaster powder.
One way to measure the plaster is by using a scale. Place a mixing bowl on the scale and press the “tare” button to reset the weight to zero. Slowly pour the plaster powder into the bowl until it reaches the desired weight. For example, if the instructions call for a 2:1 ratio of plaster to water and you need 2 pounds of plaster, you would measure out 1 pound of water.
Another option is to use a measuring cup. Place the cup on a flat surface and slowly pour the plaster powder into it until it reaches the desired mark. Again, it is important to follow the instructions for the correct mixing ratio. For example, if the instructions call for a 2:1 ratio of plaster to water and you need 2 cups of plaster, you would measure out 1 cup of water.
Note: Make sure to use clean and dry measuring tools to prevent any contamination or interference with the chemical reaction in the plaster.
Once the plaster has been accurately measured, it is time to add water and mix thoroughly. The next section will cover this process in detail.
Add Water
When it’s time to add water to the plaster, it’s important to achieve the right consistency. Adding too much or too little water can result in a weak or brittle plaster, so it’s important to measure the water carefully.
| Plaster Type | Water Measurement |
|---|---|
| Regular plaster | Start by adding 2 parts water to 1 part plaster. |
| Quick-setting plaster | Start by adding 1 part water to 2 parts plaster. |
Begin by pouring the recommended amount of water into a clean mixing container. If you don’t have a specific mixing container, you can clean out a large plastic bucket or use a wheelbarrow. Add the recommended amount of plaster, a little at a time, and begin to mix with a clean trowel or mixing tool.
It’s important to mix the plaster and water thoroughly and to avoid overmixing, as this can result in air bubbles forming in the plaster. The goal is to achieve a smooth, consistent mixture with no lumps.
If you’re unsure whether the plaster is the right consistency, start with a little less water and gradually add more until it looks right. Remember, it’s always better to err on the side of caution and add less water than too much.
Helpful tip: To ensure you’re using the right amount of water, measure it out first using a measuring cup or scale. This will help to achieve the perfect consistency for your plaster and ensure it sets correctly.
For more tips and tricks on using glue and other adhesives, check out our article on how to get glue in Destiny.
Mix Thoroughly
Mixing the plaster thoroughly is a crucial step to ensure a smooth and workable mixture. It’s important to note that the mixing ratio may vary depending on the type of plaster you are using, so make sure to refer to the manufacturer’s instructions for the correct measurements. Here are the steps to mix the plaster properly:
- Prepare the tools: Before you start mixing, make sure you have all the necessary tools such as a mixing bucket, a mixer attachment, and a power drill. It’s important to use a power drill as it will make the mixing process much easier and quicker.
- Measure the plaster: Carefully pour the plaster into a mixing bucket, ensuring that you have the correct amount according to the manufacturer’s instructions.
- Add water gradually: With the mixer attachment in place, start mixing the plaster while slowly adding water. It’s crucial to add water gradually to avoid making the mixture too runny. Aim for a smooth and creamy consistency, similar to that of pancake batter.
- Mix thoroughly: Once all the water is added, mix the plaster thoroughly for 2-3 minutes until there are no lumps or dry spots in the mixture. To ensure that the plaster is fully mixed, scrape the sides and bottom of the mixing bucket with a trowel and continue mixing until the mixture is consistent throughout.
It’s important to note that the setting time of the plaster once mixed can be quick, so it’s essential to work efficiently in applying the plaster onto the surface. If the plaster starts to thicken or dry out, do not add more water to try and prolong the working time. Instead, discard the mixture and mix a new batch to ensure the best results.
In the next section, we’ll be discussing how to apply the plaster onto the surface in detail. But before that, let’s discuss choosing the right glue for gluing plaster in place. If you’re interested, check out our guide on what type of glue to use on laptop.
Applying the Plaster
Now that you have prepared the surface, it’s time to apply the plaster! This step is crucial to achieving a smooth and even finish. The process of applying plaster involves multiple coats and attention to detail to ensure the best possible outcome. You’ll want to make sure you have all the necessary tools and materials ready before starting. Let’s dive into the steps for applying plaster to your surface.
Apply the First Coat
Once the surface has been properly prepared, it is time to apply the first coat of plaster. First, mix the plaster thoroughly to ensure it is the right consistency for application. Then, using a trowel or a putty knife, start applying the plaster to the surface. Begin in one corner and work your way horizontally across the surface, using long and even strokes. Spread the plaster onto the surface until the entire area is covered with a thin layer of plaster.
Make sure to not apply too much pressure while spreading the plaster. This can cause the plaster to become uneven, leading to a bumpy surface once it dries.
As you apply the plaster, be sure to check for any air bubbles or gaps. Use the trowel or putty knife to gently smooth out any bumps or holes in the plaster. Continue with this process until the entire surface is covered with a uniform layer of plaster.
Remember that the first coat is only the foundation for the finished surface, so it does not need to be perfectly smooth.
If there are any areas that need additional plaster, apply a second coat once the first coat has dried completely. Be sure to let the first coat dry for at least 24 hours before applying the second coat.
If you’re unsure of how much plaster is needed, it’s always better to start with a thinner coat and gradually apply more as needed.
Once the first coat has been applied, it’s important to maintain a consistent temperature and humidity level in the room while the plaster dries. In general, it’s best to keep the room at a comfortable temperature between 60-75 degrees Fahrenheit and the humidity level below 60%.
Pro tip: If you need to take a break during this process, stick your tools in a bucket of water to keep the plaster from drying and hardening on them.
By following these steps carefully, you can ensure an even and smooth coat of plaster for your next home renovation project.
Apply the Second Coat
Once the first coat has dried completely, it’s time to apply the second coat. This coat will give your plaster surface a smooth and polished look. Before you start applying the second coat, make sure that the first coat is completely dry and free of any bumps or inconsistencies. Here’s how to apply the second coat effectively:
- Prepare the mixture: Mix plaster and water together according to the instructions on the plaster package. Use the same method as you did for the first coat to get a smooth and consistent mixture.
- Apply the mixture: Start from the top and work your way down. Apply the plaster mixture with the trowel using a wiping motion. Make sure to spread it evenly and smoothly. The thickness of the second coat can be slightly thinner than that of the first coat, but make sure it covers the entire surface to avoid any bumps or inconsistencies later on.
- Smooth it out: Once you have applied the plaster mixture, use a plasterer’s trowel to smooth out any bumps or uneven spots in the coat. Apply gentle but firm pressure to the trowel to achieve a smooth finish.
- Let it dry: Allow the second coat of plaster to dry completely before moving on to the next step. The drying time will depend on the type of plaster you are using, so refer to the manufacturer’s instructions for specific drying times.
Remember, the second coat is meant to provide a smooth finish to your plaster surface. It’s important to take your time with this step to ensure you achieve the desired results. Once the second coat has dried completely, you can move on to gluing the plaster to its intended surface. For more information on choosing the right glue for your plaster, see “What Wood Glue Dries Clear?“. And if you have multiple glue jobs to complete, make sure to read our article, “How to Schedule Glue Jobs” for helpful tips on managing your time effectively.
Smooth the Surface
After applying the second coat of plaster, it’s important to smooth the surface down for a flawless finish. Here are the steps to follow to ensure that your surface is perfectly smooth:
- Scrape excess plaster: While the second coat is still wet, use a scraper to remove any excess plaster that may have dripped or clumped up.
- Sand the edges: Once the excess plaster has been removed, use sandpaper to smooth down any rough edges around the surface.
- Sand the surface: Next, use sandpaper or a sanding block to smooth down the surface of the plaster. This will ensure that it’s even and uniform.
- Wipe off dust: Use a clean, damp cloth to wipe off any dust or debris from sanding. This will prevent it from interfering with the glue or affecting the final finish of the plaster.
Remember that the smoothness of the surface will affect the final look of your project, so take the time necessary to achieve a polished finish. Once the surface is completely smooth and free of any rough patches or debris, you can move on to the next step of gluing the plaster into place.
Let the Plaster Dry
After applying the second coat of plaster, it’s time to let it dry. This is a crucial step in the process as if the plaster is not allowed to dry completely, it may crack later on.
The Drying Time
The drying time of plaster depends on a few factors, such as the temperature, humidity, and thickness of the plaster. Generally, plaster takes around 24-48 hours to dry completely. However, it’s recommended to wait at least 48 hours before applying any type of paint or finish.
Checking for Dryness
To make sure the plaster is completely dry, there are a few things you can do. First, check the surface for any dampness or soft spots. If it feels wet or soft, it’s not dry yet. You can also touch the plaster to see if it feels cool or warm. If it’s still cool to the touch, it’s not dry yet. You can also use a moisture meter to check for any remaining moisture in the plaster.
Preventing Cracks
To prevent the plaster from cracking during the drying process, it’s important to keep the room at a consistent temperature and humidity level. Rapid changes in temperature or humidity can cause the plaster to dry too quickly and crack. It’s also important not to disturb the plaster while it’s drying, so avoid touching or bumping into it.
To summarize, letting the plaster dry completely is a crucial step in the plastering process. Take the time to ensure the plaster is completely dry before moving on to the next step. This will prevent any cracks and ensure a smooth finish. Use the above tips to check for dryness and prevent cracking.
| Factors Affecting Drying Time | How to Check for Dryness | How to Prevent Cracks |
|---|---|---|
| Temperature | Check for dampness, touch to feel warmth, use moisture meter | Keep room at consistent temperature |
| Humidity | Check for soft spots, use moisture meter | Keep room at consistent humidity level |
| Thickness of plaster | Air dry for 24-48 hours, check for dryness | Avoid disturbing the plaster while drying |
Gluing the Plaster
Now that you’ve applied the plaster to your desired surface, it’s time to ensure it stays in place. This is where gluing the plaster comes into play. It might seem like a small step, but it’s important to choose the right glue and apply it correctly to ensure the longevity of your plaster project. In this section, we’ll walk you through the steps to glue your plaster properly. So, let’s dive in and learn more about the intricacies of gluing plaster.
Choose the Right Glue
Choosing the right glue is crucial for a successful plastering project. The wrong glue can cause the plaster to crack or peel off over time. Here are some factors to consider when selecting the right glue:
- Type of Plaster: Consider the type of plaster you are using. Some glues are better suited for certain types of plaster. For example, a gypsum plaster requires a different type of glue than a lime plaster.
- Bonding Strength: The bonding strength of the glue should also be considered. If the plaster is heavy or large, you will need a stronger adhesive to hold it in place.
- Application Method: The application method of the glue is also important. Some glues require a specific application method, such as a brush or sprayer, while others may require a trowel.
- Drying Time: Consider the drying time of the glue. Some glues require a longer drying time than others, which can slow down the plastering process.
- Weather Conditions: The weather conditions can also impact the choice of glue. If you are working in humid or wet conditions, a water-resistant glue may be necessary.
- Environmental Impact: Lastly, consider the environmental impact of the glue. Choose a glue that is environmentally friendly and safe to use indoors.
By taking these factors into consideration, you can choose the right glue for your plastering project and ensure a successful and long-lasting result.
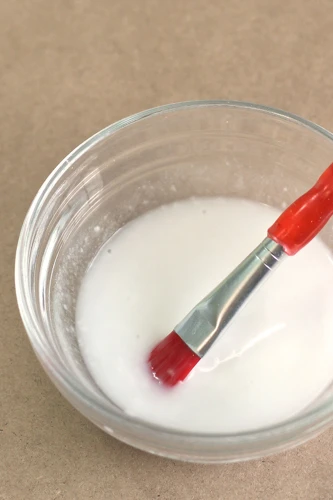
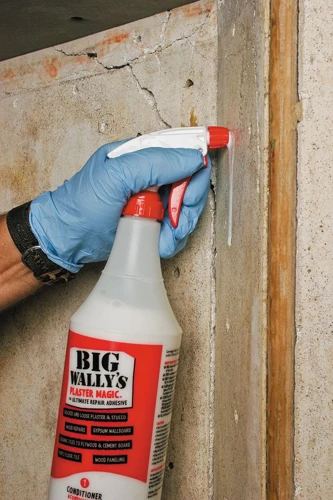
Apply the Glue
Before applying the glue, it is important to choose the right one for your project. PVA glue is a popular option for plaster as it dries clear and creates a strong bond. Construction adhesive is also a suitable option, especially for larger pieces of plaster that require more support.
Once you have selected your glue, it is time to apply it to the back of the plaster. Lay the plaster on a flat surface with the side you want to glue facing up. Using a brush or a small roller, apply a thin and even layer of glue to the back of the plaster.
Steps to Apply the Glue to Plaster:
| Step 1 | Place the plaster on a flat surface with the back facing up. |
| Step 2 | Use a brush or small roller to apply a thin and even layer of glue to the back of the plaster. |
| Step 3 | Make sure to cover the entire surface area with glue, especially the edges and corners. |
| Step 4 | Allow the glue to set for a few minutes before moving on to the next step. |
It’s important to note that using too much glue can cause it to seep out from the sides when you press the plaster onto the wall. This can lead to a messy and uneven finish. For this reason, it is best to apply a thin layer and add more as needed.
With the glue applied, it is time to press the plaster onto the wall. In the next section, we will discuss the steps for properly gluing the plaster into place.
Press Plaster into Place
Once you have applied the glue and ensured that it is evenly spread, it’s time to place the plaster onto the surface. Take your time and make sure you have positioned it in the correct spot before pressing it down firmly.
Step 1: Use both hands to carefully lift the plaster and guide it into place.
Step 2: Press down on the edges of the plaster using your fingers, working from the center outwards.
Step 3: Use a putty knife to apply pressure on the surface of the plaster, smoothing out any bumps or bubbles. Be gentle, as applying too much pressure could cause the plaster to crack.
Step 4: Continue applying pressure until the plaster is securely in place and flush with the surface.
Tip: If you’re gluing a larger piece of plaster, work with a partner to ensure that it is held and placed carefully.
Remember to work quickly, as the glue will dry fast. If you’re unsure about the placement of the plaster or need to adjust it, do so immediately after placing it onto the surface. Once the glue is dry, it will be much harder to make any changes.
By following these steps and using the right glue, you can confidently glue plaster onto any surface with ease.
Clean Up
Once you’ve successfully glued the plaster in place, it’s time to move on to the final step – cleaning up. As with any DIY project, proper clean-up ensures that your tools and surfaces are well-maintained and ready for their next use. Not only does it prevent any future damage, but it also allows you to enjoy the satisfaction of a job well-done without the worry of post-project chaos. Follow these simple steps to get your tools and materials tidy and organized after gluing your plaster in place.
Clean Tools and Materials
After completing your plastering project, it is important to properly clean up your tools and materials to ensure their longevity. Here are some steps to follow when cleaning up:
- Scrape off excess plaster: Before cleaning your tools, use a putty knife or scraper to remove any excess plaster from them.
- Wash tools with warm water: Use warm water and a sponge or cloth to wash off any remaining plaster from your tools. Make sure to get into all the crevices and corners.
- Use a cleaning solution: If there is still some residue remaining on your tools, you can create a mild cleaning solution by mixing equal parts water and white vinegar. Dip a sponge or cloth into the solution and use it to clean your tools.
- Dry your tools: Once you have cleaned your tools, dry them off thoroughly with a clean cloth. This will prevent rust and other damage caused by excess moisture.
- Clean up your work area: After cleaning your tools, take the time to clean up your work area. Sweep up any dry plaster or debris and dispose of it properly.
- Store your tools properly: Finally, store your tools in a dry, cool place to prevent damage. Make sure they are organized and easily accessible for future use.
Taking the time to properly clean your tools and materials will not only extend their lifespan, but it will also ensure a more successful plastering job in the future.
Conclusion
After following the step-by-step guide on how to glue plaster, you should now have a beautiful and durable surface. Always remember to prepare the surface properly before applying the plaster and choose the right type of plaster for the job.
During the process, it’s crucial to mix the plaster thoroughly and allow enough time for it to dry before gluing it into place. When gluing the plaster, make sure to choose the appropriate glue and press the plaster firmly into place.
After finishing the project, it’s essential to clean up all the tools and materials used. Properly cleaning and storing your tools will help prolong their lifespan.
In conclusion, gluing plaster can be a rewarding DIY project that will enhance the look and feel of any room. With the right materials, tools, and techniques, you can create a smooth, flawless finish that will last for years to come. Remember to take your time and follow each step carefully for the best results.
Frequently Asked Questions
Can I glue plaster to a painted surface?
No, it’s recommended to glue plaster to a clean and unpainted surface for best results.
How long should I let the plaster dry before gluing it?
You should wait at least 24 hours before gluing the plaster to ensure it is completely dry.
What type of primer should I use?
Use a primer that is specifically designed for plaster. This will ensure proper adhesion.
What is the best type of plaster to use?
It depends on your specific project. For interior walls, a gypsum-based plaster is a good choice. For exterior projects, a cement-based plaster is recommended.
Can I use regular glue to attach plaster?
No, it’s important to use a glue that is specifically designed for plaster to ensure proper adhesion.
Can I sand the plaster after it’s been glued onto a surface?
Yes, but be sure to use a fine-grit sandpaper and sand lightly to avoid damaging the plaster.
How long does the glue take to dry?
The drying time will vary depending on the type of glue you use. Read the manufacturer’s instructions for specific drying times.
Can I use plaster glue on a ceiling?
Yes, plaster glue can be used on ceilings as long as the surface is properly prepared and the correct glue is used.
Do I need to wear gloves when working with plaster and glue?
Yes, it’s recommended to wear gloves to protect your hands from the chemicals in the materials.
Can I paint over glued plaster?
Yes, but be sure to wait until the glue is completely dry before painting.