Have you ever wanted to create a unique and nature-inspired piece of art or decor for your home? Gluing moss to cardboard is a fantastic way to achieve just that! This step-by-step guide will walk you through the process of attaching moss to cardboard, from gathering supplies to adding final touches. By the end of this article, you’ll have a beautiful and textured piece ready to enhance your living space. So, let’s dive in!
Step 1: Gather Supplies
Before you start gluing moss to cardboard, you’ll need to gather all of the necessary supplies. Having everything you need at your fingertips will make the process go smoothly and quickly. In this step, we’ll go over all of the materials and tools you’ll need. So let’s get started! And if you’re interested in other glue-related crafts, check out our article on how to make glitter glue paint.
List of Materials
For successfully gluing moss to cardboard, it is important to gather all the necessary materials. Here is a list of materials that you will need:
| Materials | Description |
| Moss | Choose high-quality, preserved moss from a craft store or online supplier. |
| Cardboard | Use a sturdy piece of cardboard, preferably one that has been primed. |
| Primer | Use a white water-based primer to prep the cardboard surface for the moss and glue. |
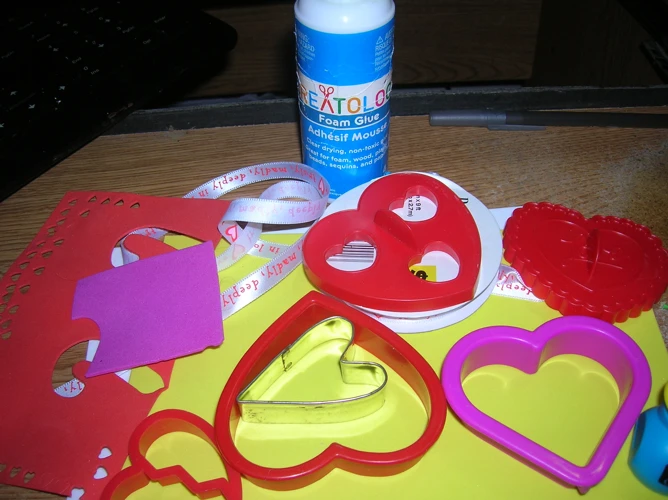
| Glue | Choose a strong adhesive like tacky glue, hot glue, or E6000 for a long-lasting hold. |
| Paintbrush | Use a clean paintbrush to apply the primer and glue. |
| Scissors | You may need to trim the moss to fit the cardboard surface. |
It is important to gather these materials before starting the project to ensure that the process runs smoothly. If you need to purchase any of the listed materials, you can find them at your local craft store or online supplier.
To learn more about gluing leaves to paper, check out our guide.
Step 2: Prep the Cardboard

Before you can glue the moss onto the cardboard, you need to properly prepare the surface. This will ensure that the moss stays securely in place and that the finished product looks neat and professional. Follow these steps to prep the cardboard for your moss creation. Don’t have any cardboard at hand? Check out what glue wine is.
Clean the Cardboard
Before you can start gluing moss to cardboard, it’s important to have a clean surface. Any dirt, dust or other debris on the cardboard can prevent the glue from sticking properly, compromising the final result. Here’s how you can clean the cardboard to ensure that the glue adheres well.
Materials needed:
- A soft-bristled brush or a clean cloth
- A small bowl of warm water
- A few drops of liquid soap (optional)
Instructions:
- Using a soft-bristled brush or a clean cloth, remove any dust or dirt from the surface of the cardboard. Make sure to get into all the nooks and crannies.
- If the cardboard is particularly dirty, mix a few drops of liquid soap into a small bowl of warm water.
- Dip the brush or cloth into the soapy water and gently scrub the surface of the cardboard. Be careful not to saturate the cardboard with water, as it can warp or disintegrate.
- Rinse the brush or cloth in clean water and wipe off any remaining soap residue on the cardboard.
- Allow the cardboard to air dry completely before proceeding to the next step.
Cleaning the cardboard may seem like a simple step, but it’s an important one that can make all the difference in the final result. Once your cardboard is clean and dry, you can proceed with the next steps to glue on the moss. If you’re looking for ideas on how to color your glue, check out our tutorial on how to make black glue.
Prime the Cardboard
Before applying the moss, it’s important to prime the cardboard so that the glue can adhere properly and the moss stays in place. Priming the cardboard covers any surface defects, creating a smooth and consistent surface for the glue. Here’s what to do:
First, gather your materials, including a primer, paintbrush or roller, sandpaper, and a clean cloth. It’s best to choose a primer that will grip on cardboard, like a PVA glue or acrylic gesso. You can also use a spray primer if you prefer.
Next, sand the surface of the cardboard to remove any bumps or rough spots. This will help the primer adhere better to the surface. Use the sandpaper to gently smooth out the surface, then wipe away any dust with the clean cloth.
Now, apply the primer evenly over the surface of the cardboard. Use the paintbrush or roller to spread the primer, working in the same direction to create a smooth finish. Allow it to dry completely before continuing to the next step. Depending on the primer used, drying time may vary from a few hours to overnight.
Once the primer is dry, lightly sand the surface again using a very fine-grit sandpaper. This helps to make the surface extra smooth and creates a better bonding surface for the glue. Remember to wipe away any dust before proceeding.
By priming the cardboard, you create the perfect surface for applying glue and moss, ensuring it stays securely in place. Now that the cardboard is prepped and ready, you can move on to applying the glue.
If you’re interested in learning how to make slime with PVA glue, check out our guide on How to Make Slime with PVA Glue.
Step 3: Apply the Glue
Now that you have primed your cardboard, it’s time to move on to applying glue. This step is crucial to ensuring your moss stays in place on the cardboard. Choosing the right glue and applying it correctly will make all the difference. Take a look at our guide below to make sure you are using the right glue for your project. And, if you’re interested in other fun glue-related crafts, check out our article on how to make thick glossy slime with school glue. Let’s get started!
Choose the Right Glue
When it comes to choosing the right glue for your moss and cardboard project, there are a few factors to consider. First, you’ll want a strong adhesive that will keep the moss securely in place without peeling or falling off over time. Additionally, you’ll want a glue that dries clear, as any visible glue residue will detract from the natural look of the moss.
One good option for gluing moss to cardboard is a clear, heavy-duty craft glue like Aleene’s Tacky Glue or E6000. These glues are strong enough to hold the moss in place while still drying clear.
Another option is to use a hot glue gun, which can provide an even stronger hold. This type of glue dries quickly and can be applied in small dots or lines for a precise application. However, hot glue can be quite visible if it drips or smears, so be careful when using it.
Table: Comparison of Glue Types
| Glue Type | Strength | Transparency |
|---|---|---|
| Aleene’s Tacky Glue | Strong | Clear |
| E6000 | Very strong | Clear |
| Hot Glue | Extremely strong | May be visible |
No matter which glue you choose, be sure to test it out on a small area before committing to gluing the entire moss piece. This will allow you to see how the glue interacts with both the cardboard and the moss, and ensure that it will provide the right level of adhesion. If you don’t have any of these glues on hand, you can check out other glue projects like how to make snowflakes out of glitter glue, how to glue Swarovski flatback, how to glue Swarovski crystals, or how to make slime with Tide and glue for other glue options and inspiration.
Apply the Glue to the Cardboard
When it comes to applying the glue onto the cardboard, it’s important to follow a few key steps in order to ensure a smooth and successful moss-gluing process.
Step 1: Squeeze a small amount of the chosen glue onto a flat surface or into a glue dish. Make sure to use a work surface that is easy to clean, as the glue may be difficult to remove once dried.
Step 2: Using a small brush or toothpick, apply a thin layer of glue onto the cardboard in the desired area. Make sure the area is completely covered with glue, but not overly saturated.
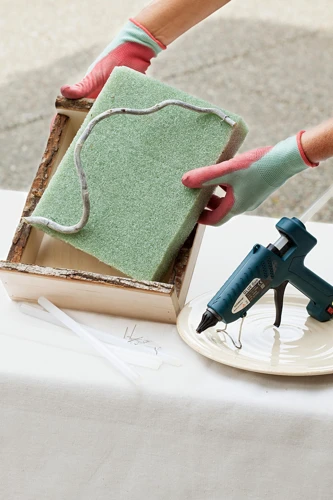
Step 3: Starting from one end, gently press the moss onto the glue-covered area of the cardboard. The moss should be pressed firmly and held in place for a few seconds to ensure it adheres properly.
Step 4: Repeat this process, working in small sections, until the entire cardboard surface is covered with moss.
Step 5: If there are any gaps in the moss coverage, apply a small amount of additional glue and moss to the area until it is fully covered.
It’s important to note that the type of glue used can make a difference in the overall success of the project. Some popular options include hot glue, craft glue, or a high-quality spray adhesive. Consider the project’s lifespan and use before deciding on a glue type.
It’s also important to not overuse the glue, as this can result in a lumpy or uneven finished product. A thin layer is all that is necessary for moss to adhere properly.
Step 4: Add the Moss
Now that you have primed your cardboard, it’s time to add the moss. This step is where the fun begins as you get to play with different textures and shades of green. The process involves carefully selecting the right type of moss and arranging it in a way that will create a visually appealing look. In this step, attention to detail is crucial as every piece of moss needs to be placed with care. Let’s dive into the process and explore how to add the moss to your cardboard base.
Choose the Right Moss
When it comes to choosing the right moss to glue to cardboard, there are a few things you should keep in mind to ensure a successful project. Here is a list of key considerations:
- Texture: Moss comes in different textures, including fuzzy, stringy, and clumpy. Consider the texture you want for your project and choose a moss that fits the bill.
- Color: Moss also comes in different shades of green, gray, and brown. If you have a specific color scheme in mind, make sure to choose a moss that complements it.
- Size: Moss can range in size from tiny grains to large clumps. Think about the size of your cardboard surface and choose a moss that will fit well without overwhelming it.
- Freshness: Depending on where you live, you may be able to find fresh moss growing in the wild. Fresh moss can be more pliable and easier to work with than dried moss that has been packaged and shipped.
By taking these factors into consideration and choosing the right type of moss for your project, you can create a beautiful and long-lasting moss-covered cardboard creation.
Arrange the Moss
Now that you have chosen the right moss for your project, it’s time to arrange it on the cardboard. This step requires a careful eye for detail because you want to make sure the moss is positioned correctly and covers the cardboard surface evenly. Follow these steps to arrange the moss:
1. Start by taking a small handful of moss and spreading it evenly over the area you want to cover with the glue. Use your fingers to press the moss firmly into the glue so it sticks well.
2. Continue to add small handfuls of moss and press them down until the entire surface is covered. Try to avoid leaving any gaps or uncovered areas, as this will make the final product look patchy.
3. To add some texture and depth to your moss-covered cardboard, try using different types of moss or pieces of bark. This will give your project a more interesting and naturalistic appearance.
4. You can also use an html table to keep your moss in different sections to create smooth arrangements. Place another type of moss in each cell using strong tag to make them stand out. Experiment with different groupings of moss until you find a look you are happy with.
5. Be sure to step back and take a look at your moss arrangement from different angles to ensure it’s looking good from all sides. If you notice any areas that look sparse or bare, add more moss until the coverage is satisfactory.
6. Once you are satisfied with the arrangement, gently press down on the moss to make sure it is securely attached to the cardboard.
With these tips, you should be able to arrange your moss in a visually appealing way that will make your project stand out. Remember, the key is to take your time and be patient in order to achieve the best possible results.
Step 5: Final Touches
As you near the end of your moss-on-cardboard project, it’s time to add the final touches that will make your creation stand out. These simple yet crucial steps will require some precision and patience, but the end result will be worth it. Get ready to put the finishing touches on your masterpiece with this guide to Step 5.
Trim the Moss
After adding the moss to the cardboard, you may find that some areas have excess moss that needs to be trimmed. To do this, start by examining the cardboard to identify any unwanted strands or patches of moss sticking out too much. Once you have identified the areas that require trimming, use a pair of scissors or sharp cutting tool to carefully trim away the excess moss.
Important tip: take your time while trimming the excess moss to avoid accidentally cutting the cardboard or any surrounding items. It’s better to cut small amounts of moss at a time and gradually modify it until you’re satisfied with the end result.
Here are a few additional tips that may come in handy while trimming the moss:
- Be sure to trim all the moss that is sticking out and has uneven edges.
- Use a small brush to remove any loose moss fragments and dust from the surface of the cardboard.
- For the areas that are too difficult to trim using scissors, try using a razor blade or craft knife to cut through the moss.
- Keep a vacuum cleaner or a dust buster nearby to clean up any mess instantly.
- Wash your hands often to avoid spreading moss or adhesive unintentionally to other surfaces.
Once you’re done with trimming, take a moment to survey the cardboard’s overall look. If you are satisfied with the appearance, you can skip this step and let the glue dry completely. However, if you still want to make further adjustments, do so. Remember that this is your project, and you should be happy with the final product.
Let the Glue Dry
Once you have applied moss to your cardboard using glue, the final step is to let the glue dry completely. This is a very important step, as it ensures that the moss stays in place and the cardboard won’t bend or fold.
Here are some key things to keep in mind while you are waiting for the glue to dry:
- Avoid touching or moving the moss: It’s important that you don’t move or touch the moss while it is drying. This can cause it to shift out of place, creating gaps and uneven coverage.
- Allow adequate drying time: Depending on the type of glue used, drying time may vary. However, it is recommended to let it dry for at least 24 hours to ensure it has fully soaked in and that the moss is properly anchored.
- Keep the cardboard flat: While the glue is drying, it’s important to keep the cardboard flat. Laying it on a surface that isn’t level or slanted can cause the moss to slide around, leading to uneven coverage or gaps.
- Avoid exposing the moss to excess moisture: While drying, excessive moisture can affect the glue’s ability to adhere its hold to the cardboard. Ensure the cardboard is kept in a dry area to help prevent the growth of mold or mildew on the moss.
By letting the glue dry thoroughly, you’ll promote good adhesion, making the moss attached to the cardboard for longer periods. This will prolong the life of your project and keep the moss firmly attached. Once the glue has completely dried, give it a quick inspection to ensure it has been properly bonded. If everything looks good, your mossy project will be ready to display for everyone to admire!
Conclusion
After following the steps outlined in this guide, you should now have a beautiful piece of artwork – a moss-covered cardboard that is ready to be displayed! However, it’s worth noting that there are many other ways you can use this technique, depending on your personal preferences and creativity.
One option is to experiment with different types of moss to add texture and dimension to your piece. You might also consider using different types of cardboard or other materials as a base, such as wood or canvas.
Additionally, this technique can be used to create a variety of moss-covered decorations, such as picture frames, vases, or even furniture pieces! The possibilities are endless, and this simple yet effective DIY project can be a great way to breathe new life into old or otherwise discarded items.
Overall, gluing moss to cardboard is not only a fun and simple project, but also a great way to add a touch of natural beauty to your home or office space. With a little bit of patience and creativity, you can create a unique and eye-catching piece that is sure to impress. So grab your supplies, put on some music, and get ready to create your very own moss masterpiece!
Frequently Asked Questions
What types of moss are suitable for gluing onto cardboard?
A variety of moss types can be used, including sheet moss, cushion moss, and mood moss.
What type of glue is best for attaching moss to cardboard?
A good glue for moss is a liquid tacky glue, which will securely adhere the moss to the cardboard.
Can I use hot glue to attach moss to cardboard?
While hot glue can be used to attach moss to cardboard, it may not provide as secure of a hold as liquid tacky glue.
Do I need to prime the cardboard before attaching moss?
Yes, priming the cardboard with a layer of white paint or gesso can help improve the adherence of the moss to the surface.
How do I clean the cardboard before priming it?
Use a clean, dry cloth or a soft-bristled brush to remove any dust or debris from the surface of the cardboard.
Can I attach other materials to the moss-covered cardboard?
Yes, you can use the moss-covered cardboard as a base to attach other materials such as flowers, twigs, or small decorations.
Can I reuse moss that has already been attached to cardboard?
While it is possible to reuse moss that has already been attached to cardboard, it may not adhere as securely the second time around.
How long does it take for the glue to dry?
The drying time for the glue will depend on the type of glue used, but typically it takes about 1-2 hours for the glue to fully dry.
Do I need to add any additional protective coating to the moss after gluing it to the cardboard?
No, the moss does not need any additional protective coating after being glued to the cardboard.
Can I use this technique to create other types of moss-covered items?
Yes, this technique can be used to create a variety of moss-covered items, such as picture frames, planters, or decorative signs.