Restoring the original charm and functionality of furniture is a craft that often involves the use of adhesives. The art of how to glue furniture back to its former glory is not just a cost-effective solution but also a rewarding DIY project. With the right approach and materials, even the most novice of handymen and women can breathe new life into their beloved furnishings.
Choosing the Best Glue for Furniture Repair
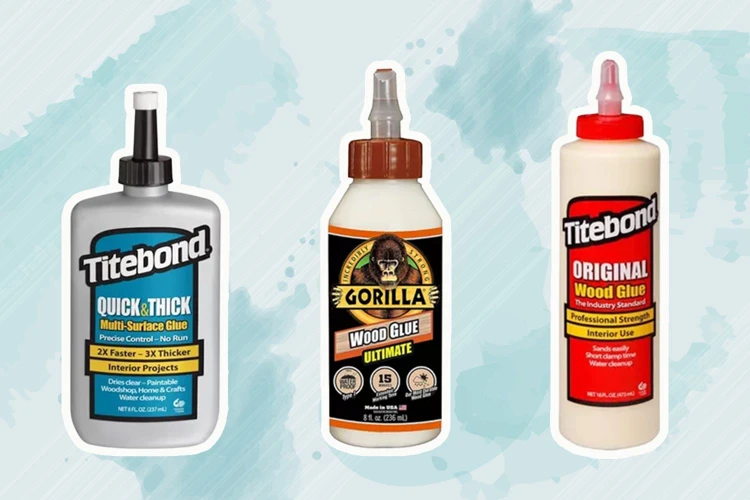
Finding the best glue for wood furniture repair is paramount to the long-term success of your project. The market offers a variety of adhesives, each suited for different materials and repair types.
Types of Glue for Wooden Furniture
- PVA (Polyvinyl Acetate) Glue
- Epoxy Resin
- Cyanoacrylate (Super Glue)
- Hide Glue
- Polyurethane Glue
Understanding Wood Glue for Furniture Repair
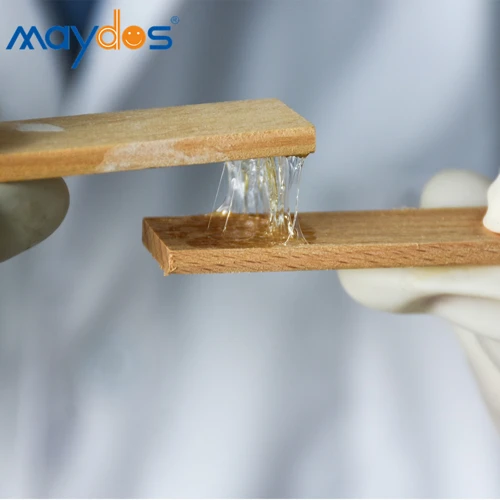
When delving into wood glue for furniture repair, it’s essential to understand its properties. Wood glue, particularly PVA type, is preferred for its strong bond and ease of use. It is designed to seep into the wood fibers, creating a bond that is often stronger than the wood itself.
Preparation for Gluing Furniture
The effectiveness of furniture glue repair begins with thorough preparation. Before you even open a bottle of adhesive, ensure that the surface and your workspace are ready.
Materials Required for Effective Furniture Glue Repair
- Quality wood glue
- Clamps
- Putty knife or a piece of cardboard
- Clean rags or paper towels
- Protective gloves
- 120-grit sandpaper
Surface Preparation Techniques
Surface preparation is a crucial step before applying glue for wooden furniture. Ensure that the surfaces to be joined are clean, dry, and free of old adhesive or finish. A light sanding will increase the adhesion by creating a rougher surface for the glue to bond to.
Step-by-Step Guide to Gluing Furniture
With your workspace prepared, the actual process of gluing can commence. Follow these steps for a seamless repair.
How to Apply Glue for Furniture Repair
Apply an even layer of glue to one of the surfaces being joined. You can use a brush or your finger (wearing a protective glove) to spread the glue. Be careful not to over-apply, as excess glue can be harder to clean up and might affect the finish.
Best Practices in Gluing Techniques
When undertaking gluing techniques, it is essential to work quickly, yet precisely, to align the pieces before the glue starts to set. Once in place, apply pressure to the joint to ensure a snug fit.
Regluing Chairs: A Specific Scenario
Regluing chairs often involves working on round tenons and mortises. It’s important to clean these areas thoroughly and apply enough glue to fill the gaps without overflowing excessively when the pieces are joined.
Clamping and Setting
Clamping plays a vital role in the success of gluing. It holds the pieces firmly together while the glue sets, ensuring a tight bond.
How Long Should Wood Glue Dry Before Removing Clamps?
The commonly asked question, “how long should wood glue dry before removing clamps,” depends on the glue type and manufacturer’s instructions. Generally, a 24-hour period is recommended for most wood glues to cure fully.
Securing the Furniture During the Drying Process
Ensure your furniture is in a stable position and not under any stress that could affect the glued joint. If necessary, use additional supports to maintain the correct alignment.
Finishing Touches and Clean-Up
Once the glue has dried, it’s time for finishing touches. This stage can make or break the visual appeal of your repair work.
Removing Excess Glue and Final Inspections
After the clamps are removed, any squeeze-out glue should be carefully scraped off with a chisel or a putty knife. Inspect the repair from all angles to ensure that the joint is seamless and the excess glue is removed.
Tips for a Clean Finish in Furniture Glue Repair
To achieve a clean finish, gently sand the area around the joint. If there’s any discoloration or glue residue, you can touch up the surface with the appropriate finish or paint.
Troubleshooting Common Gluing Issues
Even with the best intentions, sometimes furniture repairs don’t go as planned. Here’s how to address some common issues.
What to Do When the Glue Doesn’t Hold
If a joint fails, remove the old glue completely, reapply, and clamp again. Ensure that the surfaces are properly prepared and that you’re using the correct type of adhesive.
Adjusting Techniques for Different Types of Furniture
Consider the furniture’s use and the stresses it will endure. For example, a dining chair requires a stronger bond than a decorative shelf. Adjust your technique and glue choice accordingly.
Maintenance and Care After Gluing
After a successful repair, maintaining the furniture’s integrity is key to ensuring the repair lasts.
Preserving the Integrity of Glued Furniture
Avoid exposing the repaired furniture to extreme temperatures or humidity, which can weaken the glue bond. Keep the furniture clean and check the repaired joints periodically for any signs of weakness.
Long-Term Care Tips for Glued Furniture
For long-term care, treat the furniture gently. Avoid dragging or dropping which can stress the joints. Regularly dust and clean your furniture, and reapply protective finishes as needed to preserve both the wood and the glue bond.
When it comes to DIY repairs and crafting, knowing how to properly glue different materials can be incredibly useful. If you’re specifically looking to tackle furniture projects, having the right techniques is essential for a lasting finish. For more specialized guidance, you might want to explore our tutorials on how to glue jewelry, which could come in handy for decorative furniture elements, or our guide on how to glue cloth, perfect for reupholstering tasks. And if you’re dealing with carpeted furniture pieces, our article on how to glue carpet might just be the resource you need. These tips will help ensure your furniture projects look great and stand the test of time!
Conclusion: Ensuring Durable Furniture Repair with Proper Gluing
Mastering the process of how to glue furniture effectively can save you time and money, not to mention the satisfaction of extending your furniture’s life. By choosing the right glue for furniture repair, preparing the surfaces properly, applying the best gluing techniques, and allowing ample drying time, you set the stage for a repair that lasts. Add to that the finishing touches and a regime of proper care, and your furniture will stand the test of time, boasting both function and beauty.