Have you ever wondered how celebrities and influencers achieve their perfect-looking hair with the use of full lace wigs? Applying a full lace wig may seem like a daunting task at first, especially if you’re new to it. But fear not, this comprehensive guide will take you step-by-step on how to apply a full lace wig with glue. From preparing your hair and skin to styling the wig, we’ve got you covered. So, let’s get started with achieving a flawless and natural look with your full lace wig.
What You’ll Need
Gather Your Supplies: A Comprehensive List of Items Needed for Applying Full Lace Wigs with Glue
Before tackling the task of applying a full lace wig with glue, it’s important to have all the necessary supplies on hand. In addition to a high-quality full lace wig, you’ll also need scissors, adhesive or glue, a wig cap, alcohol wipes, a blow dryer, a rat tail comb, and a flat iron. Each item plays a vital role in ensuring a successful and long-lasting application. If you’re unsure about any of the supplies needed, be sure to check out our guide on how to make a wig cap with glue or explore other helpful hair extension resources.
Full Lace Wig
When it comes to applying a full lace wig with glue, the first thing you’ll need is a full lace wig. It’s essential to choose a wig that fits your head comfortably and is made from high-quality human hair or synthetic fibers. Synthetic wigs tend to be less expensive, but human hair wigs offer a more natural look and feel.
Once you have your wig, it’s important to inspect it carefully for any defects. Look for loose hairs, bald patches, or other imperfections. If you notice any problems, contact the seller for a replacement.
When choosing a full lace wig, you’ll also need to decide on the type of lace. Most full lace wigs feature either Swiss lace or French lace. Swiss lace is thinner and more delicate, while French lace is stronger and more durable. Both types of lace provide a natural-looking hairline that can be easily customized to suit your needs.
Selecting the right full lace wig is crucial for a successful application process. Make sure to do your research and choose a high-quality wig that will provide the look you desire.
Link: /how-to-make-a-wig-with-glue/
Scissors
Scissors are an essential tool for preparing your full lace wig before application. You will need a sharp pair of scissors that can easily cut through the wig’s lace material. It’s important to use scissors that are specifically designed for cutting hair and lace to avoid jagged edges or uneven cuts.
Before beginning the application process, use your scissors to carefully trim any excess lace around the edges of the wig. This will ensure a natural-looking hairline that blends seamlessly with your skin. Be sure to leave a small amount of lace in front of the hairline to avoid accidentally cutting into the hair.
After trimming the lace, you may also want to use your scissors to shape the wig to better suit your face and desired style. Keep in mind that a full lace wig allows for versatility in styling, so don’t be afraid to get creative with your cuts.
- Tip: Make sure that you have a steady hand when cutting the lace and hair of your wig.
- Tip: To avoid accidentally cutting too much hair, it’s best to cut small sections at a time and gradually work your way through the wig.
If you’re new to using a full lace wig, it may be helpful to practice cutting and shaping the wig on a mannequin head before applying it to your own head.
For more information on wig-related topics, check out our other articles on what hair glue is made of, how to make a wig cap with glue, and how to care for glue-in hair extensions.
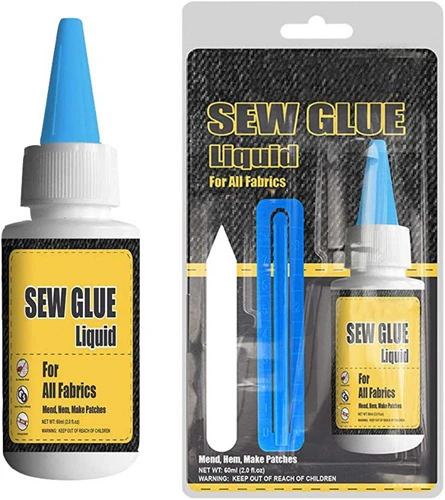
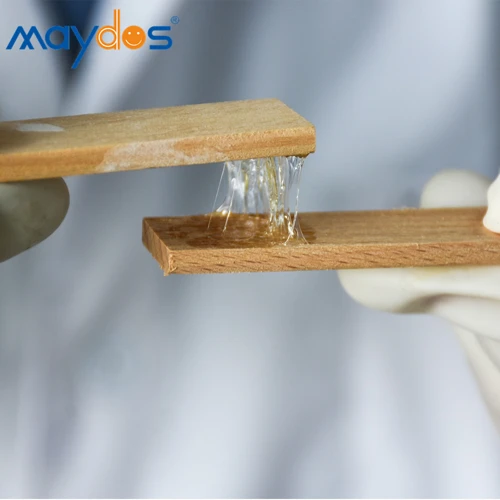
Adhesive/glue
When it comes to applying a full lace wig with glue, choosing the right adhesive is crucial for the longevity and natural look of your wig. There are various types of adhesives to choose from in the market. Here are some of the most common adhesives that you can use for applying a full lace wig.
- Lace Wig Adhesive: This is a specially formulated adhesive created for full lace wigs. It can provide a very strong bond and can last for long periods. However, it can be difficult to remove and may cause skin irritation if used improperly.
- Tape Adhesive: This type of adhesive comes in tape form and can be easily applied to the hairline. It is less messy compared to liquid adhesives but may not provide a strong hold for a long time.
- Liquid Adhesive: This type of adhesive comes in liquid form and provides a very strong bond. It’s perfect for users who are more active and need a durable hold. However, it can be messy and difficult to remove.
It’s important to note that different people may have varying reactions to different adhesives. It’s recommended to test the adhesive first on a small area of your skin to check for any allergic reactions. Additionally, it’s important to follow the instructions of the adhesive manufacturer carefully to ensure you use it safely and effectively.
If you’re looking for more information on how to install a wig without glue, check out our article “How to Install a Wig Without Glue”.
Wig Cap
Wig caps are essential to wear under your full lace wig. A wig cap is a cap that you wear underneath the wig to keep your hair in place and protect your scalp. Wearing a wig cap can also help prevent the wig from slipping out of place.
When choosing a wig cap, it is important to consider the material as well as the size. The most common materials for wig caps are nylon and mesh. Nylon wig caps are more durable and can hold up to regular use. Mesh wig caps are more breathable and lightweight, making them more comfortable to wear for long periods of time.
To determine the size of wig cap you need, measure the circumference of your head and compare it to the sizing chart provided by the manufacturer. It is important to choose a wig cap that fits securely but is not too tight, as this can cause discomfort and even headaches.
Once you have your wig cap, you will need to put it on before applying your full lace wig with glue. To do this, simply stretch the cap over your head, making sure that all of your hair is tucked inside. You can also use bobby pins to secure the wig cap in place.
It is important to keep your wig cap clean and free of oils and dirt, as this can affect the adhesive used to attach the full lace wig. Use alcohol wipes to clean your scalp and the edges of your wig cap before applying the glue.
Remember that a wig cap is just one part of the process when it comes to applying a full lace wig with glue. To learn more about the entire process, check out our detailed guide on how to glue in extensions yourself or how to glue hair on a wig cap.
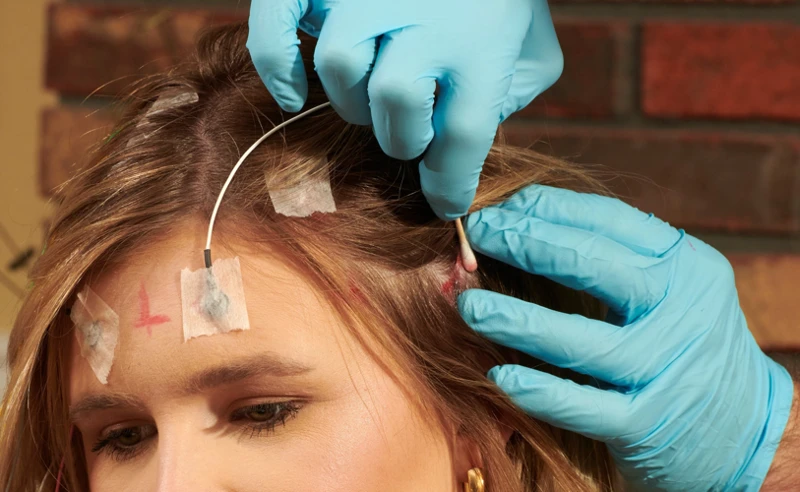
Alcohol Wipes
When it comes to applying a full lace wig with adhesive, alcohol wipes are an essential item to have on hand. They are crucial in ensuring that your skin is clean and oil-free, which can impact how well the glue adheres to your skin.
To use alcohol wipes, start by cleaning your forehead and the areas around your hairline where the lace will be glued down. Make sure to remove any makeup or oil build-up that may have accumulated on your skin. This will help the adhesive bond properly and last longer.
It’s important to note that too many alcohol wipes can dry out your skin, so use them sparingly. One wipe per section of your skin should be sufficient. They are also a convenient tool for quick touch-ups while applying your wig.
In addition to using alcohol wipes, it’s recommended that you regularly cleanse your skin to prevent oil build-up, which can interfere with the adhesive. You can also use oil-absorbing sheets throughout the day as needed to keep your skin looking fresh and matte.
With proper skin preparation and the use of alcohol wipes, you can ensure that your full lace wig is securely attached and will stay in place for extended periods of time.
If you want to learn more about hair extensions, you can check out our article on how to glue in extensions yourself or find out how to put tracks in hair without glue. Alternatively, you can also learn how to make your own hair glue with our guide on how to make hair glue.
Blow Dryer
The blow dryer is one of the essential tools you need to prepare your hair for applying a full lace wig with glue. It helps to dry your hair after washing and also to set your hair in place when braiding it.
Importance of Using a Blow Dryer
Using a blow dryer helps to dry your hair quickly and prevent damage that can be caused by damp hair. Wet hair is more prone to breakage, especially when tied in braids, and can also cause damage to your scalp.
How to Use a Blow Dryer
Before using a blow dryer, make sure your hair is clean, detangled and free from any styling products. It’s advisable to use a heat protectant spray to prevent heat damage.
Follow these steps to use a blow dryer on your hair:
| Action | Instructions |
|---|---|
| Step 1 | Divide your hair into sections. Use hair clips to keep them in place. |
| Step 2 | Set the blow dryer to a low heat and low fan speed. |
| Step 3 | Hold the blow dryer at a distance of at least 6 inches from your hair. |
| Step 4 | Starting from the roots, blow dry your hair in a downward direction using a paddle or round brush to guide the flow of the air. |
| Step 5 | Once your hair is dry, switch the blow dryer to the cool setting and blow dry your hair for a few seconds to set your hair in place. |
Tips for Using a Blow Dryer
– Always use a heat protectant spray on your hair before using a blow dryer to prevent heat damage
– Use a low heat and low fan speed setting to avoid damaging your hair
– Maintain a distance of at least 6 inches between the blow dryer and your hair
– Use a paddle or round brush to guide the flow of the air and to prevent tangled hair while blow drying
– Use the cool setting to set your hair in place when you’re done blow drying. This also helps to give your hair a shiny and smooth finish.
Rat Tail Comb
A Rat Tail Comb is a must-have tool when it comes to applying a full lace wig with glue. This comb typically has a long, pointed end allowing you to easily part your natural hair and apply the adhesive along your hairline, as well as position the lace of the wig accurately. It’s essential for achieving a natural-looking application.
Here are some key features of a Rat Tail Comb:
| Feature | Description |
|---|---|
| Length | The comb is typically around 8-9 inches long to give you enough reach and control when styling. |
| Material | A Rat Tail Comb is usually made of plastic or metal, with some featuring heat-resistant properties for use with hot styling tools. |
| Teeth | These combs typically have fine, closely spaced teeth, which make it easy to create clean and precise parts in your natural hair without damaging it. |
| Handle | The Rat Tail Comb’s handle is long and slender to provide ease and comfort when you grip it to work with it. |
Make sure to have a Rat Tail Comb in your wig application toolkit. It’s an essential tool that can help you effortlessly achieve a professional-looking application.
Flat Iron
A flat iron, also known as a hair straightener, is an essential tool in preparing your natural hair before applying your full lace wig. This aids in creating a smooth and seamless foundation for the wig to adhere to. Here are a few things to keep in mind when using a flat iron:
- Choose a flat iron with temperature control settings to ensure you don’t damage your hair by using excessive heat. Stick to a temperature range of 300°F to 350°F.
- Apply a heat protectant serum or spray before using the flat iron to prevent heat damage on your hair. This is a crucial step as it keeps your hair healthy. Look for a heat protectant product with moisturizing ingredients like argan oil as it helps keep your scalp healthy as well.
- Part your hair into small sections and clip them down to keep the hair out of the way as you work.
- Take one section and clamp the flat iron down as close to the roots as possible. The closer you get to the roots, the more natural the wig will look.
- Slowly slide the flat iron down towards the ends of the hair. Repeat this step until the entire section of hair is straightened out.
- Make sure the section is completely straightened before moving on to the next section to avoid lumps and bumps.
- After straightening each section, let it cool down before moving on to the next one. This will allow the hair to set in its straight position.
Remember that the goal is to create a smooth and flat foundation to ensure your wig looks seamless and natural. Take your time and use the flat iron with care. And as an important reminder, always remember to turn off and unplug the flat iron when not in use to avoid accidents.
Preparing Your Hair and Skin
Before you begin applying the full lace wig, it is important to properly prepare both your hair and skin. This will ensure a seamless and long-lasting application. Here are some crucial steps to follow that will help you achieve the perfect base for your wig.
Cleanse Your Skin
Before applying a full lace wig with glue, it’s essential to properly cleanse your skin. This ensures that the adhesive properly sticks to your skin and doesn’t cause any irritation. Here’s how you can cleanse your skin effectively:
| Step 1: | Remove any makeup or oil from your face and hairline using cleansing wipes or a gentle cleanser. |
| Step 2: | Wash your face and hairline with lukewarm water and a gentle, sulfate-free cleanser. Rinse thoroughly and pat dry with a clean towel. |
| Step 3: | Apply an alcohol wipe to your hairline to remove any excess oil or debris. This step is essential as the glue needs a clean and dry surface to adhere properly. |
| Step 4: | Apply a scalp protector or a thin layer of Vaseline to your hairline and the nape of your neck. This helps to protect your skin from any potential irritation caused by the wig adhesive. |
By following these steps, you can ensure that your skin is clean and ready for the wig application process. It’s important to note that if you have sensitive skin, you may want to use a skin-safe adhesive or consult with a dermatologist before applying the wig with an adhesive.
Cleanse Your Hair
Before you apply your full lace wig with glue, it’s essential to cleanse your natural hair thoroughly. Here are the steps you need to follow:
- Step 1: Brush or comb your hair to remove any tangles or knots. This will make it easier to cleanse your hair.
- Step 2: Wet your hair with lukewarm water. Avoid using hot water, as it can strip your hair of its natural oils and cause damage.
- Step 3: Apply a small amount of clarifying shampoo to your scalp and hair. Massage gently with your fingertips to create a lather.
- Step 4: Rinse your hair thoroughly with lukewarm water. Make sure that all the shampoo is removed from your hair.
- Step 5: Apply a deep conditioner or mask to your hair. This will help to nourish and hydrate your hair, keeping it healthy and strong.
- Step 6: Let the conditioner sit for 5-10 minutes, or as directed on the packaging.
- Step 7: Rinse your hair thoroughly with cool water to seal the cuticles and promote shine.
- Step 8: Gently pat your hair dry with a microfiber towel. Avoid rubbing your hair aggressively, as this can cause damage and breakage.
By following these steps, you’ll ensure that your natural hair is clean, healthy, and ready to be styled with your full lace wig. Remember to take your time when cleansing your hair to avoid damaging it, and always use lukewarm water to avoid stripping your hair of its natural oils.
Braid Your Hair
Before applying a full lace wig with glue, it’s crucial to prepare your natural hair by braiding it. Braiding your hair helps to create a flat surface on your head, which will allow the wig to lay flatter and look more natural. Here are the steps to follow when braiding your hair:
- Step 1: Start with clean, dry hair. Detangle your hair using a comb or brush to remove any knots or tangles. Use your rat tail comb to create a straight part down the center of your head.
- Step 2: Take a small section of hair from the center of your head and divide it into three equal sections.
- Step 3: Cross the right section of hair over the middle section, followed by the left section of hair over the middle section. Repeat this process, crossing the right section over the middle section, followed by the left section over the middle section, until you reach the bottom of your hair. Secure the end of the braid with a hair elastic or tie.
- Step 4: Continue to create braids in sections of your hair until all your hair is braided. Make sure to keep the sections as neat and even as possible.
- Step 5: Take your braids and wrap them around your head in a circular pattern, securing them with hairpins as you go. Make sure all the braids are flat against your head and there are no bumps or lumps. Cover your braids with a wig cap to protect your hair and help keep the wig in place.
Braiding your hair properly will not only make your wig installation more secure, but it will also protect your hair from any potential damage that could be caused by the wig glue. Take your time and make sure your braids are as flat and neat as possible for best results.
Apply Wig Cap
One of the most important steps in applying a full lace wig with glue is to apply a wig cap. A wig cap will help keep your natural hair in place and create a smooth base for your wig to adhere to. Here’s how to apply a wig cap:
| Step | Description |
|---|---|
| Step 1: | Start by cleaning and drying your hair. It’s important to have a clean and dry base for the wig cap to adhere to. |
| Step 2: | Take your wig cap and stretch it over your head. Make sure it’s snug but not too tight. You want to avoid any bumps or lumps under the wig cap that could affect the way your wig fits. |
| Step 3: | Secure the wig cap by tucking any loose hair underneath it. You can also use bobby pins to hold the wig cap in place. |
| Step 4: | Once your wig cap is secured, use scissors to cut off any excess material around the edges. This will help create a seamless transition between your wig and natural hairline. |
| Step 5: | Finally, use an alcohol wipe to clean around the edges of the wig cap. This will remove any oils or residue that could affect the bond between your wig and skin. |
Remember, applying a wig cap is an important step in achieving a natural and seamless look with your full lace wig. Take your time and make sure it’s applied correctly to ensure the best results.
Cutting Your Lace
Before attaching your full lace wig with glue, it’s important to cut the lace to the correct size and shape. The lace refers to the thin, sheer material that sits at the front of the wig and blends in with your scalp, giving the appearance of natural hair growth.
To achieve the most natural look possible, you will need to cut the lace to fit your specific hairline. First, place the wig on your head and use hair clips to secure it in place. Then, using a marker or pen, make small dots on the lace where you want your hairline to be.
Next, remove the wig and carefully cut the lace along the line of the dots. It’s important to use sharp scissors to ensure a clean cut. After cutting, be sure to try the wig on again to make sure the lace fits your hairline properly.
It’s also important to consider the shape of the lace. Some full lace wigs have lace that extends beyond the hairline, while others have lace that only covers the forehead area. In either case, cut the lace carefully and be sure to leave a small amount of lace beyond the hairline to allow for a more natural blend.
Remember that cutting the lace too close to the hairline can result in an unnatural appearance, so take your time and be cautious. Better to cut less than too much!
Cutting the lace is an important step in achieving a natural, seamless look with your full lace wig. With a bit of patience and precision, it’s easy to customize the lace to fit your unique hairline and create a stunning style.
Applying the Glue
One of the most important steps in applying a full lace wig is properly gluing it down. This part of the process can seem intimidating for beginners, but with the right technique and tools, it can be easily accomplished. In this section, we will go over the application process step-by-step, including different techniques for applying the adhesive and tips for ensuring a secure hold. Let’s get started!
Application Techniques
When it comes to applying glue to your full lace wig, there are several techniques you can use to ensure a secure hold. Here are some of the most common application techniques:
| Technique | Description |
|---|---|
| Brush-on: | This involves using a small, flat brush to apply the glue onto your forehead in a thin, even layer. Work from the center of your forehead out towards your temples, being sure to cover all areas where the wig will sit. |
| Dabbing: | This method involves using a cotton ball or small makeup sponge to dab the glue onto your forehead. This can be a messier technique, but it allows for more precise application in hard-to-reach areas. |
| Roll-on: | If you have a roll-on adhesive, you can apply it directly to your forehead in a similar fashion to the brush-on technique. Simply roll the product onto your skin in thin, even layers. |
No matter which technique you choose, be sure to avoid applying too much glue as this can cause a messy, uneven hold. It’s best to apply multiple thin layers, allowing each layer to dry completely before applying the next. This will ensure the strongest hold possible. Additionally, be sure to give yourself enough time to apply the glue and attach the wig before it dries completely. A good rule of thumb is to let the glue dry for approximately 10-15 minutes before attaching the wig. With these techniques and tips in mind, you’ll be on your way to achieving a flawless full lace wig application.
Drying Time
After applying the glue, it is important to allow sufficient drying time to ensure the wig remains secure throughout the day. The recommended drying time for the glue can vary based on the brand you use and the climate you are in. However, on average, it takes between 15 to 20 minutes for the wig to dry completely.
Here are some tips to remember while waiting for the glue to dry:
- Do not touch or disturb the wig during the drying process, as this could cause the wig to shift or become loose.
- Avoid any exposure to heat, such as blow dryers or direct sunlight, as this could compromise the wigs hold.
- If you are in a humid climate, you may want to allow for extra drying time to ensure the wig stays secure.
- Consider using a fan to help speed up the drying process, as long as it does not expose the wig to direct heat.
It is best to be patient and wait until the glue is completely dry to ensure the wig stays in place throughout the day. Rushing the drying process could lead to a sub-par hold, which could cause discomfort or embarrassment later on. So, take your time, set a timer, and wait until the glue is fully dry before moving on to attaching your wig.
Attaching the Wig

Now that you’ve prepared your hair and skin, cut the lace of your full lace wig, and applied the adhesive, you’re ready to attach the wig. This step requires some patience and attention to detail to ensure a secure and natural-looking fit. In this section, we’ll go over some tips and techniques on how to properly attach your full lace wig using adhesive. With the right steps, you’ll be one step closer to achieving your desired hair look. So, let’s get started!
Tips for Proper Placement
When it comes to wearing full lace wigs, proper placement is key. Here are some tips to ensure your wig looks natural and stays in place:
| Tip | Description |
|---|---|
| Find Your Natural Hairline | Use your fingers to feel for your natural hairline. Your wig should be positioned just in front of it, not too high or too low. |
| Use the Ear Tabs | The ear tabs on your wig should be aligned with the top of your ears. This will help to keep the wig in place throughout the day. |
| Position the Wig Properly | Make sure the wig is centered on your head and not sliding too far forward or back. You can adjust the position by gently pulling on the back or sides of the wig. |
| Avoid Over-Gluing | Be careful not to use too much adhesive, as this will cause the wig to appear bulky and may damage your hair. |
| Use a Mirror | It’s important to have a full-length mirror to check the placement of your wig. Walk around and make sure the wig looks natural and doesn’t shift as you move. |
By following these tips and taking the time to properly position your wig, you can achieve a natural and beautiful look that will last all day. Don’t be afraid to make adjustments and experiment with different styles to find the perfect fit for you.
Securing Your Wig with Clips
Once you’ve applied your full lace wig with glue, it’s important to secure it properly to prevent any unwanted shifting or potential embarrassments. One effective way to do this is by using wig clips. These small clips are designed to attach to the inside of your wig and into your natural hair for a more secure fit. Here are some steps to secure your wig with clips:
| Step | Description |
|---|---|
| 1 | Position the Wig: Before proceeding with the clips, ensure that your wig is correctly positioned on your head. |
| 2 | Find Appropriate Spots for Clips: Determine where you want to place your wig clips. Generally, it is best to position the clips around your hairline, near your temples and at the nape of your neck, as these are the areas most vulnerable to the wig slipping off. |
| 3 | Prep Clip Sites: Use a rat-tail comb to create small sections of your natural hair at each point where you want to attach the clips. Make sure the sections are small enough to accommodate the clips without any trouble. |
| 4 | Attach Clips: Take each clip and open it. Place the open clip on the wig where a corresponding section of your natural hair is located, and snap it shut. Repeat the process with all the other clips, making sure to space them out evenly and that they fit snugly. |
| 5 | Adjust Your Wig: Once all the clips have been securely attached, adjust the wig as required, and ensure it fits snugly. You can gently tug it to ensure it’s in place securely. |
| 6 | Trim the Excess: Trim any excess lace that protrudes past your hairline using scissors. Be sure to leave a small amount to avoid cutting more than required. |
By using wig clips, you can achieve a more secure fit for your full lace wig, and have peace of mind while wearing it. Remember, the key to a secure wig is in the positioning. Make sure you take adequate time to ensure that your wig is positioned well and that your clips have been attached properly.
Adjusting Your Wig
Once you have secured your full lace wig with glue, it’s important to ensure that it fits comfortably and looks natural. Here are a few tips for adjusting your wig:
| Tip 1: | Use a rat tail comb to part your wig in the desired direction. |
| Tip 2: | Trim any excess lace that may be visible around the hairline. Be sure to leave at least a quarter-inch of lace to avoid accidentally cutting the hair. |
| Tip 3: | Pluck baby hairs from the hairline to create a more natural look. Use a pair of tweezers to carefully pull out individual hairs from the wig. |
| Tip 4: | Adjust the tightness of the wig by carefully pulling it in the desired direction. Be careful not to tug too hard, as this can damage the wig or cause it to become loose. |
| Tip 5: | If you want to create a more natural look, use a flat iron or curling iron to style the wig. Be sure to use heat protectant spray to avoid damage to the wig. |
By following these tips, you can adjust your wig to fit comfortably and look natural. Don’t be afraid to experiment with different styling options to find the look that works best for you.
Creating Baby Hairs
To create a more natural look, you can create “baby hairs” along the hairline of your full lace wig. These are shorter, fine hairs that mimic the natural hair that grows around the forehead. Here’s how you can create baby hairs for your full lace wig:
- Take a small section of hair along your hairline, about an inch wide.
- Using a pair of sharp scissors, cut the hair to your desired length. It’s best to start with a longer length and gradually cut shorter if needed.
- Use a rat tail comb to tease the hair, making it look more natural and less blunt. You can also use a bit of water and hair gel to slick the baby hairs down and control flyaways.
- Repeat this process along the entire hairline of your full lace wig, paying extra attention to areas where the lace may be visible.
- Once you’re happy with the look of your baby hairs, use a blow dryer on low heat to set the hair in place.
Remember that creating baby hairs is optional, but can add a more realistic touch to your full lace wig. Take your time with this process and experiment with different lengths and shapes to find the perfect look for you.
Styling Your Wig

After properly applying your full lace wig with glue, the next step is styling. Styling your wig can be a fun and exciting process, but it’s important to approach it with care to ensure your wig looks natural and complements your overall look. With the right tools and techniques, you can customize your wig to blend seamlessly with your hairline and achieve a hairstyle that suits you. In this section, we’ll cover everything you need to know about styling your full lace wig, from blending with your hair to straightening and curling your wig. Let’s get started!
Blending with Your Hair
Once your full lace wig is successfully attached, it’s important to make sure that it blends in seamlessly with your natural hair. Here are some easy steps to help you achieve a perfectly natural look:
1. Part your hair: Begin by parting your natural hair in the same direction as your wig’s part. Use a rat tail comb for precise parting.
2. Brush your hair: Brush your natural hair and the wig’s hair so that they blend together seamlessly.
3. Make necessary adjustments: If you notice any gaps between your wig and natural hair, use a flat iron to blend them together.
4. Create layers: Use scissors to create layers on your wig if needed. This helps to mimic the natural look of your hair.
5. Use hair products: Use hair products such as a serum or oil to add shine and keep hair looking natural.
Remember, the key to blending your natural hair with your full lace wig is to take your time and pay attention to details. By following these simple steps, you can ensure that your wig looks just like your natural hair, resulting in a beautiful and confident new look.
Straightening Your Wig
When it comes to full lace wigs, straightening the hair is a popular option for achieving a sleek and smooth look. However, it’s important to use caution when applying heat to the wig hair, as too much heat can damage the fibers and cause the hair to become brittle. Here are some tips for straightening your wig:
| Step | Instructions |
|---|---|
| Step 1: | Begin by applying a heat protectant spray to your wig hair. This will help to prevent damage and keep the hair looking healthy. |
| Step 2: | Separate the wig hair into small sections using hair clips. This will make it easier to straighten the hair evenly and prevent tangling. |
| Step 3: | Using a flat iron set to a low to medium heat setting, slowly pass the iron over each section of hair. Be careful not to hold the iron in one spot for too long, as this can cause heat damage. |
| Step 4: | Continue straightening each section of hair until you have achieved your desired look. |
| Step 5: | Once you have straightened all of the hair, apply a small amount of hair serum or oil to the ends to add shine and prevent frizz. |
Remember, it’s important to use caution when applying heat to your wig, so always begin with a low heat setting and test a small section of hair before proceeding. With these tips, you can achieve a sleek and stylish straight look for your full lace wig.
Curling Your Wig
When it comes to curling your wig, there are a variety of methods you can use to achieve the look you want. Here are some steps you can follow to curl your wig:
1. Prep your wig: Before curling, make sure your wig is brushed out and free of any tangles. You can use a wide-tooth comb or brush designed for wigs to gently detangle the hair.
2. Heat up your curling iron: Set your curling iron to the right temperature for your wig type (synthetic or human hair). Keep in mind that synthetic wigs can only be curled with low heat settings, while human hair wigs can handle higher temperatures.
3. Section your hair: Using clips, divide your wig into small sections. This will make it easier to curl each strand separately.
4. Apply heat protectant: To avoid damaging your wig, it’s important to use a heat protectant spray or serum. Apply it to your hair while the sections are pinned up.
5. Curl your hair: Start curling each section with a curling iron, wrapping the hair around the barrel and holding it in place for a few seconds. Be sure to curl each section in the same direction for a consistent look.
6. Repeat: Continue curling each section until you’ve curled all the hair. Don’t forget to curl the hair around the face for a natural, flattering look.
7. Style: Once you’ve curled your wig, you can style it as desired. You may want to run your fingers through the curls to break them up for a more tousled, natural look. Or, you can use a wide-tooth comb or brush to shape the curls as desired.
Remember to avoid using too much heat on your wig, as this can damage the hair fibers. Be sure to use a heat protectant and only curl synthetic wigs on low heat. With the right tools and techniques, you can achieve beautiful, bouncy curls on your full lace wig.
Finishing Touches
After styling your full lace wig, there are a few finishing touches that can take your look to the next level. Here are some tips to help you achieve a flawless appearance:
- Spray with holding spray: To keep your styled hair in place, use a holding spray that is specially formulated for wigs. This will help keep your curls intact and prevent flyaways.
- Apply oil sheen: This step is optional, but if you want to add some shine to your wig, apply a light mist of oil sheen. Be careful not to overdo it, as too much can make your wig look greasy.
- Trim your lace: If you notice that the lace on your wig is still visible, use a pair of scissors to trim it. Be sure to only cut the excess lace and not the hairline.
- Add accessories: Personalize your look by adding some accessories like headbands, clips, or colorful scarves. This will help you elevate your style and stand out from the crowd.
- Check for any loose hairs: After you’ve finished styling your wig, be sure to examine it closely for any loose ends or flyaways. If you see any, trim them with a pair of scissors to keep your wig looking neat and tidy.
Following these finishing touches will help ensure that your full lace wig looks natural and polished, whether you’re wearing it for a special occasion or everyday wear. Remember that practice makes perfect, so don’t be afraid to experiment with different styles and techniques to find what works best for you.
Removing Your Wig
When it comes time to remove your full lace wig, be sure to do it carefully and gently. The last thing you want to do is damage your natural hair or the wig itself.
Step 1: Loosen the Adhesive
Before attempting to remove the wig, you need to first loosen the adhesive. You can do this by applying a wig adhesive solvent or alcohol to the perimeter of the wig and letting it sit for a few minutes. This will dissolve the glue and make it easier to remove.
Step 2: Gently Remove the Wig
Once the adhesive is loosened, gently pull the wig from the back of your head. Start at the nape of your neck and work your way up, being careful not to tug or pull on your hair. Use a wig comb or your fingers to help release any remaining adhesive.
Step 3: Cleanse Your Skin and Hair
After removing the wig, cleanse your skin and hair with warm water and a gentle shampoo. This will help remove any remaining adhesive and ensure that your natural hair is clean and healthy.
Step 4: Store Your Wig Properly
If you plan on reusing your wig, be sure to store it properly. You can use a wig stand or a mannequin head to help preserve the wig’s shape. Store the wig in a cool, dry place, away from direct sunlight and heat sources.
Step 5: Take Care of Your Natural Hair
Remember, wearing a wig can put extra stress on your natural hair. Be sure to take care of your hair by keeping it clean, moisturized, and well-nourished. Avoid using harsh chemicals or excessive heat styling, as this can cause damage and breakage.
By following these simple steps, you can safely and effectively remove your full lace wig without damaging your natural hair or the wig itself.
Conclusion
As you can see, applying a full lace wig with glue requires patience, attention to detail, and a few essential tools. It may seem daunting at first, but with practice, you can become an expert at applying and styling full lace wigs at home. Remember to always start with clean skin and hair, use quality adhesive, and follow the directions carefully.
Additionally, styling your full lace wig can be a fun and creative process. Whether you want to create a sleek and straight look or bouncy curls, there are plenty of styling options available. Take your time and experiment with different looks until you find the perfect style for you.
Of course, it’s important to remember that while full lace wigs can be a convenient and stylish option for anyone, they do require proper care and maintenance. Be sure to follow the manufacturer’s instructions for washing and storing your wig, and schedule regular appointments with your stylist for maintenance and adjustments.
Overall, full lace wigs with glue are a versatile and convenient solution for anyone looking to change up their hairstyle. With the right tools, techniques, and attitude, you can achieve a flawless and natural look that will turn heads wherever you go. So why not give it a try? You might just be surprised at how easy and rewarding it can be to master the art of applying and styling a full lace wig with glue.
Frequently Asked Questions
Q: How long will a full lace wig stay on with adhesive?
A: A full lace wig will stay on with adhesive for about 1-2 weeks, depending on the type of adhesive and your activity level.
Q: Can I swim with a full lace wig on?
A: It is not recommended to swim with a full lace wig on as the adhesive may come loose and cause the wig to shift or come off completely.
Q: How often should I clean my wig cap?
A: It is recommended to clean your wig cap after every use to ensure a hygienic environment for your scalp.
Q: Can I use hairspray on my full lace wig?
A: It is not recommended to use hairspray on your full lace wig as it can cause buildup and damage the hair fibers over time.
Q: Can I dye a full lace wig?
A: Yes, full lace wigs can be dyed, but it is best to have a professional do it to avoid damaging the wig.
Q: How do I prevent my wig from tangling?
A: To prevent tangling, it is important to detangle your wig with a wide-tooth comb before and after each use and store it properly when not in use.
Q: How do I maintain the quality of my wig after repeated use?
A: To maintain the quality of your wig, it is important to wash and condition it regularly using products specifically designed for wigs.
Q: Can I wear my wig in high-temperature environments?
A: It is not recommended to wear your wig in high-temperature environments as this can damage the hair fibers and cause the wig to lose its shape.
Q: How do I prevent my wig from slipping?
A: To prevent your wig from slipping, make sure to apply adhesive evenly and in small sections, use wig clips to secure the wig, and avoid excessive sweating or rubbing of the scalp.
Q: How do I store my wig when I’m not using it?
A: It is best to store your wig on a wig stand or mannequin head to maintain its shape and prevent tangling. Avoid storing it in direct sunlight or in humid environments.