As we go about our daily lives, we often find ourselves needing glue for various projects. Maybe it’s for a school assignment, an art project, or a quick fix-it job. But have you ever found yourself without glue when you need it most? Don’t worry – with just a few everyday ingredients, you can make your own simple glue right at home. In this article, we’ll dive into the world of do-it-yourself (DIY) glue and explore the advantages and disadvantages of making it yourself. We’ll also share with you our tried-and-true recipe for making your own simple glue. So let’s get started!
Motivation
Have you ever found yourself in a situation where you need glue, but don’t have any on hand? Or maybe you’re looking for a more natural, non-toxic alternative to store-bought glue. Whatever your motivation may be, learning how to make simple glue at home can be a useful skill to have. In this article, we will guide you through the process step-by-step, using easy-to-find materials and highlighting the benefits and drawbacks of making your own DIY glue. And if you’re interested in making Elmer’s glue specifically, check out our guide on how to make Elmer’s glue.
Objective
The objective of this article is to provide a simple and easy DIY glue recipe that anyone can make at home with basic materials. We aim to show that making your own glue is not only possible but also beneficial. By making your own glue, you can save money, ensure non-toxic ingredients, and even customize the recipe to fit your specific needs.
To achieve this objective, we will cover the two main types of glue, natural and synthetic, and outline the advantages and disadvantages of DIY glue. We will then provide a step-by-step recipe for making a simple glue using non-toxic ingredients. Additionally, we will share some creative ways to use your new DIY glue, from arts and crafts to household repairs and even science experiments.
We want our readers to feel empowered and confident that they can make their own glue with ease. We will provide tips and tricks to ensure success and discuss proper storage and safety measures. By the end of this article, readers will have a comprehensive understanding of how to make simple glue, its uses, advantages, and disadvantages, as well as best practices for storage and safety.
Some of the key takeaways from this article include:
- DIY glue is an inexpensive and non-toxic alternative to store-bought options.
- Making your own glue allows for customization to fit your specific needs.
- DIY glue is perfect for arts and crafts, household repairs, and science experiments.
- While DIY glue has some disadvantages, such as lower durability and shorter shelf life, with proper storage and handling, it can be just as effective as store-bought options.
- Lastly, it’s important to follow safety measures when making and handling glue, as some ingredients can be harmful if not used properly.
We hope our readers will find this article informative and useful in their pursuit of making their own glue. Let’s dive in and learn how to make simple glue.
Materials
To make simple glue at home, you only need a few basic materials. These materials are easy to find and inexpensive, which makes DIY glue an economical choice. Here are the materials required to make a simple glue:
- Flour: Any type of flour can be used to make glue, but wheat flour is the most common.
- Sugar: Granulated white sugar is typically used for its adhesive properties.
- Vinegar: White distilled vinegar is a common household item that is used as a preservative in the glue.
- Water: Tap water is suitable for making glue.
- Bowl: A mixing bowl is necessary to combine the ingredients.
- Saucepan: A saucepan is essential for heating the ingredients on the stove.
- Whisk: A whisk makes it easier to combine the ingredients smoothly.
- Container: After the glue is made, it needs to be stored in an airtight container to prevent it from drying out. A plastic or glass container with a tight-fitting lid is recommended.
It is important to note that the quality of the materials used will affect the quality of the final product. Using high-quality flour and sugar will result in smoother, stronger glue. Additionally, ensure that all materials are clean and free from contaminants to ensure the glue lasts as long as possible.
Types of Glue
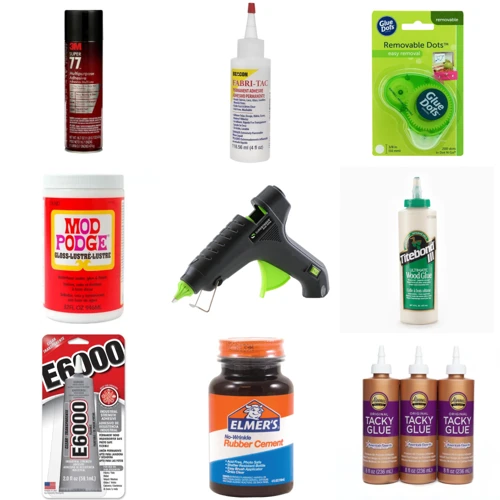
When it comes to adhesion, there are two main types of glue: natural and synthetic. Natural glue is made from organic materials and has been used for centuries. It can be made from ingredients such as animal hides, bones, and milk. Synthetic glue, on the other hand, is chemically engineered and manufactured.
Natural glue, also known as organic glue, is typically made from collagen. Collagen is a protein found in animal hides, bones, and connective tissues. When making natural glue, the collagen is extracted from the animal parts and then boiled down to create a gel-like substance. This gel is then mixed with water and any other necessary ingredients. While natural glue can be effective, it is not always as strong as synthetic glue and can break down over time.
Synthetic glue, also known as artificial glue, is made from chemical compounds. The most common synthetic glue is polyvinyl acetate (PVA) glue. This type of glue is water-based and dries clear. It is often used in woodworking, bookbinding, and paper mache projects. Other synthetic glues include cyanoacrylate (super glue), which is known for its instant bonding power, and epoxy glue, which can be used to bond nearly any material.
While both natural and synthetic glue have their advantages and disadvantages, synthetic glue is often preferred for its strength, durability, and versatility. However, natural glue is a great option for those looking for a non-toxic and environmentally friendly adhesive. Regardless of the type of glue used, it is important to follow proper safety precautions and storage methods to ensure the best results and longevity of the adhesive.
Natural Glue
When making glue, you might be surprised to learn that there are natural options available rather than just synthetic. Natural glue is a great alternative for those who prefer to use more eco-friendly and non-toxic materials in their DIY projects. With a few simple ingredients, you can make a strong adhesive that can be used for a variety of artistic, household, and scientific purposes. Let’s explore some of the natural materials that can be used to create homemade glue.
Synthetic Glue
Synthetic glue, also known as chemical glue, is a type of adhesive that is created through a chemical process. It is typically made from a mixture of chemicals, including polymers, resins, and solvents. Synthetic glue is a widely used type of adhesive due to its strength, fast-drying time, and versatility.
Advantages of Synthetic Glue:
| Advantage | Description |
| Stronger bond | Synthetic glue can create a much stronger bond than natural glue. |
| Variety of uses | It can be used for a wide variety of materials including wood, plastic, and metal. |
| Fast-drying time | Synthetic glue typically dries much faster than natural glue. |
| Water-resistant | Many types of synthetic glue are water-resistant, making them ideal for outdoor use or in areas with high humidity. |
Disadvantages of Synthetic Glue:
| Disadvantage | Description |
| Toxic | Synthetic glue can contain harmful chemicals that are toxic if ingested or inhaled. |
| Expensive | Compared to natural glue, synthetic glue can be more expensive to purchase. |
| Difficult to remove | Synthetic glue can be difficult to remove once it has bonded with a material, making it less ideal for temporary fixes. |
| Not eco-friendly | Synthetic glue is not typically environmentally friendly and can contribute to pollution and waste. |
In general, synthetic glue is a strong adhesive that is ideal for permanent or long-lasting fixes. However, it does contain some drawbacks, including toxicity and negative environmental impact. As with any adhesive, it is important to carefully consider the type of material you are bonding and the intended use before selecting a synthetic glue.
Recipe for Simple Glue
Making your own glue at home is not only economical but also environmentally friendly as you can avoid the harsh chemicals present in most store-bought glues. Here is a simple recipe for making your own glue at home.
Ingredients:
- 1 cup of flour
- 1/3 cup of sugar
- 1 ½ cups of water
- 2 tablespoons of vinegar
- A pinch of salt
Directions:
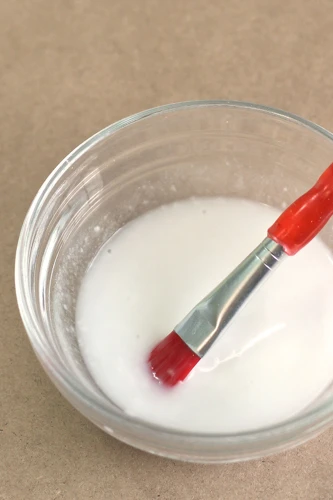
- Mix the flour and sugar together in a saucepan.
- Add the water to the mixture and whisk until there are no lumps.
- Place the saucepan on medium heat and stir continuously.
- After a few minutes, you will notice the mixture thickening. Reduce the heat to a low flame.
- Add 2 tablespoons of vinegar and a pinch of salt to the mixture and stir well.
- Continue to stir for another 5 minutes or until the glue reaches the desired consistency. The glue should be smooth and free of lumps.
- Remove from heat and let it cool down completely.
- Your DIY glue is now ready to use.
Tips & Tricks:
- The glue can be stored in a container with a tight-fitting lid in a refrigerator for up to two weeks.
- If the glue becomes too thick, you can add a few drops of water and stir well to make it smooth again.
- Contact paper can be used as a base for keeping the glue. Apply a thin layer of glue on the contact paper and let it dry. Once it has dried, cut it into small pieces and store in an airtight container.
Making your own glue may take a little more effort than simply purchasing it from a store, but it has numerous benefits. Not only is it a more eco-friendly option, but it is also non-toxic and safe for children to use. Additionally, by making your own glue, you can customize it to your needs by adjusting the consistency and the drying time. Once you try making your own glue, you may never want to go back to the store-bought version again!
Ingredients
Assembling your homemade glue only requires a few simple ingredients, many of which you may already have in your kitchen or can easily obtain. These key components work together to create a sticky, adhesive liquid that’s perfect for a variety of arts and crafts projects, household repairs, and even science experiments. Let’s take a closer look at the components that you’ll need to create your very own DIY glue.
Directions
To make your own simple glue, follow these easy steps:
- Combine ⅔ cup of white flour with ½ cup of water in a medium-sized saucepan.
- Stir well with a whisk to eliminate any lumps.
- Turn the heat to medium and stir the mixture continuously for around 5 minutes until it thickens and becomes smooth.
- Add in 2 teaspoons of vinegar, 4 tablespoons of corn syrup, and a pinch of salt.
- Whisk the mixture well and let it simmer for an additional 5 minutes.
- Let the mixture cool down for 10-15 minutes before using.
Note: It is recommended to let the glue cool completely before storing in an airtight container. It can also be refrigerated for longer shelf life.
When using the glue, apply a thin layer to both surfaces that you are joining together and then press them firmly until the glue sets. If you find that your glue has become too thick, simply add a few drops of water until you have the desired consistency again.
Tip: For stronger glue, replace the white flour with all-purpose flour and use only 3 tablespoons of corn syrup.
Tips & Tricks
When making simple glue at home, there are some tips and tricks to keep in mind to ensure the best results. Here are some helpful tips and tricks for making and using DIY glue:
| Tips & Tricks | Description |
|---|---|
| Measure Carefully | Be sure to measure each ingredient carefully to ensure the proper consistency and strength of the glue. |
| Stir Frequently | Stir the glue often during the cooking process to prevent lumps and ensure even consistency. |
| Use Warm Water | When mixing the ingredients, use warm water to help the glue dissolve more easily. |
| Add Food Coloring | If you want to add some color to your glue, mix in food coloring while cooking. |
| Experiment with Ratios | Try experimenting with different ratios of water, flour, and sugar to customize the consistency and strength of your glue. |
| Store in Air-Tight Container | Store the glue in an air-tight container to prevent it from drying out and extending its shelf life. |
| Clean Up Spills Quickly | If you accidentally spill glue, clean it up quickly with a damp cloth or tissue, as it can harden and become difficult to remove once it dries. |
By following these tips and tricks, you can make the best possible simple glue at home. Happy crafting and repairing!
Uses for Simple Glue
There are many uses for homemade simple glue. This DIY adhesive works well for both arts and crafts, as well as household repairs and even some science experiments.
For arts and crafts projects, simple glue is perfect for creating collages, scrapbooking, making paper mache, and more. It’s a great adhesive choice for crafts that involve paper, cardboard, or fabrics. Its non-toxic properties make it safe for kids to use without the worry of inhaling any harmful fumes or chemicals.
In addition to arts and crafts, simple glue can also be used for household repairs. It works best for small repairs such as fixing a loose chair leg or reattaching a small household item. It’s not recommended for larger repairs such as fixing a broken appliance or repairing furniture. For larger household projects, it’s best to use a stronger and more durable adhesive.
For science experiments, simple glue can be used to make slime, which is a popular and fun project for kids. It can also be used to create homemade lava lamps or to help with simple science fair projects.
The versatility of homemade simple glue makes it a great addition to any household or art studio. It’s also a great way to save money and reduce waste by using ingredients that are commonly found around the house.
Arts & Crafts
The creative possibilities of homemade glue are endless, making it perfect for various arts and crafts projects. By using your own DIY glue, you can create unique pieces that are not only eco-friendly but also cost-effective. You can use simple glue made at home to create anything from paper mache figurines to colorful origami. With the added benefit of knowing exactly what ingredients are in your glue, you can safely let your imagination run wild and bring your artistic vision to life. Let’s take a closer look at some fascinating art and crafts projects that can be completed with homemade glue.
Household Repairs
Simple homemade glue is also great for minor household repairs. It’s perfect for fixing things like broken ceramics, wooden furniture, and even small metal items. Here are some examples of household repairs that can be fixed with DIY glue:
- Reattaching broken ceramics or pottery: If you accidentally break a ceramic plate, bowl, or vase, don’t worry! You can easily fix it with homemade glue. Simply apply a small amount of the glue to each broken piece, hold them together for a few minutes until they set, and then let them dry completely.
- Mending wooden furniture: Loose chair legs or a broken wooden frame can be fixed with simple glue. Just apply a small amount of the glue to the broken or loose pieces, and clamp them together tightly until the glue sets. Wait for the glue to dry completely before using the furniture again.
- Fixing small metal items: Do you have a broken piece of jewelry like a necklace or bracelet? Or a small metal zipper that needs fixing? Homemade glue can come to the rescue! Apply a small amount of the glue to the broken or detached pieces, press them together, and let them dry completely before using the item again.
One of the advantages of DIY glue is that it can be customized to suit different materials and situations. It’s important to note, however, that simple glue may not work for all types of household repairs. For more complicated repairs or for items that require a stronger adhesive, it’s best to use a specific glue designed for that purpose.
Science Experiments
For science enthusiasts, making DIY glue can be a great way to explore the world of science experiments. In fact, there are a variety of experiments you can conduct with simple glue made at home. Here are some examples:
| Experiment | Materials Needed |
|---|---|
| Slime Making | 1 cup of clear glue, 1/2 cup of water, 1/2 teaspoon of baking soda, 1 tablespoon of contact lens solution, food coloring |
| Crystal Formation | 1/4 cup of borax, 1/2 cup of warm water, pipe cleaners |
| Biodegradable Glitter | 1/4 cup of clear glue, 1/4 cup of water, 3/4 cup of vegetable glycerin, 1 teaspoon of biodegradable glitter, food coloring (optional) |
As you can see, making simple glue at home can be a fun and educational activity for kids and adults alike. Plus, you can customize your glue to fit your specific needs and preferences. From making slime to growing crystals, the possibilities are endless.
Advantages of DIY Glue
When it comes to crafting, repairs, or experiments, glue is a crucial element that everyone needs. The market is full of different types of adhesives, each with its unique advantages and disadvantages. However, making your own glue at home can offer several benefits, which we will discuss below.
1. Cheap: One of the main advantages of DIY glue is that it can save you money. Most store-bought glues come in small amounts and can be quite expensive. Making your own glue at home is cheaper because it requires simple ingredients that you may already have in your pantry.
2. Non-Toxic: Store-bought glues can be made with toxic chemicals that can be harmful to your health and the environment. DIY glue recipes often use natural ingredients, making them non-toxic and safer for children and pets.
3. Customizable: Another advantage of DIY glue is the ability to customize it to your specific needs. You can adjust the thickness, color, and texture of your glue to suit your project. For example, by adding food coloring, you can create colored glue that adds a pop of color to your crafts, making them more attractive.
4. Easy to Make: Making glue at home is easy and quick. It requires just a few ingredients and simple instructions to make a batch that can last for a long time.
5. Environmentally-Friendly: DIY glue is also more eco-friendly as most store-bought adhesives come in plastic packaging. Creating your own glue reduces waste and packaging, making it a more sustainable option.
The advantages of making your own glue outweigh the disadvantages. However, it is essential to note that homemade glue may have a shorter shelf life and may not be as durable or strong as store-bought options. Nevertheless, it is a great alternative for those who want to save money, customize their glue, and reduce their environmental impact.
Cheap
It’s no secret that household expenses can quickly add up. From groceries to bills to school supplies, saving money where we can is always a plus. That’s why opting for a DIY glue recipe can be a budget-friendly solution. By using simple, affordable ingredients, you can create a strong adhesive that won’t break the bank. Not only will making your own glue save you money, but it’s also a fun project to do with kids or friends. Plus, with the ability to customize the recipe to fit your specific needs, the options are endless. So why not give it a try and see how much you can save on your next arts and crafts or household repair project?
Non-Toxic
One major advantage of making your own glue is that it can be non-toxic. Many commercial glues contain harmful chemicals that can be dangerous to handle or inhale. DIY glue made from natural ingredients, however, can be safe for both you and the environment. In fact, making non-toxic glue can be a great project to do with kids.
To ensure your glue is non-toxic, be sure to use ingredients that are safe for consumption. For example, flour and water are often used together to create a paste-like glue. Mixing small amounts of sugar or corn syrup can improve the stickiness of the final product. Another non-toxic option is using white vinegar and baking soda to create a chemical reaction that results in a glue-like substance.
Advantages of non-toxic glue:
- Safe for handling
- Non-irritating to skin and eyes
- No harmful fumes
- Environmentally friendly
Whether you are looking for a non-toxic option for your kids’ school crafts or are simply trying to reduce chemicals in your household, non-toxic DIY glue can be a fantastic choice. Just make sure to label your glue appropriately and keep it out of reach of any pets or small children.
Customizable
One key advantage of making your own glue is that it’s customizable to fit your specific needs. By using different ingredients and adjusting the ratios, you can create a glue that best suits your project. Here are some ways you can customize your DIY glue:
Color: Want your glue to blend in with your project or stand out? You can add food coloring or even acrylic paint to give your glue a desired color.
Consistency: Depending on what you’re gluing, you may want a thinner or thicker consistency. You can adjust the amount of water or flour to achieve the desired consistency.
Adhesion: Certain ingredients have stronger adhesion properties than others. For example, adding honey or sugar to your glue can make it more sticky and provide a stronger hold.
Fragrance: If you’re using glue for a craft project, you may want it to have a pleasant smell. You can add essential oils or extracts, such as lavender or peppermint, to give your glue a pleasant scent.
Below is a table showcasing how you can customize your glue:
| Customization | Ingredients | Effect |
|---|---|---|
| Color | Food coloring or acrylic paint | Changes glue to desired color |
| Consistency | More or less water/flour | Creates thicker or thinner glue |
| Adhesion | Honey or sugar | Increases stickiness for a stronger hold |
| Fragrance | Essential oils or extracts | Provides a pleasant scent |
Customizing your glue not only allows you to create a glue that best fits your needs, but it also adds a personal touch to your project.
Disadvantages of DIY Glue
While making your own glue may be a fun and affordable DIY project, there are some drawbacks to consider. Here are some disadvantages of creating your own glue:
Lower Durability: DIY glue made from natural ingredients may not have the same strength and durability as store-bought synthetic adhesives. This means that the bond may not hold up as long or may not be as strong.
Shorter Shelf Life: Since DIY glue is made from natural ingredients and lacks preservatives, it has a shorter shelf life than store-bought glues. This means that it may dry out or spoil quicker than expected, making it less effective.
Less Strength: In general, DIY glue may not have the same strength as store-bought adhesives, which can limit its uses. It may not be strong enough for heavy-duty projects or repairs.
It’s important to consider these drawbacks when deciding whether to make your own glue or purchase a commercial adhesive. However, keep in mind that DIY glue can still be a useful option for certain projects and can be a fun and creative experience.
Lower Durability
While the idea of making your own glue may seem appealing due to its cost-effectiveness and non-toxic nature, it’s important to understand that it may not hold up as well as commercial glues in terms of durability. The lower durability of DIY glue is something to keep in mind when considering using it for certain projects or applications. Despite this, there are still advantages to using homemade glue, which we will explore further in this article.
Shorter Shelf Life
One of the disadvantages of DIY glue is that it typically has a shorter shelf life compared to store-bought versions. This means that it may not be able to last as long before losing its effectiveness or spoiling. This can be a concern for those who do not use glue frequently and may have leftover supplies.
The following are some tips to help extend the shelf life of your homemade glue:
- Store in a cool, dry place: Humidity and heat can impact the quality and consistency of the glue, so it is important to keep it in a dry and cool location.
- Use airtight containers: Oxygen can cause the glue to dry out or form a skin on top, so storing it in a sealed container can prevent this from happening.
- Refrigerate: Keeping the glue in the fridge can help it to last longer and maintain its effectiveness. Just make sure to label the container clearly and keep it away from food items.
It is important to note that even with proper storage, homemade glue may still not last as long as store-bought versions. It is also important to check the consistency and smell of the glue before use, as spoiling or separating can occur over time. While DIY glue may have a shorter shelf life, the cost savings and non-toxic nature may still make it a worthwhile option for many people.
Less Strength
Although making your own simple glue may have its advantages, it also has its disadvantages. One of the downsides of DIY glue is its less strength compared to store-bought adhesive products.
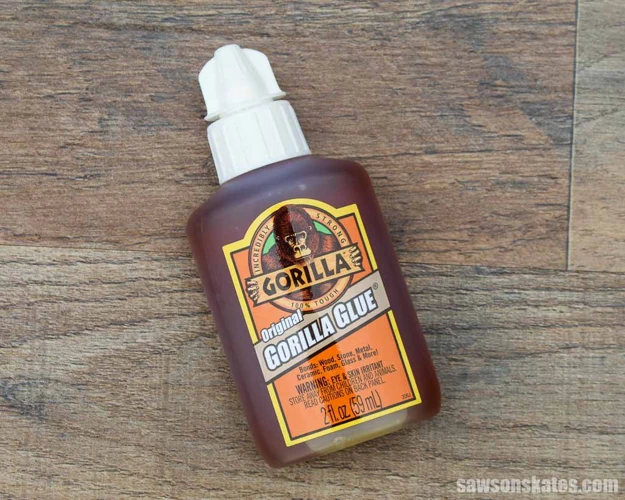
Store-bought adhesives are known for their strong bonding capabilities, especially when dealing with heavy-duty materials such as metal or wood. On the other hand, DIY glue is generally weaker and may not hold up as well under stress.
To better understand the difference in strength between DIY glue and store-bought adhesives, consider the following comparison:
| DIY Glue | Store-Bought Adhesive | |
|---|---|---|
| Bonding Strength | Weak | Strong |
| Materials | Basic household items | Specialized chemicals |
| Application Time | Longer | Shorter |
| Usage | Light-duty tasks | Heavy-duty tasks |
As seen in the table, DIY glue is made with basic household items, whereas store-bought adhesive products contain specialized chemicals designed for specific bonding purposes. The bonding strength of store-bought adhesives is typically stronger and can handle heavy-duty tasks with ease, while DIY glue is best suited for light-duty tasks.
So, while DIY glue may work for simple arts and crafts projects, it may not hold up as well when dealing with tasks that require a stronger adhesive. However, keep in mind that there are certain DIY glue recipes that can be customized to increase their strength, such as adding more glue or using stronger bonding agents.
It’s important to understand the strength capabilities of DIY glue versus store-bought adhesives before deciding which option to use for your project.
Storage and Safety Tips
Storing your homemade glue properly is essential to ensure that it stays fresh and usable for as long as possible. Here are some tips to ensure that your glue stays fresh and safe:
Container Options: When storing your glue, you want to make sure that you choose a container that will keep air out and prevent it from drying out. Glass jars with tight-fitting lids are a great option. Mason jars are easy to find and make a great air-tight storage container for your glue.
Proper Storage: Once you’ve chosen your container, it’s important to store your glue in a cool, dry place. The ideal temperature for storing glue is between 50-70 degrees Fahrenheit. Keep it away from direct sunlight and don’t store it in a humid environment as this can cause the glue to spoil more quickly.
Safety Measures: Homemade glue is generally non-toxic and safe, but it’s still important to take some safety measures when handling it. Make sure to wear gloves and avoid getting glue in your eyes or mouth. If you do get glue on your skin, wash it off with warm water and soap. Keep your glue out of reach of children and pets.
By following these storage and safety tips, you can ensure that your homemade glue stays fresh and usable for a longer period of time. Happy gluing!
Container Options
When it comes to storing your homemade glue, the container you choose is important. You may be wondering what type of container is best for holding your DIY glue, as you want to ensure that it stays fresh and usable for as long as possible. Luckily, there are several options available to you, each with its own advantages and disadvantages. Let’s take a closer look at some of the container options you can consider for storing your homemade glue.
Proper Storage
Once you have made a batch of simple DIY glue, it’s important to store it correctly to ensure its longevity and effectiveness. Here are some proper storage tips to keep in mind:
- Choose the right container: The container you use for storing your homemade glue is vital. Ideally, you should use an airtight container made of glass or plastic. The container should seal tightly to prevent air from getting in, which can cause your glue to dry out or lose its effectiveness.
- Label the container: Make sure to label your container with the date you made the glue. This will allow you to keep track of how long the glue has been stored and when it’s time to make a fresh batch.
- Store in a cool, dry place: Store your homemade glue in a cool, dry place away from direct sunlight or heat sources. This will help prevent the glue from drying out or becoming too thick.
- Keep out of reach of children: Be sure to store your DIY glue out of reach of children and pets. While the glue is non-toxic, it can still be harmful if ingested.
- Check the consistency: Before using your stored glue, make sure to check the consistency. If the glue has become too thick or lumpy, it may not be effective. In this case, you may need to thin it out with a small amount of water.
By following these proper storage tips, you can ensure that your DIY glue remains effective and usable for as long as possible. Remember to always check the consistency before using your stored glue, and make a fresh batch when needed.
Safety Measures
When working with any type of glue, safety should always be a top priority. Adhesives contain chemicals that can be harmful if not handled properly. Here are some safety measures you should take when making and using your own DIY glue:
| Avoid Contact with Skin | Glue can cause skin irritation or even allergic reactions. Wear gloves when making and using glue to protect your hands. If glue comes into contact with your skin, immediately wash the area with soap and water. |
| Proper Ventilation | When making glue, it’s important to work in a well-ventilated area to avoid inhaling harmful fumes. Open windows or use a fan to circulate the air. |
| Eye Protection | If glue accidentally gets into your eyes, it can cause serious damage. Wear safety goggles when using glue to protect your eyes. |
| Keep Away from Children and Pets | Store glue in a secure place, out of reach of children and pets. Accidentally ingesting glue can be extremely dangerous. |
| Clean Up Spills Immediately | If you spill glue, immediately clean it up with paper towels or a cloth. Do not touch the glue with your bare hands. |
| Dispose Properly | When disposing of glue, do not pour it down the drain or throw it in the trash. Check your local regulations for proper disposal methods. |
By following these simple safety measures, you can enjoy the benefits of making your own DIY glue while protecting yourself and those around you. Remember, safety always comes first!
Conclusion
After learning about the different types of glue and the recipe for making simple glue, it is clear that there are numerous advantages to making your own glue. Not only is it cheap and customizable, but it is also non-toxic and can be used for a variety of purposes- from arts and crafts to household repairs to science experiments.
However, it is important to note that DIY glue does have its disadvantages, such as lower durability, shorter shelf life, and less strength compared to store-bought options. As with any project, it is important to weigh the pros and cons before deciding whether to make your own glue.
When storing and using DIY glue, it is important to take proper safety measures and store it in a suitable container to prevent any accidents. Always keep the glue out of reach of children and use in a well-ventilated area to avoid inhaling any potentially harmful fumes.
In conclusion, making your own glue is a fun and cost-effective alternative to buying commercial options. By following this simple recipe and taking the appropriate safety measures, it is easy to create your own glue for all of your crafting and repair needs. Give it a try and see for yourself the benefits of DIY glue.
Summary
As we come to the end of our DIY glue making guide, it’s time to recap what we’ve learned. From natural to synthetic glues, we’ve covered the types of glue available and their respective advantages and disadvantages. Our recipe for simple glue using basic household items is perfect for arts and crafts, household repairs, and science experiments. Additionally, we’ve explored the benefits and drawbacks of making your own glue, as well as important safety and storage tips to keep in mind. Let’s highlight the key takeaways from this article.
Final Thoughts
As we wrap up this article on creating a simple DIY glue recipe, it’s important to remember the key takeaways. Firstly, a DIY glue recipe offers several advantages over store-bought options, such as affordability, safety, and customizability. However, it’s also important to consider the potential disadvantages, such as lower durability and shorter shelf-life.
Before trying out any of the recipes, ensure that you have the necessary materials on hand and follow the safety precautions. It’s crucial to store your homemade glue recipe properly in airtight containers away from children and pets, and label it accordingly.
Keep in mind that there are different types of glue recipes available, such as natural and synthetic options, so it’s best to find the one that suits your specific needs. Whether you’re using the glue for arts and crafts, household repairs, or science experiments, it pays to test the glue on a small surface before committing to a larger project.
Making a simple DIY glue recipe can be a fun and rewarding experience, giving you a sense of satisfaction that comes with creating something from scratch. Remember to experiment with different variations and personalize the recipe to fit your unique requirements.
To summarize, DIY glue offers several benefits, but it’s important to weigh the pros and cons before deciding to make your own. Follow the guidelines and safety tips provided in this article, and enjoy the process of creating and using your homemade glue recipe!
Frequently Asked Questions
What is the difference between natural glue and synthetic glue?
Natural glue is made from organic materials such as animal hides, while synthetic glue is made from chemicals and synthetic polymers.
Can homemade glue be used for industrial purposes?
No, homemade glue is not meant for heavy-duty applications and may not have the necessary strength and durability for industrial use.
How long can DIY glue be stored for?
DIY glue has a shorter shelf life than commercial glue, and should be used within a few weeks of making. It can be stored in an airtight container for up to a month.
Is homemade glue non-toxic?
Yes, homemade glue made from natural ingredients is non-toxic and safe for children to use.
Can DIY glue be customized for different uses?
Yes, the recipe for homemade glue can be adjusted to make it thicker or thinner, depending on the intended use.
Can DIY glue be used on different surfaces?
DIY glue can be used on a variety of surfaces such as paper, cardboard, wood, and fabric, but may not be suitable for some materials like metal or plastic.
What is the advantage of using homemade glue?
The biggest advantage of homemade glue is that it is cheap to make and can be made with natural, non-toxic ingredients.
How can I ensure the safety of using homemade glue?
Always follow safety precautions when making and using homemade glue. Keep it away from children and pets, and wear gloves and eye protection when handling the ingredients.
Can homemade glue be used for food packaging?
No, homemade glue is not approved for use in food packaging and should not be used for this purpose.
What can I do if my homemade glue dries too quickly?
If your homemade glue dries too quickly, you can add a small amount of water to thin it out and make it more workable.