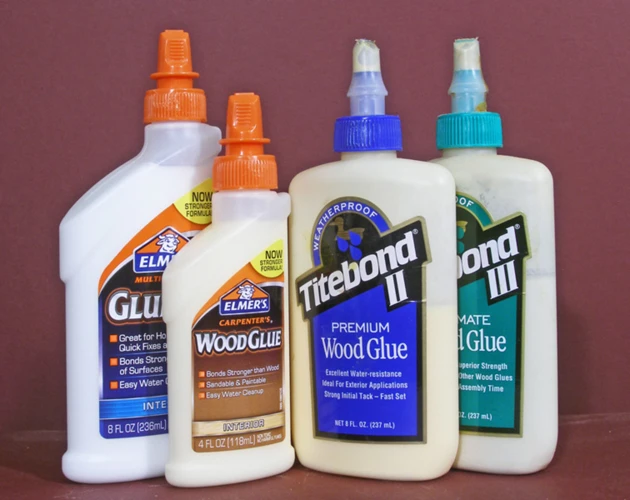
Sticky tack is a versatile, handy tool for hanging posters, securing decorations, or keeping objects in place. While it’s readily available in stores, creating your own DIY sticky tack can be a fun and cost-effective project. With a few simple ingredients and a dash of creativity, you can make a custom adhesive putty recipe that suits your needs perfectly. Not only is this a great activity for crafting enthusiasts, but it’s also an excellent way to reduce waste and control the substances used in your home or office space.
Materials Needed for Homemade Sticky Putty
List of Materials
- Liquid glue
- Cornstarch
- Measuring cups and spoons
- Mixing bowl
- Stirring utensil
- Gloves (optional)
- Food coloring (optional)
Step-by-Step Guide to Make Sticky Tack
Preparing the Liquid Glue Base
Begin by pouring a cup of liquid glue into your mixing bowl. This will serve as the foundation for your homemade sticky putty. Ensure that you’re working on a clean, flat surface and consider wearing gloves to keep your hands clean during the process.
Transforming Liquid Glue into Adhesive Putty
Gradually add cornstarch to the glue, stirring continuously until the mixture begins to thicken. This transformation is critical, as it turns the runny glue into a pliable adhesive putty. You’ll notice the mixture becoming less sticky and more moldable as you add more cornstarch.
Creating a Non-Sticky Glue Tack
To achieve the ideal non-sticky glue tack, it’s essential to reach the perfect balance between glue and cornstarch. Once the mixture resembles dough, knead it with your hands until it’s smooth and elastic. If it’s too sticky, add a bit more cornstarch; if it’s too dry, add a touch more glue.
Customizing Your DIY Sticky Tack
Adjusting the Tackiness
For a more or less sticky product, you can adjust the ratio of cornstarch to glue. More glue will result in a tackier putty, while more cornstarch will make it firmer and less adhesive.
Adding Color to Your Homemade Sticky Putty
Personalize your glue-based tack by adding a few drops of food coloring during the mixing process. This can help you match the putty to your walls or create fun colors for craft projects.
Making Reusable Adhesive
The beauty of DIY sticky tack is its reusability. After use, simply knead the putty to refresh its sticky properties, and it’s ready to go again. Store it properly to maintain its adhesive qualities for future use.
Tips for Perfecting Your Sticky Tack Recipe
Finding the Right Consistency
Achieving the right consistency is crucial for making easy sticky tack. It should be soft enough to mold but firm enough to hold objects. Test its stickiness and make adjustments as needed.
Long-term Storage Solutions
To keep your homemade sticky putty fresh, store it in an airtight container or plastic wrap. Keep it in a cool, dry place to prevent it from drying out or becoming less effective over time.
Common Questions about Homemade Sticky Putty
Best Practices for Using and Reusing Glue-based Tack
To use, simply tear off a small piece and roll it into a ball or strip depending on the application. Press it firmly onto the object and surface. For reusing, ensure the surface is clean before applying the sticky tack again.
Ensuring Safety and Efficacy
While homemade sticky putty is generally safe, it’s important to use non-toxic glue for projects involving children. Always test a small amount on a hidden area to ensure it doesn’t leave marks or residue.
Alternative Uses for DIY Sticky Tack
Sticky Putty Alternative Applications
Beyond hanging items, your adhesive putty recipe can be used to stabilize objects, fix minor leaks, or as a temporary hold for DIY projects. Its versatility makes it a useful addition to any toolkit.
Troubleshooting and Warnings
Addressing Common Issues
If your sticky tack is too dry, add more glue; if it’s too wet, incorporate more cornstarch. If it loses its stickiness over time, kneading it can often restore its properties.
Precautions When Making and Using Sticky Tack
Avoid using sticky tack on porous surfaces, as it can leave residue or become difficult to remove. Always conduct a spot test before applying it to a visible area.
Conclusion and Recap of How to Make Easy Sticky Tack
Creating your own DIY sticky tack is a rewarding process that allows for customization and reuse. By following the simple steps outlined above, you can make a reliable and effective homemade sticky putty. With the right care and storage, your handmade adhesive can serve you well in numerous applications around the home or office.
If you’re a DIY enthusiast looking to expand your crafting skills, we have a variety of tutorials that could be just what you’re looking for. For instance, you can learn about creating realistic winter decorations with our guide on how to make icicles with hot glue. Or, if you need a strong adhesive for your projects, check out our article on how to make sticky glue. Additionally, for those interested in unique paint effects, our tutorial on how to crackle paint with glue is sure to inspire your next artistic endeavor. And for your current project, learn how to create your own adhesive putty by reading our step-by-step guide on How To Make Sticky Tack With Liquid Glue.
References
For further reading on the properties of liquid glue and cornstarch, consult scientific publications and craft material manufacturers. They provide in-depth information on the chemistry behind adhesives and how various substances interact to create sticky solutions.

