Have you ever experienced a stressful game of pool only to have your cue tip fall off mid-shot? It can be frustrating and disappointing, but fear not, as there is a solution. Choosing the right glue for your pool cue tip is essential to ensure that your tip stays firmly in place. However, with so many options available, it can be overwhelming to determine which type of glue is appropriate for your needs. In this complete guide, we will explore the various options for pool cue tip glues, considerations to keep in mind when choosing one, and step-by-step instructions for how to glue a pool cue tip with ease. So, let’s get started on ensuring that your pool game is always on point.
Types of Pool Cue Tip Glue
When it comes to attaching a new tip to your pool cue, choosing the right glue is essential. You want something that will provide a secure and long-lasting bond, but with so many options available, it can be hard to know where to start. In this section, we’ll explore three common types of glue used for pool cue tips, their specific properties and advantages, and help you choose which one is best suited for your needs. Whether you are looking for a quick adhesive or a specialized glue specifically meant for pool cues, we have got you covered.
Super Glue
Super glue is a common choice for pool cue tip adhesion due to its quick drying time and strong bond. It is a type of cyanoacrylate adhesive that works by reacting with the moisture in the air and surfaces. Super glue is easy to apply and can hold the tip in place almost immediately, making it an ideal choice for those who frequently change their tips. However, it is important to note that the bond created by super glue can be brittle and may not be as durable as other types of adhesives.
When using super glue for pool cue tips, it is recommended to use a gel-like formula rather than a liquid formula. The gel formula allows for more control and less mess during application. It is also important to ensure that the tip and the cue shaft are clean and dry before applying the glue.
As with any adhesive, proper application is important for achieving a strong and lasting bond. To apply super glue, simply put a small drop onto the cue shaft and the bottom of the tip. Then, press the two surfaces together firmly for about 30 seconds to allow the glue to dry and bond. It is important to avoid applying too much glue, as this can create an uneven surface and affect the playability of the cue.
While super glue is a quick and easy option for pool cue tips, it may not provide the most durable bond over time. It is important to consider factors such as strength, drying time, and toxicity when choosing an adhesive for pool cue tips, and to follow proper application techniques to ensure a strong and lasting bond.
Two-Part Epoxy
Two-part epoxy glue is one of the most preferred glues for attaching cue tips to the ferrule. This type of glue is different from other adhesives due to its two-part formula that consists of a resin and a hardener. When mixed, these two parts activate a chemical reaction that causes the glue to harden and cure quickly. This feature makes it ideal for pool cue tips, as it dries exceptionally fast within 30 minutes of application.
Another advantage of two-part epoxy glue is its incredible strength and durability. It forms a powerful bond that can last for years, even under the rigors of regular play. Epoxy glue can resist moisture, heat, and chemicals, making it perfect for pool cues that are exposed to varying environmental conditions.
When using two-part epoxy glue, it’s best to work in a well-ventilated area and wear protective gloves as the glue can be toxic. Ensure the pool cue tip and ferrule are clean and dry before application. A small amount of glue should be mixed and applied to the center of the cue tip, spreading it evenly with a toothpick or cue tip clamp. Next, gently press the tip onto the ferrule, ensuring that it is straight and secure. Hold it in place for a few minutes until it adheres properly.
Two-part epoxy glue is an excellent choice for gluing pool cue tips due to its quick drying time, strength, and durability. However, it is essential to take necessary precautions when working with the adhesive to avoid skin contact and inhalation of fumes.
Specialized Glue for Pool Cues
Specialized glue for pool cues is designed specifically for the purpose of repairing and maintaining pool cues. Pool cue tip glue must be strong and durable to withstand the repeated impact of playing billiards. Not all glues are suited for this task, so it is important to choose a glue that is specially formulated for pool cues. Such glue types are specifically designed to bond and seal cue tips, preventing moisture from damaging the wooden cue beneath.
Some examples of specialized glue for pool cues are:
- Cue Silk – This is a specialized glue that is designed to be used with silk wraps on pool cues. Cue Silk is a thin, watery glue that is easy to apply and dries quickly. It is also a great alternative to traditional super glue.
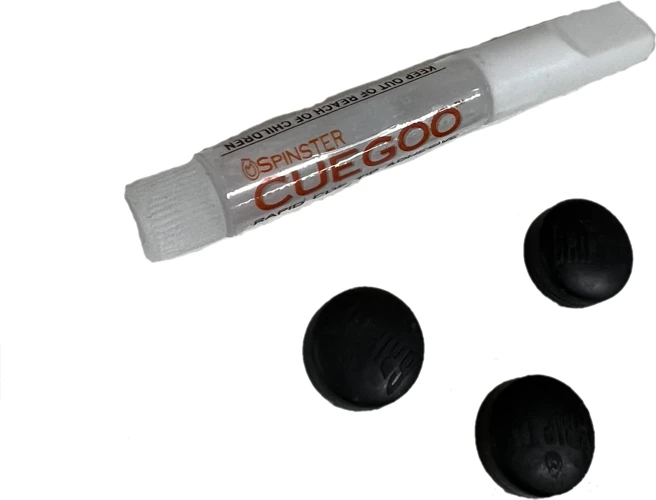
- Tiger Products Instant Cue Tip Repair – This product allows players to easily repair and play their cues on the same day. It is designed to work even in high humidity conditions and provides excellent bonding between the tip and ferrule. This glue dries clear and is easy to work with.
- Kamui Clear Cue Tip Cement – Kamui is a well-known brand in the world of billiards, and their tip cement is no exception. It is formulated to provide players with a stable bond that lasts for a long time and can withstand powerful and repeated strikes. Additionally, this glue dries clear and is easy to clean up.
Choosing the right specialized glue for your pool cue may depend on the type of cue you own, the humidity levels in your playing area, and how frequently you play. It is important to keep in mind that specialized glue for pool cues can be more expensive than standard glues, but the investment is worth it when it comes to the longevity and sustainability of your cue.
Remember, apart from specialized pool cue glue, there are other types of adhesives that you should avoid using on pool cues such as household adhesives, hot glue, craft glue, and construction adhesives. These adhesives can damage your cue and harm your playing experience. Always use glue that is specially designed and formulated for pool cues.
Things to Consider When Choosing a Pool Cue Tip Glue
When it comes to choosing the right pool cue tip glue, there are several factors to consider to ensure a successful repair or replacement. Drying time, strength, viscosity, toxicity, and cost are all important aspects to take into account. Choosing the wrong type of glue can result in a weak bond or damage to your cue. Let’s take a closer look at each factor to make sure you choose the right glue for your pool cue repair needs.
Drying Time
Drying time is an essential consideration when choosing a pool cue tip glue. No one wants to wait hours for the adhesive to dry before playing. Each type of glue has its drying time, and some may dry slower or faster than others. Refer to this table for a general idea of drying times for the different types of glue.
| Glue Type | Average Drying Time |
|---|---|
| Super Glue | 5-30 seconds |
| Two-Part Epoxy | 15-30 minutes to set, 24-48 hours to cure fully |
| Specialized Glue for Pool Cues | 30 minutes to 1 hour |
It’s important to note that drying times can vary depending on factors such as humidity, temperature, and the types of surfaces being bonded. You should always refer to the manufacturer’s guidelines for specific drying times and instructions on how to apply the glue.
If you’re in a hurry to get back to playing pool, super glue is the fastest drying option, with drying times ranging from 5 to 30 seconds. However, if you have more time to spare, two-part epoxy and specialized glue for pool cues may be a better option. Two-part epoxy has a longer setting time but will provide a more durable bond, while the specialized glue for pool cues can offer a more comfortable playing experience.
Keep in mind that although a glue may have a fast drying time, it’s still essential to wait for it to fully cure before using your pool cue. For example, although super glue dries within seconds, it can take up to 24 hours to fully cure. On the other hand, two-part epoxy may take only 15 to 30 minutes to set but requires 24 to 48 hours to cure fully.
Strength and Durability
Strength and durability are crucial factors to consider when selecting a glue for your pool cue tips. No one wants to constantly replace pool cue tips due to the glue wearing off. Here are some of the adhesives that have high strength and durability:
| Adhesive Type | Strength | Durability |
|---|---|---|
| Two-part epoxy | High | High |
| Specialized glue for pool cues | High | High |
| Super glue | Medium | Medium to Low |
Two-part epoxy and specialized glue for pool cues are the best options for maximum strength and durability. These adhesives have a stronger bond that can withstand the impact of cue ball striking, providing a longer-lasting attachment between the tip and the shaft.
Super glue, on the other hand, tends to wear down over time and may require reapplication if the bond weakens. It is suitable for beginners or those looking for a quick fix, but it is not recommended for long-term use.
Note: When using a new glue for the first time, it’s always best to test the bond’s strength and durability before using it for an actual game.
To ensure the strength and durability of your cue tip glue, you should also consider proper maintenance and care of your pool cue. With proper care, the glue will last longer, and you won’t have to worry about your cue tip coming off during a game.
Internal link: How long does windshield glue take to dry?
Viscosity
Viscosity is an important factor to consider when choosing a glue for your pool cue tip. Viscosity refers to the thickness or consistency of the glue, which can affect how easy or difficult it is to apply and how well it spreads.
- Low viscosity glues are thin and watery, which can make them easier to apply and penetrate the fibers of the tip and ferrule. They also tend to dry faster, which can be a benefit or a drawback depending on your skill level and the climate you’re working in.
- Medium viscosity glues offer a balance between thin and thick, providing some ease of application while also offering more control and staying power. This type of glue may take longer to dry but can offer a stronger, more secure bond.
- High viscosity glues are thick and pasty, which can make them difficult to spread evenly. However, they provide a very strong bond and are often used for repairing or building cue tips from scratch (which we won’t cover in this article).
When choosing a glue for your pool cue tip, consider your own level of experience and comfort with applying glue. If you’re new to cue maintenance, a lower viscosity glue like Super Glue might be easier to work with. If you’re more experienced and looking for a stronger bond, a medium or high viscosity glue like Two-Part Epoxy may be a better choice.
If you’re interested in making your own glue, we have articles on how to make roach glue traps and how to make white glue that you may find useful. However, keep in mind that making your own glue can affect the viscosity and consistency of the final product, so be sure to test it thoroughly before using it on your pool cue tip.
Toxicity
When choosing a pool cue tip glue, toxicity is an important consideration for both the player and the environment. Many types of glues contain harmful chemicals that can cause skin irritation, respiratory problems, and other health issues if not used properly. It’s always important to read the label and follow safety guidelines when working with any type of glue. To help you make an informed decision, here are some tips on selecting the best low-toxicity glue.
- Choose Water-Based Glue: One of the safest types of glue for pool cue tips is water-based glue. It has low VOC emissions, which means it won’t release harmful toxic fumes into the air.
- Look for Low-toxicity Claims: Some manufacturers make glues with low-toxicity levels to reduce user risks. Look for ones labeled non-toxic, low VOC, or low odor.
- Avoid Harmful Chemicals: Cyanoacrylate-based superglues, for instance, can release toxic fumes that can cause headaches, breathing difficulties, and other health problems. They can also cause skin irritation or burns upon contact. Avoid using such options.
- Read the Label: Check the label for warnings and usage instructions. Proper precautions must be followed, such as wearing gloves and avoiding ingestion or skin and eye contact.
- Do Not Induce Harmful Vapors: When using glue, use it in a well-ventilated area to prevent the buildup of harmful fumes. Never light a flame or a smoking material while working with the glue.
By choosing a low-toxicity, water-based glue when installing a pool cue tip, you’ll be taking the first steps towards a safer experience for you and the environment. Not only will it make the glueing process safer, but it’ll also reduce the risk of harming your cue’s materials.
Cost
When it comes to choosing a glue for your pool cue tip, cost is certainly a factor to consider. Generally, specialized cue tip glues tend to be more expensive than regular super glue or epoxy. However, it’s worth investing in a high-quality glue that can ensure the longevity of your cue tip and improve your overall gameplay experience.
Depending on the type of glue you choose, the cost may vary. Here is an approximate cost range for the three most common types of pool cue tip glue:
| Type of Glue | Approximate Cost |
|---|---|
| Super Glue | $5 – $15 |
| Two-Part Epoxy | $10 – $20 |
| Specialized Glue for Pool Cues | $20 – $40 |
It’s important to note that investing in a specialized cue tip glue can save you money in the long run. Cheaper options may not provide the same level of durability and strength, leading to more frequent replacements and added costs. Additionally, poor quality glue can result in the misalignment or slipping of your cue tip, negatively impacting your gameplay.
While cost is a consideration, it’s important to prioritize the quality and effectiveness of the glue you choose. Opting for a trusted brand and consulting recommendations from fellow pool players can ensure that you make a worthwhile investment.
How to Glue a Pool Cue Tip
Gluing a pool cue tip may seem like a daunting task, especially if you’ve never done it before. However, with the right tools and techniques, it can be a straightforward process. Before you start, make sure you have the correct type of glue for your pool cue tip as discussed in the previous section. Now, let’s dive into the step-by-step process of how to glue a pool cue tip.
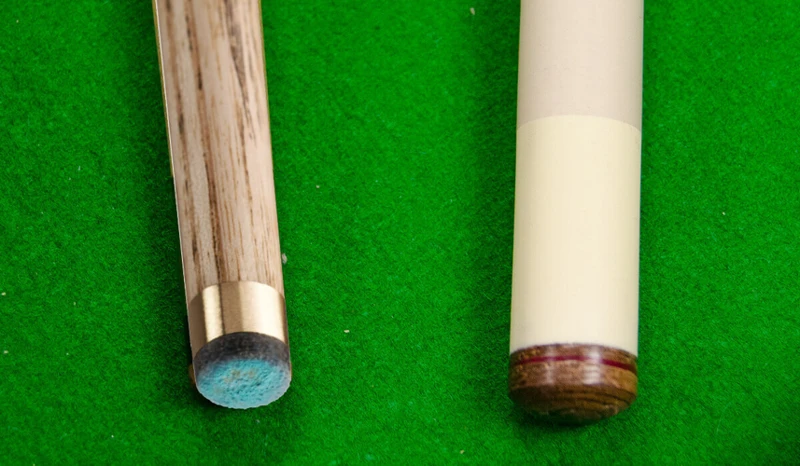
Step 1: Remove the Old Tip
To start, you need to remove the old tip from your pool cue. This process can vary depending on the type of tip you have. You may need to use a sharp knife or pool cue tip tool to gently pry off the tip. Be careful not to scratch or damage the ferrule or the shaft of the cue during this process.
Step 1: Remove the Old Tip
One of the most important steps in gluing a pool cue tip is to remove the old tip before applying new glue. This is because any remnants of the old tip or glue can interfere with the bonding process and affect the performance of the new tip. Here’s how to remove the old tip:
Step 1: Gather the necessary tools
- Sharp razor blade or utility knife
- Small pair of scissors
- Sandpaper or a sanding block
Step 2: Score the edge of the old tip
Using the razor blade or utility knife, carefully score the edge of the old tip where it meets the ferrule. This will help loosen the glue and make it easier to remove the tip in the next step. Be sure to make shallow cuts and avoid cutting into the ferrule.
Step 3: Loosen the old tip
Use the small pair of scissors to gently pry the old tip away from the ferrule. Work your way around the tip, pulling it away a little bit at a time. Take your time and be careful not to damage the ferrule.
Step 4: Remove any remaining glue
Once the old tip is removed, use the sandpaper or sanding block to lightly sand the top of the ferrule to remove any remaining glue or debris. This will create a clean surface for the new tip to adhere to.
Congratulations! You have now successfully removed the old tip from your pool cue. Properly preparing the cue for a new tip is crucial for maintaining optimal performance. Now, you can move on to the next step and prepare the cue and the new tip for gluing.
Step 2: Prepare the Cue and the New Tip
Preparing both the cue and the new tip correctly before gluing is crucial for a successful repair. It ensures that both surfaces are clean and free of any impurities that may interfere with the adhesive bond. Here are the various steps to this process:
| Steps | Details |
|---|---|
| 1 | Remove any remaining glue: Before proceeding, make sure to remove any old glue residue from the cue tip and the ferrule. Clean them with acetone or another degreaser and a piece of cloth. This step is important as it will ensure that the new glue will form a strong bond with the surfaces. |
| 2 | Choose the right tip: Select a cue tip based on the style and proficiency level of the player as well as the cue’s intended use. Cue tips vary in hardness, shape, and size so choose the one that best suits your needs. |
| 3 | Shape and sand the tip: Trim the tip so that it fits the ferrule appropriately using a sharp razor knife or a cue tip shaping tool. Then, sand the tip edges with a fine-grit sandpaper to provide a smooth surface for gluing. Ensure that the diameter of the new tip matches the ferrule size as well. |
| 4 | Roughen the tip surface: Use sandpaper or a tip pick to lightly roughen the top of the cue tip. This will help the glue bond more successfully with the surface. |
| 5 | Prepare the glue: Depending on the type of glue you use, prepare the glue according to the manufacturer’s instructions. |
It’s important to note that the weight of the glue can also affect the playability of the cue. Consider using a lightweight glue to prevent adding too much weight to the tip. You can find out how much different types of glue weigh in our article “How Much Does Glue Weigh?”.
Avoid using any glue or adhesive that contains harmful toxins or chemicals. If you’re looking for a more eco-friendly option, you can make glue from styrofoam. Check out our guide on “How to Make Glue from Styrofoam.”
Step 3: Apply the Glue
Step 3: Applying the Glue
Now that you have prepared both the cue and the tip, it’s time to apply the glue. This step is crucial and requires a steady hand.
The table below outlines the types of glue that can be used for pool cue tips, along with the recommended application method:
| Glue Type | Recommended Application Method |
|---|---|
| Super Glue | Apply a small drop of glue to the center of the cue tip |
| Two-Part Epoxy | Mix the two parts of the epoxy together in a small dish, then apply a small amount to the center of the cue tip |
| Specialized Glue for Pool Cues | Follow the manufacturer’s instructions for application |
No matter what type of glue you decide to use, be sure to apply it to the center of the cue tip. This will help ensure the best possible bond.
When applying the glue, use a toothpick or other small tool to spread the glue evenly over the surface of the cue tip. Be careful not to use too much glue, as this can cause the tip to slide around on the cue while it dries.
Once the glue has been applied, wait a few seconds for it to begin to set up. This will make it easier to attach the tip to the cue in the next step.
Pro tip: If you’re using super glue, avoid getting it on your fingers. Super glue can be difficult to remove from skin and can cause irritation.
By following these steps for applying glue to your pool cue tip, you’ll be well on your way to a successful repair or replacement.
Step 4: Install the New Tip
Installing the new pool cue tip is a crucial step in the process of gluing a cue tip. This step requires a patient and steady hand to ensure that the new tip adheres properly. Here are the detailed steps for installing the new tip:
| Step | Description |
|---|---|
| 1. | Apply a small amount of glue to the center of the new tip. |
| 2. | Align the new tip with the center of the ferrule, making sure it is straight. |
| 3. | Press down on the new tip and hold it in place for at least 30 seconds to ensure proper adhesion. |
| 4. | Hold the tip down while rotating the cue for even distribution of the glue. |
| 5. | Place a clamp or a clothespin on the new tip and ferrule junction. This helps the glue dry without the tip sliding out of place. |
| 6. | Let the glue dry according to the manufacturer’s instructions. Do not disturb the new tip during the drying process. |
It is important to remember to align the new tip properly with the center of the ferrule to avoid any misalignment or wobbling of the new tip. After pressing down on the new tip, rotating the cue ensures even distribution of the glue and minimizes the possibility of air pockets. Placing a clamp or a clothespin on the new tip and ferrule junction prevents the new tip from sliding out of place while the glue dries. Finally, allowing the glue to dry undisturbed according to the manufacturer’s instructions ensures that the new tip adheres properly to the cue.
Step 5: Shape and Sand the Tip
Now that you’ve installed the new pool cue tip and the glue has dried, it’s time to shape and sand it. Here are the steps to help you shape and sand the tip to perfection:
- Trim the Excess: Use a sharp razor blade or a pair of scissors to gently trim off the excess portion of the tip. Be careful not to cut too much. You can always trim more later, so it’s best to start with a small amount.
- Shape the Tip: Use a tip shaper or a shaping tool to achieve the desired shape. Depending on your playing style, you may prefer a flat, rounded, or cone-shaped tip. Take your time and make small adjustments as you go. It is essential that you do not remove too much material and keep the tip’s original diameter and shape. Always use a fine grit sandpaper when shaping the tip.
- Sand the Tip: After shaping, you must sand the tip. Use fine sandpaper or a finishing pad to remove any rough edges and achieve a smooth surface. Work your way up from a coarse grit to a fine grit to obtain the intended result.
- Chalk the Tip: Always remember to chalk the tip before using it. Rub chalk on the top of the tip and tap it lightly to spread it evenly. This helps reduce miscues and improve your shot accuracy.
By following these steps, you can ensure that your newly glued pool cue tip is properly shaped and sanded, ready for action. Proper preparation and care of the tip can help increase its life and improve your overall game performance.
Step 6: Finish the Tip
After installing and shaping the new pool cue tip, the final step is to finish it. This involves using sandpaper or a tip shaper to smooth out any rough spots or uneven edges. Here are the steps to finish the tip:
- Using a fine-grit sandpaper (around 600 grit), gently rub the edges of the tip to remove any excess glue and smooth out any rough spots.
- After sanding, use a soft-bristled brush or cloth to remove any debris from the tip.
- Now, take a burnisher or a tip shaper and use it to lightly burnish the sides of the tip, making sure to apply even pressure. This will help to harden the tip and prevent it from mushrooming over time.
- Once you have completed the burnishing, use a piece of low-grit sandpaper (around 300 grit) to lightly sand the top of the tip. This will help to remove any imperfections and ensure a smooth playing surface for better ball control.
- Next, use a higher-grit sandpaper (around 800 grit) to further smooth and polish the tip.
- Finally, use a piece of soft cloth or felt to apply a coat of tip oil to the tip. This will help to condition it and prevent it from drying out, leading to better spin and ball control.
Remember to only apply a small amount of tip oil, as using too much can cause the tip to become saturated and lose its elasticity. By following these steps, you can ensure that your pool cue tip is properly finished and ready for optimal performance.
Troubleshooting Tips
Experiencing issues while gluing a pool cue tip can be frustrating, especially if you’re in the middle of a game or tournament. Don’t worry though, as there are several troubleshooting tips that can help you overcome common problems. Below are some suggestions on how to troubleshoot issues like the tip not sticking, glue drying too fast or slow, and tips slipping or misaligning. By following these tips, you’ll be able to avoid any potential mishaps and ensure a successful repair or replacement of your pool cue tip.
The Tip is Not Sticking
If you’re having trouble with the cue tip not sticking properly, don’t worry – this is a common issue that can be easily fixed. Here are some possible solutions:
- Clean the tip and ferrule: Dirt, grease, or residue on the tip or ferrule can prevent the adhesive from bonding properly. Use rubbing alcohol or acetone to thoroughly clean both surfaces before attempting to glue the tip.
- Rough up the tip surface: Sometimes the tip may be too smooth for the glue to adhere to properly. Lightly scuff or sand the surface of the tip with fine-grit sandpaper to create a rougher texture that will help the glue hold on better.
- Use a different glue: If you’re using a glue that isn’t strong enough for your needs, it may not stick the tip properly. Consider switching to a stronger adhesive, such as two-part epoxy.
- Apply more pressure: It’s possible that you didn’t apply enough pressure when installing the tip. Put more pressure on the tip and hold it in place, using a clamp or vise if necessary, until the glue sets.
- Wait longer for the glue to dry: If you’re expecting the glue to set too quickly and not giving it enough time to dry, the adhesive may not bond properly. Follow the manufacturer’s guidelines for drying time and don’t rush the process.
Try these remedies and see if your cue tip starts sticking securely again. In this way, you can avoid any problems during your gameplay and enjoy improved performance from your cue stick.
The Glue is Drying Too Fast
If you find that the glue is drying too fast when gluing your pool cue tip, you may have some issues. Here are some possible reasons why the glue is drying too fast and some tips on how to solve it:
- Ambient Temperature: The temperature where you are gluing the pool cue tip can have a significant impact on how fast the glue dries. If it is too hot where you are, the glue will dry too quickly.
- Humidity: If you are in a dry environment, the glue will dry too fast. Humidity slows down the drying process of the glue, so if you have a dehumidifier, it may help slow down the drying time.
- Applying too Much Glue: If you apply too much glue, it will dry too quickly. The excess glue will not be able to dry as quickly as the glue underneath it, leading to an uneven drying time.
- Wrong Type of Glue: If you are using the wrong type of glue, it may not be able to handle the pool cue tip’s weight and dry too fast.
To solve these issues, try these tips:
- Adjust the Temperature: If the ambient temperature is too hot, try moving to a cooler, more shaded area. Conversely, if it is too cold, moving to a warmer area may help.
- Add Humidity: If the air is too dry, adding humidity to the air with a humidifier or a damp towel can help slow down the drying process.
- Apply Less Glue: To avoid over-applying glue, use a thin layer of glue instead of globbing it on.
- Use a Different Glue: If you have used a glue that is not meant for pool cue tips, switch to one that is designed for it.
By following these tips, you will be able to control the drying time of your pool cue tip glue and have a successful gluing experience.
The Glue is Drying Too Slow
One common issue that can occur when gluing a pool cue tip is that the glue may dry too slowly. This issue can be frustrating but can typically be easily resolved. One of the first things to check is the temperature and humidity of the room, as these factors can greatly affect the drying time of the glue.
If the room is too cold or humid, it can cause the glue to dry much slower than expected. One way to speed up the drying time is to move the cue and tip to a room with a higher temperature and lower humidity. Additionally, you can use a fan to circulate the air and help the glue dry more quickly.
Another factor that can contribute to slow drying time is the type of glue being used. Some types of glue naturally take longer to dry than others. If you are using a slow-drying glue, such as two-part epoxy, then you may need to be patient and allow the glue to fully cure before using the cue.
To help speed up the drying process, use a heating lamp or place the cue in a warm area for a few hours. However, be cautious not to overheat the cue as this can cause damage to the wood.
It’s important to note that rushing the drying process by using high heat or force can also lead to a weaker bond between the tip and the cue. The glue needs time to properly cure and harden in order to create a strong and durable connection.
If your glue is drying too slowly, check the room temperature and humidity and consider using a fan or moving to a warmer area to help speed up the process. Also, be sure to choose a glue that is appropriate for the job and allow enough time for it to fully cure before using the cue.
The Tip is Slipping or Misaligned
If the pool cue tip is slipping or misaligned after gluing, don’t worry, there are a few things you can do to fix it:
1. Allow the Glue to Dry Completely: Make sure that the glue has completely dried before you start playing with the cue stick. This will ensure that the tip is firmly glued to the cue, preventing slipping or misalignment issues.
2. Re-Glue the Tip: If the tip is still slipping or misaligned, the glue may not be strong enough. In this case, you can re-glue the tip using a stronger adhesive, such as two-part epoxy. However, be sure to sand down the previous glue before applying the new adhesive.
3. Adjust the Pressure: Sometimes, the tip can slip or become misaligned due to uneven pressure during the gluing process. To fix this, you can adjust the pressure by using clamps or weights on the tip while the glue is drying.
4. Seek Professional Help: If you’re still having issues with the tip slipping or misaligning, it may be best to seek professional help. A professional pool cue repair expert will have the knowledge and experience to help you fix your cue stick and get it back to its original condition.
Remember, a slipping or misaligned tip can affect your game and lead to frustration. Take the time to properly glue and maintain your pool cue tip to ensure optimal performance on the table.
Conclusion
In conclusion, choosing the right glue for your pool cue tip is essential for ensuring a strong and long-lasting bond. As we’ve discussed, there are several types of glue available such as super glue, two-part epoxy, and specialized glue for pool cues.
When selecting a suitable glue, factors such as drying time, strength and durability, viscosity, toxicity, and cost should be taken into consideration. It’s also important to follow the manufacturer’s instructions and take care when applying the glue to prevent any mishaps.
Once you have the right glue, gluing a pool cue tip can be a straightforward process. However, if you do encounter any issues, such as the tip not sticking or misalignment, there are troubleshooting tips that you can follow.
In summary, by following the steps outlined in this guide and taking the necessary precautions, you can successfully glue a pool cue tip with confidence and enjoy playing your game of pool without any tip related issues.
Frequently Asked Questions
What is the best glue for pool cue tips?
The best glue for pool cue tips depends on personal preference and the specific needs of the cue. Super glue, two-part epoxy, and specialized glue for pool cues are all viable options.
How long does it take for pool cue tip glue to dry?
Drying time depends on the type of glue used. Super glue usually dries within a few seconds, while two-part epoxy can take anywhere from 5-24 hours to fully cure.
Can I use regular glue for pool cue tips?
No, regular glue is not suitable for pool cue tips. It is important to use a glue specifically designed for pool cues to ensure the best possible results.
What is the difference between super glue and two-part epoxy?
Super glue is a fast-drying adhesive that is best used for quick repairs or for tips that do not require a lot of shaping. Two-part epoxy, on the other hand, takes longer to dry but provides a stronger bond and is better suited for tips that require a lot of shaping.
Is pool cue tip glue toxic?
Some types of glue may contain toxic chemicals, so it is important to read the label carefully before use and take proper safety precautions.
How much glue should I use when gluing a pool cue tip?
You should use just enough glue to cover the base of the tip and the ferrule. Using too much glue can lead to a mess and make it difficult to properly align the tip.
Do I need to sand the cue before gluing on a new tip?
It is a good idea to lightly sand the cue to ensure a clean and smooth surface for the new tip to adhere to.
How often should I replace my pool cue tip?
The frequency of tip replacement depends on usage and personal preference. Generally, it is recommended to replace the tip every 6-12 months.
What should I do if the tip is misaligned?
If the tip is misaligned, it is best to remove it and start the gluing process over again. Attempting to adjust the tip after it has been glued on can lead to a weaker bond and an uneven playing surface.
Can I use a hairdryer to speed up the drying process?
No, it is not recommended to use a hairdryer as it can cause the glue to dry too quickly and weaken the bond between the tip and the cue.