Have you ever come across intricately decorated handmade cards or stunning scrapbook pages and wondered how they achieve such a professional look? One of the secrets lies in the use of embossing powder with glue. Embossing powder is a popular crafting material that adds texture, dimension, and shine to paper projects. It might seem like a challenging technique at first, but with a little bit of guidance, you can create jaw-dropping designs in no time. In this article, you’ll learn everything you need to know about using embossing powder with glue, including tips, tricks, and common mistakes to avoid. So, let’s get started!
What is Embossing Powder?
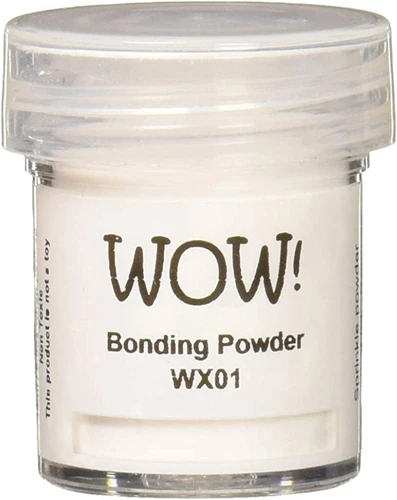
Embossing powder is an incredibly versatile material that can add dimension and texture to any craft project. It’s made up of tiny granules that, when heated, melt and create a raised and glossy effect. It’s a favorite among scrapbookers, card makers, and other artists who want to add a special touch to their work. But what exactly is this magical powder? Embossing powder is a specialized material that is designed to work with a specific glue, and knowing how it works is key to creating beautiful embossed projects.
How Does it Work?
Embossing powder works by melting when it’s heated. It begins as a powder and transforms into a raised design when it’s heated with a heat gun. The high-temperature heating process causes the powder to bond with the glue, which solidifies and forms a raised, glossy, and embossed design.
When you apply the powder over wet glue, it sticks to the glue, and when you apply heat, the powder liquifies, flows, and solidifies in raised form. The end product is a permanent and dimensional design that’s perfect for adding texture and depth to various projects.
The reason this process works so well is because of the unique properties of embossing powder. Its special coating makes it resistant to color change, even when heated at high temperatures. For this reason, embossing powder is ideal for working with pigments and dyes, such as ink and watercolor.
Embossing powder can also be combined with other materials, such as glitter, flocking powder, and even small beads! Because the powder can be heated and made to stick on almost any surface, it offers endless possibilities for customization and creativity.
Here is a table to summarize how embossing powder works:
| Step | Description |
|---|---|
| 1 | Apply glue to the surface in the desired design |
| 2 | Sprinkle embossing powder generously over the wet glue. |
| 3 | Gently tap off any excess powder onto a clean surface, and return the remaining powder to its container. |
| 4 | Heat the powder with a heat gun until the powder melts and turns into a raised design. |
| 5 | Allow the design to cool and dry, which should take only a few seconds. |
Now that you know how embossing powder works, let’s move on to the different types of embossing powders and their uses. Before that, let me tell you about different types of glue that are used in embossing.
Types of Embossing Powder
There are several types of embossing powder available in the market for you to choose from. Each type has its own unique properties and effects that you can explore and experiment with to create various styles of crafts.
Regular Embossing Powder: This is the most common type of embossing powder and usually has a fine texture. It comes in a wide variety of colors and works great with any kind of stamp or adhesive.
Detail Embossing Powder: Detail embossing powder has an ultra-fine texture that is perfect for capturing intricate details. It is usually available in neutral colors such as black, white, or clear.
Opaque Embossing Powder: This type of embossing powder offers a solid, opaque color that covers the stamped image or adhesive. It works great as a background or base for your designs.
Transparent Embossing Powder: If you want to add a glaze-like effect to your crafts, then transparent embossing powder is the way to go. When heated, it creates a glossy, see-through layer over the stamped image or adhesive.
Metallic Embossing Powder: This type of embossing powder has a metallic finish that adds a bit of shine and elegance to your crafts. It is usually available in gold, silver, copper, and bronze colors.
Glitter Embossing Powder: Glitter embossing powder adds a sparkly effect to your crafts. It is available in different colors and sizes of glitter particles to suit your preferences.
Embossing Powder with Texture: This type of embossing powder has a textured finish, which adds depth and dimension to your crafts. It can be a fun way to experiment with new techniques and create unique designs.
By trying different types of embossing powder, you can create a variety of looks and styles for your crafts. Don’t be afraid to mix and match colors and textures, and experiment with different techniques to discover what works best for you.
If you are new to glue or do not know about wood glue, you can read an article about what wood glue dries clear, which will provide you with all the necessary information about wood glue.
How to Use Embossing Powder with Glue
Now that you have a good understanding of what embossing powder is and the different types available, let’s dive into the process of using it with glue. Embossing powder can give your craft projects a unique and professional-looking finish. The process may seem intimidating at first, but with the right tools, tips, and tricks, it can be easy to master. In this section, we will go over what you will need and the step-by-step instructions for using embossing powder with glue. But first, let’s quickly discuss what glue works best with embossing powder. To learn more about glue, check out our article on what is a glue stick.
What You’ll Need
Before you get started with your embossing powder and glue project, it’s important to make sure you have all the necessary materials. Here’s a list of what you’ll need:
| Materials | Description |
| Embossing powder | This is the main material you’ll be using to add texture and designs to your project. Make sure to choose the color and type that fits with your vision. |
| Glue | You’ll need a good quality glue that will dry clear, such as a clear-drying liquid glue or a glue pen. Make sure the glue is completely dry before applying and heating the embossing powder. |
| Stamp or stencils | If you’re using a stamp or stencil to guide your embossing powder, you’ll need to have these on hand and ready to use. |
| Heat source | You’ll need a heat source to activate the embossing powder and make it melt and fuse onto the glue. A heat gun or embossing tool is the most efficient and safest option, but a toaster oven or hair dryer can also work in a pinch. |
| Protective mat or surface | It’s a good idea to work on a protected surface, such as a craft mat or non-stick surface, to avoid damaging your table or workspace. A protective mat will also help you easily clean up any excess embossing powder. |
| Brush or sponge | You’ll need a brush or sponge to apply the embossing powder evenly onto the glue. You can use a small paintbrush, makeup brush, or foam sponge to spread the powder over the glue area. |
| Accessories (optional) | You may want to have some accessories on hand to enhance your project, such as glitter, beads, or sequins. These are optional but can be a fun addition to your embossing powder design! |
Now that you have all the necessary materials, you’re ready to move on to the next step: applying the embossing powder onto glue. But, before you do, make sure your workspace is clean and tidy. If you need help with staying organized, check out our article on How to Store Glue, which offers tips and tricks for keeping your craft materials clean and organized.
Step-by-Step Instructions
Using embossing powder with glue may seem intimidating at first, but it’s actually quite simple! Just follow these easy step-by-step instructions and you’ll be creating embossed designs in no time:
Step 1: Prepare Your Surface
Choose the surface you wish to emboss and prepare it by wiping it down with a clean cloth to remove any dust or debris. Some good options include cardstock, vellum, or chipboard. You may also choose to stamp a design onto your surface before embossing it.
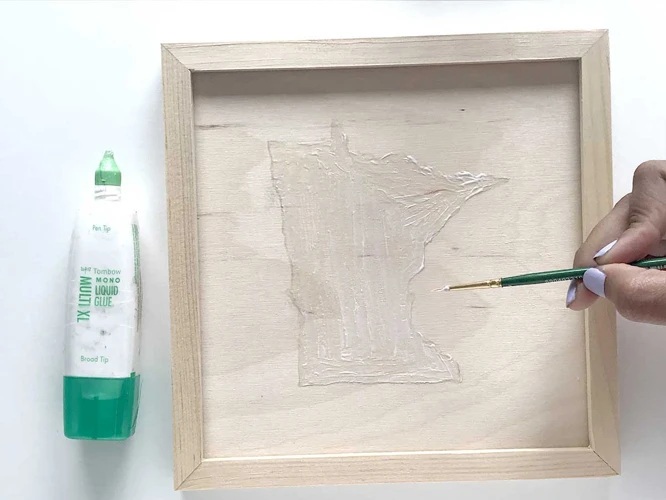
Step 2: Apply the Glue
Next, apply the glue to your surface in the area where you want the embossed design to appear. Use a brush to spread the glue evenly and be sure to avoid any clumps or bumps in the glue. You want a nice, smooth surface for the embossing powder to adhere to.
Step 3: Add the Embossing Powder
Before the glue dries, sprinkle the embossing powder generously over the glue. Be sure to cover the entire area with a thick layer of powder. You can then tap off the excess powder and return it to the container for future use.
Step 4: Heat the Powder
Now it’s time to heat the embossing powder to activate it and create the raised, glossy effect. Use a heat gun or embossing tool to heat the powder until it melts and becomes smooth and shiny. Be careful not to overheat the powder or it may burn and become discolored.
Step 5: Allow it to Cool
Once the embossing powder has been heated, allow it to cool and harden for a few moments before handling or adding any additional layers. Your embossed design is now complete and ready to be added to a card, scrapbook page, or other project!
By following these easy steps, you can create beautiful embossed designs on a variety of surfaces using embossing powder and glue. Be sure to experiment with different color powders and glues to achieve unique and eye-catching effects. For more crafting and adhesive tips, check out our article on what does curing glue mean?.
Tips and Tricks

After mastering the basics of using embossing powder with glue, it’s time to explore some tips and tricks that will take your creations to the next level. These techniques can help you achieve unique and stunning results that will set your artwork apart. Here are some helpful suggestions to enhance your embossing powder projects:
– Experiment with Different Glues
– Play with Colors
– Try Different Heat Sources
– Work in Small Sections
– Use a Light Hand
To take things even further, you could also combine embossing powder with other art forms. For instance, gluing a finished puzzle to a canvas could provide a great surface for an embossed design.
Experiment with Different Glues
Experiment with Different Glues: When it comes to using embossing powder with glue, you don’t necessarily have to stick to one type of glue. Depending on the texture, color, and finish you want to achieve, different types of glues can be used for different purposes. Some popular options to experiment with include PVA glue, tacky glue, and even glue pens.
Here are some glue types and their characteristics:
- PVA glue: This glue is water-soluble and dries clear. It’s perfect for delicate projects, such as embossing fine details. PVA glue also works well with watercolors and is relatively easy to clean up.
- Tacky glue: As the name suggests, this glue is known for its strong hold. It dries clear and is perfect for bonding heavy materials, such as fabrics and wood. However, it may take longer to dry, so be sure to give it enough time before applying embossing powder.
- Glue pens: These pens are perfect for adding small, intricate details to your projects. They’re easy to control and apply and come in a range of colors, making them a great option for heat embossing.
Experimenting with different glue types can help you achieve different effects and textures that can add depth and interest to your project. For example, using a tacky glue with a coarse embossing powder can create a rough, textured finish, while using a glue pen with a metallic embossing powder can add a shiny, glittery effect.
It’s important to note that different glues dry at different rates, so be sure to wait until your glue is completely dry before applying the embossing powder. This can prevent smudging and other errors that can ruin your project.
In addition to trying out different glue types, you can also experiment with using different amounts of glue. Using too much glue can cause your embossing powder to clump, while using too little can result in an uneven finish. Play around with different amounts until you find what works best for your project.
Pro tip: Want to try a unique project with different types of glue? Check out our guide on how to glue a puzzle to a canvas.
Play with Colors
Experimenting with different colors is one of the most exciting parts of using embossing powder. With a wide range of powders available in various shades and finishes, there are endless possibilities for creating a unique and personalized piece of art. Here are some tips for playing with colors:
| Tip | Details |
|---|---|
| Combine colors | Create unique shades by mixing different colors of embossing powder together. Use a small container to mix the powders, and then sprinkle them on your project for a one-of-a-kind effect. |
| Layer colors | For a multi-dimensional effect, layer different colors of embossing powder on top of each other. Simply apply your first layer, heat set it, and then repeat with a different color. |
| Use colored paper | Try embossing on colored paper to add an extra pop of color to your project. Choose a shade that complements or contrasts with your embossing powder for a visually interesting effect. |
| Blend with markers or inks | You can also blend your embossing powder with alcohol markers or pigment inks to create custom colors. Swipe your marker or ink pad on a non-stick surface, pour embossing powder over it, and then heat set it. |
There are truly endless possibilities when it comes to playing with embossing powder colors. Get creative and try out different techniques to see what works best for you. And if you’re feeling really adventurous, why not incorporate your embossing powder skills into other fun DIY projects like slime making, gluing paper to glass, creating envelope liners, or even concocting a glue-free slime with embossing powder. The possibilities are endless, so let your imagination run wild!
Try Different Heat Sources
When it comes to embossing powder, the heat source you use to melt it can have a big impact on the final result. While a heat gun is the most commonly used tool, there are other options to try that can give your projects varying effects. Here are some different heat sources to experiment with:
- Candle Flame: This is a fun and unique way to melt your embossing powder. Hold your project over a candle flame, being careful not to let it get too close or catch on fire. Move the project back and forth, slowly melting the powder as you go. This method creates a more distressed and uneven look.
- Toaster Oven: If you don’t have a heat gun, a toaster oven can be a great way to melt your embossing powder. Place your project on a heat-safe tray and heat it in the toaster oven on a low setting. Keep an eye on it to make sure it doesn’t overheat or burn, and be careful when removing it from the oven.
- Stove: This is another unconventional way to melt your embossing powder. Use a gas or electric stove to heat up a metal tray or skillet, then hold your project over the heated surface until the powder melts. Again, be cautious and make sure your project doesn’t get too close to the heat source.
No matter which heat source you choose, make sure to keep your project at a safe distance and move it around slowly to ensure even melting. Experimenting with different heat sources can lead to unexpected and unique results, so don’t be afraid to try something new.
Work in Small Sections
When using embossing powder with glue, it’s important to work in small sections to ensure that the powder adheres properly and doesn’t start to dry before you have a chance to heat it. Working in small sections also allows you more control over the application process, ensuring that you get the desired effect.
Here are some tips for working in small sections:
- Start by dividing the surface area into small, manageable sections.
- Apply the glue to one section at a time
- Sprinkle the embossing powder over the wet glue, making sure to cover the entire section
- Shake off any excess powder onto a piece of paper or a tray and save it for later use
- Move onto the next section and repeat the process until you’ve covered the entire surface area
- Once all sections are covered, heat the powder with a heat tool until it melts and forms a raised, glossy surface
Working in small sections may take longer, but it’s worth the extra effort to get a beautiful, professional-looking result. It also prevents any mishaps, such as the powder accidentally drying before you can heat it or the glue setting and becoming too sticky to work with. Remember to be patient and take your time to ensure that each section is done correctly.
Use a Light Hand
When working with embossing powder and glue, it’s important to use a light hand. This means that you should be gentle when applying the embossing powder to the glue and when heating it up with a heat tool. Too much pressure or heat can cause the powder to spread unevenly or fly off the paper entirely.
To avoid this issue, try using a light touch when sprinkling the embossing powder onto your glue-covered paper. You can use a small spoon or a fine-tip brush to carefully apply the powder where you want it to go. It can also be helpful to hold your paper at an angle, tapping off excess powder onto a clean sheet of paper to reuse later.
When heating the embossing powder, hold the heat tool at a safe distance from your paper and focus the heat on one small section at a time. This will help you avoid overheating the powder or causing it to blow away. You can also move the heat tool in a circular motion to keep the heat evenly distributed.
Table: Tips for Using a Light Hand with Embossing Powder
| Tip | Description |
|---|---|
| Use a small spoon or brush | These tools can help you control the amount of powder you apply to your paper. |
| Hold paper at an angle | Tapping off excess powder can help you avoid using too much powder in one area. |
| Hold heat tool at a safe distance | Applying heat too close to the paper can cause embossing powder to blow away or become overheated. |
| Move heat tool in a circular motion | This can help distribute heat evenly and prevent any one area from becoming overheated. |
By using a light hand, you can create beautiful embossed designs without worrying about ruining your paper or causing the embossing powder to become uneven. Experiment with different techniques to find the method that works best for you and your projects.
Common Mistakes to Avoid
As with any crafting technique, there are always potential pitfalls that can ruin your efforts. Embossing powder is no exception. To ensure that your embossed creations don’t fall victim to common mistakes, it’s essential to be aware of the pitfalls and know how to avoid them. In this section, we’ll take a closer look at the most common mistakes that crafters tend to make when working with embossing powder. By knowing what they are and how to steer clear of them, you’ll be well on your way to creating beautiful, one-of-a-kind pieces that are sure to impress. So, before you get started, take a moment to familiarize yourself with these suggestions and incorporate them into your embossing powder routine.
Using Too Much Powder
Using Too Much Powder
One of the most common mistakes people make when embossing is using too much powder. While it may seem like more powder equals a better embossed design, this actually isn’t the case. In fact, using too much powder can result in a messy, uneven design that is difficult to fix.
Why Using Too Much Powder is a Problem
There are several reasons why using too much embossing powder can be problematic. First, it can cause the powder to clump together, resulting in a thick, uneven layer. This can make it difficult to melt the powder evenly and can result in unsightly clumps or bubbles.
Additionally, using too much powder can cause it to spill over onto areas of your project where you don’t want it. This can be especially frustrating if you’ve already spent time carefully applying glue and positioning your stencil or stamp.
How to Avoid Using Too Much Powder
The good news is that it’s easy to avoid using too much embossing powder on your projects. The key is to use a light hand when applying the powder and to work in small sections. This will allow you to carefully control the amount of powder you’re using and prevent it from clumping or spilling over.
Another helpful tip is to tap off any excess powder before heating it. This will ensure that only the necessary amount of powder is used and will prevent any excess from sticking to your project.
| Common Mistake | How to Avoid It |
| Using too much powder | Use a light hand, work in small sections, tap off excess powder |
| Overheating your powder | Use a heat gun instead of a torch, hold the gun 2-3 inches away from the project, move the gun constantly |
| Not heating it enough | Hold the heat gun close to the project, move the gun constantly to prevent overheating, wait for the powder to turn shiny |
| Not waiting for your glue to dry | Make sure your glue is completely dry before applying the powder, use a heat tool to speed up the process if needed |
By being mindful of how much embossing powder you’re using and using a few simple techniques to control the amount applied, you can avoid the common mistake of using too much powder on your projects. This will result in a beautiful, even design that you’ll be proud to show off.
Overheating Your Powder
Overheating your embossing powder is one of the most common mistakes made when using this technique. Overheated powder can become discolored, grainy, and even burn, ruining your project before it even gets started. To avoid this common error, it is essential to understand the basics of how heat is used when embossing.
What happens when you overheat your embossing powder?
Overheating your embossing powder can cause several issues. First, it can cause the powder to become discolored or turn brown. This can happen if you are using a heat source that is too intense or if you hold the heat gun too close to the paper. The result is an unattractive finished product that does not achieve the desired effect.
Second, overheating your embossing powder can also cause it to melt and become grainy. When this happens, the powder loses its smooth finish, and the sparkling effect is diminished. This problem occurs when the heat is too high or if you hold the heat gun in one spot for too long.
Third, overheating your embossing powder can cause it to burn. Once the powder has burned, it is impossible to restore its original appearance. This problem occurs when the heat is too high or if you hold the heat gun too close to the paper.
How can you avoid overheating your embossing powder?
There are several things you can do to avoid overheating your embossing powder. Firstly, use a heat gun specifically made for embossing. This tool allows you to control the heat and keep it at the right temperature. Secondly, hold the heat gun at the recommended distance from the paper. This helps to ensure that the heat is spread evenly and not concentrated in one area. Thirdly, use a timer to avoid applying heat for too long. Remember that embossing powder melts very quickly, and it is better to apply heat in short bursts to avoid overheating.
| Things to avoid when heating your embossing powder | Things to do when heating your embossing powder |
|---|---|
| Don’t use a heat source that is too strong | Use a heat gun specifically designed for embossing |
| Don’t hold the heat gun too close to the paper | Hold the heat gun at the recommended distance from the paper |
| Don’t apply heat for too long | Use a timer to avoid overheating |
| Don’t heat your powder in one spot for too long | Apply heat in short, controlled bursts |
By paying close attention to the heat source and following recommended techniques, you can achieve beautiful embossing effects without overheating your powder.
Not Heating it Enough
One of the mistakes that people make when using embossing powder with glue is not heating it enough. It’s important to apply enough heat to activate the powder and cause it to melt and bond with the glue. If you don’t heat it enough, the powder will not adhere properly, and you’ll end up with a patchy or incomplete result.
Here are some tips to avoid this mistake:
- Hold the heat source close enough: Make sure the heat source is close enough to the powder and glue mixture. Holding it too far away can cause the powder to take longer to melt, which can make you think that it’s not melting at all.
- Use a tool to hold the paper: Holding the paper with a tool, such as tweezers or pliers, can help keep your fingers away from the heat source. It can also allow you to hold the paper in the air, making it easier to see when the powder starts to melt.
- Heat the paper from underneath: Heating the paper from underneath can be a more efficient way to melt the powder. Place the paper on a heat-resistant surface and hold your heat source (heat gun or embossing tool) underneath until the powder melts and becomes smooth.
- Be patient: Heating the embossing powder with glue can take some time. Don’t rush the process, and make sure to heat the mixture until it is fully melted and smooth. If you remove the heat source too soon, you may end up with an incomplete embossed image.
By following these tips, you can make sure to avoid the mistake of not heating your embossing powder enough. Taking your time and using the right technique will produce beautiful and professional-looking results in your crafting projects.
Not Waiting for Your Glue to Dry
One of the most common mistakes when using embossing powder with glue is not waiting for the glue to dry completely before applying the powder. This can lead to a messy and ineffective result.
Why is it important to wait for the glue to dry?
When you apply embossing powder to glue that is not yet dry, the powder can stick to areas where it shouldn’t be, creating a messy look. Additionally, the powder may not stick properly if the glue is still wet, resulting in an unattractive finish that flakes off easily.
How long should you wait for the glue to dry?
The drying time for glue can vary depending on the type of glue you are using and the conditions in which you are working. It’s important to read the label of your glue to determine the recommended drying time, as this will give you the best results.
As a general rule of thumb, you should wait at least 5-10 minutes for the glue to dry completely before applying any embossing powder. However, if you are working in a humid or cold environment, or if you are using a thicker glue, you may need to wait longer.
How can you tell if your glue is dry?
The easiest way to tell if your glue is dry is to touch it lightly with your finger. If it feels tacky or wet, it needs more time to dry. If it feels dry and smooth, you should be ready to apply your embossing powder.
Here are some other ways to tell if your glue is dry:
| Method | How to Do It |
| Visual Inspection | Look at the glue to see if it has changed from a liquid to a solid state. If it has, it should be dry enough for embossing powder application. |
| Blow Test | Blow lightly on the glue to see if it moves or changes shape. If it does, it is not yet dry. |
| Smudge Test | Touch the glue lightly with a tissue or paper towel. If the glue smudges or sticks, it is not yet dry. |
What should you do if you don’t wait for the glue to dry?
If you accidentally apply embossing powder to wet glue, don’t panic. Simply let the glue and powder dry completely, then use a small brush or your finger to remove any excess powder that did not properly adhere. You may need to reapply more embossing powder in certain areas to ensure an even and complete coverage.
Remember: Patience is key when working with embossing powder and glue. Waiting for the glue to dry completely will help you achieve a beautiful, polished look that will last.
Conclusion
In conclusion, using embossing powder with glue can be a fun and creative way to add texture and dimension to your crafting projects. With the right materials and techniques, you can achieve stunning results that will impress your family and friends.
Remember to start with the basics: select a suitable glue and embossing powder, then practice on scrap paper until you’re comfortable with the process. Once you feel confident, you can experiment with different glues, colors, and heat sources to create unique effects.
Some tips and tricks to keep in mind: work in small sections, use a light hand, and play with colors to find the perfect shade. And don’t forget to avoid common mistakes like using too much powder, overheating your powder, or not waiting for your glue to dry.
All in all, embossing powder with glue is a versatile and exciting technique that can yield beautiful and rewarding results. With some practice and creativity, you can take your crafting skills to the next level and impress everyone with your unique designs. So go forth and have fun with embossing powder and glue!
Frequently Asked Questions
What is the best glue to use with embossing powder?
Any clear drying glue will work well with embossing powder. Some popular choices include Ranger Multi Medium Matte, Aleene’s Tacky Glue, and Mod Podge Gloss.
Can you mix different colors of embossing powders?
Yes, you can mix different colors of embossing powders to create a custom shade. Just mix them together well before applying to your project.
Do you have to use a heat gun to set the embossing powder?
A heat gun is the most effective way to set the embossing powder, but you can also use a toaster oven, heat tool, or even a hair dryer. Just be careful not to overheat and melt your project.
Can you emboss on colored paper or cardstock?
Yes, you can emboss on colored paper or cardstock. Just keep in mind that the color of the paper will affect the final result of the embossed image.
How long should you wait for the glue to dry before adding embossing powder?
You should wait for the glue to dry completely before adding embossing powder. This can take anywhere from 15 minutes to an hour, depending on the type of glue and the thickness of the layer.
Can you emboss on fabric?
Yes, you can emboss on fabric. However, you will need to use a fabric-safe adhesive and a heat tool that is safe for use on textiles.
What is the best way to apply embossing powder?
The best way to apply embossing powder is to sprinkle it evenly over the adhesive and then tap off any excess before heating. You can also use a small spoon or brush to apply the powder more precisely.
Can you emboss on textured surfaces?
Yes, you can emboss on textured surfaces. However, the final result may not be as crisp as on a smooth surface.
Can you use embossing powder without glue?
No, embossing powder needs a heat-activated adhesive to stick to the project. Without glue, the powder will just fall off.
How do you know when the embossing powder is set?
The embossing powder is set when it has melted and turned glossy. This usually takes only a few seconds with a heat gun or tool.