Crafters and DIY enthusiasts are always on the lookout for easy and inexpensive ways to make exciting projects, and cold porcelain is a popular choice for its versatility and durability. However, most recipes for cold porcelain include glue, making it unsuitable for those who prefer glue-free alternatives. If you’re one of those people, don’t worry – you can still make cold porcelain without glue! In this article, we’ll explore a step-by-step guide to making glue-free cold porcelain, including tips and tricks to help you perfect your craft. So, gear up and let’s get started!
What You Need
To begin your journey in creating cold porcelain without glue, let’s have a look at what you need. This easy DIY recipe requires only a few simple ingredients that you may have in your kitchen cupboard. With some basic tools and ingredients, you’ll be able to create beautiful porcelain-like projects without the need for any glue. So let’s get started and gather everything that you need.
Ingredients
To make cold porcelain without glue, you will need just a few simple ingredients that are likely already in your pantry. Here is a list of the necessary ingredients for making cold porcelain:
| Cornstarch | 1 cup |
| Baking Soda | 1 cup |
| Vegetable Oil | 1/2 cup |
| Lemon Juice | 1/2 cup |
These basic ingredients work together to create a smooth and pliable clay-like material perfect for crafting.
It’s important to note that the quality of the ingredients you use will affect the final product. In particular, using fresh baking soda and lemon juice can make all the difference in the consistency and texture of your cold porcelain.
If you need to purchase any of the ingredients, you can find them at your local grocery store or online. For example, you can purchase high-quality vegetable oil from \[internal link\], or baking soda from \[internal link\].
Using these four ingredients, you can create your very own cold porcelain at home without the need for glue or any other complicated materials.
Tools
To make cold porcelain without glue, it’s important to have the right tools to achieve the best results. Here are the tools you’ll need to make cold porcelain:
- Non-Stick Pot: Choose a pot that you do not use for cooking, but for crafts only. A non-stick pot works best to prevent the mixture from sticking and burning.
- Wooden Spoon: You’ll need a wooden spoon to mix the ingredients. Avoid using metal spoons as they can cause the mixture to react and change color.
- Measuring Cups and Spoons: Accurate measurements are crucial when making cold porcelain. You’ll need measuring cups and spoons to ensure you get the right amount of ingredients.
- Bowl: You’ll need a bowl to transfer the mixture after it’s cooked. A plastic or glass bowl is a good option.
- Glycerin: This tool is used as a moisturizer to prevent the cold porcelain from drying out. It also makes the dough more elastic and pliable.
- Cornstarch: Cornstarch is the main ingredient in this cold porcelain recipe. It’s what makes the dough harden and dry to a smooth finish when left to air-dry.
- White Vinegar: White vinegar is an optional ingredient, but it helps to preserve the final product and prevents the mixture from spoiling.
Using the right tools and ingredients is essential in making cold porcelain without glue. For those who are new to crafting, you can find some of these items at your local craft store or online. If you’re unsure where to get some of these tools, there are also articles online that can guide you, like who sells PVA glue. Remember, it’s important to get everything ready before starting to make the cold porcelain to ensure that the process goes smoothly.
Step-by-Step Guide
Once you’ve gathered all the necessary ingredients and tools, it’s time to begin making your own cold porcelain without glue. It might seem daunting, but with this step-by-step guide, you’ll be able to create a high-quality clay-like substance that’s perfect for crafting various objects. Follow each step carefully to ensure your end result is smooth and durable. And if you ever find yourself in need of glue in your crafting endeavors, check out how to thicken PVA glue or how to thicken super glue. Now, let’s get started with creating your very own cold porcelain!
Step 1: Mix the Ingredients
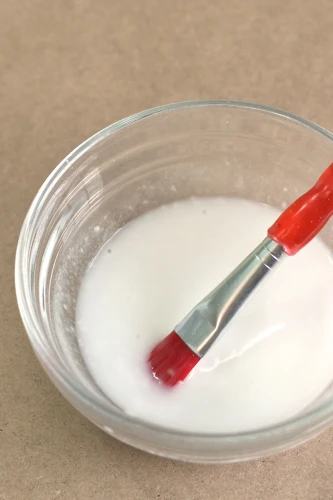
When mixing the ingredients, you will need 1 cup of cornstarch, 1 cup of white glue, 1 tablespoon of white vinegar, and 1 tablespoon of baby oil. Begin by pouring the cornstarch into a mixing bowl. Then, add the white glue, making sure to get all of it out of the container. You can use any brand of white glue, but it’s best to avoid clear or colored glues as they will affect the color of your porcelain.
Next, add the tablespoon of white vinegar and tablespoon of baby oil into the mixture. White vinegar is essential to prevent the mixture from spoiling and developing mold. Baby oil will give your porcelain a smooth and shiny texture. Use a spoon or spatula to stir the mixture until all the ingredients are well combined.
If you find that your mixture is too dry, add a few more drops of baby oil or knead it with your hands for a few minutes. If it’s too sticky, add more cornstarch.
It’s important to note that you should mix the ingredients quickly to prevent the mixture from drying out. Once you’ve mixed them, cover the bowl with a damp cloth or plastic wrap to prevent air from getting in. This will help keep the mixture fresh and pliable while you work on the next steps.
Before moving on to the next step, it’s recommended to read our guide on how to make goo with starch and glue, as it will give you additional information on how to work with this kind of mixture.
Step 2: Cook the Mixture
After mixing the ingredients, it’s time to cook the mixture. This step is essential since it determines the final product’s consistency and color. Follow the instructions carefully to achieve the desired results.
Step 2: Cook the Mixture
- Transfer the mixture to a non-stick pan and cook over low heat.
- Keep stirring continuously to prevent the mixture from sticking to the bottom and burning.
- Cook the mixture for approximately 10-15 minutes or until it starts to harden and come away from the sides of the pan.
- Once it has reached the desired consistency, remove the pan from heat and allow the mixture to cool down a bit.
- Transfer the mixture onto a flat surface and start kneading it with your hands.
Cooking the mixture is a really important step because it ensures that the dough is hardened and can hold its shape. If you don’t cook the mixture for long enough, the dough will become very soft and will not hold its shape, which will make it nearly impossible to create with.
Additionally, make sure you are cooking the mixture over low heat and are stirring it frequently to prevent it from burning. By stirring frequently, it will ensure the mixture is evenly cooked.
Once the mixture has reached the right consistency, set aside your cookware and allow the mixture to cool. When you can handle the mixture without burning yourself, take it out and place it on a flat surface. By kneading the dough, it will ensure that it is smooth and free of any lumps.
If you want to learn how to make goo with starch and glue, then check out our article on how to make goo with starch and glue.
Step 3: Knead the Dough
After you have cooked the mixture on low heat until it forms a ball, it is time to knead the dough. The dough will be hot, so make sure to let it cool down a bit before you start kneading it. Kneading the dough is very important since it will give the dough its smooth texture and proper consistency.
To begin, lightly sprinkle some cornstarch or potato starch on a flat surface to prevent the dough from sticking. Then, take the dough out of the pot and place it on the surface. Knead the dough by stretching it, folding it, and then pressing it with the heel of your hand. Repeat this process for about 5-10 minutes, or until the dough is smooth and pliable.
If the dough is too sticky, add a bit more cornstarch or potato starch. Keep in mind that adding too much starch can dry out the dough and make it brittle. If the dough is too dry, add a bit of water to moisten it. Once you have achieved the proper consistency, your cold porcelain is ready to use for your crafting needs.
To store the remaining cold porcelain, wrap it tightly in plastic wrap or store it in an airtight container. It can last for several days if stored properly.
Remember, cold porcelain is a great alternative to traditional clay since it does not require baking or firing. It is also customizable in terms of color since you can paint over it once it has dried. So, next time you need some clay for your crafting projects, try making your own cold porcelain without glue using this easy step-by-step guide.
If you’re interested in other DIY projects that require glue, check out how to glue intricate die cuts or what glue to use on wax candle.
Tips and Tricks
Making cold porcelain without glue requires some patience and practice to get it just right. That being said, a few tips and tricks can make the process easier and help you achieve the best results possible.
Tip 1: Use Gloves
While making the cold porcelain dough, it’s best to use gloves to prevent the mixture from sticking to your hands. Gloves will help you avoid any skin irritation caused by the ingredients.
Tip 2: Add Cornstarch Slowly
When kneading the dough, add cornstarch slowly until you reach the desired consistency. Adding too much cornstarch at once can result in a dry and crumbly mixture, which is difficult to work with.
Tip 3: Store the Dough Properly
Once you’ve made the cold porcelain, store it in an airtight container to avoid drying. If the dough becomes too dry, add a few drops of water and knead it again. On the other hand, if it’s too soft, add a small amount of cornstarch.
Tip 4: Create Small Batches
Make small batches of cold porcelain, about one cup at a time. This will prevent any waste and make it easier to manage the consistency of the mixture as you knead.
Tip 5: Experiment with Coloring
Cold porcelain can be easily colored in a variety of ways, including using food coloring, acrylic paint or even eyeshadow. Experiment with different colors to achieve your desired result.
Tip 6: Use it for Different Crafts
Cold porcelain is versatile and can be used for a variety of craft projects such as creating small figurines, jewelry, and even as covers for tea light candles. You can also use it alongside glue for other projects like mosaic-making or as a substitute for hot glue.
By following these tips and tricks, you’ll ensure that your cold porcelain is of the highest quality and you can expand how you use it in your crafts. For more inspiration and creative how-to’s, check out our other articles such as “How to make Goo with Starch and Glue”, “How to Glue Mosaic”, “How Much Does a Hot Glue Stick Weigh”, “How to Laminate Paper with Glue”, and “How to Make a Fake Nose Stud without Glue.”
Conclusion
After following this step-by-step guide, you should now have a beautiful batch of cold porcelain that is ready to be molded and shaped into any design you desire. The best part is that you were able to make it without using any glue or harmful chemicals.
By using simple ingredients such as glue-free cornstarch, vinegar, and oil, you have created a natural and safe alternative to traditional porcelain. Not only is this DIY project cost-effective, but it is also an eco-friendly option compared to purchasing plastic or synthetic figurines.
This is a perfect project for parents, teachers, or anyone who wants to exercise their creative muscles. You can even involve your kids in this fun and safe activity. Take the opportunity to create beautiful and unique decorative pieces for your home, or personalized gifts for your loved ones.
Remember to follow the tips and tricks provided in this guide to achieve the best possible results. Keep experimenting with different shapes and designs until you reach the desired outcome.
In conclusion, making cold porcelain without glue can be a fun and rewarding experience. With just a few simple steps and some creativity, you can create beautiful and unique pieces for yourself or as a thoughtful gift for someone else. Start crafting today and join the millions of people who embrace the art of DIY.
Frequently Asked Questions
Can I add food coloring to the cold porcelain?
Yes, you can add food coloring to the cold porcelain. It is recommended to add it after cooking the mixture for better color quality.
Will the cold porcelain crack or break easily?
Not necessarily. The dough can be quite flexible if kneaded properly and handled with care. However, it is best to avoid dropping or exposing it to extreme temperatures.
How long can I store cold porcelain?
You can store the cold porcelain in an airtight container for up to a month. If you plan to store it for a longer period, it is recommended to refrigerate it.
Can I use white glue instead of vinegar?
No, white glue cannot be used as a substitute for vinegar. Vinegar acts as a hardener in the mixture; glue will not have the same effect.
What can I make with cold porcelain?
You can make a variety of things with cold porcelain, including figurines, decorative objects, jewelry, and even small household items.
Can I add essential oils to the cold porcelain?
Yes, you can add essential oils to the cold porcelain mixture if you want to add a scent. It is recommended to add them after cooking the mixture.
Is it safe to use cold porcelain with food?
No, it is not recommended to use cold porcelain with food items since it is not food-grade material.
How can I fix cracks in the cold porcelain?
You can fix cracks in the cold porcelain by applying a small amount of water to the affected area and smoothing it out with your fingers. Allow it to air dry before using it again.
Can I add glitter to the cold porcelain?
Yes, you can add glitter to the cold porcelain to create a sparkly effect. It is recommended to add it after cooking the mixture for better adhesion.
Do I need to wear gloves when making cold porcelain?
No, you do not necessarily need to wear gloves when making cold porcelain. However, it is recommended to avoid contact with the mixture if you have sensitive skin or allergies.