Cleaning putty is a highly effective but often expensive cleaning tool. It’s great for lifting dirt and grime from hard-to-reach places, such as keyboards, vents and nooks and crannies, and it is typically used over and over again. However, many commercial cleaning putties contain harsh chemicals and adhesives like glue, which can be harmful to both your health and the environment. If you’re looking for a safer and cheaper alternative, you’ll be pleased to know that you can make your own cleaning putty without glue using some simple household ingredients. In this article, we’ll show you step-by-step how to create your own cleaning putty and provide tips for using and storing it.
Why Use Cleaning Putty?
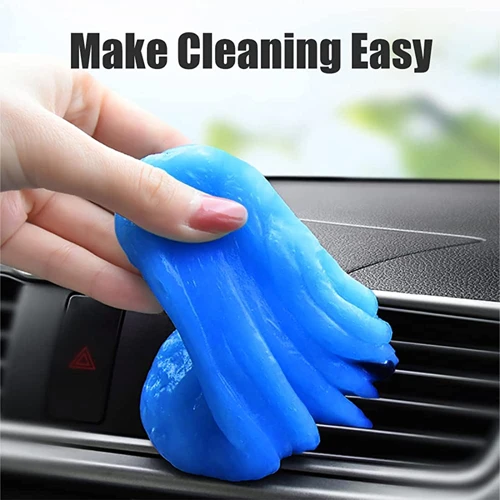
Are you tired of scrubbing away at dust and debris in hard-to-reach places of your home or office? Have you tried various cleaning products only to be frustrated by their inefficiency? Look no further than cleaning putty! This malleable material is perfect for getting into every nook and cranny, leaving your surfaces spotless. But why should you consider using cleaning putty? Let’s explore the benefits together. If you’ve ever wondered how long to clamp Gorilla wood glue, check out our article to learn more!
The Benefits of Cleaning Putty
Cleaning putty is an incredibly versatile product that can be used for all sorts of cleaning tasks. One of the main benefits of cleaning putty is its ability to reach into tight spaces and remove dirt where other cleaning products cannot. Here are some more benefits of using cleaning putty:
| Benefit | Description |
|---|---|
| Environmentally-Friendly | Cleaning putty is made from natural ingredients like jojoba oil and beeswax, so it is non-toxic and safe for the environment. It is also reusable, making it a more sustainable choice than disposable wipes or paper towels. |
| Efficient | Cleaning putty can easily pick up dust, dirt, and debris in just one swipe. Its soft and pliable texture allows it to conform to the shape of whatever surface it is cleaning. |
| Gentle on Surfaces | Cleaning putty is gentle on surfaces and won’t scratch or damage them. It is safe to use on electronics, keyboards, and other delicate items. |
| Versatile | Cleaning putty can be used for a variety of cleaning tasks, including cleaning electronics, car interiors, and household items like lampshades and decorative objects. |
If you’re looking for a sustainable and versatile cleaning solution, cleaning putty may be the perfect product for you. It is gentle on surfaces, efficient at cleaning, and environmentally-friendly.
Making Cleaning Putty without Glue
Making Cleaning Putty without Glue can seem like a daunting task, especially if you’ve never tried it before. Fortunately, with just a few simple ingredients and a little bit of time, you can create your own cleaning putty that’s just as effective as the store-bought variety. Best of all, this DIY cleaning putty does not require any glue! So, put on your apron, gather your ingredients, and let’s get started.
Ingredients
To make your own cleaning putty without glue, you’ll need just a few simple but essential ingredients. Below is a list of the items you’ll need to gather to get started:
- Cornstarch: You will need 1/2 cup of cornstarch as the main ingredient to create the putty’s texture.
- Dish soap: You need a tablespoon of dish soap to give your cleaning putty its cleaning capabilities.
- Lemon juice: Adding a tablespoon of lemon juice can help add a pleasant scent to your cleaning putty and also make it a more effective disinfectant.
- Baking soda: The addition of 1/4 cup of baking soda can help the putty absorb odors more efficiently and make it more effective at scrubbing stains.
- Food coloring (optional): Although not an essential ingredient, adding a drop of food coloring can help your cleaning putty look more aesthetically pleasing.
These ingredients are easy to find at your local grocery store, and you may even have some of them already in your pantry. By combining them in the right proportions, you can make a cleaning putty that is both effective and affordable!
Internal link: What is Glue Up?
Step-by-Step Instructions
Making cleaning putty without glue is easier than you might think! Follow these simple step-by-step instructions using the ingredients listed in the previous section.
| Step | Instructions |
|---|---|
| 1 | Mix together flour and salt in a large mixing bowl. |
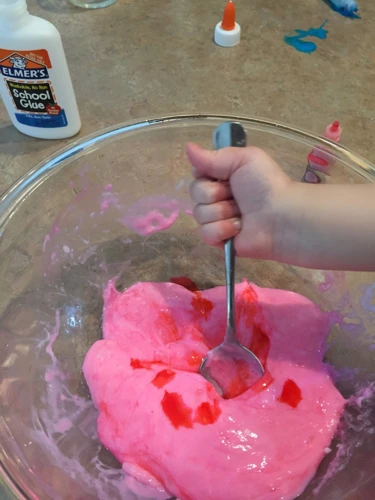
| 2 | Add warm water slowly to the mixture and stir well with a spoon until it forms a dough-like consistency. |
| 3 | Add food coloring of your choice (optional) and mix well until desired color is achieved. |
| 4 | Knead the dough on a flour-dusted surface for several minutes until it becomes smooth and pliable. |
| 5 | Break off small pieces of the dough and roll them into balls (about the size of a marble). |
| 6 | Store the putty in an airtight container until it is ready to be used for cleaning. |
This recipe for cleaning putty is a fun and easy DIY project that you can make with ingredients you probably already have in your pantry. By following these simple steps, you’ll have a cleaning tool that can be used over and over again to pick up dirt, dust, and debris from all around the house.
And the best part of making cleaning putty without glue is that it’s safe for all surfaces, including wood, metal, and plastic. So, you can use your putty worry-free, without the risk of damaging any of your belongings.
Now that you know how to make cleaning putty without glue, it’s time to put it to the test and see how well it works! For more tips and tricks on various types of glue, check out our article on what glue to use for your DIY projects.
Using and Storing Cleaning Putty
Now that you have successfully made your own cleaning putty without using glue, it’s time to learn how to use and store it. Using cleaning putty is an easy and fun way to clean hard-to-reach areas in your home, office, or your car. Plus, cleaning putty is reusable and can last for a long time, making it a cost-effective cleaning solution. In this section, we will discuss the proper way of using and storing your cleaning putty to ensure its longevity. So, grab your jar of cleaning putty and let’s get started! If you’re interested in learning more about Tacky Glue, check out our article on how to use tacky glue.
Tips and Tricks for Using Cleaning Putty
Here are some tips and tricks for using cleaning putty effectively:
| Tip/Trick | Description |
|---|---|
| Press Gently: | When using cleaning putty, make sure to press it gently on the surface you want to clean. Pressing too hard can leave residue behind or damage delicate surfaces. |
| Avoid Heat: | Be careful not to expose the cleaning putty to heat as it can melt and become sticky. Keep it away from direct sunlight and hot surfaces. |
| Reuse: | Don’t throw the cleaning putty away after just one use. You can reuse it multiple times until it loses its tackiness. Store it properly after each use to maintain its effectiveness. |
| Clean in Hard-to-Reach Areas: | Cleaning putty is great for getting into tight spaces that are hard to reach with other cleaning tools. Use it to clean your keyboard, car vents, or small crevices around the house. |
| Test on Hidden Areas: | Before using cleaning putty on a visible surface, test it on a small hidden area to make sure it doesn’t leave any residue or damage the surface. |
| Wash Hands: | After using cleaning putty, wash your hands thoroughly to avoid transferring any residue or particles to other surfaces or objects. |
If you need to glue things together (click here to learn how long to clamp Gorilla Wood Glue), or (how to glue a puzzle with Mod Podge), or (how to reseal an envelope without glue), there are many great resources available online. However, if you’re looking for a fun and easy DIY project, try making (flubber without glue or borax) or (a paper crown without glue). And if you’re working with clear glue and need to dry it quickly, check out (these tips for drying clear glue fast).
Storing Your Cleaning Putty
After making your cleaning putty, it’s understandable that you’ll want to store it properly to maintain its effectiveness. Here are some tips to help you store your cleaning putty:
- Use an airtight container: One of the most important things you can do to keep your cleaning putty fresh is to store it in an airtight container. This will prevent the putty from being exposed to air, which can dry it out and reduce its effectiveness over time. Make sure the container is clean and dry before placing the putty inside.
- Store in a cool, dry place: Heat and humidity can have a negative impact on your cleaning putty, so it’s best to store it in a cool, dry place. A cupboard or pantry is ideal, as long as it’s not near a heat source like an oven.
- Label the container: It’s always a good idea to label the container with the date you made the putty, so you have an idea of how long it has been stored. This is especially useful if you make large batches of cleaning putty at once.
- Test it before using: Before using your cleaning putty, give it a quick test to make sure it hasn’t dried out or lost its effectiveness. Simply press a small amount of the putty onto a surface and see if it picks up dirt and dust as it should.
By following these simple tips, you’ll be able to keep your cleaning putty in great condition and ensure that it’s ready to use whenever you need it. Don’t forget to check the putty regularly to ensure its cleaning power hasn’t diminished over time. And if you want to learn more about other DIY cleaning solutions, check out our article on how to cure UV glue without a lamp.
Conclusion
In conclusion, creating homemade cleaning putty without glue is a simple yet effective way to keep your home clean and free of dust and debris. Not only is it easy to make, but it is also a cost-effective alternative to purchasing commercial cleaning putty.
By using natural ingredients such as borax, cornstarch, and dish soap, you can rest assured that you are creating a product that is safe for you and your family to use. Plus, you have the added benefit of being able to customize the scent and texture of your putty to your liking.
Once you have created your putty, there are a variety of ways that you can use it to clean around your home. Its unique texture allows it to get into tight spaces and pick up dirt and debris that other cleaning methods may miss.
When you are finished using your putty, it is important to store it properly to ensure that it stays fresh and ready for future use. This can be done by placing it in an airtight container and storing it in a cool, dry place.
Overall, making your own cleaning putty without glue is a fantastic, eco-friendly way to keep your home clean. So why not give it a try? Your home will thank you for it!
Frequently Asked Questions
What can I use cleaning putty for?
Cleaning putty is a versatile cleaning tool that can be used to clean hard-to-reach spaces, such as keyboards, car vents, and tight corners.
Can I make cleaning putty without glue?
Yes, you can make cleaning putty without glue using a mixture of baking soda, cornstarch, and dish soap.
What kind of dish soap should I use?
You can use any kind of dish soap for this recipe, but it’s best to use a clear or lightly colored soap to avoid staining the cleaning putty.
Is cleaning putty safe to use?
Yes, cleaning putty is safe to use on most surfaces, but it’s always a good idea to test it on a small, inconspicuous area first.
How often should I change my cleaning putty?
You should change your cleaning putty when it becomes visibly dirty or loses its effectiveness at picking up dirt and debris.
Can I reuse cleaning putty?
Yes, you can reuse cleaning putty multiple times before you need to make a new batch. Just store it in an airtight container between uses.
How long does cleaning putty last?
Cleaning putty can last for several months if stored properly and used regularly.
What surfaces can I use cleaning putty on?
Cleaning putty can be used on a variety of surfaces, including keyboards, car interiors, electronics, and household fixtures.
Can I add essential oils to my cleaning putty?
Yes, you can add a few drops of essential oils to your cleaning putty for a fresh scent. Just be sure to mix them in thoroughly.
Can I use cleaning putty on my phone screen?
It’s not recommended to use cleaning putty on phone screens, as it may damage the delicate surface. Stick to using a microfiber cloth instead.