You’re working on an urgent project and can’t seem to find your UV lamp to cure the glue. Panic sets in as you don’t have the time or resources to get a new one. Don’t worry, you’re not alone in this challenge! Curing UV glue without a lamp may seem difficult, but it’s not impossible. In this guide, we will take you through the alternative ways to cure UV glue and the step-by-step process to do it without a lamp. So, sit tight, and let’s get started!
What is UV Glue?
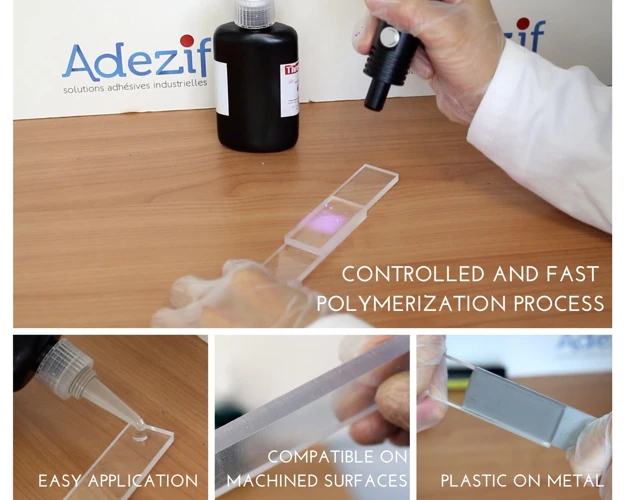
UV glue, also known as ultraviolet glue, is a special type of adhesive that cures under UV light. It is a popular choice for bonding materials that cannot be glued together using traditional adhesives. UV glue is used in a variety of applications, including the electronics, medical, and automotive industries. The adhesive is versatile and can bond a range of materials, including glass, plastic, and metal. In the next sections, we will discuss the mechanics of UV glue and why it is a popular choice for bonding intricate die-cuts (link to /how-to-glue-intricate-die-cuts/) and puzzles (link to /how-to-glue-a-puzzle-with-mod-podge/).
How does UV glue work?
UV glue, also known as ultraviolet adhesive, is a type of adhesive that cures quickly when exposed to UV light. This type of adhesive contains photoinitiators that cause the polymerization of the adhesive when exposed to UV light.
Table: How UV glue works
| Step | Process |
|---|---|
| Step 1 | The UV glue is applied to the surface that needs to be bonded. |
| Step 2 | The photoinitiators in the adhesive become active when exposed to UV light, causing the adhesive to start polymerizing. |
| Step 3 | As the adhesive polymerizes, it starts to form a bond between the two surfaces. |
| Step 4 | The curing process is complete when the adhesive has fully polymerized, creating a strong and durable bond. |
UV glue is a popular adhesive option due to its ability to cure quickly and efficiently. This adhesive is commonly used in industries such as electronics, automotive, and medical, where fast bonding and curing times are crucial. Additionally, UV glue is transparent, making it an ideal adhesive for applications where visibility is important, such as optical bonding.
Internal link: If you’re looking for alternatives to traditional glue, check out our article on how to make glue without glue.
Why is it popular?
UV glue has gained significant popularity in recent years due to its numerous advantages over traditional adhesives. UV glue is used in various industries including electronics, automotive, and medical, to name a few. Below is a table summarizing the main reasons behind the popularity of UV glue:
| Reasons for Popularity | Description |
|---|---|
| Fast curing time | UV glue cures within seconds of being exposed to UV light, making it ideal for high-speed production lines. |
| High bonding strength | The bonding strength of UV glue is significantly stronger than traditional adhesives due to the cross-linking of molecules caused by UV light. |
| Transparent finish | UV glue dries clear, making it ideal for applications where the adhesive should not be visible. |
| Resistance to temperature and chemicals | UV glue can withstand high temperatures and exposure to harsh chemicals without losing its bonding strength. |
| Easy to apply | UV glue is easy to apply and does not require mixing or special equipment, making it ideal for small-scale applications. |
UV glue’s popularity is set to continue to rise as the development of new technologies changes the way we approach various industries.
Challenges of Curing UV Glue

When it comes to using UV glue, there may be some challenges that you need to consider before attempting to cure it. These challenges include not having a UV lamp, insufficient UV light, and the UV glue not curing completely. However, not to worry, because there are alternative ways to cure UV glue without a lamp, and a step-by-step guide will be provided in the following sections. Let’s take a closer look at these challenges and how to overcome them. This article will not cover what to use for wallpaper glue, how to put a picture in a locket without glue, what does glue-like discharge mean, how to make goo out of glue and water, how to do glue, how to glue boards together without warping, or how to glue carbonless forms.
Not having UV lamp
One of the main challenges of using UV glue is not having a UV lamp, which is required to cure the glue effectively. Unfortunately, not everyone has access to a UV lamp or can justify the cost of purchasing one. However, there are several alternative ways to cure UV glue without a lamp.
- Natural sunlight: If the weather is sunny and warm outside, natural sunlight could be a good source of UV light. Simply place the project in direct sunlight for several hours to allow the glue to cure.
- LED flashlight: An LED flashlight can be used to cure UV glue effectively. Aim the flashlight at the glue and keep it lit for several seconds.
- Fluorescent light: Fluorescent lights emit UV light and can also be used to cure UV glue.
- Candle flame: The heat from a candle flame can also cure UV glue. Hold the project close to the flame for several seconds, making sure not to burn it.
- Incandescent light: Incandescent lights also emit UV light and can be used to cure UV glue.
- Halogen light: Halogen lights emit a broad spectrum of light, including UV light, which makes them an option for curing UV glue.
Note: It’s important to note that these alternative methods may take longer to cure the glue compared to a UV lamp. It’s also important to protect your eyes from UV light by wearing protective glasses or goggles. If you’re unsure about which alternative method to use, try testing the glue on small projects before using it on a larger or more important project.
Not having a UV lamp should not discourage you from using UV glue. With a little creativity, you can still effectively cure the glue and achieve the desired results.
Insufficient UV light
One of the major challenges with curing UV glue is when there is insufficient UV light. This can be due to a variety of factors including the distance between the glue and the UV light source, low battery power in a UV flashlight, or using a light source with a lower wattage than what is recommended.
Here are some tips to overcome the challenge of insufficient UV light:
- Use a high wattage light source: It is important to use a UV light source with the recommended wattage for the type of glue you are using. This will ensure that the glue is cured properly.
- Reduce the distance between the glue and the light source: If the distance between the glue and the light source is too far, the amount of light reaching the glue may be insufficient. Move the light source closer to the glue to ensure optimal curing.
- Use a reflective surface: A reflective surface, such as aluminum foil, can help increase the amount of UV light hitting the glue. This will increase the strength of the bond.
- Use a UV curing chamber: A UV curing chamber can help ensure that the glue is cured evenly on all sides. This is especially helpful when curing larger objects or those with complex geometries.
By using these tips and tricks, you can ensure that insufficient UV light is no longer a challenge when working with UV glue. Remember, it is always important to follow the instructions provided with the UV glue to ensure optimal curing and bonding strength.
UV glue not curing completely
Sometimes despite using a UV lamp or an alternative source of light for curing, UV glue may not cure completely. This can be a perplexing problem if you are not sure about the reason. This issue can be caused due to a variety of reasons such as:
- Inadequate thickness: If the layer of UV glue is too thick, the curing process can become slow, resulting in incomplete curing.
- Insufficient exposure to light: If the UV light source is not strong enough or not placed close enough to the glue, it may not cure completely.
- Contamination: Sometimes contamination on the surface or in the glue can hinder its ability to cure.
- Wrong type of glue: Using the wrong type of UV glue that is not compatible with the materials being bonded can lead to incomplete curing.
To resolve this problem, it is essential to first determine the reason for incomplete curing. Once that is established, you can take corrective measures such as adjusting the thickness of the glue, using a stronger light source or switching to a different glue that is more suited to the job at hand. However, if you are consistently having trouble with UV glue not curing completely, it might be beneficial to consult with an expert or a manufacturer for advice and guidance.
Pro Tip: If you are still facing problems with curing UV glue, try using a black light for better results. Black lights emit UV light that is closer to the wavelength at which UV glue cures, resulting in more effective and efficient curing.
If you are interested in learning about more DIY glue-related topics, check out what to use for wallpaper glue or how to glue boards together without warping.
Alternative Ways to Cure UV Glue
Finding yourself without a UV lamp can be a challenge when it comes to curing UV glue. Fortunately, there are alternative ways to cure UV glue. These methods use different types of light sources that can be found around your home or purchased inexpensively. While each method has its own advantages and disadvantages, they all provide a viable solution for curing UV glue. In the following sections, we’ll explore the various methods and give you step-by-step instructions on how to cure UV glue without a lamp.
Natural Sunlight
When it comes to curing UV glue without a lamp, natural sunlight can be a great option. Natural sunlight is a free, easily accessible and powerful source of UV radiation, making it perfect for curing the glue. However, it is important to note that the curing time may vary depending on weather conditions and time of day.
How does it work? Natural sunlight emits UV-A, UV-B and UV-C rays, which can initiate the curing process of UV glue. While UV-C radiation is the most efficient in curing the glue, it is mostly absorbed by the Earth’s atmosphere and does not reach the surface. UV-A and UV-B rays are mostly responsible for the curing process in natural sunlight.
What are the advantages? One of the main advantages of using natural sunlight is that it is free and readily available. This makes it a convenient option for those who do not have access to a UV lamp or other light sources that emit UV radiation. Additionally, natural sunlight contains a wider spectrum of UV radiation than most UV lamps, making it more effective in curing the glue.
What are the challenges? One of the biggest challenges of using natural sunlight is the uncontrollable nature of the curing process. As mentioned earlier, weather conditions and time of the day can significantly affect the curing time of the glue. Additionally, the intensity of the UV radiation that reaches the glue may also vary due to factors such as cloud cover and the angle of the sun.
How to use natural sunlight to cure UV glue? Here’s a step-by-step process to cure UV glue using natural sunlight:
| Step 1 | Clean and prepare the surfaces to be bonded. |
| Step 2 | Apply the UV glue to one of the surfaces. |
| Step 3 | Place the two surfaces together and hold them in place. |
| Step 4 | Expose the area to natural sunlight. |
| Step 5 | Wait for the glue to cure fully, checking periodically for adhesion strength. |
Using natural sunlight can be an effective way to cure UV glue without a lamp, but it is important to keep in mind the challenges and limitations of this method. As with any curing process, it is important to test the adhesion strength before using the bonded surfaces in any kind of application.
For those who are interested in creative bonding methods, check out our guide on how to put a picture in a locket without glue.
LED Flashlight
LED flashlights can be an effective alternative to curing UV glue when a UV lamp is not readily available. LED flashlights are a popular choice due to their accessibility and affordable price. They emit high-intensity light that is suitable for curing the glue.
However, not all LED flashlights work equally well for curing UV glue. It is important to choose a flashlight with a wavelength of 365nm or higher, as lower wavelengths will not be effective. Additionally, a flashlight with a higher power output will provide better and faster curing results.
When using a LED flashlight to cure UV glue, it is important to follow the same steps as curing with a UV lamp. The surface should be prepared and cleaned before application to ensure maximum adhesion. Once the glue is applied, a thin layer should be flashed for a few seconds before curing to produce better results.
Some tips to consider when using an LED flashlight for curing UV glue are:
- Hold the flashlight directly over the glue to optimize the curing process
- Keep the surface clean and dry to prevent contaminants from interfering with the curing process
- Use a magnifying glass for better precision and to ensure that all areas of glue have been cured
- Always test the adhesive strength after curing to ensure that it has cured completely.
- Do not look directly into the LED flashlight as it can cause eye damage.
LED flashlights can be a viable option for curing UV glue without a UV lamp. Although not all flashlights work well for this purpose, a high-power flashlight with a wavelength of 365nm or higher can produce satisfying results. Remember to follow the proper steps and take necessary precautions when using an LED flashlight for curing UV glue.
Fluorescent Light
Fluorescent light is another option that can be used to cure UV glue. This type of light is popular because it can cure glue quickly and efficiently. Here are some tips for using fluorescent light to cure UV glue:
Use a High-Intensity Bulb: If you want to cure UV glue quickly, the best option is to use a high-intensity fluorescent bulb. These bulbs emit strong UV light, which can cure the glue within a matter of minutes.
Hold the Bulb Close to the Glue: To ensure that the UV light penetrates the glue and cures it properly, hold the fluorescent bulb as close to the glue as possible. This will help to prevent any areas of the glue from remaining tacky or uncured.
Use a Reflective Surface: Fluorescent light can be quite powerful and may cause some glare, so it’s important to use a reflective surface to help direct the light onto the glue. A piece of aluminum foil or a reflective surface should help to accomplish this.
Be Patient: While fluorescent light can cure UV glue quickly, it’s important to remember that some light sources may take longer than others. Be patient and wait until the glue is completely dry and cured before handling the object.
Fluorescent light is a popular choice for curing UV glue because it is easy to find and can be used in a variety of situations. Whether you are working on a small craft project or a larger repair job, this method can help to ensure that your glue cures completely and effectively.
If you want to learn more about dealing with glue-related issues, check out our article on what does glue-like discharge mean or our guides on how to make goo out of glue and water or how to do glue. Alternatively, if you need help with gluing carbonless forms, we’ve got you covered there, too!
Candle Flame
Using a candle flame to cure UV glue is an unconventional but effective alternative to using a UV lamp. It works because the heat from the flame can initiate a chemical reaction in the glue, causing it to cure. However, it’s important to remember that using fire can be hazardous, so caution must be taken when attempting to cure UV glue using a candle flame. Here are some steps to follow if you want to try this method:
Step 1: First and foremost, make sure that you’re working in a well-ventilated area with no flammable materials nearby. Safety should always be your top priority.
Step 2: Light a candle and hold the tip of your UV glue tube close to the flame. Don’t let the flame touch the tube because it can melt the plastic and ruin the glue.
Step 3: Hold the glue tube in the flame for a few seconds, rotating it to heat the glue evenly. It’s important not to overheat the glue, or it may not cure properly.
Step 4: After heating the glue, quickly apply it to the surface you want to bond. As soon as you apply the glue, press the two surfaces together firmly.
Step 5: Hold the surfaces together for a few minutes to allow the glue to cool and cure. Keep in mind that this method may not cure the glue completely, so it’s important to monitor the bond’s strength and reapply the glue if necessary.
Although this method may seem like a risky proposition, it can be an effective solution for those who are in a bind and don’t have access to other curing methods. Just make sure to use caution when handling the candle flame and to ensure your safety at all times.
Incandescent Light
One alternative way to cure UV glue without a UV lamp is by using an incandescent light, which is a regular light bulb that emits light through a heated filament. Here are the steps to follow when using an incandescent light to cure UV glue:
- Select the right wattage: Choose an incandescent light bulb with a wattage between 60 and 100 watts. This will provide enough heat and UV light to cure the glue.
- Prepare the surface: Make sure the surface is clean and dry before applying the UV glue.
- Apply the glue: Apply the UV glue in a thin, even layer on the surface you want to bond.
- Flash the glue: Using the incandescent light, hold it a few inches away from the glue and move it around for approximately 30 seconds to flash the glue. This will help the glue begin to cure.
- Cure the glue: After flashing the glue, move the incandescent light closer (approximately 1 inch away) to the glue and hold it there for approximately 5 minutes. This will give the UV glue enough heat and light to fully cure.
It’s important to note that not all incandescent lights will work for curing UV glue. Look for ones that emit some level of UV light or include the word “clear” on the package. It’s also important to avoid touching the glue before it’s completely cured, as this can weaken the bond. Finally, always test the adhesive strength before using the bonded object for its intended purpose.
Halogen Light
Halogen light is another alternative for curing UV glue when a UV lamp is not available. It emits a bright white light that contains a large amount of UV radiation and can cure UV glue effectively.
To cure UV glue using a halogen light, you need a halogen bulb and a lamp that can handle the high temperatures produced by the bulb. Follow the below steps to cure UV glue using a halogen light:
1. Choose the right type of halogen bulb: Make sure that the halogen bulb you choose emits a high amount of UV radiation. The higher the wattage of the bulb, the more UV radiation it will emit.
2. Set up the light: Place the halogen bulb in the lamp and position it about 4-6 inches away from the glue surface. Make sure that there are no objects blocking the light from reaching the glue surface.
3. Turn on the light and cure the glue: Turn on the halogen light and cure the glue for the recommended time. Typically, halogen lights require a longer curing time than UV lamps, so be prepared to wait longer.
4. Check the glue: After the curing time is up, check the glue to make sure it has cured completely. If there are any areas that have not cured, repeat the process until the entire surface is cured.
Halogen light may not be as effective as UV lamps, but it is still a viable alternative for those who do not have access to UV lamps. It is important to note that halogen bulbs produce a lot of heat, so be careful when using them to cure UV glue. Always wear protective gear and keep a safe distance from the light source.
Step-by-step Process to Cure UV Glue Without Lamp
Now that we’ve looked at the challenges of curing UV glue and the alternative ways to do it, let’s delve into the step-by-step process to cure UV glue without a lamp. With some basic materials and a little bit of patience, you can achieve a strong bond without the need for specialized equipment. Follow these instructions carefully to ensure success.
Selecting the Light Source
When selecting the light source for curing UV glue without a lamp, it is important to consider the wavelength, intensity, and type of light. Different types of lights have varying wavelengths and intensities, which can affect the curing process. Here are some options for selecting the best light source:
| Light Source | Wavelength | Intensity | Type |
|---|---|---|---|
| Natural Sunlight | 290-400 nm | Varies throughout the day | Free and widely available |
| LED Flashlight | 365-400 nm | Varies depending on bulb and battery power | Portable and easy to use |
| Fluorescent Light | 313-365 nm | Varies depending on bulb type | Commonly available and easy to find |
| Candle Flame | 260-280 nm | Low intensity | Not recommended for larger projects |
| Incandescent Light | 320-400 nm | Low intensity | Not recommended for larger projects |
| Halogen Light | 340-400 nm | Varies depending on bulb type | More intense and brighter than incandescent light |
Natural sunlight is the cheapest and most accessible option for curing UV glue. However, the intensity of natural sunlight can vary depending on the time of day, weather conditions, and the location of the project.
LED flashlights are a good alternative as they emit a consistent wavelength and are portable, making them easy to use in any location.
Fluorescent light is a commonly available light source that emits a wavelength suitable for curing UV glue but may require a longer curing time due to its lower intensity.
Using a candle flame or incandescent light is not recommended for larger projects due to their low intensity. However, they can be used for smaller projects that require less curing time.
Halogen light is a good alternative to fluorescent light as it is more intense and brighter. However, it can also generate more heat, which may cause certain materials to warp or melt.
Selecting the right light source is crucial to ensure proper curing of the UV glue. It is important to consider the size of the project and the materials being used when selecting the light source.
Preparing the Surface
Proper preparation of the surface is crucial for successfully curing UV glue without a lamp. Follow these steps for best results:
| Step | Action |
|---|---|
| 1 | Clean the surface. Use a clean cloth or paper towel to wipe away any dirt, dust, or debris from the surface. Any contamination on the surface can affect the adhesive strength of the glue. |
| 2 | De-grease the surface. Use a solvent such as isopropyl alcohol or acetone to remove any grease, oil, or other substances that may be present on the surface. Grease and oil can also negatively impact the adhesive strength of the glue. |
| 3 | Roughen the surface. Use sandpaper or a wire brush to create a rough surface to which the glue can adhere better. This is especially important for smooth surfaces or surfaces that have been previously coated with paint or other materials. |
| 4 | Dry the surface. Make sure the surface is completely dry before applying the glue. Any moisture on the surface can prevent the glue from curing properly. |
By properly preparing the surface, you can ensure that the UV glue will adhere well and cure properly without the need for a UV lamp. Remember to take your time with each step and make sure that the surface is completely clean, de-greased, roughened, and dry before applying the glue. This will give you the best results in terms of adhesive strength and durability.
Applying the Glue
When applying UV glue without a lamp, it is important to follow the steps carefully to ensure proper curing. Below is a step-by-step guide for applying the glue:
Step 1: Clean the surface
Before applying the glue, ensure that the surface is clean and free of any debris. Use a clean cloth or alcohol wipes to clean the surface.
Step 2: Apply the glue
Apply a small amount of UV glue to the surface. Use a toothpick, a specialized applicator, or the nozzle of the glue bottle for accuracy.
Step 3: Spread the glue
Spread the glue evenly over the surface. Use a toothpick or a specialized tool to spread the glue and ensure that there are no air bubbles.
Step 4: Position the parts
Position the parts that need to be bonded together. Carefully align and adjust the parts to ensure a secure bond.
Step 5: Apply pressure
Apply gentle pressure to the parts to ensure that they bond properly. Use clamps or tape to hold the parts together if necessary.
Step 6: Check for excess glue
Check for any excess glue that might have seeped out. Use a clean cloth or a specialized clean-up tool to remove any excess glue.
Following these steps when applying UV glue can help ensure that the bond is strong and long-lasting. Remember to choose the right light source and to properly cure the glue to achieve the best results.
Flashing the Glue
Once you have applied the UV glue, it’s time to start the flashing process. Flashing refers to the act of briefly exposing the glue to the chosen light source. This is an important step because it helps the glue to partially cure, which will make it easier to apply additional layers.
Step 1: Hold the light source about an inch away from the glue. Move the light source in a circular motion over the glue. This allows the light to hit every part of the glue, ensuring that it is exposed to enough light.
Step 2: Flash the glue for about 10-15 seconds. This time may vary depending on the type of glue and the light source being used.
Step 3: After the flashing period is over, turn off the light source and let the glue sit for a few seconds. This will allow it to partially cure.
Step 4: If you are applying multiple layers of glue, repeat the flashing and curing process before applying the next layer.
It’s important to remember not to over-flash the glue. If the glue is exposed to too much light, it can cause it to harden or even crack. A good rule of thumb is to flash the glue for no more than 15 seconds at a time.
Flashing the UV glue is an essential step in the curing process. It helps the glue to partially cure, making it easier to work with and ensuring that it sticks to the surface properly.
Curing the Glue
Once you have flashed the glue, the next step is to cure it. This is where you allow the adhesive to fully harden and bond to the surface it has been applied to.
The curing process can take anywhere from a few seconds to a few hours, depending on the type of glue and the light source being used.
To cure the glue properly, you need to keep the light source focused on the glue for the recommended duration. This is usually stated on the adhesive packaging. Depending on the intensity of the light source, you may need to leave the glue under the light for a longer period.
Here is the step-by-step process for curing the glue without a UV lamp:
- Place the light source directly above the glue
- Ensure that the adhesive is fully covered by the light
- Set a timer for the recommended curing duration
- Leave the glue under the light until the timer goes off, or check the adhesive for full cure
- If the glue hasn’t fully cured, repeat the process until you get the desired result
It’s important to be patient when curing UV glue without a lamp. Rushing the process could result in a weak bond between the surfaces.
Once you’re satisfied with the curing, remove any excess adhesive that may have seeped out during the process. Use a clean cloth or a solvent recommended by the adhesive manufacturer for best results.
Remember to always test the strength of the bond before subjecting it to any heavy loads or stress. A properly cured UV glue bond should be able to hold up against daily wear and tear.
Tips and Tricks
Now that you know the alternative ways to cure UV glue without a lamp and the step-by-step process, it’s important to understand some tips and tricks to ensure that your project turns out perfectly. Some of the tips and tricks below may seem small, but they could make a big difference in the strength and durability of the adhesive bond. Keep reading to discover some of the best practices for working with UV glue.
Keep the surface clean and dry
One of the key factors in curing UV glue without a lamp is to ensure that the surface on which the glue is applied is clean and dry. Any dirt, debris, or moisture can interfere with the curing process and weaken the adhesive bond.
To keep the surface clean and dry, follow these tips:
| Tips | Description |
|---|---|
| Clean the surface thoroughly | Before applying the glue, clean the surface with a lint-free cloth or paper towel and a drop of rubbing alcohol. This will remove any oils, dust, or dirt that may be present on the surface. |
| Avoid touching the surface | Try not to touch the surface with your fingers, as this can leave oils or sweat on the surface that can interfere with the curing process. If you need to handle the surface, use a pair of clean gloves. |
| Avoid applying the glue in humid conditions | Humidity can prevent the glue from curing properly, so it’s best to apply it in a dry environment. If you must apply the glue in a humid environment, use a dehumidifier or fan to dry the air around the surface. |
| Ensure the surface is completely dry | After cleaning the surface, allow it to air dry completely before applying the glue. Any residual moisture on the surface can interfere with the curing process and weaken the adhesive bond. |
By keeping the surface clean and dry, you can ensure that the UV glue cures properly and forms a strong bond. It’s important to take the time to prepare the surface properly before applying the glue, as this can make a big difference in the effectiveness of the adhesive.
Use a white surface
When curing UV glue without a lamp, it is important to consider the surface on which you will apply the glue. The color of the surface can affect how the glue cures. When curing the glue, it is best to use a white surface, as it reflects light and provides better curing results.
Why Use a White Surface?
A white surface reflects light better than colored or dark surfaces, providing a better environment for curing. Dark surfaces absorb light, while white surfaces reflect it, making it easier for the glue to cure. Using a white surface ensures that the UV light is distributed evenly and reaches all parts of the glue, resulting in a stronger bond.
What Surfaces Can Be Used?
When curing UV glue, any white surface can work. Here are some examples:
| Surface | Description |
|---|---|
| White paper | A simple and easily accessible option, which is great for small projects. |
| White cardboard | A thicker surface that can support larger projects and provides a more stable surface for the glue to cure. |
| White ceramic | A smooth and solid surface that can handle high temperatures, making it ideal for projects that require heat curing. |
| White metal | A durable and sturdy surface that allows for strong curing, but should be used with caution to avoid reflection or direct contact with the UV light. |
How to Prepare the Surface
Before applying the UV glue, it is important to prepare the surface to ensure a successful cure. Here are some steps to follow:
- Clean the surface thoroughly to remove any dirt or debris that may interfere with the curing process. Use a cloth or paper towel to wipe the surface clean.
- Dry the surface completely to avoid any moisture that may affect the adhesion of the glue.
- Position the surface in an area with enough light to ensure a successful cure.
Using a white surface can make all the difference in the curing process when curing UV glue without a lamp. With these tips and tricks, you can achieve a strong bond and successfully complete your project.
Use a black light for better curing
Did you know that using a black light can improve the curing of UV glue? While any source of UV light will suffice, black lights emit UV rays that are more intense than regular sources of UV light. This means that the curing time may be reduced and the adhesive strength may be increased.
Here are some reasons why using a black light can help with the curing process:
- Increased intensity: Black lights are designed to emit long-wave UV light, which penetrates deeper into the glue and activates the curing process more effectively.
- Reduced curing time: The increased intensity of black lights can reduce curing time significantly, allowing for a faster, more efficient process.
- Better adhesive strength: Using a black light can result in a stronger bond between the materials being joined, providing a more durable and long-lasting adhesion.
When using a black light, it’s important to keep in mind that prolonged exposure can be harmful to the eyes and skin. Always wear protective eyewear and gloves to prevent any potential damage.
Additionally, it’s recommended to use a black light that emits at least 365 nm of UV light for optimal results. This wavelength is typically used in industrial curing applications and is readily available in black light bulbs and flashlights.
Incorporating a black light into your UV glue curing process can help to increase the efficiency and effectiveness of the adhesive bond. So if you’re looking for a way to enhance your results, consider using a black light for better curing.
Use a magnifying glass for precision
When working with UV glue, precision is key. Sometimes, it can be difficult to see small details and areas that require more glue, especially when dealing with intricate designs. This is where a magnifying glass can come in handy.
Using a magnifying glass can help you see the finer details of your work and ensure that you have applied the glue in the right places. It can also help you see if there are any bubbles or spots that need to be fixed before curing.
When selecting a magnifying glass, consider the magnification power. A 10x magnifying glass is usually sufficient for most hobbyists and DIYers. You can find magnifying glasses with built-in LED lights to help illuminate your work area and make it easier to see.
Here are some tips for using a magnifying glass when curing UV glue without a lamp:
| Tip | Explanation |
|---|---|
| Position the magnifying glass correctly | Place the magnifying glass between the light source and the work area to magnify the glue. |
| Use a steady hand | Hold the magnifying glass with a steady hand to avoid shaking or wobbling. |
| Focus on one area at a time | Try to focus on one area at a time and apply the glue slowly and carefully. |
| Keep the surface clean | Ensure that the surface is clean before applying glue to avoid any impurities that might affect the curing process or the strength of the bond. |
Using a magnifying glass can make a big difference when working with UV glue, especially when dealing with intricate designs that require precision. By following these tips, you can ensure that you get the best results possible and create strong, long-lasting bonds.
Avoid direct contact with UV light
While curing UV glue without a lamp, it’s essential to avoid direct contact with UV light. Direct exposure to UV light can lead to severe skin damage and even cause cancer. It’s necessary to take adequate precautions when using UV light as a curing agent.
To avoid direct exposure to UV light, you can take the following steps:
| Step | Description |
|---|---|
| Step 1 | Wear protective gear like gloves and goggles to prevent direct skin and eye contact with UV light. |
| Step 2 | Always keep the surface to be cured a few inches away from direct exposure to UV light. Even when using alternative light sources, ensure that the light doesn’t come in direct contact with the glue. |
| Step 3 | Never look directly at UV light, even if you are wearing protective eyewear. Prolonged exposure to UV light can cause damage to the eyes. |
| Step 4 | After curing the glue, keep it away from UV light to prevent further exposure. Store it in a dry, dark place away from sunlight and artificial light sources. |
UV glue is a fantastic adhesive that can bond almost any surface, but it comes with its risks. By taking the necessary precautions and avoiding direct exposure to UV light, you can safely cure the glue without any harm. Always prioritize safety while working with UV light, and never compromise on it.
Always test the adhesive strength
It’s crucial to test the adhesive strength of the cured UV glue before using it for any critical application. Testing the strength involves applying a small amount of force or pressure on the bond to see how well it holds up. Here are some tips to ensure that you have tested the adhesive strength of the cured UV glue:
- Use a testing tool: You can use a variety of tools to test the adhesive strength of the cured UV glue, including pliers, force gauges, and tapping hammers.
- Apply consistent force: When testing the adhesive strength, make sure that you apply a consistent amount of force or pressure on the bond. This will help you get an accurate measurement of the strength of the bond.
- Test different surfaces: Test the adhesive strength of the UV glue on different surfaces to see how well it holds up. It’s essential to test the adhesive strength on the actual surfaces that the bond will be used on.
- Wait for the full curing time: Ensure that the cured UV glue has fully cured before testing its adhesive strength. If you test the glue before it’s fully cured, you may get inaccurate results.
- Repeat the test: It’s always recommended to test the adhesive strength of the UV glue multiple times to ensure that it consistently holds up.
By testing the adhesive strength of the cured UV glue, you can ensure that the bond is strong enough for its intended purpose. Failure to test the adhesive strength can result in the bond breaking, which could be dangerous in some applications. So always take the time to test the adhesive strength to ensure that the bond is secure and reliable.
Conclusion
After exploring various methods of curing UV glue without a lamp, we hope this comprehensive guide has helped you understand the different alternatives and the step-by-step process to curing UV glue. Remember, curing UV glue can be a challenge without the right equipment, but with the right light source and preparation, it is possible to get your glue to fully cure.
It’s important to note that each method has its advantages and disadvantages; for instance, natural sunlight may be free and readily available but it can also be weather-dependent. Meanwhile, using an LED flashlight may be convenient and effective, but may require some investment.
To maximize your success, we recommend testing the adhesive strength of the cured glue before relying on it for any critical applications. And of course, safety is of of utmost importance when working with any UV source – avoid direct contact with the light and ensure proper eye protection.
To sum up, employing non-traditional methods to cure UV glue is a great option when you don’t have access to a UV lamp, and we hope that this guide has provided you with useful information to help you achieve the best results. Happy gluing!
Frequently Asked Questions
Can UV glue cure without a UV lamp?
Yes, UV glue can cure without a UV lamp using alternative light sources such as natural sunlight, LED flashlight, fluorescent light, candle flame, incandescent light, or halogen light.
What are the advantages of using UV glue?
UV glue is a fast-curing adhesive that forms strong and transparent bonds. It is ideal for bonding glass, plastic, metal, and ceramics. It is also resistant to water, heat, and chemicals.
Is it safe to cure UV glue with a candle flame?
Yes, it is safe to cure UV glue with a candle flame as long as you avoid direct contact with the flame. The heat of the flame can help to accelerate the curing process of the glue.
Why does UV glue not cure completely?
UV glue may not cure completely due to insufficient UV light, improper application, or contamination of the bonding surface. Make sure to follow the recommended curing time and conditions for best results.
Can I use a black light to cure UV glue?
Yes, you can use a black light to cure UV glue as it emits UV radiation. A black light can help to cure the glue more efficiently and uniformly than other light sources.
What is the recommended curing time for UV glue?
The recommended curing time for UV glue depends on the type and thickness of the adhesive. Typically, it takes 30 seconds to 3 minutes to cure UV glue under a UV lamp or alternative light source.
Can I use water to clean the bonding surface before applying UV glue?
No, you should avoid using water to clean the bonding surface before applying UV glue. Water can interfere with the curing process of the glue and weaken the bond. Instead, use a dry and clean cloth to remove any dirt or residue on the surface.
Can I use a magnifying glass to cure UV glue?
No, you should not use a magnifying glass to cure UV glue as it can concentrate the UV radiation and damage your eyes or the surrounding area. Only use the recommended light source for curing the glue.
Does UV glue have any odor?
No, UV glue does not have any strong odor or fumes. It is a low-odor adhesive that is safe to use in well-ventilated areas.
Can I remove cured UV glue from surfaces?
No, once UV glue is cured, it forms a strong and permanent bond with the surface. It cannot be easily removed without damaging the surface. Make sure to apply the glue carefully and accurately to avoid unwanted bonding.