Introduction
As we dive into the world of glue printing, you’ll discover a fun and unique way to create stunning works of art. From basic techniques for beginners to advanced methods for experienced artists, there’s something for everyone to learn. In this guide, we’ll cover everything you need to know about glue printing, including the tools and materials you’ll need, step-by-step instructions on how to get started, advanced techniques to take your art to the next level, and common mistakes to avoid. So grab your adhesive and let’s get creative!
What is Glue Printing?
Glue printing is a unique printing technique that involves using adhesives as the primary medium for creating a design. This type of printing has been around for quite some time, but has recently gained popularity among artists and crafters due to its versatility and accessibility. With glue printing, you can use a variety of adhesives to create different textures and effects on your artwork.
Glue works as a bonding agent by adhering two surfaces together. Depending on the type of adhesive used, the bond can range from temporary to permanent. For example, some adhesives like PVA glue can be repositioned and will eventually dry clear, while others like super glue provide a strong, permanent bond. If you’re curious about how glue works, check out our article on how glue works.
Glue comes in different forms including liquid, gel, or paste, and can be made from a variety of materials including resin, rubber, or synthetic polymers. For instance, PVA glue is a type of synthetic polymer made from polyvinyl acetate, while bee glue, also known as propolis, is a natural adhesive produced by bees. To learn more about bee glue, take a look at our article on what bee glue is.
The viscosity of the glue also plays a crucial role in glue printing. This refers to its thickness or resistance to flow. Thicker adhesives will create more defined and textured lines in your design, while thinner adhesives will create smoother lines. Curious about what the viscosity of glue is and how it’s measured? Check out our article on what the viscosity of glue is.
While glue printing can be done on a variety of surfaces, it is best suited for porous paper substrates. Some adhesives may not adhere well to certain surfaces, so it’s important to consider the compatibility of the adhesive with the surface you plan to use. For instance, PVA glue is a great adhesive for paper, while super glue should be used with caution on skin and may not be suitable for all paper types. If you’re wondering what glue is safe for birds, check out our article on what glue is safe for birds.
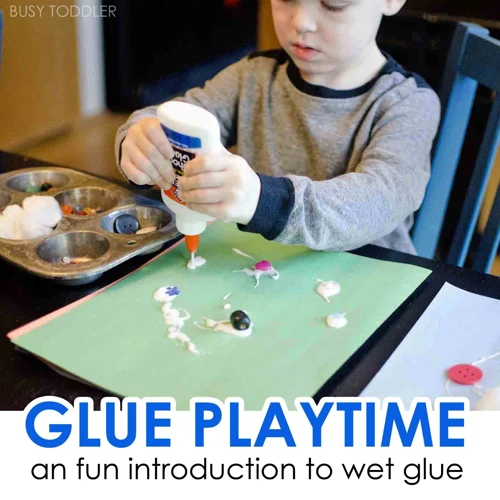
Glue printing is a fun and unique way to create one-of-a-kind pieces of art. It allows you to experiment with different types of adhesives and techniques to achieve the desired look and feel for your design. Just be sure to read the instructions carefully and avoid some common mistakes, such as using too much adhesive or not waiting for the adhesive to dry, which we’ll cover in more detail later in the article.
Why is Glue Printing Popular?
One reason why Glue Printing has become increasingly popular in recent years is due to its versatility and accessibility. Unlike some other printmaking techniques, glue printing requires minimal supplies and can be done by anyone, even those without prior artistic experience.
Glue printing also offers a wide range of creative possibilities, allowing artists to experiment with different adhesives, textures, and layers to create unique and intricate designs. It’s a great way to add personal touches to items like cards, invitations, or even home decor.
Moreover, glue printing can be an eco-friendly option as it doesn’t require the use of harsh chemicals or expensive equipment. Many people also appreciate the tactile nature of the process, as it involves physically working with the adhesives and creating something tangible.
Another reason for the popularity of glue printing could be its therapeutic benefits. Creating art has been shown to have a positive impact on mental health, and the process of glue printing can be meditative and calming, allowing individuals to focus on the present moment and express their creativity.
In short, glue printing is popular because it is accessible, versatile, eco-friendly, and offers a sense of creativity and mindfulness. In the next section, we’ll go over the basic supplies you’ll need to get started with glue printing.
| Reasons for Glue Printing’s Popularity | Benefits |
|---|---|
| Versatility and accessibility | Minimal supplies and suitable for beginners |
| Creative possibilities | Experiment with adhesives, textures, and layers |
| Eco-friendly | No harsh chemicals or expensive equipment required |
| Therapeutic benefits | Meditative and calming process with mental health benefits |
Learn how to open a glue tube if you’re having a hard time accessing your adhesive.
The Basics of Glue Printing
As with any art form, mastering the basics of glue printing is crucial before moving on to more advanced techniques. To help you get started, this section will cover everything from the essential supplies needed to the different adhesives you can use. Before we dive in, you might be wondering how many syllables are in glue or what PVA glue is made of, but fear not, we have you covered. Let’s begin with the basics.
What Supplies Do You Need?
To get started with glue printing, you’ll need a few essential supplies. These include:
| Adhesive | For this craft, any type of adhesive works great. Consider PVA glue or double-sided tape for beginners. More advanced techniques can use spray adhesives, mod podge, and other options. |
| Printing Plates | You will need a surface to print on. Common options include paper, canvas, or wood. Beginners should stick to paper options. |
| Printing Ink | If you have printing ink available, that works great for this craft. However, you can also use acrylic paint or any other type of ink that you have available. |
| Brayer or Roller | A brayer or roller is an essential tool in this craft. They help spread the ink or paint evenly on the printing plate and ensure a smooth and even print. |
| Cutting Tools | If you plan to create intricate designs, you will need a set of cutting tools. This includes scissors, an X-acto knife, a cutting mat, and any other devices that you prefer using for cutting. |
Before you start crafting, be sure to stock up on all the necessary supplies. Each item is crucial to the craft, and you don’t want to have to stop mid-project to run to the store for more glue or ink.
Note: If you’re using a particularly strong adhesive, like super glue — also known as rugby glue — remember to use it in a well-ventilated area to avoid harmful fumes. Super glue contains cyanoacrylate, which can cause irritation to the eyes, nose, or throat when inhaled. PVA glue is a safer option for those with sensitivities. Additionally, if you’re curious about the composition of PVA glue, it is a synthetic polymer that is water-soluble and creates a flexible bond when dry.
How to Prepare Your Workspace
A clean, organized workspace is essential for glue printing. It will help prevent unnecessary mess and ensure that your final product comes out looking professional. Here’s a table that outlines how to prepare your workspace for glue printing.
| Step | Description |
|---|---|
| Step 1 | Cover your workspace. Lay down a drop cloth or plastic sheeting to protect your surfaces from glue and ink. |
| Step 2 | Gather your supplies. Make sure you have all the necessary supplies within reach to avoid having to get up and disrupt the printing process. |
| Step 3 | Organize your work surface. Set up your work surface in a way that makes sense for you. This may mean having designated areas for your ink, adhesive, and paper. |
| Step 4 | Have a clean-up plan. Make sure you have plenty of water, paper towels, and a trash can nearby for easy clean-up and disposal of used materials. |
| Step 5 | Consider your lighting. Adequate lighting is crucial for good visibility during the printing process. Make sure your workspace is well-lit. |
By following these simple steps to prepare your workspace, you’ll be ready for a successful glue printing experience. And if you’re looking to learn about different types of adhesive that can be used in this process, check out our article “What is Rugby Glue: A Comprehensive Guide”.
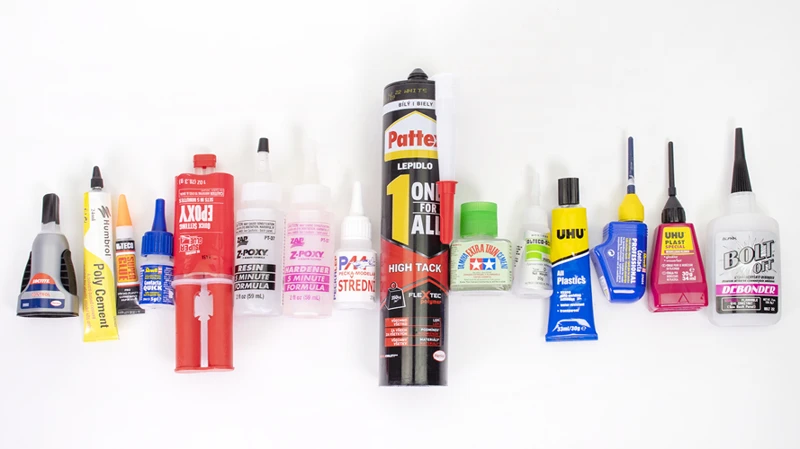
The Different Adhesives You Can Use
When it comes to glue printing, the type of adhesive you use plays a crucial role in the outcome of your design. There are different types of adhesives available, and each one creates a different effect when printed. Let’s take a closer look at some of the different adhesives you can use for your glue printing projects.
| Adhesive | Description |
|---|---|
| White school glue | This is a popular choice for beginners as it is easy to use and dries clearly. However, it may not hold up well for intricate designs or multiple layers. |
| Mod Podge | This is a versatile adhesive that can be used for a variety of crafts. It dries clear and is water-resistant, making it a good option for projects that may come into contact with moisture. |
| Acrylic gel medium | This adhesive is thicker than white school glue and can create a textured effect when printed. It can also be used as a varnish for sealing finished projects. |
| Spray adhesive | This adhesive comes in an aerosol can and is applied by spraying it onto your surface. It creates a strong hold and is a good option for larger designs, but can be difficult to control and may require a well-ventilated workspace. |
| Double-sided tape | As the name suggests, this adhesive has adhesive on both sides of a thin strip of tape. It is good for creating clean edges and precision in small areas. |
Keep in mind that these are just a few examples of the types of adhesives you can use for glue printing. Experimenting with different types and combinations of adhesives can lead to unique and interesting results. When selecting an adhesive, consider the level of detail in your design, the texture you want to create, and the surface you will be printing on.
Getting Started with Glue Printing
So, you’ve gathered all the essential supplies, and you’ve prepared your workspace, now it’s time to dive into the fun part – creating your glue print! Whether you’re a beginner or an experienced crafter, the process of getting started with glue printing can be both exciting and intimidating. But fear not, with the right guidance and a bit of creativity, you’ll be creating stunning prints in no time. Let’s explore the step-by-step process of creating a glue printed design.
Step 1: Choosing Your Design
Choosing your design is an important first step to ensure a successful glue printing project. Here are some things to consider:
| Consideration | Explanation |
|---|---|
| The size of your design | Make sure your design fits within the size of your paper or surface. |
| The complexity of your design | Beginners may want to start with a simple design with minimal details. |
| The purpose of your design | Are you creating a work of art or a design to use for another project? |
| The color scheme of your design | Consider what colors you will be using and how they will interact with each other. |
| The style of your design | Are you going for a more abstract look or a realistic image? |
Taking the time to carefully consider these points will help you choose a design that will work well for your glue printing project and make the process smoother and more enjoyable. Once you have chosen your design, it’s time to move on to the next step and apply your adhesive.
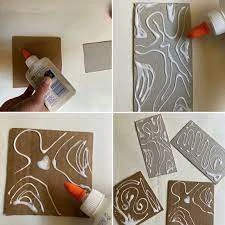
Step 2: Applying Your Adhesive
When it comes to applying your adhesive in glue printing, there are a few things to keep in mind to ensure a successful outcome. Follow these steps to make sure your adhesive is applied correctly:
- Choose Your Adhesive: The first step is to select the right adhesive for your project. Consider the type of surface you are printing on and the type of design you are creating. Some popular adhesives for glue printing include PVA glue, white school glue, and gel medium.
- Prep Your Surface: Before applying your adhesive, make sure your surface is clean and free of any debris or dust. You can use a soft-bristled brush or damp cloth to gently wipe down the surface.
- Apply Your Adhesive: Once you have chosen your adhesive and prepped your surface, it’s time to apply the adhesive. You can use a brush, sponge, or even your fingers to apply the adhesive to the surface. Use a thin, even layer of adhesive to ensure that your design sticks properly. Avoid applying too much adhesive which can lead to texture and drying issues.
- Wait for It to Dry: After applying the adhesive, it’s important to wait for it to dry completely before moving on to the next step. This can take anywhere from a few minutes to several hours depending on the type of adhesive used and the thickness of the layer that was applied. Be patient and let your adhesive dry completely to avoid any smudging or smearing.
By following these steps, you’ll be ready to move on to the next step in glue printing: printing your design. Remember that the key to success with glue printing is taking your time and being patient with each step of the process.
Step 3: Printing Your Design
Once you have applied your adhesive and prepared your design, it’s time to print it onto your chosen surface. Here are the steps to follow:
- Ink your brayer: Load up your brayer with ink by rolling it back and forth on your ink tray. Make sure the ink is evenly distributed across the brayer.
- Roll ink onto adhesive: Once your brayer is loaded with ink, roll it over your adhesive-covered design. Make sure to apply enough pressure to transfer the ink onto the surface. You can test the transfer by gently peeling up a corner of the paper to check if all the ink has transferred.
- Place paper or surface onto design: With your design inked up, carefully place your desired paper or surface onto the design. Make sure it is aligned correctly and press down firmly all over the surface to ensure the ink is transferred evenly.
- Burnish: Using a burnishing tool or even just a brayer, rub over the entire surface to further ensure the ink is transferred evenly. This step can also help to create a smoother finish.
- Lift paper or surface: After burnishing, gently lift up the paper or surface to reveal your printed design. Congratulations! You have successfully completed a glue printing project.
Remember, it’s important to work quickly while ink is still wet, as it can dry and cause your print to be incomplete or patchy. Don’t be afraid to experiment with different colors, papers, and adhesives to create your own unique designs. Happy printing!
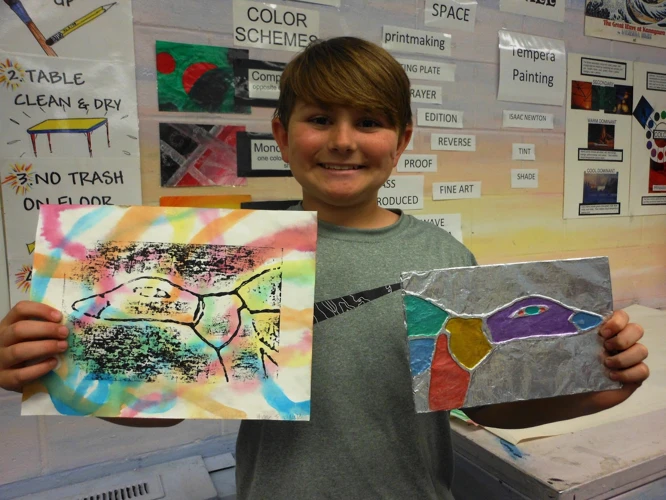
Advanced Techniques for Glue Printing
Now that you have the basics of glue printing down, it’s time to explore some more advanced techniques to take your creations to the next level. By incorporating different adhesives and methods, you can create unique textures, 3D effects, and unexpected outcomes. Below are some innovative ideas to try out when experimenting with glue printing. Let your imagination run wild and see what amazing results you can achieve.
Creating Texture with Adhesives
One of the most exciting aspects of glue printing is the ability to create unique and textured designs using different adhesive techniques. By experimenting with various adhesives and application methods, you can add depth and dimension to your prints.
Adhesive Options for Texture:
| Adhesive Type | Texture Created |
|---|---|
| Thick Glue | Bumpy, raised texture |
| PVA Glue | Smooth, shiny texture |
| Spray Adhesive | Light, spotty texture |
One way to create texture with adhesives is by using a thicker glue. Applying the glue in a thicker layer can create a bumpy, raised texture that adds depth to your print. Another option is to use PVA glue, which will create a smooth and shiny texture on your print.
Another way to create texture is by using a spray adhesive. This will create a lighter, spotty texture that can resemble a splatter effect or give the appearance of a more organic texture.
Application Techniques:
| Application Technique | Texture Created |
|---|---|
| Splatter Technique | Random, organic texture |
| Patterned Application | Structured, repeating texture |
| Comb Technique | Straight, uniform lines |
The application technique you use can also greatly affect the texture of your print. One option is the splatter technique, where you randomly apply adhesive in a splattering motion to create an organic texture. Another option is to use a patterned application, where specific shapes or patterns are created through the application of adhesive. Lastly, using a comb technique can create straight and uniform lines that add another dimension to your print.
Experimenting with different adhesive techniques is a fun and creative way to add texture and depth to your glue prints. By using different adhesives and application methods, you can create truly unique and stunning designs.
Building Layers for a 3D Effect
Creating a 3D effect with glue printing is fun and easy. Building layers is a great way to add depth to your design. Here are some tips to help you build layers using adhesive.
- Start with a Base Layer: Begin by printing your design on your paper or surface. Once dry, apply your adhesive to areas where you want to add depth. Use a thicker adhesive for the base layer to create a strong foundation for your layers.
- Work from Front to Back: To create depth, you need to build from the front to the back. Apply your adhesive to the areas that should be in the foreground first. Then, work your way to the back of the design, applying adhesive to each layer as you go.
- Choose Different Types of Adhesives: Experiment with different types of adhesives to create different textures and effects. You can use a thinner adhesive for some layers to create a delicate, almost lace-like effect, or you can use a chunkier, more textured adhesive for a bolder, more dramatic look.
- Don’t Be Afraid to Overlap: Overlapping your layers can create interesting textures and patterns. Play around with different placement options to see what works best for your design.
- Allow Time to Dry: It’s crucial to let each layer dry completely before adding the next one. If you don’t wait long enough, you risk smudging or ruining your design.
By following these tips, you can create a stunning 3D effect with your glue printing. Remember to be patient and experiment with different adhesives and layering techniques to find out what works best for you.
Mixing Adhesives for a Unique Outcome
Mixing different adhesives can lead to a unique outcome in glue printing. It’s important to experiment with different combinations and mixtures to find what works best for your desired effect.
Here are some adhesives to consider mixing:
- PVA glue
- Gel medium
- Mod Podge
- White glue
Each adhesive has its own properties, such as thickness, transparency, and drying time. By mixing these adhesives, you can create a custom texture and finish.
Here are some tips for mixing adhesives:
- Mix small amounts of each adhesive together to test the effect before applying to your final project.
- Use a palette knife or mixing stick to thoroughly blend the adhesives together.
- Try layering the different mixtures to create a 3D effect.
- Be patient and allow the adhesive to dry completely before printing.
Remember to have fun and experiment with different adhesives and mixes to create a truly unique outcome in glue printing. The possibilities are endless!
Common Mistakes to Avoid
Nobody’s perfect, and every artist makes mistakes. Glue printing is no exception. However, some mistakes can be more costly than others. While it may be frustrating to encounter issues during the process, knowing how to avoid these common mistakes can save you both time and resources. In this section, we’ll discuss several of the most common mistakes that artists make while glue printing, as well as the solutions to those problems. By being aware of these potential pitfalls, you can ensure that your glue printing projects are a success.
Using Too Much Adhesive
When it comes to glue printing, using too much adhesive can be a common mistake that beginners tend to make. While it may seem like applying more glue will result in a better outcome, this is not the case. Using too much adhesive can actually ruin your design and make it difficult to work with.
What happens when you use too much adhesive?
When you apply too much adhesive, it can bleed through your paper or the surface you’re printing on. This not only ruins your design but can also damage your workspace and materials. It can create a messy and uneven texture, making it difficult to achieve your desired outcome.
How much adhesive should you use?
The amount of adhesive you use will depend on the specific project you’re working on and the adhesive you’ve chosen. Generally speaking, it’s best to start with a thin layer of adhesive and gradually build it up until you achieve your desired level of texture and dimension.
What are some ways to avoid using too much adhesive?
One way to avoid using too much adhesive is to use a brush or spatula to apply it instead of pouring or spreading it directly from the bottle. This allows you to have more control over the amount you’re applying. You can also practice on a few test prints before moving on to your final project to get a better sense of how much adhesive you need to use.
The Importance of Being Patient
Another way to avoid using too much adhesive is to be patient and wait for each layer to dry completely before adding more. This will prevent the glue from bleeding through your paper or surface and give you a more even texture overall.
Conclusion:
Using too much adhesive is a common mistake in glue printing, but it’s one that can be easily avoided with some patience and practice. By starting with a thin layer, using a brush or spatula, and waiting for each layer to dry completely, you can achieve a beautiful and professional-looking design without any mess or frustration.
Not Waiting for Your Adhesive to Dry
When it comes to glue printing, one common mistake that can ruin your project is not waiting for your adhesive to dry. It can be tempting to start printing right away, especially if you’re excited about your design, but rushing the process can lead to smudging, smearing, and overall messiness.
Why is it important to wait for your adhesive to dry?
If you start printing on wet adhesive, you run the risk of disturbing the glue and causing it to spread or transfer onto unwanted areas of your design. Additionally, wet adhesive can cause your paper to buckle or wrinkle, which can be a frustrating setback after spending time on a project.
How long should you wait for your adhesive to dry?
The drying time for glue depends on the type of adhesive you’re using, as well as the humidity and temperature of your workspace. As a general rule, however, it’s best to wait at least 15-20 minutes for your adhesive to dry completely before moving on to the printing stage. You can test whether your adhesive is dry by gently touching it with your finger; if it feels tacky or wet, it’s not dry yet.
What can you do while waiting for your adhesive to dry?
Waiting for glue to dry can be a bit tedious, especially if you’re eager to see your final product. However, there are a few things you can do to make the most of your time:
- Use the waiting time to prep your printing surface, such as laying out protective sheets or selecting your ink colors
- Clean up any excess adhesive or tools from your workspace to keep things organized and tidy
- Take a break and stretch, grab a snack, or step outside for fresh air
Remember, a little bit of patience can go a long way in achieving a successful glue printing project. Don’t rush the process and risk ruining your design – instead, take your time and allow your adhesive to dry completely before moving forward.
Selecting the Wrong Paper or Surface
When it comes to glue printing, the surface or paper that you choose can greatly impact the outcome of your design. The wrong choice can result in paper that buckles or wrinkles, or an overall lackluster print. So, how do you know which surface or paper to choose?
Surface or Paper Type
There are a few factors to consider when selecting the right surface or paper for your project. First, consider the absorbency of the surface or paper. Generally, papers with a higher absorbency are better for glue printing because they allow the adhesive to penetrate the paper fibers and create a stronger bond. If the paper is too slick or nonabsorbent, the adhesive may not adhere properly.
Another factor to consider is the weight of the paper or surface. Heavier papers are more durable and less likely to buckle or wrinkle under the weight of the adhesive and ink. Additionally, thicker surfaces can handle multiple layers of glue and ink without becoming too saturated.
Lastly, the color and texture of the surface or paper can also impact the final print. Lighter colored papers will allow your ink colors to pop more, while darker colors can create a more dramatic effect.
Common Surface or Paper Mistakes to Avoid
Now that you understand the factors to consider, let’s talk about common mistakes to avoid. One mistake is using a surface or paper that is too thin or flimsy, which can result in unwanted wrinkles and buckling. Another mistake is using a surface or paper that is too smooth or slick, which can prevent the adhesive from bonding properly.
Additionally, avoid using surfaces or papers that have a glossy finish, as it can also prevent proper adhesion. Lastly, using surfaces or papers that have been heavily processed or coated can also result in poor adhesive bonding.
To summarize, when selecting the right surface or paper for your glue printing project, consider the absorbency, weight, color, and texture. Avoid thin or flimsy papers, surfaces or papers that are slick or glossy, and those that have been heavily processed or coated. By selecting the right surface or paper, you can ensure that your glue printing project will turn out just as you envisioned.
| Mistakes to Avoid | Factors to Consider |
|---|---|
| Using thin or flimsy surfaces or papers | Consider the weight of the paper or surface |
| Using surfaces or papers that are too slick or glossy | Consider the absorbency of the surface or paper |
| Using heavily processed or coated surfaces or papers | Consider the texture of the surface or paper |
Conclusion
In conclusion, glue printing is a unique and versatile art form that allows for endless creativity and experimentation. Whether you’re a beginner just starting out or an experienced artist looking to try something new, glue printing has something to offer everyone.
By understanding the basics of glue printing, including the supplies you need and how to prepare your workspace, you can easily get started and create beautiful designs. As you become more comfortable with the process, you can begin to explore advanced techniques such as creating texture with adhesives, building layers for a 3D effect, and mixing different adhesives for a unique outcome.
However, it’s important to be aware of common mistakes to avoid in order to achieve the best results. Using too much adhesive can cause your design to smudge or become blurry, while not waiting for the adhesive to dry can cause your paper to tear or warp. Additionally, selecting the wrong paper or surface can affect the final outcome of your design.
Overall, glue printing offers a fun and exciting way to express your creativity and experiment with different techniques. By following these guidelines and tips, you can create stunning designs and elevate your art to the next level. So go ahead, grab some adhesive and paper, and start creating!
Frequently Asked Questions
What is the best paper to use for glue printing?
Thicker, cardstock paper works best because it can withstand the moisture from the adhesives.
Can you use any type of adhesive for glue printing?
No, you’ll want to use a glue that dries clear and isn’t too thick or it will create bumps in your design. Recommendations include Aleene’s Tacky Glue or a PVA glue.
Do you need any special equipment for glue printing?
No, you just need basic printing supplies such as a brayer, ink, and something to roll the ink onto the printing block.
What is the difference between glue printing and other types of printmaking?
Glue printing is a relief printing technique that involves creating the design with adhesive, while other types of printmaking involve etching or carving the design into a plate.
Can you reuse the adhesive-covered printing block?
No, once the adhesive has been applied and inked, the design will be transferred onto the paper, so the printing block will need to be cleaned and a new layer of adhesive will need to be added if you want to print the same design again.
Can you create fine details with glue printing?
Yes, but it can be more difficult than other printmaking techniques. You may need to experiment with different adhesives and tools such as fine-tip applicators to create precise lines and details.
Can you add color to glue printing?
Yes, you can add color by mixing ink or paint with the adhesive or by using a separate color for each layer of adhesive that you print.
What is the best way to clean and maintain your printing tools?
After each use, you should clean the brayer and any other tools you used with soap and water, then dry them thoroughly. To maintain the adhesive layer on your printing block, store it flat and away from moisture.
What kind of designs work best for glue printing?
Simple, graphic designs with bold lines and shapes work best. Avoid designs with fine details or intricate patterns, as they can be difficult to replicate with adhesive.
Can children participate in glue printing?
Yes, glue printing can be a fun and easy introduction to printmaking for children. However, adult supervision is recommended when using sharp cutting tools or other potentially dangerous equipment.