Picture yourself playing your beloved guitar, strumming your favorite tune when suddenly, your guitar bridge falls off. This situation is not only frustrating, but it can also be devastating for a musician. Luckily, repairing a guitar bridge is not impossible, but it requires the right tools and, most importantly, the right glue. With so many different types of glue available on the market, it can be overwhelming to choose the best one for your guitar bridge. That’s why we’ve put together this essential guide on what glue to use for guitar bridge repairs. In this article, we’ll explore the importance of choosing the right glue, the different types of glue for guitar bridges, compare them based on specific criteria, and provide step-by-step instructions on how to glue a guitar bridge. Stay tuned, and let’s dive in!
Why Choosing the Right Glue is Important
Choosing the right glue is an essential part of the guitar repair process, and the type of glue you use can have a significant impact on the sound quality and durability of your instrument. There are several types of glue available on the market, and each one has its own unique properties that make it suitable for specific applications. In this article, we will explore the importance of selecting the right glue for your guitar bridge and provide a detailed guide to help you make the best choice.
Reason #1: Sound Quality
When it comes to guitar bridges, using the right glue can have a significant impact on the instrument’s sound quality. A poorly glued bridge can lead to vibrations being absorbed instead of being transferred to the guitar’s soundboard. This can result in a dull and muted sound, which is not ideal for any musician.
Different types of glue have different properties that affect the sound transmission. For instance, hide glue is known for its excellent sound transmission, making it a popular choice among guitar luthiers. On the other hand, polyurethane glue, while possessing high strength and durability, can create a clunky and dead sound due to its stiffness.
It is, therefore, essential to choose a glue that can provide proper sound transmission without compromising on strength and durability. A high-quality glue ensures that the guitar bridge is securely attached to the instrument and can withstand the tension from the strings without hampering the sound quality.
When selecting the right type of glue for a guitar bridge, it is best to consider the type of wood used, climate, and playing style. The glue should be able to withstand the pressure of the strings and seasonal changes while maintaining superior sound transmission.
By understanding the importance of choosing the right glue for a guitar bridge, you can ensure that your instrument produces clear and crisp sound quality, making your music stand out.
Reason #2: Durability
When it comes to guitar bridge glue, durability is another crucial factor to consider. You want a glue that can withstand the tension and stress placed on the bridge, as it is constantly being pulled by the strings. The last thing you want is for the bridge to come loose or break away from the body of the guitar, causing damage to the instrument or affecting the sound.
To ensure durability, it’s important to choose a glue that has strong bonding properties. Certain types of glue are specifically designed for high-stress applications, such as Epoxy or Polyurethane glue. These types of glue have strong adhesion and can withstand a lot of tension and stress, making them excellent choices for guitar bridge glue.
Additionally, the type of wood used for the bridge can also affect the durability of the glue. Some woods are more porous and absorbent, which can affect the bonding strength of the glue. In such cases, it may be necessary to apply multiple coats or prepare the surface of the wood to improve the bonding surface before applying the glue.
To ensure maximum durability, it’s important to choose a high-quality glue and properly prepare the surface and wood before applying it to the bridge. By doing so, you can be confident that the bridge will be securely attached to the body of the guitar, providing excellent sound quality and longevity.
Want to know more about which glue to use for your instrument? Check out our in-depth guide on which glue to use for different applications.
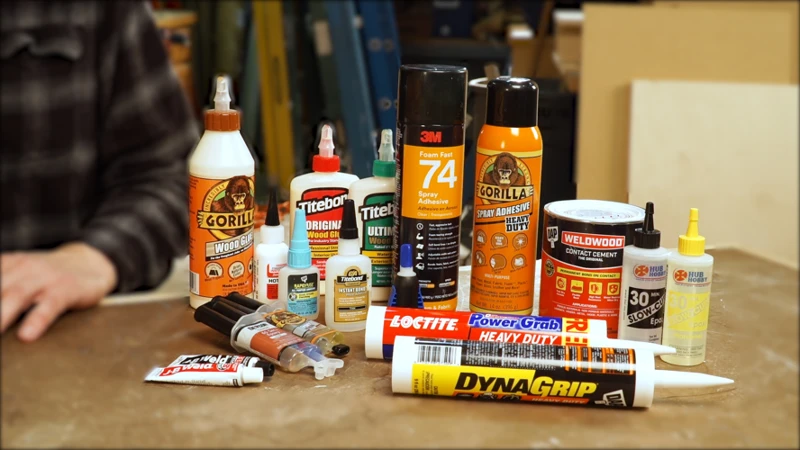
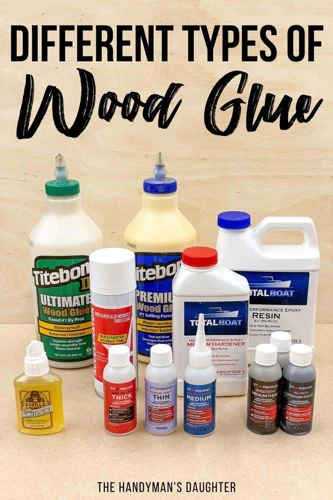
Types of Glue for Guitar Bridge
When it comes to repairing guitar bridges, the type of glue you use can have a significant impact on the sound quality and durability of the instrument. There are several different types of glue that can be used, each with its own unique properties and benefits. In this section, we’ll go over some of the most commonly used types of glue for guitar bridges and provide an overview of their characteristics and applications, so you can make an informed decision about which type of glue to use for your own guitar repair needs.
1. Hide Glue
Hide glue has been used for centuries in luthiery due to its superior acoustical properties. It is made from animal collagen (usually from cows or rabbits) and must be heated to use. However, hide glue sets quickly and can dry before the bridge is properly placed and aligned. It also requires some skill to use and may not be suitable for beginners. Nevertheless, it is still considered by many to be the best glue for guitar bridges.
| Pros | Cons |
|---|---|
| Superior acoustical properties for better sound quality | Requires heating before use |
| Dries hard for better vibration transfer | Sets quickly and can dry before proper placement is achieved |
| Potentially reversible for repairs | Requires skill to use properly |
One advantage of hide glue is that it is potentially reversible, meaning that repairs or adjustments to the bridge can be made more easily in the future. This is because hide glue can be reactivated with heat and moisture. However, this is also a disadvantage as it means that hide glue may not be as durable as some other types of glue.
While hide glue may not be the most beginner-friendly option, it remains a favorite among experienced luthiers and guitar players due to its superior acoustical properties and potential reversibility. If you decide to use hide glue for your guitar bridge, it is important to take the time to properly prepare and align the pieces before applying the glue.
2. Epoxy
Epoxy is an excellent glue choice for attaching a guitar bridge due to its strong, durable bond. This type of adhesive consists of two parts, a resin and a hardener, which are mixed together in equal parts before application.
Advantages:
- Epoxy creates a very strong bond that can withstand the high tension and pressure exerted on a guitar bridge.
- It has a longer open time than other types of glue, which allows for more time to adjust the position of the bridge before the adhesive sets.
- Epoxy is also waterproof and temperature-resistant, making it ideal for use in guitars that may be exposed to varying weather conditions.
Disadvantages:
- Unlike hide glue, epoxy glue cannot be reversed or undone without causing damage to the guitar.
- Epoxy can be more difficult to clean up than other types of glue and typically requires the use of solvents such as acetone.
While epoxy glue may not be the easiest glue to work with, it is an excellent choice for those seeking a strong, long-lasting bond for their guitar bridge. If you’re not sure which glue to choose for your guitar, you may want to consult with a professional luthier or guitar repair person for guidance.
Recommended internal link: If you’re interested in learning more about other types of glue, you may want to read our article on which glue to use for different types of projects.
3. Polyurethane Glue
Polyurethane glue is a solvent-based adhesive that creates an incredibly strong bond. Unlike other glues, polyurethane glue requires moisture to cure. It is also known as Gorilla Glue because of its popular brand name.
This glue has many benefits because it can be used on different types of materials, including wood, metal, plastic, and ceramics. It is also water-resistant, making it ideal for guitar bridges that come into contact with moisture from players’ hands during performance.
Polyurethane glue is available in both one and two-part formulas. The one-part formula can be used straight from the bottle, while the two-part formula involves mixing two parts together before application. One disadvantage of polyurethane glue is that it tends to expand significantly as it dries, meaning that excess glue may need to be trimmed off once it cures.
In terms of strength, polyurethane glue is one of the strongest types of glue available. It creates a bond that is even stronger than the wood itself, meaning that the bridge will be firmly attached to the guitar body. However, this also means that the bond is permanent, making it difficult to reverse if any errors occur during the gluing process.
Polyurethane glue has a relatively long open time, which is the time during which the glue remains workable before it sets. This makes it easy to apply the glue to the guitar bridge before attaching it to the body. However, because polyurethane glue is solvent-based, it can be difficult to clean up if it drips or spills onto other surfaces.
To sum up, polyurethane glue is an excellent choice for guitar bridges because of its strength and water-resistance. It requires careful application, as the excess glue must be trimmed once it expands to avoid any adverse effects on the guitar’s aesthetics. One should also handle it with care, as it can be challenging to remove once it dries.
If you’re interested in purchasing polyurethane glue, it can be found at most hardware stores. You may also find a variety of other glues there, including PVA glue and cyanoacrylate glue.
4. Cyanoacrylate Glue
Cyanoacrylate glue, commonly known as “super glue,” is a type of adhesive that bond quickly and strongly. This glue is made by cyanoacrylate esters in which a reaction occurs with moisture present on the surface to make a bond. It is a popular choice for guitarists due to its quick bonding and high strength.
Pros:
- Cyanoacrylate glue dries faster than most other types of glue.
- It dries to a hard, brittle finish, which can help transmit sound and vibrations through the guitar.
- It can fill gaps, creating a strong bond even on uneven surfaces.
Cons:
- Cyanoacrylate glue is not reversible, so the bridge cannot be easily removed once it has been glued.
- It can bond skin immediately, so it is important to handle it with care and wear gloves.
- It can become brittle over time, which can affect the durability of the bond.
Compared to other glues, cyanoacrylate glue has a short open time, which means it sets quickly and doesn’t allow for much adjustment once applied. This can make it difficult to use, especially for those who are not experienced with this type of glue. It is important to be accurate when applying cyanoacrylate glue, as mistakes can be costly.
Tip: When using cyanoacrylate glue, it is recommended to use a small amount and apply it to one surface only. Putting too much glue can result in a weak bond, while putting it on both surfaces can cause it to dry before you are ready to join the pieces together.
Cyanoacrylate glue can be a good choice for those who value quick drying times and high strength. However, it is important to take caution when using it due to its irreversible nature and potential hazards. If you are uncertain whether cyanoacrylate glue is the right choice for your project, consider consulting with a professional or doing additional research.
5. Titebond Glue
Titebond glue is another popular option used for guitar bridges. Titebond is a brand name for PVA glue that is commonly used in woodworking. It is known for its strong bond and waterproof properties. It is also easy to work with and dries clear. Titebond glue comes in three variations – Titebond Original, Titebond II Premium, and Titebond III Ultimate.
Titebond Original is a strong glue that provides a tight bond between the bridge and the guitar top. It has a longer open time, which means it takes a longer time to set and allows for adjustments to be made before it dries. This makes it a good choice for beginners who are not as experienced in guitar building.
Titebond II Premium is a water-resistant glue that is ideal for situations where the guitar may be exposed to moisture. This glue dries quicker than Titebond Original, which can be beneficial when time is a concern. It also has a longer shelf life than other types of glue.
Titebond III Ultimate is a waterproof glue that is perfect for outdoor guitars or those that will be exposed to humidity. It has a similar open time to Titebond Original, but is more resistant to moisture. It also has a longer working time, so adjustments can be made before it sets.
Titebond glue is a reliable and easy-to-use choice for guitar builders. It dries clear and is strong enough to hold the bridge securely in place. However, it is important to note that Titebond glue is not completely reversible, meaning it cannot be easily removed if there is ever a need to repair or replace the bridge.
Comparing Different Types of Glue
As we have explored the different types of glue that can be used for a guitar bridge, it is important to compare and analyze them to understand which one suits your needs the best. There are various criteria to evaluate glue, including open time, strength, reversibility, and clean-up. Let’s dive deeper into the key aspects of each type of glue and compare them to help you make an informed decision on which type to use for your guitar bridge.
Criteria #1: Open Time
Criteria #1: Open Time
Open time is the time that the glue remains workable after it has been applied to the surfaces. It is an important consideration in choosing the right glue for a guitar bridge. Different types of glue have varying open times, and this can affect the ease and quality of the final result.
Here is a table summarizing the open time of different types of glue:
| Glue Type | Open Time |
|---|---|
| Hide Glue | Short |
| Epoxy | Long |
| Polyurethane Glue | Short |
| Cyanoacrylate Glue | Very Short |
| Titebond Glue | Medium |
As seen from the table, hide glue and polyurethane glue have short open times, while epoxy has a long open time. Cyanoacrylate glue has a very short open time, which can make it tricky to work with. Titebond glue has medium open time, which can make it more forgiving than the other glues on this list.
If you are not sure which glue to use for your guitar bridge, consider the open time as one of the factors to help you decide. Hide glue, despite its short open time, still remains a popular choice for many luthiers since it is a traditional and natural glue, and it can produce a warm and resonant sound. However, if you are looking for a more durable and modern solution, epoxy or polyurethane glue might be a good option.
Internal link: If you need more information about how to apply glue on another surface, check out our article on how to apply glue.
Criteria #2: Strength
When it comes to choosing the right glue for a guitar bridge, strength is definitely a crucial factor to consider. The bridge is responsible for transferring the vibrations from the strings to the guitar’s top, so a weak bond could certainly affect the sound quality. Here are some of the strongest types of glue available for guitar bridge repair:
- Epoxy: This type of glue is very strong and durable. It’s resistant to moisture, heat, and chemicals, making it a good choice for instrument repair. Epoxy is also gap filling, so it can be used to fill any small gaps between the bridge and the guitar top. However, epoxy can be difficult to work with and may require more preparation than other types of glue.
- Polyurethane glue: Another strong adhesive, polyurethane glue expands as it cures, filling any gaps in the joint. It’s also waterproof and bonds well to a variety of materials. However, polyurethane glue can be messy to work with, and excess glue is difficult to remove once it has dried.
- Titebond glue: Titebond is a type of aliphatic resin glue that is commonly used in woodworking. It’s a strong, water-resistant glue that dries clear and can be sanded or painted over once cured. Titebond is also easy to work with, making it a good choice for beginners. However, it may not be as strong as some of the other adhesives mentioned.
Important note: It’s important to use a glue that is specifically designed for woodworking or instrument repair. Using a general-purpose adhesive could result in a weaker bond or even damage to the guitar.
If you’re still unsure about which glue to use for your guitar bridge, consulting with a professional luthier or instrument repair technician can be helpful. They can provide guidance and recommend the best glue for your specific needs.
Internal link: /who-sells-pva-glue/
Criteria #3: Reversibility
Criteria #3: Reversibility
One of the most important criteria when choosing the right glue for your guitar bridge is reversibility. Reversibility refers to how easily the glue bond can be undone if needed, without causing any damage to the wood. As a guitar bridge needs to be removed and adjusted from time to time, it is essential to choose a glue that allows for easy removal without damaging the guitar.
To evaluate the reversibility of various glue types, we need to look at the bonding strength and how easily the glue can be softened or dissolved. Here’s a breakdown of how each glue type performs in terms of reversibility:
| Glue Type | Reversibility |
|---|---|
| Hide Glue | Easily reversible |
| Epoxy | Difficult to reverse without causing damage |
| Polyurethane Glue | Difficult to reverse without causing damage |
| Cyanoacrylate Glue | Can be reversed with acetone, but may cause damage to the wood |
| Titebond Glue | Can be softened with heat and moisture, but may cause damage to the wood |
As we can see, hide glue is the easiest to reverse without causing any damage to the wood. This is because hide glue is water-soluble, which means that it can be softened with heat and moisture, allowing for easy removal. On the other hand, epoxy and polyurethane glues are difficult to remove without causing damage to the wood, as they cure very hard and require mechanical force to break the bond.
It is important to note that while cyanoacrylate and Titebond glues can be reversed, they may still cause some damage to the wood. It is recommended to use hide glue for the guitar bridge, as it provides a strong bond and allows for easy removal and adjustments without damaging the wood.
Internal link: If you need to remove glue from a guitar or any other surface, you can check our article on how to remove glue from a headliner for useful tips.
Criteria #4: Clean Up
Clean up is an essential aspect to consider when choosing a glue for your guitar bridge. You want a glue that is easy to clean up once the job is complete. Here are some things to keep in mind when comparing the different types of glue:
- Hide Glue: Hide glue is probably the easiest glue to clean up because it can easily be dissolved with warm water. If you accidentally get hide glue on your hands, simply wash it off with soap and water.
- Epoxy: Epoxy glue can be a bit more challenging to clean up because it is a two-part adhesive. You will need to use a solvent such as acetone or isopropyl alcohol to remove any excess glue.
- Polyurethane Glue: Polyurethane glue is also a bit tricky to clean up because it expands as it cures. You will need to use a chisel or scraper to remove any excess glue, and then sand the surface to remove any remaining residue.
- Cyanoacrylate Glue: Cyanoacrylate glue (also known as super glue) can be easily removed with acetone. However, be careful not to get the acetone on the guitar’s finish as it can cause damage.
- Titebond Glue: Titebond glue is water-soluble, which makes it easy to clean up with soap and water before it dries. However, once it dries, it can be more challenging to remove and may require scraping or sanding.
It’s important to use caution when using solvents to clean up glue as they can be harsh and potentially damage your guitar. Additionally, if you are working with certain types of wood, such as rosewood or ebony, you may want to avoid certain solvents altogether as they can cause the wood to discolor or become damaged.
When choosing a glue for your guitar bridge, consider how easy it will be to clean up once the job is complete. You want a glue that is effective but also won’t cause any damage to your instrument during the clean up process.
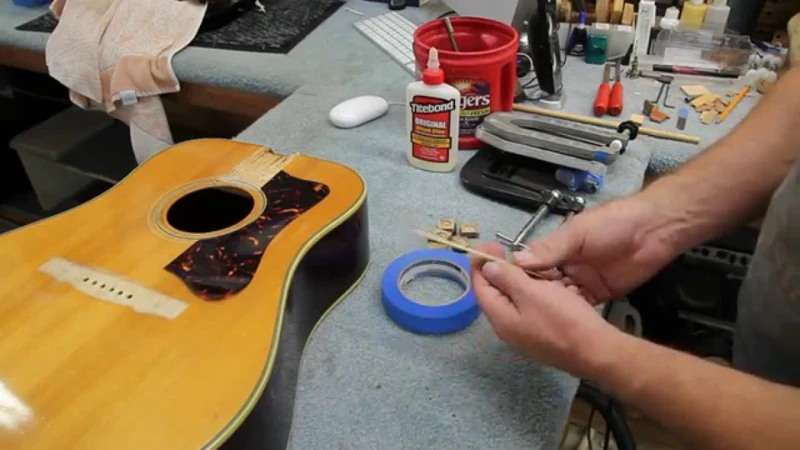
How to Glue a Guitar Bridge
Gluing a guitar bridge can seem like a daunting task, but with the right technique and materials, it can be a simple process. Before you begin, it’s important to choose the right glue for your guitar bridge. Refer to the previous sections of this article to determine which glue type is best for your needs. Once you’ve selected your glue, you’re ready to start the gluing process. In this section, we will guide you through the steps to ensure successful bonding of your guitar bridge to the guitar body. So let’s get started! We won’t be discussing how to trap birds with glue, how to make cigar glue, what is CA glue activator, how to make rice starch glue, or how to glue styrofoam to cardboard – this article is focused solely on how to glue a guitar bridge.
Step #1: Prepare the Surface
Before attempting to glue a guitar bridge, it’s important to prepare the surface of the guitar where the bridge will be attached. This ensures proper adhesion and improves the strength and durability of the bond.
The following steps should be taken to prepare the surface:
| Step | Description |
|---|---|
| 1 | Remove the old bridge and any remaining glue residue using a chisel or scraper. Be sure to work carefully to avoid damaging the guitar’s top. |
| 2 | Clean the surface using a soft cloth or brush to remove any debris or dust. This will help ensure a clean and smooth surface for the new glue to adhere to. |
| 3 | Use sandpaper to lightly sand the surface where the bridge will be attached. This will help create a rough surface for better adhesion. Be sure to sand in the direction of the grain and use a fine-grit sandpaper to avoid damaging the wood. |
| 4 | Wipe the surface with a damp cloth to remove any sanding dust or debris. Allow the surface to dry completely before applying the glue. |
Properly preparing the surface is essential for creating a strong and long-lasting bond. Skipping this step or rushing through it can result in a poor-quality glue joint, which can negatively impact both the sound quality and durability of the guitar. Take your time and follow these steps carefully for optimal results.
Internal html link: How to glue styrofoam to cardboard
Step #2: Apply the Glue
Once you have prepared the surface, it’s time to apply the glue. Depending on the type of glue you are using, the application process may differ. Here are the general steps to follow:
Step 1: Squeeze a liberal amount of glue onto the bridge plate. It is recommended to apply glue only on the bridge plate, not on the guitar top, as excess glue can seep through the bridge pin holes and affect the sound quality of the guitar.
Step 2: Spread the glue evenly over the surface of the bridge plate using a brush or a toothpick. Be careful not to use too much glue as this can cause it to seep out of the sides and potentially damage the guitar.
Step 3: Place the bridge on the guitar in the correct position, making sure that the marks you made earlier line up with the guitar’s top.
Step 4: Apply pressure to the bridge to ensure a good bond. Using a clamp is highly recommended to apply even pressure to the entire surface of the bridge.
Here are some tips to keep in mind when applying glue:
1. Choose a glue that has a longer open time to give you more time to work with the glue before it sets.
2. Check the manufacturer’s instructions on how much glue to use. Over-application of glue can cause it to squeeze out and leave a mess.
3. Some guitar builders prefer heating the glue before application to improve its flow and penetration into the guitar joints.
4. Avoid using glue with strong odours as they can linger in the guitar and negatively affect the sound quality.
5. Take caution when using certain types of glue, like cyanoacrylate glue, as they have fumes that can be harmful when inhaled.
Following the proper application procedure will help you achieve a strong bond between your guitar’s bridge and top. Once you have applied the glue, it’s important to move on to the next step of the process, which is to clamp the bridge in place.
Step #3: Clamp the Bridge
Once the glue has been applied, it is time to clamp the bridge. Clamping the bridge ensures that the glue forms a strong and tight bond with the guitar. For this step, you will need a good quality clamp that can apply pressure evenly and securely.
Before clamping, make sure that the bridge is properly aligned and in position. Once you are satisfied with the placement, gently tighten the clamp to apply enough pressure to the bridge. Do not overtighten as this may cause damage to the guitar.
It is important to use protective padding between the clamp and the bridge to prevent any damage or scratches on the guitar’s finish. A piece of cloth can be used for this purpose.
Leave the bridge clamped for at least 24 hours to ensure that the glue has fully cured. Once the glue has dried, gently remove the clamp and check to ensure that the bridge is securely attached.
It is worth noting that different glues may have different clamp times. Always refer to the manufacturer’s instructions for the recommended clamp time for the glue you are using.
Pro tip: If you don’t have a clamp, you can create your own clamping system using rubber bands. Simply place several rubber bands around the guitar to hold the bridge in place while the glue dries.
Important: Never use glue to trap birds. This is cruel and illegal. If you come across a bird stuck in glue, seek professional help to safely and humanely remove the bird. For more information, visit /how-to-trap-birds-with-glue/.
Step #4: Let the Glue Dry
Once you have clamped the bridge, let the glue dry completely before removing the clamps. The time required for glue to dry depends on the type of glue you used. Refer to the manufacturer’s instructions for specific drying times.
It’s very important to let the glue dry completely since any movement of the bridge during the drying process can result in poor sound quality and structural integrity. Be patient and let the glue fully dry before moving on to the next step.
To ensure that the glue has completely dried, you can perform a simple test by gently tapping on the bridge with your finger. If it feels like it’s moving or the sound is dull and muted, it’s not dried yet. Conversely, if you hear a clear, ringing sound, the glue is dry, and you can carefully remove the clamps from the bridge.
It’s crucial to note that the amount of time needed for glue to dry can be affected by factors such as humidity, temperature, and the type of wood used for the guitar. Thus, if you are not sure if the glue has dried completely, it’s always best to wait longer than the manufacturer’s recommended drying time.
Once the glue has fully dried and the clamps have been removed, you can clean up any excess glue that may have seeped out of the joint. Use a razor blade or sharp chisel to remove any dried glue from the area around the joint. Be careful not to damage the guitar’s finish during cleanup.
Letting the glue dry completely is a critical step in the process of gluing a guitar bridge. Be sure to follow the manufacturer’s recommended drying times and perform a simple test to ensure the glue has fully dried before removing the clamps. Once the glue is dry, be sure to clean up any excess glue to ensure a clean and professional-looking finish.
Conclusion
Choosing the right glue for your guitar bridge is crucial in ensuring both the sound quality and durability of your instrument. With so many types of glue available, it can be overwhelming to make a decision. However, by understanding the different types of glue and their advantages and disadvantages, you can make an informed decision to get the best result.
In this article, we discussed the five types of glue that work best for guitar bridges, including hide glue, epoxy, polyurethane glue, cyanoacrylate glue, and Titebond glue. We also compared them using different criteria such as open time, strength, reversibility, and clean-up.
When it comes to gluing the guitar bridge, preparation is key. You need to ensure that the surface is clean and free from debris, and that the bridge is clamped down tightly until the glue dries. Following these steps will give you a successful gluing experience.
Remember that the glue that you use for your guitar bridge can make a significant difference in both sound quality and durability. Choose the right glue based on the type of wood used for your guitar and the conditions it will be exposed to.
In conclusion, the right glue can make all the difference in the longevity and quality of your guitar. Take the time to understand the different types of glue available for guitar bridges and their properties to choose the right one. If you want to learn more about different types of glue, you can check out what does glue-like discharge mean, how to make cigar glue, how to make rice starch glue, or what is CA glue activator articles.
Frequently Asked Questions
1. Can any type of glue be used for a guitar bridge?
No, not all types of glue are suitable for use on a guitar bridge. The type of glue used can affect the sound quality and durability of the bridge.
2. What is the best type of glue for a guitar bridge?
The best type of glue for a guitar bridge is subjective and may depend on personal preferences. However, hide glue is commonly used by luthiers due to its excellent sound transmission qualities.
3. Can I use regular wood glue for a guitar bridge?
No, regular wood glue is not recommended for use on a guitar bridge as it does not withstand the tension and stress put on a guitar bridge, unlike specialized guitar glues.
4. Is epoxy glue reversible?
No, epoxy glue is not reversible. This makes it difficult to remove the bridge from the guitar in case changes or adjustments are necessary in the future.
5. How long does polyurethane glue take to dry?
Polyurethane glue takes around 24-48 hours to fully dry.
6. Can cyanoacrylate glue be used on all types of wood?
No, cyanoacrylate glue is not suitable for use on oily or resinous woods, such as rosewood or cocobolo, as it may not form a strong bond due to poor surface preparation.
7. What is the difference between Type I and Type II Titebond glue?
Type I Titebond glue is water-resistant and is best used for indoor conditions, while Type II Titebond glue is waterproof and is suited for outdoor use and humid environments.
8. Do I need to clamp the bridge when gluing it to the guitar?
Yes, clamping the bridge during the gluing process ensures even pressure distribution and a strong bond between the bridge and the guitar body.
9. How long should I let the glue dry before removing the clamps?
You should let the glue dry for at least 24 hours before removing the clamps to ensure that the bond has fully set.
10. Can I remove a glued guitar bridge, or is it permanent?
A glued guitar bridge can be removed, but it may cause damage or marks on the guitar body. It is best to consult a professional luthier for bridge removal and replacement.