As you get ready to paint your walls, you may notice that they are not quite ready for a fresh coat just yet. Perhaps there are visible stains or spots that need special attention before painting, or maybe you just want to make sure that the surface is as clean as possible to ensure lasting results. Whatever the case may be, it’s important to take the proper steps when cleaning your walls to ensure that you don’t damage the surface or compromise the paint job. In this article, we will explore various cleaning methods and techniques for when your walls need extra surface cleaning before painting.
Gather Your Supplies

Before diving into the actual cleaning process, it is important to first gather all the necessary supplies. Not having the right materials on-hand can lead to frustration and unnecessary trips to the store. So, what do you need to get the job done? Let’s take a look. We have compiled a list of essential supplies that will ensure that you are equipped for the task ahead. Make sure you have everything from drop cloths to cleaning solutions to sandpaper. This will help to make the process smoother and efficient. If you need help selecting the right tools, check out our top 5 surface cleaning tools for painters article. It is important to be well-prepared before starting any new project, and cleaning your walls before painting is no exception.
What You Will Need
To properly clean your walls before painting, you will need several materials to make the job easier and more effective. Here is a list of vital supplies:
| Materials | Description |
| Clean towels or cloths | These will be useful for wiping away cleaning solutions and drying the walls afterward. |
| Drywall compound | To fill in holes and gaps in the wall. |
| Drywall sandpaper | Use this to sand down the drywall compound, creating a smooth surface for painting. |
| Gloves | Protect your hands from any chemicals or rough surfaces while cleaning. |
| Ladder | Reach high spots on your walls with this ladder for a more thorough cleaning. |
| Plastic drop cloths | Cover floors and furniture with plastic to ensure that no cleaning solution or paint drips on them. |
| Protective eyewear | Shield your eyes from any harmful chemicals or dust while cleaning or sanding. |
| Scraper or putty knife | Use this to scrape off any loose paint or debris before cleaning. |
| Soap or cleaning solution | Choose a mild soap or a specially formulated cleaning solution for your walls. |
| Trisodium phosphate (TSP) | A powerful cleaning agent that can help remove tough dirt and grime. Be sure to wear gloves and follow instructions carefully when using TSP. |
| Vacuum or broom | Sweep the floors and vacuum any dust or debris on the walls before cleaning. |
| Vinegar and water | A natural cleaning solution that can also help remove stains and deodorize your walls. |
Before starting the cleaning process, make sure to check the label on your paint can for any specific instructions on cleaning the walls. For more detailed information on preparing your walls for painting, check out our complete guide to surface cleaning before painting. It’s important to understand the importance of proper surface cleaning before painting to ensure a smooth and long-lasting finish.
Protecting Your Space
To ensure that your cleaning process doesn’t end up creating a bigger mess or causing damage to your home, it’s important to protect the space before you begin. Here are some things to consider:
- Cover the floors: Lay down a drop cloth or plastic sheeting to protect your floors from any cleaning solutions or debris that may fall during the cleaning process. You can also use old towels, newspapers or cardboard boxes to protect your floors.
- Tape off areas: Use painter’s tape to protect door frames, windows, outlets, and any other areas that you don’t want to get wet or damaged during the cleaning process. Make sure the tape is securely in place and covers the entire area you want to protect.
- Wear protective clothing: Wear gloves, old clothes, and eye protection to keep yourself safe while cleaning. You may also want to wear a face mask if you’re using strong chemicals or if you have respiratory issues.
- Close the doors: Close all doors and windows in the room where you’ll be working to prevent dust and debris from spreading to other areas of your home.
By taking the time to properly prepare your space, you can save yourself a lot of headaches and minimize any potential damage to your home. With everything in place and protected, it’s time to move on to the next step in preparing your walls for painting.
Pre-Cleaning Preparations
Before diving into the cleaning process, it’s essential to take care of some preparatory steps. These preparations can make a significant difference in the effectiveness of your cleaning and the final outcome of your painting job. To ensure that your walls receive the best possible cleaning, follow these essential pre-cleaning steps.
Clear the Room
When preparing to clean your walls, it’s important to clear the room of any furniture or decorations that could get in your way or be damaged during the cleaning process. Here are some steps to take:
| Step 1: | Remove any wall hangings, such as pictures or mirrors, and set them aside in a safe place. |
| Step 2: | Take down any curtains or window treatments that might brush against the walls during cleaning. |
| Step 3: | Move any furniture away from the walls and cover it with plastic or drop cloths to protect it from water or cleaning solutions. |
| Step 4: | Cover the floor with plastic or drop cloths to protect it from drips and spills. |
By removing all of these items, you’ll be able to work more efficiently and thoroughly clean your walls without any distractions or obstructions. Not only that, but you’ll also be able to protect your belongings from any potential damage.
Inspect the Walls
Before you begin cleaning your walls, it’s essential to thoroughly inspect them. This step is vital to identify any damages, including scratches, holes, or other imperfections that may require additional attention. Follow these steps to inspect the walls:
- Turn On the Lights: Ensure the walls are well lit, so you don’t miss any imperfections.
- Look for Scratches, Dents, and Holes: Inspect each wall carefully, from top to bottom, to identify scratches and damages.
- Check for Cracks: Look for cracks in the walls. It’s crucial to fix such cracks before painting because they can worsen over time.
- Identify Stains: Identify any stains, such as water, ink, or grease, on the walls. You will need to use different cleaning methods depending on the type of stain.
- Assess the Material: Not all walls are the same, and different surfaces require different cleaning techniques. Determine the type of wall you’re going to clean before selecting a cleaning method.
- Make a Plan: Once you’ve inspected the walls, identify the type of cleaning method that you will use, and create a plan to ensure that the cleaning process goes smoothly.
By thoroughly inspecting your walls, you’ll be able to identify any imperfections and take the necessary steps to clean and prepare them for painting.
Cleaning Methods
Now that you’ve gathered your supplies and prepared your space, it’s time to begin the actual cleaning process. There are several methods you can use to clean your walls before painting, all of which have their own strengths and weaknesses. Below we will explore a few of the most effective cleaning methods to help you determine which one is right for your walls. From simple soap and water to powerful TSP, each method has its own unique benefits and can help you achieve a perfectly clean surface for your paint job.
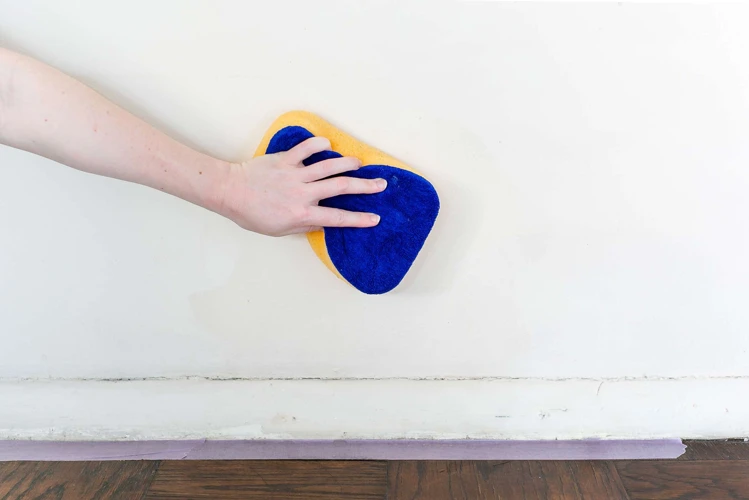
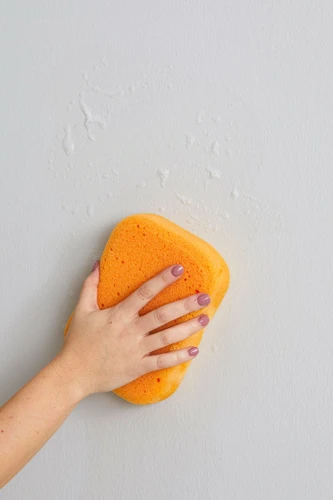
Soap and Water
One of the easiest and most cost-effective ways to clean your walls before painting is by using soap and water. This method is ideal for removing general dirt, dust, and grime that may have accumulated on your walls over time. Here’s how to do it:
- Mix warm water and a few drops of dish soap in a bucket.
- Dip a sponge or microfiber cloth into the solution, wring it out, and start scrubbing the wall from top to bottom. Be sure to use gentle pressure and don’t apply too much water, as this can damage the paint and drywall.
- Work in small sections and change the water frequently to avoid spreading dirt around.
- Once you’ve cleaned the entire wall, rinse it with warm water and a clean sponge or cloth.
- Next, use a dry cloth or towel to remove any excess water from the wall.
- Allow the wall to dry completely before applying paint.
Note: If your walls are particularly dirty or greasy, you may need to use a stronger cleaning solution or a different method, such as hiring a professional cleaner or using trisodium phosphate (TSP).
Hire a Professional Cleaner
If the walls in your home are particularly dirty or have tough stains that are difficult to remove, it might be time to consider hiring a professional cleaner. Professional cleaners have specialized tools and cleaning agents that can make the job easier and faster.
Before hiring a professional cleaner, consider the cost and your budget. Research several different companies before making a decision, and read reviews and ask for referrals from friends or family members who have used similar services in the past.
Once you have selected a professional cleaner, schedule a consultation appointment. During the consultation, be sure to discuss the scope of the job and any potential challenges or concerns that you have. This will also give you a chance to discuss pricing and ask any questions that you may have.
If you decide to go ahead with hiring a professional cleaner, it is important to protect your home during the cleaning process. Consider removing any fragile items and taping plastic or drop cloths over furniture and flooring to prevent damage from water or cleaning agents.
If there are any areas of the walls or ceilings that you want to preserve, be sure to communicate this with the cleaner before they begin the job.
Keep in mind that while hiring a professional cleaner can be more expensive than cleaning the walls yourself, it can also save you time and energy. Additionally, professionals often have access to specialized cleaning agents or equipment that may be more effective than what you can purchase at a hardware store.
Trisodium Phosphate (TSP)
For tough dirt and grime, Trisodium Phosphate (TSP) may be your best option. It is a powerful cleaner that is effective at removing stubborn stains and priming surfaces for painting. However, it’s important to note that TSP can be harmful if not used properly. Always wear gloves and protective eyewear when handling this chemical, and avoid contact with skin and eyes.
Here’s a step-by-step guide to using TSP for cleaning your walls before painting:
| Materials Needed: |
|---|
| – Trisodium Phosphate (TSP) |
| – Bucket |
| – Sponge or scrub brush |
| – Water |
| – Protective gloves |
| – Protective eyewear |
1. Prepare the solution: Mix 1/2 cup of TSP with 2 gallons of hot water in a bucket.
2. Protect yourself: Wear protective gloves and eyewear before handling the solution.
3. Apply the solution: Use a sponge or scrub brush to apply the TSP solution generously onto the wall, starting from the top and working your way down.
4. Let it sit: Allow the solution to sit for 10 to 15 minutes to allow it to loosen the dirt and grime.
5. Rinse: Rinse the wall thoroughly using clean water and a clean sponge or cloth.
6. Repeat if necessary: If stubborn stains remain, repeat the process until the wall is clean.
7. Dry the wall: Allow the wall to air dry completely before painting.
TSP is a powerful cleaner that can effectively remove stubborn dirt and stains. However, it should be used with caution, and always wear protective gear when handling it. Also, it’s important to note that TSP is not recommended for use on surfaces that are not water-resistant, such as wood, drywall, or plaster.
Vinegar and Water
One effective and affordable cleaning solution for walls is a mixture of vinegar and water. Here’s how you can use this method:
- Mix the solution. Combine equal parts of vinegar and water in a bucket or spray bottle.
- Test on a small area. Before applying the solution to the entire wall, test it on a small area to make sure it doesn’t cause any damage or discoloration.
- Apply the solution. Dip a sponge or cloth in the solution and apply it to the wall in circular motions.
- Rinse with clean water. After cleaning the wall with the vinegar and water solution, rinse it thoroughly with clean water.
- Dry the walls. Use a clean towel or allow the walls to air dry completely.
Benefits of using vinegar: Vinegar is a natural disinfectant and can help remove stains, grease and grime from painted walls. It is also a great solution for removing odors from the wall.
Be cautious: Vinegar may be too harsh for walls with delicate paint or wallpaper. Additionally, its smell may be overpowering, so consider proper ventilation while cleaning with vinegar.
Handling Tough Stains and Spots
Dealing with stubborn stains and spots on your walls can be a puzzling task, especially if you’re not sure what methods to use. Fortunately, there are various solutions you can try, depending on the type of stain or spot. From crayon marks to mold and mildew, there’s a solution to remove them and prepare your walls for painting. In this section, we’ll explore some effective cleaning methods for handling tough stains and spots on your walls.
Crayon and Marker
When it comes to dealing with crayon and marker stains on your walls, there are a few different methods you can try. Here are some steps to follow:
- Try erasing the marks: For light marks, you may be able to simply erase them using a pencil eraser or a melamine sponge. Rub gently and see if the marks come off.
- Use baking soda and water: Mix a small amount of baking soda with water to make a paste. Apply the paste to the mark and scrub gently with a soft-bristled brush or cloth. Rinse the wall with clean water and dry with a towel.
- Apply vinegar: If the baking soda method doesn’t work, try applying vinegar directly to the mark. Let it sit for a few minutes, then scrub with a soft brush or cloth. Rinse the wall with water and dry with a towel.
- Make a paste with baking soda and vinegar: If the vinegar method doesn’t work, mix baking soda and vinegar together to make a paste. Apply the paste to the mark and let it sit for a few minutes. Then, scrub gently with a soft brush or cloth. Rinse the wall with water and dry with a towel.
These methods should help remove the crayon and marker stains from your walls. If the stains are particularly stubborn, you may need to try a stronger chemical cleaner or consider repainting the affected area. Remember to always test any cleaning method in a small, inconspicuous area before applying it to the entire stain.
Grease and Oil
When it comes to dealing with grease and oil stains on your walls, it’s crucial to act fast to prevent the substance from spreading further. To tackle these stains effectively, follow these steps:
- Protect the area: Place drop cloths or old newspaper sheets around the affected area to prevent the grease and oil from spreading to other surfaces.
- Mix a cleaning solution: Combine a cup of baking soda with a half cup of warm water to create a paste. Alternatively, you can use a specialized degreaser available at most hardware stores.
- Apply the solution: Use a clean cloth or a sponge to apply the cleaning solution to the affected area. Rub the paste or degreaser onto the stain in a circular motion, starting from the outside and working your way in.
- Rinse and dry: Use a clean, damp cloth to rinse the area thoroughly, and then dry it with a clean towel or let it air dry.
Remember, timing is key with grease and oil stains. The sooner you act, the easier it will be to remove the stain. Don’t try to scrape the stain off, as this can damage the surface of the wall. Instead, be patient and persistent with your cleaning efforts, and the stain should eventually come off.
Mold and Mildew
When dealing with mold and mildew on your walls, it’s important to take extra precautions to protect yourself from the spores. Make sure to wear a mask and gloves before beginning the cleaning process.
Here are the steps to follow when cleaning mold and mildew:
- Mix the cleaning solution: In a bucket, mix equal parts water and white vinegar or bleach. This will create a powerful cleaning solution that will kill and remove any mold or mildew on your walls.
- Apply the cleaning solution: Using a sponge or cloth, apply the cleaning solution to the affected areas of your walls. Make sure to cover the entire area and let the cleaning solution sit for at least 30 minutes.
- Scrub the area: After the cleaning solution has had time to sit, scrub the area thoroughly with a scrub brush or sponge. If the mold or mildew is particularly stubborn, add a little baking soda to the cleaning solution to create a paste for extra scrubbing power.
- Rinse and dry the area: Once you’ve finished scrubbing the area, rinse it thoroughly with clean water and dry it well with a clean towel or fan. Make sure the area is completely dry before moving on to the next step.
- Apply a mold-resistant paint: After cleaning the area, it’s important to ensure that the mold and mildew won’t return. Apply a mold-resistant paint to the area to prevent any future growth.
Remember, mold and mildew can be harmful to your health, so it’s important to take proper precautions when cleaning it from your walls. If you have a severe mold or mildew problem, consider calling in a professional to handle the cleaning process.
Water Stains
Water stains on walls can be especially frustrating to deal with, as they can leave unsightly discoloration and may even cause mold growth if left untreated. Fortunately, there are several methods for removing water stains from walls.
One option is to mix a solution of equal parts white vinegar and water in a spray bottle. Spray the solution onto the water stain and use a brush or sponge to gently scrub the area. Repeat as necessary until the stain is fully removed. Be sure to use a clean cloth or towel to dry the area thoroughly.
Another option is to use a commercial stain remover, such as Zinsser Water Stain Remover. Follow the instructions on the product carefully, as application methods can vary. Typically, the product is applied directly to the stain and left to sit for a period of time before being wiped away with a clean towel or cloth.
If the water stain is particularly stubborn, you may need to resort to sanding the affected area. Use a fine-grit sandpaper and lightly sand the area until the stain is removed. Be sure to carefully wipe away any dust or debris with a damp cloth before proceeding.
Whatever method you choose, be sure to thoroughly dry the area after removing the water stain. This will help prevent mold growth and further water damage to the wall.
Water Stains Methods
| Method | Materials | Instructions |
|---|---|---|
| Vinegar and Water | Equal parts white vinegar and water, spray bottle, brush or sponge, clean cloth or towel | Spray solution onto water stain, use brush or sponge to gently scrub the area, repeat as necessary, dry thoroughly |
| Zinsser Water Stain Remover | Zinsser Water Stain Remover, clean towel or cloth | Follow product instructions carefully, apply directly to stain, let sit, wipe away with clean towel or cloth |
| Sanding | Fine-grit sandpaper, clean damp cloth | Lightly sand area until stain is removed, wipe away dust and debris with damp cloth |
Drying and Sanding
Once you’ve thoroughly cleaned your walls in preparation for painting, it’s important to ensure that they’re completely dry before sanding. Drying your walls can be a time-consuming process, but it’s crucial for achieving a smooth and even paint job. Additionally, sanding your walls helps to remove any remaining debris or imperfections, making the surface as smooth as possible for painting. In this section, we’ll cover some tips for effectively drying and sanding your walls to ensure a flawless finish.
Drying the Walls
Once you have finished cleaning your walls, it’s essential to make sure they’re completely dry before you start painting. Moisture on your walls can cause paint to bubble and peel, ruining your hard work. Here are some steps to follow for drying your walls:
- Let the Walls Air Dry: If you have time, it’s best to let your walls air dry completely. Turn on a fan or open a window to increase air circulation in the room. Avoid using a heat source to dry your walls too quickly, as this can cause the paint to crack.
- Use a Fan: If you’re short on time, you can use a fan or two to help speed up the drying process. Point the fan at the walls and switch it on at high power. Move it around the room to make sure it dries evenly.
- Use a Dehumidifier: In damp or humid conditions, it can be challenging to remove all moisture from your walls just by air drying them. Using a dehumidifier can help to remove excess moisture from the air.
Remember, it’s crucial to ensure your walls are completely dry before moving on to the next step. Take the time to check all areas of the wall, including corners and edges, to make sure there’s no lingering moisture. If you’re unsure, wait an additional 24 hours to ensure the walls are completely dry before painting.
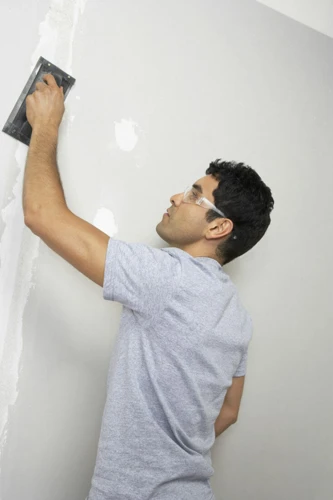
Sanding the Walls
Once you have allowed the walls to dry completely, it is time to sand them down. Sanding the walls is an important step in ensuring that the surface is smooth and free of imperfections before applying paint. Here are the steps to sand your walls:
- Begin with a Coarser Grit: Start with a 100-grit sandpaper and work your way up gradually to a finer grit. Start sanding in a circular motion, applying even pressure across the wall. Be careful not to sand too hard or you may damage the wall.
- Sand in One Direction: Once you have completed sanding with the coarser grit, switch to a 220-grit sandpaper and sand in one direction to smooth any remaining rough patches on the surface.
- Clean the Walls: Once you are done sanding, use a soft cloth to wipe down the walls and remove any dust or debris left over from the sanding process.
After sanding and cleaning the walls, it is important to inspect them closely for any remaining imperfections. If you notice any uneven areas or imperfections, repeat the sanding process with the coarser grit until the surface is smooth and even. Remember to take breaks and pace yourself to avoid over-exerting yourself. By following these steps, your walls will be ready for painting and will have a smooth, clean surface.
Final Tips
As you near the end of your extra surface cleaning journey, it’s important to keep a few final tips in mind to ensure a successful painting experience. These tips will not only help you achieve a smooth surface but also assist in maintaining the longevity of your new paint job. Let’s dive into some important things to consider before you start painting.
Start at the Top
When starting to clean your walls before painting, it’s important to begin at the top and work your way down. This is because the cleaning solution will trickle down as you work, and cleaning from the top will prevent dripping on previously cleaned areas.
To begin, use a ladder or step stool to reach the highest parts of the walls. It’s also helpful to use an extension pole with a rag or sponge attached to clean hard-to-reach areas.
| Steps for starting at the top: |
|---|
| – Use a ladder or step stool to reach high areas. |
| – Use an extension pole with a rag or sponge attached to clean hard-to-reach areas. |
| – Begin cleaning at the top of the wall and work your way down. |
| – This prevents cleaning solution from running down onto previously cleaned areas. |
By starting at the top, you’ll also be able to avoid having to re-clean areas that you’ve already finished. This will save you time and effort in the long run, allowing you to achieve a better result when your new coat of paint goes up.
It’s important to remember to start at the top when cleaning your walls before painting to ensure that you achieve the best results possible.
Don’t Skimp on Materials
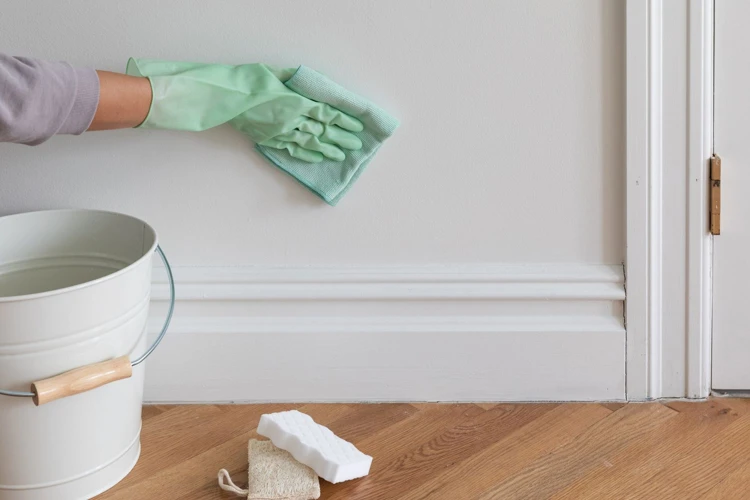
When it comes to painting your walls and specifically cleaning them before you do, it is important not to skimp on materials. Using high-quality cleaning materials and supplies can make all the difference in achieving a clean, smooth surface for your paint to adhere to. To ensure the best results, we recommend using the following materials:
- Sturdy cleaning gloves: to protect your hands from harsh cleaning chemicals
- Microfiber cloths or sponges: for gentle and effective cleaning that won’t damage your walls
- Buckets: to mix your cleaning solution and hold rinse water
- Cleaning solutions: such as soap and water, TSP, or vinegar and water
- Sanding materials: such as sandpaper, sanding sponges, or drywall sanding screens to smooth out any rough spots on your walls.
While buying all of these materials may seem like an extra expense, using subpar cleaning supplies can jeopardize the look and longevity of your painting job. Cheap cloths may leave behind lint or streaks, while poor-quality soap can fail to break down grime and grease on your walls. Investing in good materials upfront can save you from a potentially frustrating and costly do-over. Plus, most cleaning materials can be reused in future cleaning projects, making it a worthwhile investment in your home maintenance.
Take Breaks
Taking regular breaks while cleaning your walls is crucial to avoid burnout and exhaustion. It can be tempting to power through the cleaning process, but frequent breaks help you stay focused and energized. Below are some tips for taking breaks during the cleaning process:
| Tip 1 | Take a break every hour or so |
| Tip 2 | Stretch your muscles and take a walk around the room |
| Tip 3 | Stay hydrated by drinking water or a sports drink |
| Tip 4 | Eat a snack or light meal to keep your energy levels up |
| Tip 5 | Take deep breaths to help reduce stress |
Remember, taking breaks will ultimately help you work more efficiently and with greater success. Don’t hesitate to give yourself some time to recharge during the cleaning and painting process.
Conclusion
After following the steps outlined in this guide, you should now have walls that are clean, dry, and ready for the next coat of paint. Remember to take your time and not rush through the cleaning process, as proper preparation is crucial for achieving a professional-looking paint job.
It is important to gather all of the necessary supplies and take the necessary precautions to protect your space before beginning the cleaning process. By taking these precautions, you’ll ensure that your furniture, flooring, and other household items are safe from harm.
If you’re not sure which cleaning method to use, consider hiring a professional. They have the expertise and tools necessary to get the job done quickly and efficiently, and they can offer advice on how to handle tough stains and spots.
Remember that drying the walls thoroughly is key to achieving a successful painting job. This will prevent the paint from blistering or peeling and will give you a smooth surface to work with.
Finally, take care to follow the tips outlined in this guide, such as starting at the top, not skimping on materials, and taking breaks if necessary. By doing so, you’ll be well on your way to achieving a beautiful, long-lasting paint job that you can be proud of.
By following these steps and taking care to properly prepare your walls before painting, you can ensure that your paint job looks professional and lasts for years to come.
Frequently Asked Questions
What supplies do I need for extra surface cleaning?
You will need soap, water, trisodium phosphate (TSP), vinegar, sandpaper, cleaning gloves, and a bucket.
Can I paint over dirty walls?
No, it’s essential to clean walls before painting to ensure the paint adheres correctly and looks its best.
How do I protect my floors during the cleaning process?
You can cover your floors with plastic sheets, old towels, or drop cloths.
What’s the best method for cleaning walls with tough stains?
For tough stains, you can use trisodium phosphate (TSP) or a professional cleaner.
Can I use bleach to clean my walls?
No, bleach can damage your walls’ paint and textures, even causing discoloration.
Should I wear gloves when cleaning walls?
Yes, it’s recommended to wear cleaning gloves to protect your skin from harsh chemicals and irritants.
What’s the best way to remove water stains from walls?
A mixture of vinegar and water can be effective in removing water stains from walls.
How long should I wait before painting after cleaning the walls?
It’s advisable to wait for at least 24 hours for the walls to dry completely before painting.
Do I need to sand the walls after cleaning them?
Sanding is not mandatory, but it can be beneficial to even out any rough areas and create a smoother surface for painting.
What happens if I paint over dirty walls?
If you paint over dirty walls, the paint won’t adhere correctly, and it will compromise the overall finish and durability of the paint job.