Introduction
When it comes to painting your walls, surface preparation is key to achieving a professional-looking finish. From removing dust and debris to repairing damaged areas, each step ensures that your walls are primed for the perfect paint job. In this comprehensive guide, we’ll take you through each stage of the process, so you can prepare your walls with confidence and achieve a flawless finish every time.
Why Surface Cleaning is Important
Taking the time to properly clean and prepare your walls for painting is crucial for achieving a smooth and long-lasting finish. Surface cleaning is essential in order to remove any dirt, debris, or grime that has accumulated on your walls over time. If you skip this step, you run the risk of the paint not adhering properly to the surface, resulting in a patchy and uneven finish.
It is important to note that not all surfaces are created equal and may require different cleaning methods. For example, a wall in a high traffic area such as a hallway may require more thorough cleaning than a wall in a low traffic area such as a bedroom. This is why it is important to assess the condition of your walls before starting the cleaning process.
In addition to ensuring a smooth and even finish, surface cleaning also helps to identify any wall damage or imperfections that may need to be repaired before painting. This includes cracks, holes, or rough spots that can be filled and sanded down prior to painting.
Taking the time to properly clean and prep your walls before painting is a critical step that should not be skipped. By doing so, you can achieve a professional-looking finish that will last for years to come. For more information on the importance of surface cleaning before painting, check out our article on /surface-cleaning-before-painting/. Additionally, if you’re looking for the top tools for surface cleaning, be sure to read our article on /top-5-surface-cleaning-tools-for-painters/.
Gather Your Materials
Before you begin preparing your walls for painting, it’s important to gather all of the necessary materials. Having everything you need in one place will save you time and ensure that you don’t overlook any important steps. Proper surface cleaning is crucial for achieving a smooth and long-lasting paint finish. If you want to take extra care with your wall’s surface cleaning, you can follow our guide on walls extra surface cleaning for painting. Let’s find out what materials you’ll need and how to use them effectively. This step is essential, as it influences the overall quality of the final result. You can read more about the importance of proper surface cleaning for painting here.
What You’ll Need
Preparing your walls for painting can seem like a daunting task, but with the right tools and materials, it can be much easier than you think. To get started, here’s a list of everything you’ll need to clean and repair your walls:
- Dust mask: Protects your lungs from inhaling dust and debris while cleaning.
- Vacuum cleaner with a soft brush attachment: Ideal for removing dust and cobwebs from walls and ceilings.
- Soft, lint-free cloths: Use a dry cloth for dusting and a damp cloth for cleaning stains.
- Bucket: Used for mixing cleaning solution and rinsing the walls.
- Mild dish soap: Gentle yet effective at removing dirt and grime from walls.
- White vinegar: Can be used as a natural cleaning solution for tough stains and grime.
- Baking soda: Great for removing stubborn stains and odors from walls.
- Soft-bristled brush or sponge: Used for scrubbing away tough stains and grime.
- Putty knife: Needed for filling in cracks and holes in the walls.
- Spackling compound: Used for filling holes and cracks in the walls before applying paint.
- Sandpaper: Essential for smoothing rough patches and leveling out repairs before painting.
- Painter’s tape: Used to protect edges and trim from paint splatters.
- Primer: Necessary if the walls have dark colors or have been patched or repaired.
Having these materials on hand will make the process of preparing your walls for painting much more efficient and effective. Remember to wear a dust mask to protect yourself from debris, and use soft cloths and brushes to prevent damage to your walls. With these tools and a bit of elbow grease, you’ll have your walls looking clean and ready for a fresh coat of paint in no time.
Remove Dust and Debris
Before applying a fresh coat of paint to your walls, it’s important to ensure that the surface is clean and free of any debris that could potentially impact the quality of the finished product. Taking the time to properly clean your walls before painting will not only result in a more polished final look, but it will also ensure that the paint adheres properly and lasts for years to come. Here are some steps to help you remove dust and debris from your walls.
Vacuum the Walls
To begin preparing your walls for painting, the first step is to remove any dust and debris from the surface. The best way to do this is by vacuuming the walls.
Why is vacuuming important?
Any dust or debris left on the walls can interfere with the new paint adhering properly. If there is a lot of dust or debris on the walls, it can also create a mess when you start to wipe them down, potentially making your cleaning job even harder. Vacuuming the walls first will help ensure a cleaner surface for the next steps.
What materials will you need to vacuum the walls?
– Vacuum cleaner with a hose attachment
– Soft-bristled brush attachment (optional)
| Step 1 | Attach the hose to your vacuum cleaner. |
| Step 2 | Use the soft-bristled brush attachment (if available) to gently brush any loose dust or cobwebs off the walls. |
| Step 3 | Slowly run the vacuum nozzle over the walls from top to bottom. Use a steady and slow sweeping motion to avoid damaging the wall surface. |
| Step 4 | Make sure to vacuum corners and around baseboards where dust and debris can accumulate. |
| Step 5 | If necessary, repeat the vacuuming process until the walls are completely free of dust and debris. |
By vacuuming your walls before cleaning, you’ll remove most of the dust, cobwebs, and loose dirt that accumulated on them. Make sure to use a soft-bristled brush attachment to avoid damaging the walls. Once you’ve vacuumed your walls, you’ll be ready for the next step of surface cleaning.
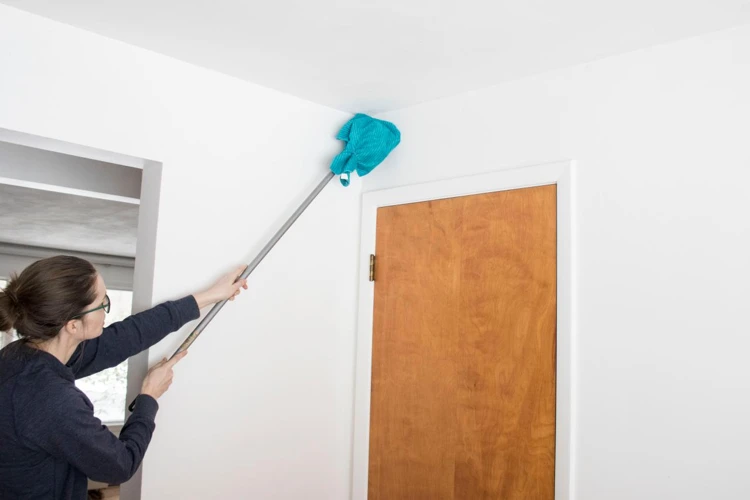
Wipe Down with a Soft Cloth
After vacuuming the walls, it’s time to wipe down the walls with a soft cloth. This step is crucial in ensuring that any remaining dust or dirt is removed before painting, allowing for maximum adhesion and a smoother finish. To wipe down your walls effectively, follow these steps:
- Start from the top: Working from the top of the wall down will prevent any dirty water from dripping down onto already cleaned areas.
- Use a gentle cleaning solution: Dampen your soft cloth with warm water and a gentle cleaning solution, such as dish soap or vinegar. Avoid using anything abrasive, as this can damage the paint or wall surface.
- Wipe gently: Use light pressure and gentle circular motions to wipe the walls, taking care not to extend beyond the area you’ve already cleaned.
- Change your cloth frequently: As your cloth becomes dirty, switch it out for a clean one. This will help prevent streaks and ensure that you’re removing as much dirt as possible.
- Don’t forget the corners: Use a clean, damp cloth to wipe down the corners and edges of the walls, where dust tends to accumulate.
By wiping down your walls with a soft cloth, you’ll be able to remove any remaining dust or dirt, leaving the surface clean and ready for painting.
Clean Tough Stains and Grime
Now that you’ve removed the dust and debris from your walls, it’s time to focus on any tough stains and grime that may be lingering on the surface. These blemishes can not only affect the appearance of your paint job, but they can also cause the paint to adhere poorly or become easily damaged. With a few simple steps and the right tools, you can effectively remove stains and grime from your walls, leaving them ready for a fresh coat of paint. Let’s explore the process together.
Use a Cleaning Solution
When it comes to tough stains and grime on your walls, a cleaning solution can be a lifesaver. But not all solutions are created equal, and some can be too harsh for your walls. Here is a table that outlines some safe and effective cleaning solutions for different types of stains on your walls:
| Stain Type | Cleaning Solution |
|---|---|
| Oily or greasy stains | A mixture of warm water and dish soap can help cut through the grease. Additionally, you can use baking soda or vinegar to break down tough stains. |
| Mildew or mold | A mixture of bleach and water is effective in killing mold and mildew. Just be sure to wear gloves and protect your eyes and lungs when using bleach. |
| Water stains | Diluted vinegar can be used to remove water stains on walls. Apply the solution to the stain and let it sit for a few minutes before wiping it away with a damp cloth. |
| Marker or crayon stains | Rubbing alcohol or hydrogen peroxide can be effective in removing these types of stains. Apply the solution to the stain and gently scrub with a soft brush. |
Keep in mind that before using any cleaning solution, it’s important to test it on an inconspicuous area of the wall first to make sure it won’t cause discoloration or damage. And always use gloves and protective eyewear when handling cleaning solutions.
Apply Solution to Stains
When it’s time to tackle tough stains and grime on your walls, simply wiping them down won’t always do the trick. That’s when it’s necessary to use a cleaning solution to break down the grime and remove it from the walls. Here’s how to properly apply a solution to stains:
- Step 1: Mix a cleaning solution according to the instructions on the label. Alternatively, you can make your own cleaning solution by mixing warm water and a mild detergent.
- Step 2: Pour the solution into a bucket, and dip a soft sponge or brush into the cleaning solution.
- Step 3: Apply the cleaning solution to the stain, working from the bottom up to avoid streaking the wall.
- Step 4: Allow the solution to sit on the stain for a few minutes to penetrate the grime.
- Step 5: Scrub the stain using a soft brush or sponge. Be careful not to scrub too hard and damage the wall’s surface.
- Step 6: Rinse the wall thoroughly with clean water to remove any remaining cleaning solution.
- Step 7: Allow the wall to dry completely before continuing with any repairs or prep work.
Remember to read the label of any commercial cleaning solution and use caution when applying it to your walls. Always spot test any cleaning solution on a small, inconspicuous area of the wall before using it on larger stains. By following these steps, you can remove tough stains and prep your walls for a fresh coat of paint.
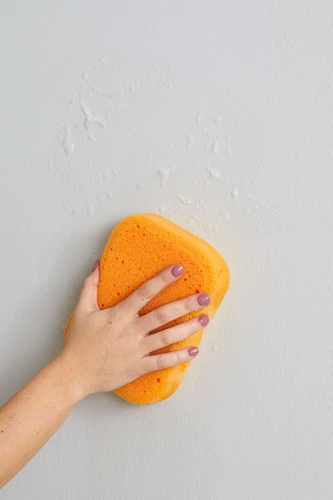
Scrub with a Soft Brush or Sponge
After applying the cleaning solution to the tough stains and grime on your walls, it’s time to start scrubbing with a soft brush or sponge. Using a brush or sponge will help to dislodge dirt and grime that has embedded itself into the wall’s surface. Here are some tips to help you scrub your walls more effectively:
| Tip #1 | Apply pressure, but not too much. The goal is to scrub away the dirt and grime without damaging the paint or wall surface. Avoid using hard-bristled brushes or abrasive scrubbers that can damage the wall. |
| Tip #2 | Work in sections. Divide your wall into sections and work on one section at a time. Scrubbing your entire wall at once can be overwhelming, and can result in you missing spots or skipping over tough stains and grime. |
| Tip #3 | Clean your brush or sponge regularly. As you scrub, dirt and grime will collect on your brush or sponge. Rinse it out regularly to avoid spreading dirt around the wall. |
| Tip #4 | Be patient. Tough stains and grime may require several passes with the brush or sponge before they’re fully removed. Take your time and don’t rush the process. |
Remember to rinse your walls thoroughly with clean water after scrubbing to remove any residue left behind by the cleaning solution. Once you’re finished, let your walls dry completely before moving on to the next step of the painting process.
Rinse Walls Thoroughly
After you’ve scrubbed away any tough stains and grime on your walls, it’s important to rinse them thoroughly to ensure that no residue is left behind before painting. Here’s how to do it:
- Fill a bucket with clean water.
- Use a clean sponge or cloth to wipe down the walls with the water, being careful not to oversaturate them.
- Change the water in the bucket as it becomes dirty.
- Repeat the process, rinsing the walls several times to ensure that they are completely clean.
- Allow the walls to air dry completely before moving on to the next step in the painting process.
It’s important not to skip this step, as any remaining residue on the walls can affect the adhesion of the paint and result in an uneven finish. Taking the time to rinse your walls thoroughly will ensure a successful end result for your painting project.
Repair Wall Damage
As you prepare your walls for painting, you may encounter some damage that needs to be addressed. Whether it’s cracks, holes, or rough spots, it’s important to repair these issues before applying a new coat of paint. Neglecting to do so can result in an uneven surface that will be noticeable under the fresh paint. But not to worry, with the right tools and techniques, you can easily fix any damage and have your walls looking brand new in no time. Let’s dive into the necessary steps for repairing wall damage.
Fill in Cracks and Holes
One important step in preparing your walls for painting is filling in any cracks or holes. These imperfections can not only affect the appearance of your finished paint job, but they can also cause issues with the durability of the paint. Here are the steps for filling in cracks and holes on your walls:
| Step 1: | Use a putty knife to scrape away any loose debris or chipped paint around the area that needs to be filled in. |
| Step 2: | Apply spackling paste or filler compound to the crack or hole using a putty knife. |
| Step 3: | Smooth the surface of the filler compound with the edge of the putty knife, making sure it is even with the surrounding wall surface. |
| Step 4: | Allow the filler compound to dry completely, following the manufacturer’s instructions. |
| Step 5: | Sand the area gently with a fine-grit sandpaper until it is smooth and level with the wall surface. Be careful not to sand away the surrounding paint. |
| Step 6: | Wipe away any dust with a clean, damp cloth before painting. |
By taking the time to properly fill in any cracks or holes on your walls, you will ensure a smooth and even surface for painting. This will not only improve the appearance of your finished paint job, but it will also increase its durability and longevity.
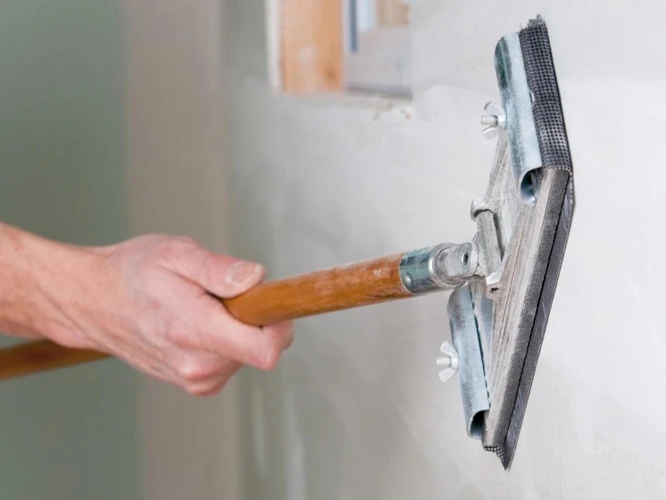
Sand Down Rough Spots
After filling in cracks and holes on your walls, you may notice some rough spots left behind. To ensure a smooth, even finish when painting, it’s important to sand down these areas. Here’s how:
1. Gather Materials:
– Fine grit sandpaper (120-220 grit)
– Sanding block or electric sander
– Dust mask
– Eye protection
2. Put on Protective Gear:
Before starting the sanding process, be sure to wear a dust mask and eye protection to avoid inhalation of dust particles and eye irritation.
3. Sand the Rough Spots:
Using the fine grit sandpaper, sand down the rough spots in a circular motion with either a sanding block or electric sander. Be careful not to apply too much pressure as it could damage the wall.
4. Clean Up the Dust:
Using a dry cloth or vacuum, clean up any remaining dust particles left behind by the sanding process.
5. Check Your Work:
Once you’ve finished sanding, run your hand over the area to ensure it’s smooth and free of rough patches. If necessary, repeat the sanding process until you’re satisfied with the result.
By following these steps, your walls will be free of rough spots and ready for an even paint application.
Prep Walls for Painting
Preparing your walls properly is a crucial step in achieving a flawless paint job. Any imperfections on the surface can affect the final result, leaving you with a less-than-perfect finish. In this section, we’ll go over the necessary steps for prepping your walls, including allowing them to dry completely, taping off trim and edges, and applying primer if necessary. By following these steps, you’ll be one step closer to achieving the professional-looking room of your dreams.
Let Walls Dry Completely
After you have cleaned and repaired your walls, it is essential to let them dry completely before moving forward with the next steps of painting. This is because painting on wet walls can cause the paint to streak, bubble, or peel, which would ruin your hard work.
How long should you wait? The answer to this question depends on several factors. The type of paint and primer you’re using, the humidity in the environment, and the temperature of the room all play a role in how long it takes for walls to dry. In general, it takes anywhere from 24 to 48 hours for walls to dry completely after cleaning and repairing.
How can you tell if walls are completely dry? One way to tell is by touch. Touch the wall with your fingers and see if it feels cool or damp. If it does, then it’s not dry yet. Another way to check is to use a moisture meter. This tool measures the amount of moisture in a material, and if it shows a reading of more than 10%, then it means the walls are still wet.
So, to ensure that your walls are completely dry, it’s best to wait a full 48 hours. This may seem like a long time, but keep in mind that it’s better to be safe than sorry when it comes to painting your walls. In the meantime, you can prep your painting area by laying down drop cloths and setting up your paint supplies.
Once your walls are dry, you can move forward with taping off any trim or edges that you don’t want to get paint on, and applying primer (if necessary). Taking the time to let your walls dry completely will ensure that your paint job goes smoothly and looks great in the end.
Tape Off Trim and Edges
It is crucial to tape off the trim and edges of your walls before painting to ensure that you achieve the cleanest and most professional-looking results. This process involves carefully applying painter’s tape to the areas of the walls where they meet with baseboards, windowsills, and other trim surfaces to prevent the paint from bleeding onto them.
Here are a few tips to keep in mind when you are taping off the trim and edges of your walls:
| Tip | Description |
|---|---|
| Use high-quality painter’s tape | Invest in painter’s tape that is designed specifically for painting and will not damage the underlying surfaces. Avoid using regular masking tape, which may not adhere well and can leave behind residue. |
| Apply the tape carefully | Make sure that the tape is flush against the wall and the trim or edge that you are covering. Use a smoothing tool or your fingers to press down on the edges of the tape, ensuring that there are no air pockets or gaps. |
| Remove the tape at the right time | Be sure to remove the painter’s tape before the paint fully dries to prevent it from peeling or chipping. However, avoid removing the tape too soon as it may cause the paint to smudge. |
By using painter’s tape and paying close attention to detail, you can effectively protect your walls’ trim and edges from paint during the painting process, which will result in a polished and professional-looking finish.
Apply Primer (if Necessary)
Once you have completed all of the necessary steps for cleaning and repairing your walls, you may need to apply a primer before you start painting. A primer is a type of paint that is specifically designed to help your new paint adhere better to the surface of your walls.
When is a Primer Necessary?
In some cases, you may not need to apply a primer. If you are painting over a clean and undamaged wall, then you may be able to apply your paint directly onto the surface. However, there are situations where a primer is necessary to ensure a smooth and long-lasting finish.
Here are some situations where you may need to apply a primer:
| Situation | Explanation |
|---|---|
| Stained or Damaged Walls | If your walls have stains or damage that cannot be fully removed, a primer can help to cover up these imperfections and provide a more even base for your paint. |
| Changing Wall Colors | If you are changing the color of your walls, a primer can help to hide the previous color and prevent it from bleeding through your new paint. |
| Porous or Uneven Surfaces | If your walls are porous or have an uneven texture, a primer can help to fill in the gaps and create a smoother base for your paint. |
How to Apply a Primer
If your situation calls for a primer, here are the steps you can follow to apply it:
1. Choose the right type of primer for your walls. There are different types of primers available, depending on the surface you are painting over and the type of paint you will be using. Consult with a paint specialist to help you choose the right one for your needs.
2. Using a paintbrush or roller, apply the primer to your walls. Start at the top of the wall and work your way down in smooth, even strokes. Be sure to apply the primer thinly and evenly, so that it dries evenly.
3. Allow the primer to dry completely. Check the label on the primer for drying time, as it can vary depending on the brand and type of product you are using.
4. Inspect the primer for any spots that may need touch-up. If necessary, add a second coat of primer and allow it to dry completely.
Once you have applied the primer, you are ready to start painting your walls. With a clean, smooth surface and a good base coat of primer, your walls will look like new and your paint will last longer.
Conclusion
In conclusion, preparing your walls for painting is an essential step in achieving a smooth and professional-looking finish for your home décor. By taking the time to properly clean and repair any damage, you can avoid the frustration of having to redo your work or settle for a less-than-perfect result.
Remember to gather all your materials beforehand to make the process smoother and more efficient. Vacuum and wipe down your walls to remove any dust and debris that can interfere with the quality of the paint job. For tough stains and grime, use a cleaning solution and a soft brush or sponge to scrub the walls thoroughly, and rinse them clean.
If there are any significant cracks or holes in your walls, be sure to fill them in and sand down any rough spots to ensure that the surface is smooth and even. Let the walls dry completely before taping off the trim and edges and applying a primer (if needed) to ensure the base layer for your paint is perfect.
With these steps in mind, you can prepare your walls for painting like a pro and achieve a beautiful and lasting result. So, take your time and put in the effort to prep your surfaces properly, and you’ll be rewarded with a room that’s not only visually appealing but also more durable and easy to maintain. Happy painting!
Frequently Asked Questions
How often should I clean my walls before painting?
It’s recommended to clean your walls at least once a year, especially before painting.
Can I use bleach to clean my walls?
No, bleach can damage and discolor some wall surfaces. Use a mild cleaning solution instead.
Do I need to remove pictures and decorations before cleaning the walls?
It’s best to remove any decorations before cleaning to ensure you can clean the entire surface of the wall.
What type of brush or sponge should I use to clean the walls?
Use a soft-bristled brush or a non-abrasive sponge to avoid damage to the wall surface.
Do I need to sand the walls before painting?
If you have any rough spots or damage on the walls, sanding it down can help create a smoother surface for painting.
Can I skip the primer step?
No, using a primer helps the paint adhere better to the surface and provides better coverage.
How long do I need to wait for the walls to dry after cleaning?
It can take anywhere from 2-24 hours depending on the humidity and temperature. Make sure the walls are completely dry before painting.
Can I use a pressure washer on the walls?
No, pressure washing can damage and strip the paint from the walls. Use a soft cloth and gentle cleaning solution instead.
Should I wear protective gear while cleaning my walls?
It’s always a good idea to wear gloves and eye protection while cleaning to avoid any irritation from the cleaning solution and debris.
Can I paint over a hole or crack without repairing it?
No, it’s best to properly repair any wall damage before painting to ensure a smooth surface and overall better end result.