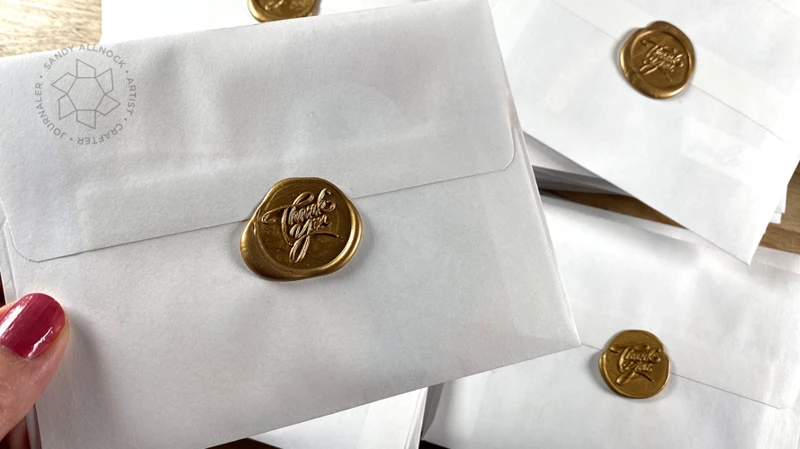
Picture this: You’ve just finished putting together a stunningly crafted letter, invitation, or gift. However, it still feels like it’s missing a touch of elegance and charm. You could simply send it off as is, but why not make it stand out with a classic wax seal? While wax seals were once reserved for royalty and official documents, they’ve made a comeback in recent years and are a beautiful addition to any piece of mail. In this complete guide, we’ll show you how to use a glue gun for wax sealing – a way that is quick, easy, and accessible. Plus, we’ll give you tips and tricks on how to customize your wax seals and troubleshoot common issues along the way. Let’s get started on turning your mail into a stunning work of art.
Why Use a Glue Gun?
Using a glue gun for wax sealing may seem unconventional, but it has become a popular method in recent years. This alternative method has its advantages and downsides to using traditional wax sealing techniques. Some people may wonder, “Why use a glue gun?” The advantages and disadvantages of using a glue gun for wax sealing will be discussed in this section, so you can decide for yourself if it’s the right method for you. To learn more about alternative uses for a glue gun, check out what to do with a glue gun.
Advantages of Using a Glue Gun for Wax Sealing
Using a glue gun for wax sealing has several advantages over traditional methods. Firstly, glue guns are more efficient and faster than using a candle or a melting spoon because they produce a consistent, reliable heat source that enables quicker and easier wax melting. Secondly, glue guns are more precise than using a candle, especially when it comes to shaping and sizing the wax. You can control the flow of the wax better, creating more elaborate designs and patterns.
Another advantage of using a glue gun for wax sealing is convenience. It eliminates the need for a flame, making it a safer option. Glue guns are easily accessible and can be found in any crafts or hardware store. Lastly, using a glue gun also creates less mess compared to other methods because the wax is contained within the glue gun and dispensed cleanly and quickly.
Using a glue gun for wax sealing is more efficient, precise, convenient, and less messy than traditional methods. If you’re interested in learning more about using glue guns, check out our guide on how to melt hot glue sticks.
Disadvantages of Using a Glue Gun for Wax Sealing
Using a glue gun for wax sealing definitely has its advantages, but it also has some disadvantages to consider. Let’s take a closer look at some of the downsides to using a glue gun for wax sealing.
| Disadvantages | Explanation |
|---|---|
| Difficult to Control Amount of Wax | Unlike with a traditional wax seal, using a glue gun can make it challenging to control the amount of wax that comes out. This can lead to inconsistencies in the size and shape of the seal. |
| Possible Wax Leakage | When using a glue gun, the wax can sometimes leak out of the bottom of the metal stamp. This can result in a messy seal and ruined envelopes or papers. |
| Cooling Time | The wax created by a glue gun takes longer to cool and harden than traditional wax used for sealing. This means that you may have to wait longer to handle the sealed envelope or paper, which can be inconvenient if you have multiple items to seal. |
| Uniformity | Because the wax does not melt and create a uniform seal, like the traditional wax does, there is a degree of unpredictability associated with using a glue gun. The seals might not look as uniform, affecting the aesthetics of your documents. |
Despite these disadvantages, using a glue gun remains a popular method for wax sealing because of its many benefits. However, it’s essential to keep these downsides in mind while using a glue gun for wax sealing. If you want to avoid wax leakage, check out tips for gluing foam rubber to wood or how to make hot glue stick better guides that might be helpful even for wax sealing.
How to Prepare for Wax Sealing
Preparing for wax sealing requires careful consideration and planning to ensure that your project turns out perfectly. Before jumping into the fun part of using your glue gun, a few key steps must be taken to set yourself up for success. These steps include selecting the right wax and seal, preparing your glue gun, and creating a workspace that is conducive to wax sealing. In this section, we will walk you through the process of preparing for wax sealing so that you can confidently move on to creating beautiful wax seals with your glue gun.
Choosing Your Wax and Seal
When it comes to wax sealing, there are several factors to consider, and one of the most important is choosing the right wax and seal. Not all waxes are created equal, and some are better suited for certain applications than others. Here’s what you need to know about choosing your wax and seal:
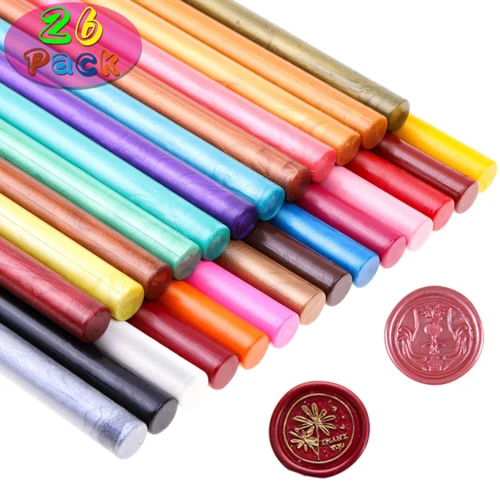
Types of Wax: First, consider the type of wax you want to use. There are several types of wax available on the market, including traditional sealing wax, flexible sealing wax, and faux wax. Traditional sealing wax is made from a blend of beeswax and resin, and is the most popular type of wax for sealing letters, invitations, and other documents. Flexible sealing wax, on the other hand, is a modern take on traditional sealing wax that contains synthetic resins to give it more flexibility and durability. Faux wax is a type of wax that resembles sealing wax but is made from plastic or other materials. It is typically used for decorative purposes and not for document sealing.
Seals: The next thing to consider is the seal you’ll use. The seal is what creates the design on the wax and can be made from a variety of materials, including brass, wood, and even plastic. The design on the seal can be anything from a simple monogram or initial to a more intricate design. Keep in mind that the size of your seal should be proportional to the size of your wax.
Color: Finally, consider the color of your wax. While traditional sealing wax is typically red, there are plenty of other colors available to suit your style and needs. From metallics to matte finishes, there’s a wax color out there for everyone.
Choosing the right wax and seal is essential to achieving a beautiful and professional-looking wax seal. So take the time to consider your options and choose the ones that best fit your needs and preferences.
Preparing Your Glue Gun
Before you start wax sealing with a glue gun, it’s important to prepare your tool properly. This will ensure your glue gun is functioning properly and that the wax will adhere correctly to the envelope. Here are the steps to prepare your glue gun for wax sealing:
| Step | Description |
|---|---|
| Step 1: | Choose the correct type of glue gun. You’ll need a high-temperature glue gun for wax sealing. Make sure that the glue gun you use has a temperature range of 350-400 degrees Fahrenheit. |
| Step 2: | Insert the glue stick into the back of the glue gun. Make sure that the stick is secure and that the end of the stick is flush with the end of the gun. |
| Step 3: | Plug in the glue gun and let it heat up for at least 5 minutes. This will ensure that the glue is melted and ready to use. |
| Step 4: | During this time, set up your workspace. Lay down a sheet of paper or plastic to protect your table or work surface. |
| Step 5: | Once the glue gun is heated up, test it on a scrap piece of paper. This will ensure that the glue is flowing smoothly and that there are no clogs. If the glue gun isn’t functioning properly, refer to troubleshooting section to address common issues that may arise. |
Following these steps will ensure that your glue gun is functioning properly and that you are ready to start wax sealing. Don’t forget to keep the glue gun upright when not in use to prevent the wax from flowing back into the gun and causing a clog. If you do experience a clog or other issue with your glue gun, refer to the troubleshooting section for tips on how to fix common issues.
Setting Up Your Workspace
Setting up your workspace is an important step in ensuring a smooth wax sealing process. It’s important to make sure that you have everything you need within easy reach and that your workspace is clean and organized.
Here are some tips for setting up your workspace for wax sealing:
- Choose a sturdy table or work surface that is flat and level. This will help ensure that your seals come out neat and even.
- Clear the surface of any clutter or debris to avoid any accidental spills or mishaps.
- Place your wax and seal within easy reach, along with any other tools you’ll be using for the process.
- Ensure that your glue gun is plugged in and heating up before you begin your project to avoid any unnecessary delays.
- Protect your workspace by placing a sheet of paper or cloth underneath your project area. This will help prevent any wax spills from making a mess.
By following these simple steps, you’ll be able to set up your workspace quickly and easily, and be well on your way to creating beautiful wax seals.
If you need some inspiration for other projects using glue guns, check out this article on how to glue sand on cardboard.
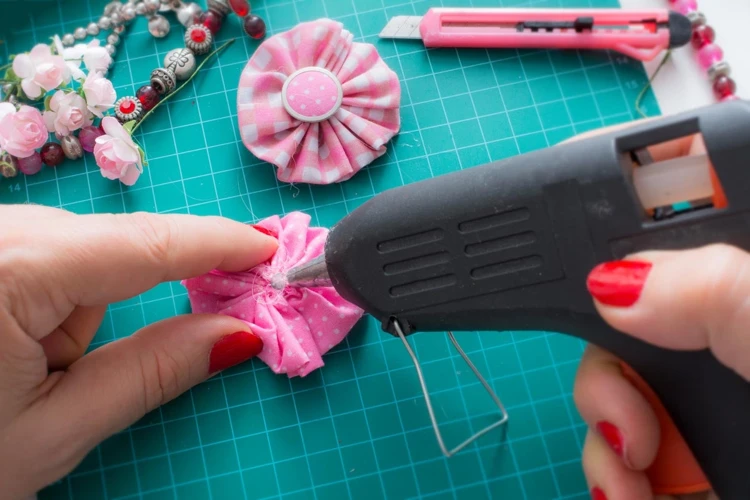
How to Wax Seal with a Glue Gun
Once you’ve prepared everything for wax sealing, it’s time to start. In this section, we’ll guide you through the process of **using a glue gun to wax seal your envelopes**. This method is quick, easy, and produces a beautiful result. Plus, you can experiment with different wax colors and seal designs to really make your envelopes pop. Let’s get started!
Step 1: Load Your Glue Gun
Before you begin wax sealing with a glue gun, you need to make sure that it is properly loaded with wax sticks or beads. Here’s how to load your glue gun step by step:
Step 1: First, insert your wax sticks or beads into the glue gun’s chamber. Make sure that you are using the correct size of glue gun for your wax sticks or beads.
Step 2: Turn on your glue gun and let it heat up according to the manufacturer’s instructions. For most glue guns, this will take about 5 minutes.
Step 3: Once the glue gun is heated up, press the trigger slowly to start feeding the wax sticks or beads into the heating chamber. As you do this, keep an eye on the level of wax inside the chamber. You don’t want to overfill it, as this can cause messy drips.
Step 4: Wait until the wax inside the glue gun has completely melted. This will be indicated by the glue gun’s heating light turning off or by a change in the consistency of the wax.
Step 5: Once your wax is melted, you’re ready to start sealing! It is important to work quickly, as the wax will start to harden and become difficult to work with after a few seconds of being extruded from the glue gun.
Remember, if you are using a glue gun for the first time or are unfamiliar with using wax sealing sticks or beads, it’s a good idea to practice on a scrap piece of paper or envelope before attempting to seal an important document.
In case you have any issues with loading your glue gun or melting wax you can find helpful information in our other guides on how to make piñata glue, which is better hotfix or glue, how to make fake teeth with hot glue, and even how to glue popcorn to paper.
Step 2: Prep Your Seal and Wax
Prepping your seal and wax is a crucial step in achieving a perfect wax seal with a glue gun. Here are the steps to follow:
- Select your seal: Choose a seal that is appropriate for the occasion. There are a variety of seals available including initials, symbols, and logos.
- Select your wax: Choose a wax that works well with your glue gun. It is essential to choose a high-quality wax that is flexible and durable. The most common types of wax for sealing are traditional wax and flexible wax.
- Melt the wax: Melt your wax in a hot glue gun. It is essential that the wax reaches its melting point before you apply it to your seal.
- Prepare your seal: While your wax is melting, prepare your seal by wiping it clean of any excess wax or debris, making sure that the surface of the seal is smooth and even.
- Apply the wax: Once the wax has melted, carefully dispense it onto the surface where you want to apply the seal. Using your glue gun, make sure that the wax spreads evenly and covers the entire surface.
- Attach the seal: While the wax is still hot, press your seal firmly onto the wax and hold it in place for a few seconds. This will ensure that the seal is embedded firmly into the wax.
By following these steps, you can be sure that your seal and wax are prepared correctly and will allow you to achieve a perfect wax seal every time. It’s essential to ensure that your seal is clean and free of any dirt or debris before applying the wax. Additionally, choosing a high-quality wax and seal will provide you with the best results.
Step 3: Glue the Wax to the Envelope
Once you have melted your wax using the glue gun, it’s time to glue the wax to the envelope. To do this, follow the steps below:
- Hold your glue gun at a 45-degree angle and position it about 1/4 inch above the envelope where you want the wax seal to be.
- Squeeze a dollop of melted wax onto the envelope. Be sure to apply enough wax to create a full seal, but not too much that it spills over the edges.
- Using a circular motion, move the glue gun tip around the perimeter of the dollop to even out the wax and spread it evenly across the envelope.
- Once you have evenly distributed the wax, let it cool for a few seconds.
- Take your prepped seal and press it firmly into the center of the wax while it is still soft, and hold it in place for about 10 seconds.
- Gently lift the seal off the wax, and voila! You have successfully created a wax seal on your envelope.
Remember to hold the glue gun steady and to apply even pressure when creating your wax seal. If you find that your wax is too thick or dripping too much, try adjusting the temperature of your glue gun or using less wax. And if the wax cracks or your seal isn’t picking up the design, you may need to re-melt the wax and try again.
Pro tip: If you want to add a personal touch to your wax seal, try incorporating some glitter or metallic dust into the wax before applying it to the envelope. This will give your seal a unique shimmering effect that will dazzle anyone who receives it.
Step 4: Press Your Seal onto the Wax
Once you’ve applied the hot glue to the wax on your envelope, it’s time to press the seal onto the wax. This step is essential to ensure that the seal sticks to the wax and creates a secure bond.
Step-by-Step Guide:
- Hold the seal by its handle and place it directly over the center of the hot wax on the envelope.
- Press down firmly and evenly on the seal for about 5-10 seconds.
- Without lifting the seal, wiggle it slightly to ensure that the wax has cooled and hardened enough to keep the seal in place.
- Once you’re confident that the seal has adhered to the wax properly, gently lift the seal off of the wax.
- Inspect the seal to make sure that it has left a clear and well-defined impression on the wax.
It’s important to note that if you lift the seal off too quickly, the wax may not have had enough time to cool and the impression may be blurred or incomplete. In contrast, if you wait too long, the wax will have hardened completely, and it will be difficult for the seal to adhere properly.
Pro Tips:
- If you want to add a bit of personal flair to your seal, you can apply a small amount of ink to the seal before pressing it onto the wax. This will create a more dramatic contrast and make your seal stand out even more.
- To ensure even pressure on the seal, try pressing down with the palm of your hand instead of your fingers.
- If you want to give your wax seal an extra touch of elegance, you can use metallic or pearlized wax instead of traditional colors.
- If you’re sealing a large number of envelopes, take breaks between each one to avoid burnout or fatigue.
By following these steps and tips, you can master the art of wax seal stamping with a glue gun and create beautiful, personalized seals for your letters, invitations, and documents.
Step 5: Remove the Seal
After you have applied enough pressure to your seal, it is time to remove it. Removing the seal from the wax can be a delicate process, but with the right technique, it can be easy and stress-free. Follow these steps to remove your seal from the wax:
- Hold the Envelope: Hold your envelope firmly with one hand, so it doesn’t move during the seal removal process.
- Loosen the Seal: With the other hand, gently wiggle the seal back and forth to loosen it from the wax. Avoid pulling it straight up, as this could damage the wax or the seal.
- Peel the Seal: Once the seal is loosened, use your fingers to gently peel it off the wax. Start at one corner and slowly work your way across the seal until it is completely removed.
- Clean Your Seal: After you remove the seal, use a soft cloth or tissue to wipe off any excess wax residue from the seal. This will help keep it clean and ready for the next use.
It is important to be gentle and patient when removing the seal from the wax. Rushing or using too much force can result in a messy and damaged seal. If you encounter any resistance while removing the seal, stop and wiggle it back and forth a bit more before continuing.
Troubleshooting

While wax sealing with a glue gun can be a fun and rewarding project for many people, it’s important to note that sometimes issues can arise. Don’t worry, though – many common problems have simple solutions. In this section, we’ll explore some troubleshooting tips to help you overcome any challenges you might face while wax sealing with a glue gun. From uneven seals to wax that won’t melt properly, we’ll provide you with helpful solutions to keep your project running smoothly and successfully. So, if you ever encounter any problems while wax sealing, just refer to these tips and get back to creating beautifully sealed envelopes and letters in no time.
Common Issues and How to Fix Them
When wax sealing with a glue gun, it’s common to experience a few issues. Here are some of the most common issues people face and how to fix them:
| Issue | Solution |
|---|---|
| Wax drips after it’s been applied | The most likely reason for this is that the wax was too hot when applied. Let it cool for a few seconds longer before pressing the seal into it. |
| Wax doesn’t stick | Several factors may be causing this, but the most common is that the glue gun isn’t hot enough. Make sure it’s at the right temperature before starting. |
| Wax breaks when removed from the seal | The seal may be too deep or the wax too thin. Try pressing gently or adding a little more wax to the seal for a stronger hold. |
| Seal doesn’t come out clean | This can happen if the seal is pressed too hard into the wax or if the wax wasn’t hot enough. Be gentle when pressing the seal and let the glue gun heat up fully before starting. |
If you encounter any other issues not listed here, don’t give up! There are often simple fixes to common wax sealing problems. Try adjusting the temperature, the amount of wax, or the pressure you’re applying when making a seal. With a little practice and troubleshooting, you’ll be able to achieve beautiful, professional-looking wax seals every time.
Tips and Tricks
Now that you’ve learned the basics of wax sealing with a glue gun, it’s time to explore some tips and tricks that can take your wax sealing game to the next level. By using these techniques, you can create unique wax seals that stand out and add a personal touch to your envelopes, invitations, or gifts. So, grab your glue gun and wax and get ready to try out these creative and practical tips. Here are a few ideas to get you started:
How to Create Custom Wax Seals
Creating your own custom wax seals can add a personalized touch to your envelopes and correspondence. Here are some steps you can take to make your own custom wax seal:
- Choose a design: Decide on a design that you want to use for your custom wax seal. This can be a monogram, a symbol, or even a simple pattern. Make sure the design is something that will be easily recognizable when pressed onto the wax seal.
- Purchase a sealing wax kit: You will need a sealing wax kit to make your custom wax seal. These kits usually include a stamp or seal with your chosen design, as well as wax and a glue gun. You can find these kits online or at your local craft store.
- Melt the wax: Follow the instructions that come with your sealing wax kit to melt the wax. You can use a glue gun to melt the wax quickly and easily.
- Stamp your design: Once the wax is melted, use the stamp or seal to press your custom design into the wax. Hold the stamp in place for a few seconds to ensure a clean impression.
- Let the wax cool: Allow the wax to cool and harden before handling the envelope. This will ensure that your custom wax seal stays in place.
Creating your own custom wax seals can be a fun and creative way to add a personal touch to your correspondence. By following these steps, you can create a unique and memorable wax seal that will make your envelopes stand out in the mail.
How to Use Wax Seals in Creative Ways
Wax seals are a great way to add a touch of elegance and personalization to your letters, invitations, or even gifts. But did you know that wax seals can also be used in creative ways? Here are some ideas to get you started:
| Use | Description |
| Sealing jars and bottles | Use wax seals to seal the lids of jars and bottles, adding a decorative touch to your kitchen or bathroom. |
| Gift wrapping | Use wax seals instead of traditional tape or ribbon to seal your gift wrapping. Your recipient will be delighted with the added touch of elegance. |
| Embellishing home decor | Add flair to your home decor by using wax seals on picture frames, mirrors, or even furniture. Use a glue gun to apply the seal and create a unique, one-of-a-kind piece. |
| Creating jewelry | Use wax seals to create unique and personal jewelry. You can attach them to necklaces, bracelets, or even use them as earrings. |
| Personalizing wedding details | Use wax seals to add a personal touch to your wedding. From invitations to place cards, wax seals can add a touch of elegance and set your wedding apart from the rest. |
These are just a few ideas to get your creative juices flowing. Don’t be afraid to experiment with different colors and designs to make your wax seals truly unique. With the help of a glue gun, you can add a touch of elegance and personality to almost anything.
Caring for Your Wax Seal and Glue Gun
After you have completed your wax sealing project, it is important to properly care for your wax seal and glue gun so that they will last for a long time. Here are some tips for properly caring for your wax seal and glue gun:
For the Wax Seal:
- Store your wax seal in a cool, dry place to prevent it from melting or warping.
- Handle your wax seal carefully to avoid breaking or cracking it.
- If your wax seal becomes dirty, gently clean it with a soft cloth and mild soap. Do not use any harsh chemicals or abrasive materials on the wax seal.
For the Glue Gun:
- Clean your glue gun after each use to prevent glue build-up that can clog the nozzle or damage the gun.
- Unplug your glue gun and let it cool down completely before cleaning.
- Use a damp cloth or alcohol wipe to clean the glue gun, being careful not to touch the hot nozzle.
- Store your glue gun in a safe place away from children and pets.
By following these simple tips, you can ensure that your wax seal and glue gun will last for many wax sealing projects to come. Proper care and maintenance will help you to get the most out of your tools, so take the time to store and clean them properly.
Conclusion
After following this complete guide on how to wax seal with a glue gun, you should be well-equipped to create beautiful wax seals on your envelopes, invitations, and other special documents. Using a glue gun for wax sealing may not be the most traditional method, but it certainly has its advantages and can be a convenient and easy option for those new to the process.
Remember to choose the right type of wax and seal for your project, and prepare your glue gun appropriately to ensure smooth and even melting. Setting up your workspace can also help make the process go smoothly and prevent any accidental spills or messes.
By following the step-by-step instructions for loading the glue gun, prepping the seal and wax, gluing the wax to the envelope, and pressing the seal onto the wax, you can achieve a perfectly sealed and elegant finished product.
If you encounter any issues or problems along the way, consult the troubleshooting section for solutions to common wax sealing problems.
Finally, don’t be afraid to get creative with your wax seals! Custom wax seals and using them in unique and creative ways can add a personal touch to your correspondence and make a lasting impression on your recipients.
Remember to also take proper care of your wax seal and glue gun so that they last for many future projects to come. By following these tips and tricks and practicing your wax sealing skills, you can become a pro at this classic art form and add a touch of timeless elegance to your correspondence.
Frequently Asked Questions
1. Can you use a glue gun for wax sealing?
Yes, a glue gun can be used for wax sealing. However, it requires a specific type of glue gun and wax.
2. What kind of glue gun do I need for wax sealing?
You will need a low-temperature glue gun, also known as a cool melt glue gun, to prevent the wax from melting.
3. Can any type of wax be used with a glue gun?
No, only low-temperature or cool melt wax sticks can be used with a glue gun to prevent the wax from melting.
4. Can I use a glue gun for multiple wax seals at once?
It is possible, but it is best to work on one wax seal at a time to ensure accuracy and prevent mistakes.
5. How do I make sure the wax seal is even and centered?
Take your time and apply the wax evenly to the envelope. Position the seal in the center of the wax and hold it steady until the wax cools and hardens.
6. How do I create a custom wax seal?
You can create a custom wax seal by designing a stamp or having one made, then using it to press into the wax before it cools and hardens.
7. Can I reuse a wax seal stamp?
Yes, wax seal stamps can be reused for multiple seals. Simply wipe off any excess wax after each use.
8. How should I store my glue gun and wax sticks?
Store your glue gun and wax sticks in a cool, dry place away from direct sunlight to prevent melting or warping.
9. Can I use a hair dryer instead of a glue gun?
It is possible, but it may be more difficult to control the temperature and create an even wax seal.
10. How long does it take for the wax to cool and harden?
The wax typically takes around 10-15 seconds to cool and harden, but it may take longer in cooler temperatures.