As you stand in front of the mirror preparing for a night out, you realize that your lashes are looking a little lackluster. You want to add a little extra glam to your makeup routine, and what better way to do that than with false lashes? However, if you’re new to using eyelash glue, it can be a little intimidating. Not to worry, we’re here to help! In this beginner’s guide, we’ll cover everything from the types of eyelash glue available to troubleshooting common issues. So, grab your favorite false lashes and let’s get started!
Types of Eyelash Glue
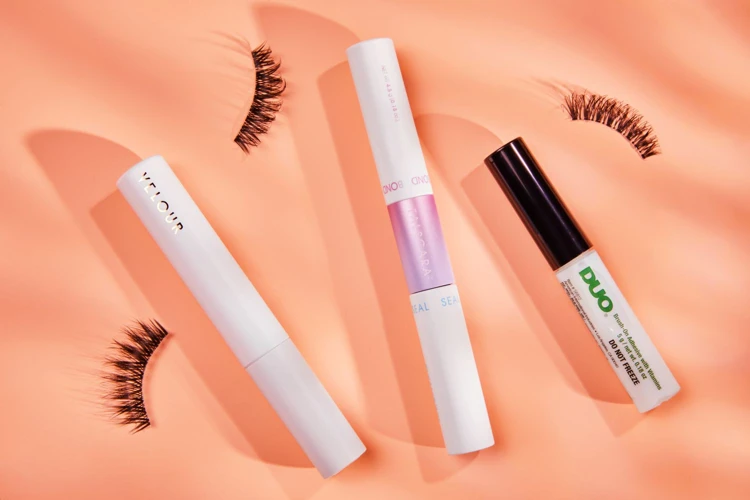
When it comes to enhancing your natural lashes or creating a dramatic look, eyelash glue is an essential tool for achieving the perfect style. However, with so many types of eyelash glues available on the market, it can be tough to know which product to use. Do you opt for clear or colored glue? What about strip versus individual eyelash glue? To help clear up any confusion, we’ve outlined the different types of eyelash glue available and their benefits. So whether you’re a beginner or an experienced lash user, this guide will help you choose the right type of adhesive for your needs. To learn more about eyelash glues, check out this article on what glue to use for fake eyelashes.
1. Strip eyelash glue
Strip eyelash glue is a popular adhesive choice for those who wear strip eyelashes. It is a temporary glue that is easy to use and is perfect for those who do not want to commit to permanent lash extensions. There are different types of strip eyelash glue available in the market with various features. Below are some common types of strip eyelash glue along with their brief description and unique features:
| Types of Strip Eyelash Glue | Description | Unique Features |
|---|---|---|
| Latex-based glue | A popular type of strip eyelash glue that is made from natural rubber latex. | – It is easy to find and widely available in the market. – It dries quickly and holds the lashes in place for several hours. – It is affordable and perfect for beginners who want to try strip lashes. |
| Non-latex glue | As the name suggests, this glue is free from natural rubber latex and is made from synthetic ingredients. | – It is perfect for those who have sensitive skin, allergies, or are allergic to latex. – It is water-resistant and holds the lashes in place for a longer period. – It is slightly more expensive than latex glue, but the benefits are worth the extra cost. |
| Clear glue | Clear glue is a popular choice for strip lashes as it dries transparent and does not leave any residue on the lashes. | – It blends well with natural lashes and makes the falsies look more natural. – It dries quickly and holds the lashes in place for hours. – It is perfect for those who do not want any visible glue marks on their lashes. |
| Colored glue | Colored glue is a fun and exciting way to add a pop of color to your falsies. | – It is available in a variety of colors, including black, brown, red, and blue. – It can be used to create different looks and styles. – It is perfect for those who want to experiment with different lash looks. |
If you’re a beginner, it is recommended to use latex-based or non-latex strip eyelash glue for their ease of use and affordability. Ultimately, the type of eyelash glue you choose depends on your personal preference and requirements.
For more information on choosing the best lash glue, please refer to our article on What is the Best Lash Glue.
2. Individual eyelash glue
Individual eyelash glue is specifically designed to adhere each single lash extension to your natural lashes. This type of glue comes in a smaller tube compared to strip eyelash glue, and it has a thinner consistency. Individual eyelash glue is usually more long-lasting than strip eyelash glue, and it’s suitable for those who want a more natural-looking finish.
One important factor to consider when choosing individual eyelash glue is the setting time. Some individual eyelash glue can take a longer time to dry completely, while others can dry much quicker. If you’re a beginner, it’s recommended to choose a slower-drying glue to give you more time to work on your extensions.
Another important consideration is the ingredients in the glue. Individual eyelash glue usually contains cyanoacrylate, which can cause allergic reactions in some people. If you have sensitive eyes or skin, it’s best to opt for a hypoallergenic glue that is free from formaldehyde and latex.
When applying individual eyelash glue, it’s important to work in small sections. Apply a small amount of glue onto the base of one extension using a micro-brush or a glue ring. Using tweezers, gently place the extension onto your natural lash, making sure not to touch the eyelid. Repeat the process until you achieve your desired look.
If you experience any issues with individual eyelash glue, there are some troubleshooting tips that you can try. If the glue is too sticky, try using a primer before applying the glue. If the glue is not sticking enough, you may need to switch to a stronger adhesive. If the glue is clumpy, try using a different glue or adjust the amount of glue you’re using. If the lashes won’t stay put, try placing them closer to the root of your natural lashes. If the glue is irritating your eyes, remove the lashes immediately and seek medical attention if necessary.
If you want to learn more about eyelash glue, check out our article on what glue to use for individual lashes.
3. Clear eyelash glue
Clear eyelash glue is a great option for those who prefer a natural look but still want their lashes to stay put. This type of eyelash glue dries clear and invisible, making it an ideal choice for everyday wear or when you want to keep the focus on your eyes. Here are some features and benefits of using clear eyelash glue:
- Easy to use: Clear eyelash glue is easy to apply and can be used with both strip and individual lashes.
- Long-lasting: This type of glue has a strong hold and can keep your lashes in place for several hours.
- Safe for sensitive skin: Clear eyelash glue is usually gentle and safe to use on sensitive skin, making it a great option for those with allergies or sensitivities to other types of glue.
- No clumping: Clear eyelash glue formulas are designed to dry clear without leaving any clumps or residue on your lashes.
- Customizable: Clear glue can be used with any color or style of lashes, allowing you to create a customized look that suits your preferences.
However, one downside of clear eyelash glue is that it can take longer to dry compared to other types of glue. This means you’ll need to wait a bit longer before applying your lashes to ensure they stay in place. It’s also important to choose a high-quality clear eyelash glue that won’t turn white or become clumpy throughout the day.
If you’re a beginner and have never used clear eyelash glue before, it’s important to test it out before applying your lashes. Place a small amount of the glue on the back of your hand and wait a few minutes to see if you have an allergic reaction.
Clear eyelash glue is a versatile and reliable option for those who want a natural-looking hold for their lashes. If you’re interested in learning more about lash glue or how to troubleshoot common issues with it, check out our articles on what lash glue do lash techs use or why is my lash glue turning white.
4. Colored eyelash glue
When it comes to colored eyelash glue, it can be a fun way to add some variety to your lash game. These glues come in a range of colors from classic black to bold and vibrant shades. However, it is important to note that colored eyelash glue is not as widely available as traditional clear or black glue.
Table below outlines the pros and cons of colored eyelash glue:
| Pros | Cons |
|---|---|
|
|
If you do choose to use colored eyelash glue, it is important to keep in mind that it may not last as long or hold as well as traditional clear or black glue. You may also need to experiment with different brands or shades to find the right one for you. Additionally, it is important to properly neutralize colored eyelash glue to prevent staining or discoloration of your natural lashes. To learn more about this process, check out our article on how to neutralize lash glue.
Choosing the Right Eyelash Glue
Choosing the perfect eyelash glue is an important factor in achieving a flawless lash look that can last all day. With so many options available in the market, it can be overwhelming to decide which type of glue is right for you. It’s important to consider various factors while making your decision, such as your daily plans, the ingredients in the glue, your comfort level, and your budget. In this section, we will take a closer look at each of these factors and provide tips to help you make the right choice. So, before you start applying your lashes, let’s explore how to choose the right eyelash glue that will keep your lashes in place all day long.
If you face any issues with the eyelash glue, such as it not sticking properly or coming out, don’t worry, we have got you covered. Check out our internal link on /why-isn-t-my-lash-glue-sticking/ for some helpful tips and tricks to resolve these common issues.
1. Consider your plans for the day
When deciding on which eyelash glue to use, it’s important to consider your plans for the day. If you’re going to a formal event or you plan on wearing your lashes all day, you should opt for a stronger adhesive that will last longer. On the other hand, if you’re just going out for a few hours or you’re new to using eyelash glue, a milder adhesive may be a better choice.
Remember: Some lash glues may require time to dry and set properly. If you’re short on time, consider using a quick-drying eyelash glue. Additionally, some types of glue can withstand humidity and moisture, making them ideal for more active days while others can be damaged by these conditions.
Consider your lifestyle, exercise routines, and work environment. If you work in humid or hot conditions, for example, you may want to choose a waterproof eyelash glue. Similarly, if you plan on going swimming or doing water sports, this type of glue will hold up better than a regular adhesive.
Tip: Be sure to read the label carefully to determine the lifepan of your glue. Knowing how long the adhesive will last will help you make the right decisions.
If your plans include wearing your lashes for several hours or even all day, you need to use a lash glue that has a strong hold. As a rule of thumb, strip lash glues can last up to 24 hours. However, individual lash glue can last longer, up to several days with careful care.
Tip: Apply a methol or aloe vera-infused product before applying the eyelash glue to create a barrier or a primer. This helps keep the glue in place and provides nourishment to your lashes.
Consider the type of eyelash you are using as this will also determine the strength of the glue needed. With heavier lashes, a stronger adhesive is required to keep them in place. Lightweight lashes, on the other hand, doesn’t require a strong hold and can be styled with a lighter adhesive.
If you’re unsure about the type of eyelash glue to buy, you can always consult a sales representative at a beauty supply store for recommendations. Additionally, a patch test on your arm, or a test using a small amount of glue can provide you with useful information when choosing the right adhesive.
Related Link: How Long Does Strip Lash Glue Last?
2. Check the ingredients
When choosing the right eyelash glue, it’s important to check the ingredients to avoid any potential allergic reactions or irritation. Look for formulas that are hypoallergenic and free of harmful chemicals such as formaldehyde and latex which are common allergens.
Here are some ingredients to look for in eyelash glues:
| Ingredient | Purpose |
|---|---|
| Cyanoacrylate | Main bonding ingredient |
| Polyvinyl acetate (PVA) | Helps with holding the lashes in place |
| Water | Helps the glue dry quickly |
| Polymethyl methacrylate (PMMA) | Forms a film on your skin |
Some eyelash glues may also contain additional ingredients, such as vitamins and peptides, that help keep your lashes healthy and nourished.
It’s also important to note that some ingredients, like cyanoacrylate, can cause the glue to harden or become clumpy over time. If you experience this issue, try softening the glue before use.
If you notice that your glue is not coming out of the tube properly, it could be due to dried-up residue. Here’s how to fix it.
By checking the ingredients in your eyelash glue, you can ensure that it’s safe and suitable for your needs.
3. Determine your comfort level
When choosing the right eyelash glue, it’s important to consider your comfort level. Some people may have more sensitive skin than others, making certain types of eyelash glue uncomfortable to wear. Here are some factors to consider when determining your comfort level:
- Adhesive strength: If you have never worn false lashes before, you may want to start with a less strong adhesive to get used to the feeling. Some glues are marketed as “gentle” or “sensitive” and are designed for people with delicate skin.
- Fumes: Certain types of eyelash glue contain ingredients that emit fumes when they dry, which can cause irritation or discomfort. If you’re sensitive to strong odors, look for a glue that’s labeled as “low-fume” or “non-fume.”
- Drying time: Some eyelash glues can take longer to dry than others, which can be uncomfortable if you have to keep your eyes closed for an extended period of time. If you want a quicker drying time, look for a glue that dries in 10-15 seconds.
- Texture: The texture of the glue can also affect how comfortable it is to wear. Some people prefer a thinner, more liquid consistency, while others prefer a thicker, creamier texture that’s easier to control.
It’s important to remember that everyone’s comfort level is different, and what works for one person may not work for another. Be sure to do a patch test on your skin before using any new product, and read reviews or ask for recommendations from friends to find a glue that will work best for you.
4. Factor in your budget
When it comes to buying eyelash glue, considering your budget is an important factor. You don’t want to overspend on a product that you won’t use frequently or that doesn’t fit your needs. On the other hand, you also want to avoid buying something too cheap that may harm your eyes.
Here are some tips for managing your budget while still getting the right product for you:
- Compare prices of different brands – Don’t always go for the most expensive or cheapest option. Look around and compare prices.
- Consider the size of the glue – Some stores sell eyelash glue in large bottles, but if you don’t use it often then a smaller size might be better for your budget.
- Look for discounts or promotions – It never hurts to look for a good deal. Check if there are any promotions or coupons so that you can save some money.
- Buy in bulk – If you use eyelash glue frequently or share with friends, it might be cost-effective to buy a larger quantity all at once.
Remember, just because a product is expensive doesn’t always mean it’s the best for you. Finding the right eyelash glue within your budget can take some trial and error, but it’s worth it to avoid irritation or discomfort.
Application Technique

So, you have chosen the perfect eyelash glue and now it’s time to apply those gorgeous lashes. But wait, you might be wondering how to apply it correctly to avoid any mishaps. Fear not, we have got you covered. In this section, we will guide you through the step-by-step process of applying eyelash glue like a pro. Grab your glue and let’s get started!
1. Prep your eyelashes
Before you begin applying eyelash glue, it’s important to properly prepare your eyelashes. This step ensures that the glue adheres correctly and your lashes stay in place throughout the day. To prep your eyelashes for glue application, follow these steps:
- Clean your lashes: Use a gentle eye makeup remover to clean your lashes and remove any dirt or debris. This will ensure that the glue adheres to your natural lashes and not any leftover makeup.
- Curl your lashes: Use an eyelash curler to curl your natural lashes. This step ensures that your false lashes blend in better with your natural lashes, creating a seamless look. If you have trouble curling your lashes, heat up your eyelash curler with a blow dryer for a few seconds before using it.
- Trim your lashes: If your false lashes are too long for your eye shape, use a pair of scissors to trim them down to size. Hold the lashes up to your natural lash line to determine how much to cut off. It’s important to trim from the outer end of the lash strip and not the inner end, as this can cause the lashes to look unnatural.
- Apply mascara: Applying mascara to your natural lashes before applying false lashes can help them blend in better. It also gives the glue something to adhere to, making the lashes stay in place for longer. Make sure to let the mascara dry completely before applying the false lashes.
By properly preparing your lashes before applying eyelash glue, you’ll ensure that your false lashes stay in place all day long while also blending seamlessly with your natural lashes.
2. Apply the glue
Now that you’ve prepped your eyelashes, it’s time to apply the glue. Follow these steps for a flawless application:
- Take the eyelash glue and carefully squeeze out a small amount onto the back of your hand. It’s important to only use a small amount of glue as too much can cause clumping and discomfort.
- Using a pair of tweezers or an eyelash applicator, gently pick up one of the false eyelashes from its tray. Be sure to grip it at the band and avoid touching the actual lash fibers as this can damage them.
- Dip the end of the lash band into the glue. Make sure the entire band is coated, but be careful not to apply too much glue as it can overflow and get into your eyes.
- Wait a few seconds for the glue to become tacky. This is an important step as it allows the glue to become slightly sticky, making it easier to attach the lashes to your natural lash line.
- Starting from the outer corner of your eye, gently place the false lash onto your natural lash line. Using your fingers or the eyelash applicator, gently press down on the lash band to ensure it is securely attached.
- Repeat the same steps for the other eye. Remember to always apply the lash band as close to your natural lash line as possible for the most natural look.
Pro Tip: If you’re having trouble getting the lashes to stick, try bending the lash band slightly to fit the curve of your eyelid. This will also help prevent the lashes from lifting throughout the day.
3. Wait a few seconds
After applying the eyelash glue, it’s important to wait a few seconds before placing the lashes. This allows the glue to become tackier and stickier, which will help the lashes adhere better. The exact amount of time you should wait can vary depending on the type of glue you are using and the specific instructions provided by the manufacturer.
Here’s a rough guide to follow:
| Type of Glue | Wait Time |
|---|---|
| Quick-drying glue | 5-10 seconds |
| Semi-drying glue | 15-20 seconds |
| Slow-drying glue | 30-60 seconds |
If you’re unsure about how long to wait, it’s always better to err on the side of caution and wait a little longer. Rushing the process could result in the lashes not sticking properly or even falling off completely. Remember, the key to successful lash application is patience and precision.
While waiting for the glue to dry, it’s also important to avoid blinking or touching your eyelids to prevent the lashes from shifting. Once the glue has become tacky, you can carefully place the lashes onto your lash line, starting from the inner corner and working your way outwards. Use a clean pair of tweezers or your fingers to gently press the lashes into place and hold them there for a few seconds to ensure a strong bond.
By following these steps, you’ll be able to achieve a flawless and long-lasting lash look that will make your eyes pop and turn heads wherever you go.
4. Place the lashes
After waiting a few seconds for the glue to become tacky, it’s time to place your lashes. This step can be a bit tricky, but with practice, it’ll become second nature.
Here’s a step-by-step guide on how to place your lashes using eyelash glue:
| Step 1: |
Using your fingers or a pair of tweezers, pick up the lashes by the ends. Be careful not to touch the glue with your fingers or tweezers. |
| Step 2: |
Keeping your eyes open, place the center of the lash strip on top of your natural lash line. Start from the center of your eye and work your way outward. |
| Step 3: |
Once the center of the lash strip is in the right position, use your fingers or tweezers to gently press the strip onto your natural lash line, working your way out to the outer corners of your eye. Be sure to press down on the ends, as those tend to lift up the most. |
| Step 4: |
If you’re having trouble getting the lashes to stick, you can use a clean, angled eyeliner brush to apply a small amount of eyelash glue directly to the ends of the lash strip. This will help keep them in place. |
Remember, practice makes perfect when it comes to applying false lashes. Don’t get discouraged if it takes a few tries to get them to sit just right. With a little patience and practice, you’ll be a pro in no time.
Removing Eyelash Glue
Removing eyelash glue can be a bit of a challenge, especially if it’s your first time doing it. You want to make sure you remove the glue thoroughly but also gently without damaging your natural lashes. With so many makeup removers and techniques out there, it can be perplexing to figure out what’s best for you. Luckily, we’ve researched the best methods for removing eyelash glue and compiled them into this guide. So, let’s get started!
1. Choose the right makeup remover
When it comes to removing eyelash glue, choosing the right makeup remover is crucial. Not all makeup removers are created equal, and using the wrong one can lead to irritation and damage to your delicate eye area.
First and foremost, avoid using oil-based makeup removers when removing eyelash glue. These types of removers can weaken the glue bond and cause your lashes to fall off prematurely.
Instead, opt for a gentle, water-based makeup remover that is specifically formulated for use around the eye area. Look for products that are labeled as “eye makeup removers” or “gentle makeup removers.”
If you have sensitive skin or eyes, consider using a fragrance-free makeup remover. Fragrances can be irritating to the skin and eyes, so choosing a product that is formulated without them can help prevent redness and discomfort.
To make sure you’re getting a high-quality product, check the ingredients list before purchasing a makeup remover. Avoid products that contain alcohol or other harsh ingredients that can dry out or damage the skin.
Below is a table of recommended makeup removers for removing eyelash glue:
| Makeup Remover | Key Features |
|---|---|
| Neutrogena Oil-Free Eye Makeup Remover | Water-based, gentle, fragrance-free |
| Garnier SkinActive Micellar Cleansing Water | Water-based, gentle, fragrance-free, alcohol-free |
| Cetaphil Gentle Waterproof Makeup Remover | Water-based, gentle, fragrance-free, pH-balanced for the eye area |
| Simple Kind to Eyes Eye Makeup Remover | Water-based, gentle, fragrance-free, pH-balanced for the eye area |
Remember, when it comes to removing eyelash glue, choosing the right makeup remover is key to keeping your lashes and delicate eye area healthy. Use these recommended products to gently and effectively remove glue residue without causing irritation or damage.
2. Soak a cotton pad
When it comes to removing eyelash glue, soaking a cotton pad is one of the most effective methods. Here’s how to do it:
- Choose the right makeup remover: It is important to use a makeup remover that is specifically formulated for the eyes. Look for a gentle formula that is oil-based and free from harsh chemicals.
- Soak a cotton pad: Once you’ve found the right makeup remover, soak a cotton pad in it. Make sure the cotton pad is wet but not dripping with the remover.
- Hold it on your eyelids: Close your eyes and place the soaked cotton pad on your eyelids. Gently press it against your skin and hold it there for a few seconds. This will help to loosen the glue and make it easier to remove.
- Gently remove the glue: After a few seconds, gently remove the cotton pad from your eyelids. Use a gentle wiping motion to remove any remaining eyelash glue. Be careful not to rub too hard or pull your lashes, as this can cause damage or discomfort.
Remember, when it comes to removing eyelash glue, patience and gentle care are key. Rushing or using too much force can lead to discomfort or even damage to your natural lashes. Take your time, follow these steps, and you’ll be able to remove your eyelash glue safely and easily.
3. Hold it on your eyelids
When it comes to removing eyelash glue, it’s important to be gentle with your lashes and the delicate skin around your eyes. Here are the steps to follow:
- Choose the right makeup remover: Look for an oil-based remover specifically designed to remove waterproof mascara and eyeliner. This will help break down the glue without irritating your eyes.
- Soak a cotton pad in the makeup remover: Saturate the pad with the remover and hold it over your closed eye.
- Hold it on your eyelids: Be sure to hold the cotton pad firmly on your eyelids so that the glue is fully soaked in remover. A gentle but firm pressure will help the remover do its job without rubbing your delicate eyelid skin.
- Gently remove the glue: After about 30 seconds, gently rub the cotton pad over your eyelid in a downward motion. You should see the glue start to come off. Don’t pull too hard or rub too vigorously, as this can damage your lashes or irritate your eyes.
Repeat this process on the other eye, using a fresh cotton pad for each eye. Be sure to rinse your eyelids with water once all the glue is removed to prevent any residue from irritating your eyes. If you experience any irritation or discomfort, stop the process immediately and consult with your doctor. Remember, gentle and patient removal is key to keeping your lashes healthy and beautiful.
4. Gently remove the glue
Removing eyelash glue properly is just as important as applying it correctly. If you don’t remove the glue gently, you can damage your natural lashes. Here are the steps to follow to remove your eyelash glue safely:
- Select the right makeup remover: It’s important to choose a makeup remover that works for your lash glue. Avoid using oil-based makeup removers as they may leave residue on the lashes.
- Soak a cotton pad: Take a cotton pad and soak it in the makeup remover of your choice.
- Hold it on your eyelids: Carefully place the soaked cotton pad on your eyelid and hold it there for a few seconds. This will help loosen the glue.
- Gently remove the glue: After a few seconds, gently pull the lash strip off of your eyelid. If there is still a lot of glue left, you can use a clean cotton pad with more makeup remover to wipe it away. Avoid using excessive force as this may harm your natural lashes.
Remember to be gentle when removing your eyelash glue. Rushing or using excessive force can cause irritation or damage to your natural lashes. Take your time and follow these steps carefully to remove the glue safely.
Troubleshooting
Even with the best techniques and high-quality eyelash glue, issues can still arise. From overly sticky glue to lashes that just won’t stay put, there are several common issues that can occur when using eyelash glue. It can be frustrating when you’re trying to achieve the perfect look, but don’t worry, troubleshooting these problems is easier than you might think. Let’s explore some solutions to common eyelash glue mishaps.
1. The glue is too sticky
It can be frustrating when your eyelash glue is too sticky, causing your lashes to stick together or making it difficult to adjust their placement. Here are some tips to help you deal with overly adhesive glue:
- Use less glue: Sometimes, less is more. Try using smaller amounts of glue and see if it still holds up your lashes well enough. You can always add more if necessary.
- Blow on the glue: Give the glue a quick blow to help it dry a bit before applying your lashes. This can help reduce stickiness.
- Wait: If you find that your glue is consistently too sticky, try waiting a bit longer before placing your lashes on your lids. The glue may need more time to set and dry out.
- Try a different glue: If you’ve tried all of the above and your glue is still too sticky, it may be time to switch to a different type of glue or brand. Look for a glue that has a lighter consistency or a different adhesive formula.
Remember, practice makes perfect. It may take some time to find the right amount of glue and technique that works best for you. Don’t get discouraged, and keep experimenting with different approaches until you find one that works.
2. The glue is not sticky enough
One of the concerns you might experience when using eyelash glue is when it isn’t sticky enough. After applying the glue, you may notice that your lashes are not staying in place or are falling off entirely. This can be frustrating, especially if you’re running late or you’re depending on your eyelashes to complete your makeup look.
Reasons why the glue isn’t sticky enough
There might be various reasons why the eyelash glue isn’t sticky enough. Some of the common reasons include:
| Reason | Solution |
|---|---|
| The glue is old or expired | Invest in a new glue bottle or check the expiration date before purchasing. |
| Your natural lashes are oily or dirty | Cleanse your natural lashes before applying the glue. Use an oil-free makeup remover to get rid of any oil or dirt buildup. |
| You applied too little glue | Apply an extra coat of glue to the lashes. But be careful not to apply too much, as it might create a mess. |
| You’re using a low-quality glue brand | Invest in a well-known brand that has positive reviews and is trusted by professionals. Do your research before purchasing and read the ingredients list. |
Tips to make your eyelash glue stick better
If you’re experiencing problems with your eyelash glue not being sticky enough, try these tips to make it work better:
– Cleanse: First and foremost, ensure your natural lashes are clean from oils and dirt before applying the glue. This helps the glue bond better with your lashes.
– Apply more glue: Apply an extra coat of glue to the lashes if the first application isn’t sufficient. But be careful not to apply too much, as it might create a mess.
– Use adhesive strips: Another great option is to use adhesive strips. They’re made to stick onto your natural lashes and provide a surface for your falsies to adhere to.
– Invest in a quality eyelash glue: Purchase a well-known brand that is known to work well and trusted by industry professionals. Do your research beforehand and read reviews, as not all glues are created equal.
Don’t let sticky eyelash glue ruin your makeup look. By implementing these tips and tricks, you’ll be able to keep your falsies in place all day long.
3. The glue is clumpy
Finding that your eyelash glue is clumpy can be a frustrating experience, but it can happen to anyone. Luckily, there are ways to troubleshoot this issue.
Try these tips if your glue is clumpy:
- Check the expiration date: Make sure that the glue hasn’t expired, as expired glue may not apply smoothly and can become clumpy.
- Pay attention to the storage: Ensure that you store your glue properly. Exposure to heat and humidity can cause the glue to thicken and become clumpy.
- Apply less glue: You might be using too much glue when applying your lashes, which can cause clumps. Try using a smaller amount of glue to avoid this issue.
- Thoroughly mix the glue: Before applying the glue, give it a good shake or stir. This will help mix any separation that may have occurred, leading to a smoother application.
- Use a different bottle: If you find the glue often becomes clumpy and you’ve tried the above tips, consider using a different bottle. Sometimes the bottle itself can be the issue.
By following these tips, you can avoid clumpy glue during application and achieve a flawless look for your eyelashes. Remember, practice makes perfect, and with a few tweaks, you’ll be an expert in no time!
4. The lashes won’t stay put
Sometimes, even after applying the eyelash glue correctly, the lashes just won’t stay put. This can be quite frustrating, especially if you are trying to achieve a specific look or wearing the lashes for an important event. However, there are a few reasons why this might be happening and some solutions that could help.
One possible reason the lashes aren’t staying put is that the glue is not strong enough. If you’re using a weaker lash glue, the lashes may not have enough adhesive to stay on for a long period of time. It can be tempting to go for a softer glue to avoid any discomfort, but if you’re having trouble with your lashes staying on, it might be time to switch to a stronger adhesive.
Another reason could be that you’re not waiting long enough for the glue to dry before applying the lashes. If you apply the lashes too soon after applying the glue, they won’t have enough time to bond properly and may fall off. It’s important to wait the full recommended drying time, which is usually around 30 seconds to a minute before placing the lashes on.
Alternatively, the issue could be with the lashes themselves. If the lashes are heavy or too long for your natural lashes, they may not adhere well to the lash line. In this case, you may need to trim the lashes or find a lighter pair that will stay on more easily.
Below is a table summarizing the possible causes and solutions for when your lashes won’t stay put:
| Possible Cause | Solution |
|---|---|
| The glue is not strong enough | Switch to a stronger adhesive. |
| Not waiting long enough for the glue to dry | Wait the full recommended drying time before placing the lashes on. |
| Heavy or too long lashes | Trim the lashes or find a lighter pair that will adhere better. |
It’s important to note that everyone’s experience with eyelash glue is different, and it may take some trial and error to find the perfect glue and technique that works for you. Don’t be discouraged if your lashes don’t stay put the first time, as it can take some practice to get it right.
5. The glue irritates your eyes
Experiencing eye irritation from eyelash glue can be a frustrating and uncomfortable experience. If you find yourself in this situation, there are several steps you can take to alleviate the discomfort:
- Remove the lashes: If you notice immediate irritation after applying eyelash glue, it’s best to remove the lashes altogether. Gently and carefully remove the lashes using an oil-based makeup remover.
- Use a hypoallergenic glue: Sensitive eyes require special care. Consider using a hypoallergenic or formaldehyde-free glue to avoid further irritation. These types of glues are often designed for those with sensitive skin and are less likely to cause an adverse reaction.
- Try a different brand: Not all eyelash glues work well for everyone. If you find that one brand is causing constant irritation, try a different brand to find one that works better for you.
- Consult with a professional: If your eye irritation persists or you experience other symptoms such as redness or swelling, it’s best to consult with an optometrist or dermatologist. They can help you determine the cause of your irritation and recommend the best solution for your individual situation.
Don’t suffer in silence if you experience irritation from eyelash glue. Follow these tips to find relief and protect your delicate eye area. Remember to always prioritize your health and comfort when it comes to beauty.
Conclusion
After reading this beginner’s guide on how to use eyelash glue, one should feel much more confident about applying and removing false eyelashes. With careful consideration of the type of eyelash glue to use, proper application technique, and troubleshooting tips, even beginners can achieve a flawless, natural-looking lash line.
In conclusion, applying false lashes can be a bit intimidating, but with practice and patience, you’ll be a pro in no time. Remember to choose the right eyelash glue for your needs, prep your eyelashes properly, and be gentle when removing the glue. Don’t be discouraged if it takes a few tries to get it right – practice makes perfect! With the tips and techniques outlined in this guide, you’ll be able to confidently and easily sport those gorgeous, fluttery lashes. Good luck!
Frequently Asked Questions
1. How long does eyelash glue last?
Eyelash glue can last between 12-24 hours depending on the type of glue and the quality of the adhesive. Once applied to the lashes, eyelash glue should hold until you need to remove it.
2. Can I wear false eyelashes with contact lenses?
Yes, you can wear false eyelashes with contact lenses, but it is important to be cautious and ensure that the lashes do not come into contact with the lenses. Apply the lashes carefully and avoid letting the glue get into your eyes.
3. Is it safe to use eyelash glue with sensitive eyes?
It depends on the individual. Some people with sensitive eyes may experience irritation or an allergic reaction to the glue. It is important to test the glue on a small area before applying it to your eyelashes.
4. Can I wear false eyelashes every day?
You can wear false eyelashes every day, but it is important to give your natural lashes a break occasionally to prevent damage. Give your lashes a break for a day or two each week to promote healthy growth.
5. How do I clean my false eyelashes?
Clean your false eyelashes by using a makeup remover or micellar water to remove any excess glue. Gently brush the lashes with a clean spoolie and store them in their original packaging to protect them from damage.
6. Can I reuse my false eyelashes?
Yes, you can reuse your false eyelashes. However, it is important to clean them thoroughly after each use and store them properly to prevent damage.
7. How do I know if the eyelash glue is safe for my eyes?
Check the ingredients list on the eyelash glue and research any unfamiliar compounds to ensure they are safe for use around the eyes. It is also important to use glue that is specifically designed for eyelashes, as other adhesives may be harmful.
8. How do I choose the right type of eyelash glue?
Consider your needs, preferences, and budget when choosing eyelash glue. Read reviews and compare different types of glue to find one that works well for you.
9. Can I exercise or swim while wearing false eyelashes?
It is best to avoid excessive sweating or swimming when wearing false eyelashes, as water can cause the glue to loosen and the lashes to fall off. If you must participate in these activities, choose a waterproof eyelash glue to ensure that the lashes stay put.
10. How do I prevent the glue from getting on my eyelids or natural lashes?
Apply the glue carefully and use a small amount to prevent it from spreading onto your natural lashes or eyelids. It can also be helpful to use a pair of tweezers to place the lashes precisely where you want them.