Embarking on a kitchen makeover can be an invigorating experience, particularly when exploring the transformative power of chalk paint kitchen cabinets. This unique medium offers a fresh approach to reviving your culinary space without the need for costly replacements or professional services.
Benefits of Refinishing Cabinets with Chalk Paint
Refinishing cabinets with chalk paint not only breathes new life into your kitchen but also boasts several advantages. This paint’s forgiving nature allows for minimal preparation, while its matte finish can hide imperfections and give your cabinetry a charming, bespoke feel. The quick-drying aspect also accelerates the renovation process, ensuring a swift and satisfying transformation.
Chalk Paint Cabinet Ideas for Your Kitchen Makeover
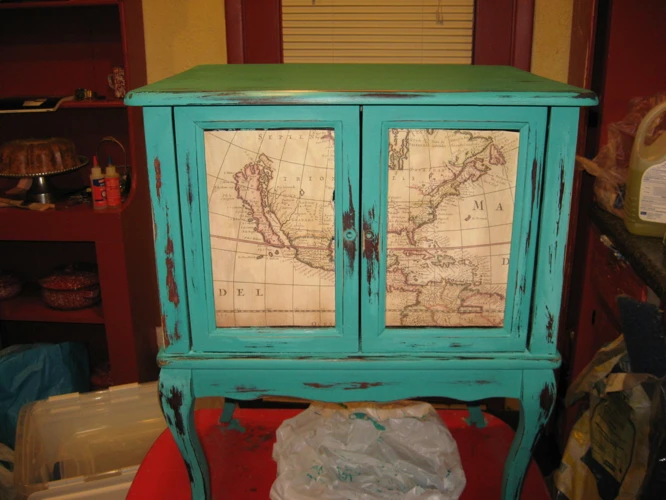
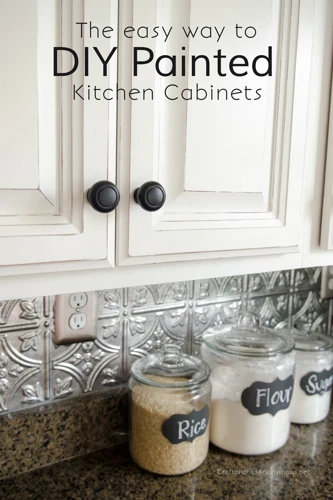
From vintage elegance to modern chic, chalk paint offers a spectrum of possibilities. Consider a classic white for a bright and airy feel, or go bold with a deep navy or playful teal. The versatility of chalk paint cabinet ideas means there’s a hue to reflect every personality and décor style.
Preparation for Your DIY Chalk Paint Project
Success in any DIY chalk paint project lies in thorough preparation. Gathering the right materials and setting the stage ensures a smooth painting experience and stellar results.
Materials and Tools Required for Chalk Paint Cabinets
- High-quality chalk paint
- Paint brushes and rollers
- Painter’s tape
- Sandpaper (fine-grit)
- Clean cloths
- Drop cloths or plastic sheets
- Screwdriver (for hardware removal)
Cleaning and Prepping Your Kitchen Cabinets
Begin by removing cabinet doors and hardware. A thorough cleaning to remove grease and dirt is crucial, as these can hinder paint adhesion. Light sanding may be necessary to roughen up glossy surfaces, followed by wiping away the dust. This prep work ensures a receptive canvas for your chalk paint.
How To Use Chalk Paint on Kitchen Cabinets
With preparations complete, it’s time to dive into the heart of how to use chalk paint to transform your cabinetry into a work of art.
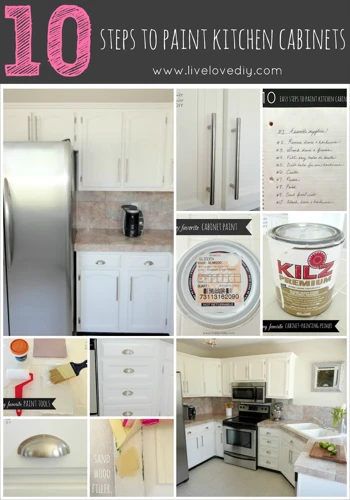
Step-by-Step Chalk Paint Cabinets Tutorial
- Apply the first coat of chalk paint, working in the same direction as the wood grain.
- Allow the paint to dry completely, which typically takes about an hour.
- Apply a second coat if necessary, ensuring full coverage and a uniform color.
- Reattach the hardware once the paint has dried and cured.
Tips for a Smooth Chalk Paint Application
For a flawless finish, apply the paint with smooth, even strokes. Avoid overloading your brush to prevent drips, and sand lightly between coats if you encounter any texture issues. Patience here is key; let each layer dry thoroughly before proceeding.
Chalk Paint Finishing Tips
After the painting is done, the focus shifts to long-term preservation of your handiwork.
Sealing and Protecting Your Chalk Painted Cabinets
To safeguard your freshly painted surfaces, a sealant such as wax or polyurethane is essential. This will protect against stains and wear, ensuring your cabinets remain as beautiful as the day you finished painting them.
Best Practices for Chalk Paint Finishes
Apply your chosen sealant with care, adhering to the manufacturer’s instructions. Whether you opt for a matte, satin, or glossy finish, the key is to achieve an even coat that complements the charm of the chalk paint beneath it.
Best Chalk Paint for Cabinets
Selecting the best chalk paint for cabinets is pivotal to your project’s success, as it will influence both application ease and the durability of the finish.
Choosing the Right Chalk Paint for Your Cabinets
Consider factors like the paint’s consistency, drying time, and color availability. You’ll want a paint that offers a rich, pigmented color and a formula that adheres well to cabinetry surfaces.
Comparing Chalk Paint Brands and Formulas
Researching and comparing brands can help you find the perfect match for your vision and budget. Look for reviews from other DIY enthusiasts and pay attention to their experiences with durability and ease of use.
Maintaining Your Chalk Painted Kitchen Cabinets
Once your cabinets are beautifully coated, maintaining their appearance becomes the next priority.
How to Clean Chalk Painted Surfaces
Cleaning with a soft, damp cloth is usually sufficient for removing everyday grime. Avoid harsh chemicals or abrasive cleaners, which can damage the protective finish.
Touching Up and Reapplying Chalk Paint
If your cabinets sustain a scratch or ding, a small touch-up can be done with the same chalk paint used initially. For larger areas or after significant time has passed, a fresh coat might be necessary to maintain the pristine look.
Chalk Painted Kitchen Makeover Showcase
Feast your eyes on the dramatic transformations that chalk paint can facilitate, turning dated kitchens into modern marvels.
Before and After: Transformations with Chalk Paint
Pictures of kitchen cabinets, from worn and outdated to stylish and trendy, demonstrate the power of a chalk painted kitchen makeover. These visuals can serve as inspiration and testament to the efficacy of chalk paint.
Personal Stories and Testimonials
Read about the experiences of others who have undertaken this journey. Their stories can provide valuable insights and motivation for those considering their own cabinet revamps.
Frequently Asked Questions About Chalk Paint Cabinets
Delve into the collective knowledge surrounding this popular painting technique to ease any uncertainties you may have.
Common Concerns and Solutions for Chalk Paint Projects
Questions about durability, finish options, and application techniques are addressed here, offering clarity and confidence to prospective painters.
Advanced Techniques and Tricks for Chalk Paint Enthusiasts
For those looking to elevate their skills, explore advanced methods such as layering colors, creating distressed finishes, or implementing stenciling to add personal flair to your cabinets.
Conclusion: Revitalizing Your Kitchen with Chalk Paint
The journey of transforming your kitchen with chalk paint is one filled with creativity and satisfaction. It’s a venture that invites personal expression and promises a significant visual impact.
Summary of the Chalk Paint Journey
From preparation to finish, this process is a testament to the versatility and charm of chalk paint. Your kitchen cabinets can become a reflection of your unique style, with a touch of timeless elegance or modern flair.
If you’re a DIY enthusiast looking to upgrade your kitchen, our guide on how to use chalk paint on kitchen cabinets might be just what you need to give your space a fresh, new look. While you’re at it, don’t miss our other handy tutorials such as how to glue ceiling tiles for a quick home renovation fix, how to glue window glass for those minor repairs, and how to use puzzle glue sheets for your crafting projects. Dive into our resources to make your next DIY project a breeze!
Encouragement for Future DIY Projects
Equipped with the knowledge and experience from your chalk paint adventure, you’re now primed to tackle future DIY endeavors. Embrace the empowering world of home improvement, where your vision and effort can manifest beautiful, tangible results.