Have you ever found yourself struggling to find the perfect adhesive for your craft projects? Traditional glue can be messy and difficult to apply with precision, but fear not! A glue pen may just be the solution you’ve been looking for. In this comprehensive guide, we will explore everything you need to know about using a glue pen. From the different types available to the proper application technique, we’ve got you covered with all the tips and tricks to ensure a successful and stress-free crafting experience. So, let’s dive into the world of glue pens and discover how they can revolutionize your projects!
What is a Glue Pen?
If you are a crafting enthusiast or simply someone who needs to put together items quickly, you might have heard of a glue pen before. This versatile tool is a variation of the regular glue that comes in a convenient pen-shaped container. It is not just used for crafting purposes, but also for small household repairs, attaching embellishments to clothes and accessories, and in the beauty industry too. You might have a lot of questions in your mind regarding its usage and versatility. This article will guide you through everything you need to know about a glue pen, from its definition to its application, and also provide you with some helpful tips and tricks.
Types of Glue Pens
When it comes to glue pens, there are different types available in the market that cater to different uses. Each type has its own unique features to meet the needs of various projects. Here are some of the most common types of glue pens:
| Type of Glue Pen | Description and Use |
|---|---|
| Permanent Glue Pen | A permanent glue pen is ideal for creating a permanent bond between two surfaces. It is perfect for attaching paper, cardboard, and small embellishments on scrapbooks, cards and other paper-based crafts. |
| Repositionable Glue Pen | This type of glue pen is great for temporary bonding, as it allows you to reposition the item before it dries completely. It’s perfect for when you’re not sure you want a permanent bond, and it also works well for attaching lightweight items such as photos, postcards, and notes. |
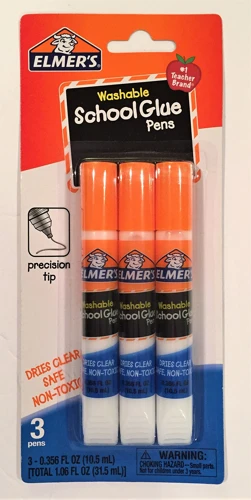
| Washable Glue Pen | Washable glue pens are water-soluble and are perfect for use with kids who like to craft, scrapbook, and create art. It is easy to clean up and is ideal for attaching felt, foam and other lightweight materials. |
| Colored Glue Pen | A colored glue pen is perfect for paper crafts and scrapbooking where you need to add a splash of color to your designs. It comes in a variety of colors and is opaque when it dries. |
| Glitter Glue Pen | A glitter glue pen is perfect for adding some sparkle and shine to your crafts. It works well with paper-based materials and can be used for writing or drawing as well. |
Depending on your project, you may need to use a specific type of glue pen to achieve the desired results. It’s important to choose the best one for the job. If you’re unsure which type to use, visit your local craft store or do some research online to find the right one for you.
_Internal Link: To learn more about another type of glue used for beauty purposes, read our article on what does peggable mean eyelash glue._
Benefits of a Glue Pen
Using a glue pen may seem like an extra step in your crafting or DIY projects, but it actually offers several advantages. Here are some of the benefits of using a glue pen:
| Benefits | Explanation |
|---|---|
| Convenient Size | Glue pens are small and easy to hold, making them perfect for intricate projects. They’re also great for taking on-the-go. |
| Precise Application | The thin and precise tip of a glue pen allows for controlled application, making it easy to apply glue exactly where you need it. |
| No Mess | Traditional glue bottles can be messy, with excess glue oozing out and getting on your hands and work surface. With a glue pen, you can avoid this mess and keep your workspace clean. |
| Dries Clear | Many glue pens dry clear, which means you don’t have to worry about visible glue marks on your projects. |
| Multiple Uses | You can use a glue pen for a variety of projects and materials, from paper and cardboard to fabric and even some plastics. |
With these benefits in mind, it’s no wonder that glue pens have become a popular choice for crafters, DIY enthusiasts, and even professionals. Investing in a good quality glue pen can save you time, make your projects cleaner and neater, and help you achieve better results.
How to Use a Glue Pen?
Let’s dive into the process of using a glue pen! If you’re not familiar with a glue pen, it is a handy tool that can help you stick materials together quickly and with precision. Whether you want to make a craft project, repair a broken item, or create something new, a glue pen can come in handy. In this section, we’ll take a look at the steps involved in using a glue pen to help you achieve the best results. So, grab your glue pen and let’s get started!
Step 1: Prepare the Surface and Glue Pen
Before using a glue pen, it is crucial to prepare both the surface and the glue pen. Failing to do so can lead to a subpar result. Here are the steps to follow to prepare the surface and glue pen:
- Clean the Surface: Begin by cleaning the surfaces you want to bond. The surface should be free of any dust, dirt, or oil. This will allow the glue to stick to the surface better. You can use rubbing alcohol to clean the surface if needed.
- Prepare the Glue Pen: Once the surface is cleaned, it is time to prepare the glue pen. Shake the glue pen well for an even mix. Check the pen’s instructions to ensure proper use, especially if it’s a newly purchased pen. Then, remove the cap and prime the pen by depressing the tip until the glue comes out. Be careful not to squeeze too hard as this could cause the glue to flow out too quickly. Also, avoid touching the glue tip to prevent contamination.
These steps are crucial in ensuring that the glue pen is prepared and the surfaces are ready for bonding. You can proceed to the next steps after ensuring that these steps have been taken seriously.
It’s important to use a glue pen the right way. Using it incorrectly could lead to suboptimal results when it comes to bonding surfaces together. Be sure not to confuse it with other types of glue in eyelash preparation. For more information, check out these links, “how to use eyelash glue remover,” “how to use mascara as eyelash glue,” “what happens if you use nail glue for eyelashes,” “how to make facial glue,” “how to use eye glue,” “how to fix lashes without glue,” “how to glue glasses,” “which is better glue or magnetic eyelashes,” and “what is a glue pen.”
Step 2: Test the Glue Pen
After preparing the surfaces and glue pen, the next step is to test the glue pen to ensure that it works properly. This can help you avoid any potential issues that may arise during the actual application process.
To test the glue pen, you should first apply a small amount of glue on a scrap piece of paper or a surface similar to what you will be gluing. Wait for the glue to dry completely before checking its strength. This can take anywhere from a few seconds to a few minutes, depending on the type of glue pen you are using.
If the glue is too weak and does not hold the surfaces together, you may need to apply more glue or look for a stronger glue pen. On the other hand, if the glue is too strong and dries too quickly, you may need to apply less glue or work faster during the application process.
It is important to note that some glue pens may have specific instructions for testing, so be sure to read the label carefully before proceeding. Additionally, if you are using a new brand or type of glue pen, it may be helpful to research online or ask for advice from other crafters or professionals.
Testing the glue pen beforehand can save you time and frustration, and ensure that your final project turns out as intended. So be patient and take your time during this step before moving on to the actual application.
Note: Using glue meant for a different purpose can lead to problems. For example, using nail glue for eyelash can be harmful, as it contains chemicals that are not safe for use around the eyes. If you want to know how to use eyelash glue remover, you can check out our article on how to use eyelash glue remover.
Step 3: Apply the Glue Pen
When it’s time to actually apply the glue from the pen, it’s important to follow a few key steps to ensure correct usage. First and foremost, make sure the tip of the glue pen is clean so that any excess glue won’t interfere with the application.
Next, hold the two surfaces together that you plan to glue, or have someone else hold them if necessary. Then, apply a small amount of glue from the pen onto one surface. Remember, a little goes a long way with glue pens, so avoid applying too much.
Using the table below, we’ve broken down some of the most important steps to follow when applying glue with a pen:
| Step | Instructions |
|---|---|
| Step 1 | Clean the tip of the glue pen to avoid excess glue interfering with the application. |
| Step 2 | Hold the two surfaces together that you plan to glue, or have someone else hold them if necessary. |
| Step 3 | Apply a small amount of glue from the pen onto one surface. |
| Step 4 | Press the two surfaces together and hold firmly for a few seconds. |
| Step 5 | Allow the glue to dry completely before using or moving the glued item(s). |
Press the two surfaces together and hold firmly for a few seconds to ensure a strong bond. Allow the glue to dry completely before using or moving the glued items. This could take anywhere from a few minutes to a few hours depending on the type of glue pen and the materials being glued together.
If you’re unsure of how long the drying process will take, refer to the instructions on the glue pen packaging. It’s also important to note that some glue pens may take longer to dry than others, so be patient and wait until you’re confident that the glue has fully dried.
Remember, glue pens are designed to be easy and convenient to use, but they still require proper care and attention to ensure the best results. By following these steps, you can be confident in your ability to use a glue pen effectively and efficiently.
Step 4: Join the Surfaces
Step 4: Join the Surfaces
Now comes the final step; joining the surfaces. Carefully align the surfaces and firmly press them together. Make sure to apply pressure evenly throughout the surfaces for better adhesion.
If you are working with a delicate material or a small area, you can use a toothpick or a brush to aid in precise application. Slowly apply the necessary pressure on the surfaces and hold them together for a few seconds until the glue sets properly.
If you are joining larger surfaces, consider using clamps or weights to hold the surfaces in place until the glue dries completely. Some glues take longer to dry than others, so make sure to check the manufacturer’s instructions.
Important note: Avoid moving or adjusting the surfaces once they are joined, as this can weaken the bond and affect the overall integrity of the final product.
| Materials | Joining Technique |
|---|---|
| Wood, Paper, and Cardboard | Apply glue to both surfaces and hold them firmly together for a few seconds. |
| Plastic, Glass, and Metal | Apply glue to one surface and press the other surface onto it. Hold the surfaces in place until the glue dries. |
| Ceramics and Pottery | Apply glue to both surfaces, then press the surfaces together and hold them in place with clamps or weights until the glue sets. |
Remember to always read the manufacturer’s instructions carefully and follow them accordingly. Improper use can result in weak bonds or even damage to the surfaces being joined.
If you enjoyed learning about how to use a glue pen, you may be interested in how to use mascara as eyelash glue or how to fix lashes without glue.
Tips and Tricks for Working with a Glue Pen
As you gain more experience using a glue pen, there are some tips and tricks that can help you achieve a better result. By following these recommendations, you’ll not only save time and effort but also ensure that your projects turn out perfectly. So, let’s dive in and explore some of the best tips and tricks for working with a glue pen!
For those who want to know more about the specifics of a glue pen, check out what is a glue pen?
Tip 1: Store Properly
When it comes to using a glue pen, proper storage is crucial to ensuring its longevity and effectiveness. To store your glue pen properly, make sure to cap it tightly after each use to prevent the glue from drying out. Also, store it in a cool, dry place away from direct sunlight or heat sources as heat can cause the glue to become less effective.
It’s also important to store your glue pen in an upright position to prevent the glue from spilling or leaking out of the tip. If the glue does spill or leak, it can dry around the tip and clog it, making it difficult to dispense the glue properly.
Additionally, never store your glue pen near heat sources or open flames as glue pens are flammable. Store it away from children and pets to avoid accidents.
Finally, be sure to check the expiration date on your glue pen before using it. Expired glue pens can lose their effectiveness and may not properly adhere to surfaces.
By following these simple storage tips, you can ensure that your glue pen is always ready to use when you need it. For more information on eyelash glue storage, check out our related article on What Happens If You Use Nail Glue for Eyelashes?
Tip 2: Apply with Care
When it comes to using a glue pen, it’s essential to handle it with care to achieve the best results. Mishandling the glue pen might make the glue flow too quickly or not at all, ruining your project in the process. To avoid any mishandling, here are some tips to apply with care:
| Tip: | Details: |
| Hold the glue pen correctly | When using a glue pen, it is essential to hold it correctly. Hold it so that the tip is facing downwards, and the glue will flow naturally by the force of gravity. |
| Use just enough pressure | Exerting too much pressure when using a glue pen might cause the glue to come out too fast. Gently apply pressure to the pen until the glue starts to flow. |
| Slow and steady wins the race | The glue will come out consistently and smoothly if you take your time applying it. Rushing the process may cause the glue to go places where it’s not needed, ruining the project. |
| Apply in a well-lit area | For accuracy, it is best to use a glue pen in an area with adequate lighting. You’ll be able to see precisely where you’re applying the glue. |
| Don’t apply too much | Applying too much glue at one time is another common issue to avoid. Use the pen to apply the glue in a thin, even layer. If necessary, you can always add more later. |
By following these tips, you’ll handle the glue pen with the necessary care and precision to achieve your desired results. If you’re looking for more information on how to make facial glue or how to use eye glue, check out our other articles on these topics.
Tip 3: Use in a Well-Ventilated Area
When using a glue pen, it is important to remember that the fumes can be harmful if inhaled in large quantities. It is recommended to use in a well-ventilated area. This can be achieved by working near an open window or by using a fan. If using indoors, it is important to make sure there is enough fresh air circulating to avoid any potential respiratory problems.
Here are some practical tips to help you work with a glue pen in a well-ventilated area:
- Choose a well-ventilated area: Make sure you’re working in an area with plenty of fresh air circulation, like near an open window or a fan.
- Wear a mask: If you’re sensitive to the fumes or working with a particularly strong adhesive, you may want to consider wearing a mask to protect your respiratory system.
- Don’t use near flames: Do not use a glue pen near any open flames or ignition sources, as these can be dangerous when mixed with the fumes.
- Take frequent breaks: Take breaks and step outside for fresh air intermittently when using a glue pen for an extended amount of time. This can help prevent any potential health issues that may arise from inhaling the fumes.
While it may be tempting to work in a small, enclosed space for the sake of convenience, always prioritize your health and wellbeing when working with any type of adhesive. Inhaling too many fumes or exposing yourself to toxic chemicals can have serious consequences. For example, inhaling the fumes from facial glue, which contains cyanoacrylate, can lead to respiratory problems like bronchitis if used in a poorly ventilated area. Similarly, using eye glue or glue pens near your eyes can cause irritation or damage if not used correctly.
So, make sure to follow this tip and use the glue pen in a well-ventilated area to avoid any potential health problems that can arise from the fumes. If you’re looking for more tips and tricks on how to use glue pens, check out our other articles, including How to Glue Glasses and How to Make Facial Glue.
Tip 4: Clean Up Excess Glue Pen
When using a glue pen, there may be excess adhesive that needs to be cleaned up. It is important to take care of any leftover glue promptly to ensure the best results for your project. Here are some tips for cleaning up excess glue pen:
| Tip | Description |
|---|---|
| 1. | Use a cotton swab dipped in acetone or nail polish remover to gently rub away any excess glue. |
| 2. | If the glue has dried, try using a scraper or an old toothbrush to gently remove it. |
| 3. | For larger or tougher areas of excess glue, try using a heat gun to soften the adhesive before scraping it away with a plastic scraper. |
| 4. | If you accidentally get glue on your skin, use a cotton swab or cloth to wipe it off. If necessary, use soap and water to clean the area. |
Cleaning up excess glue may seem like a tedious task, but it is essential for ensuring a clean and professional-looking finished product. Following these tips can help make the process easier and more efficient.
For more information regarding eye glue, check out our article on How to Use Eye Glue. If you’re curious about the difference between glue and magnetic eyelashes, read our guide on Which is Better: Glue or Magnetic Eyelashes?.
Common Mistakes and How to Avoid Them
Mistakes are an inevitable part of any learning process. When it comes to using a glue pen, there are several common mistakes that people often make. These mistakes can lead to a weak bond, messy application, or even damage to the surfaces being glued. In this segment, we’ll highlight some of the most frequent mistakes people make while using a glue pen and share some tips on how to avoid them. Pay attention to these mistakes and learn from them, so you can master the use of a glue pen like a pro.
Mistake 1: Overuse of Glue Pen
One of the most common mistakes people make when using a glue pen is overuse. Overusing a glue pen can lead to excess glue on the surface, which can impact the quality of the bond and cause unsightly bumps and lumps. To avoid this mistake, it’s important to understand how much glue is needed for each job and to apply the glue pen in a controlled manner.
To help you avoid overusing your glue pen, here are some common signs that you’ve applied too much glue:
| Signs of Overusing a Glue Pen | Solutions |
|---|---|
| Excess glue oozing out of the sides of the joined surfaces | Apply less glue and press the surfaces together firmly to avoid excess glue from escaping |
| Visible bumps or lumps in the glue line | Apply less glue and spread it evenly with a toothpick or another small tool |
| Difficulty in removing excess glue from the surface | Use a damp cloth or cotton swab to gently remove the excess glue before it dries |
By paying attention to these signs, you can avoid overusing your glue pen and achieve a smooth and uniform bond between your surfaces. Remember, it’s better to start with less glue and apply more if needed, rather than starting with too much and having to deal with excess glue.
Mistake 2: Rushing the Application
One of the most common mistakes when using a glue pen is rushing the application process. It can be tempting to rush when there is a lot to be glued, or if you’re in a hurry, but this can result in a less-than-perfect bond. Here are some reasons why rushing can lead to mistakes when using a glue pen:
- Uneven application: When you rush through applying the glue, there is a higher chance of the glue being unevenly distributed. This can lead to areas of the project not sticking together properly, or even not sticking at all.
- Incomplete drying: After applying the glue, it needs time to dry and set. If you rush through the application process, the glue may not have enough time to dry completely. This can lead to the project falling apart or coming undone at a later time.
- Difficulty adjusting: Once the glue is applied, it can be difficult to adjust the position of the items being glued. If you rush through the application, it can be harder to adjust the placement of the items if you need to.
To avoid rushing the application process, take your time and apply the glue carefully. Work on smaller sections at a time, and make sure the glue is evenly distributed. Be patient and wait for the glue to dry completely before moving on to the next step. This will ensure a strong and lasting bond for your project.
Mistake 3: Using on Incompatible Surfaces
It is important to know that not all surfaces are compatible with glue pens. Using a glue pen on a surface that is incompatible can result in a weak bond or even damage the surface. Incompatible surfaces are those that either repel or absorb the glue, preventing it from bonding properly.
Examples of incompatible surfaces:
| Surface Type | Explanation |
| Non-Porous Surfaces | Surfaces such as glass, metal, or plastic are non-porous and don’t allow the glue to seep in and bond properly. In such cases, a different adhesive should be used. |
| Oil or Grease Stained Surfaces | If the surface is stained with oil or grease, it creates a barrier preventing the glue from bonding properly. In this case, the surface should be cleaned before applying the glue. |
| Dirty or Dusty Surfaces | Dirt, dust, or any other particle on the surface can weaken the bond of the glue. It is important to clean the surface before applying the glue. |
| Fabric or Thread Surfaces | The glue from a glue pen can seep through the fabric or thread and create a mess. It may also weaken the fibers of the fabric. In such cases, a fabric glue or a needle and thread should be used. |
| Wet or Damp Surfaces | Water can weaken the bond of the glue, so it is important to ensure that the surface is dry before applying the glue. |
How to avoid this mistake:
It is important to read the label of the glue pen before applying it to a surface as it usually indicates the types of surfaces it’s compatible with. If unsure about a surface’s compatibility with a glue pen, it is best to test the glue pen on a small, inconspicuous area first. If the glue doesn’t bond properly, it is likely incompatible with the surface and a different adhesive should be used.
Mistake 4: Not Cleaning the Tip Properly
One of the common mistakes people make while using a glue pen is not cleaning the tip properly. Over time, glue residue can build up on the tip of the pen, which can affect the quality of the glue application. This can prevent the glue from sticking or cause it to clump up and create an uneven surface. To avoid this mistake, it is important to clean the tip properly after each use.
Why is cleaning the tip of a glue pen important?
Cleaning the tip of a glue pen is important because it helps to maintain the quality of the glue application. When glue residue builds up on the tip, it can affect the flow of glue and prevent it from sticking properly. This can cause frustration and lead to a waste of time, money, and materials.
How to clean the tip of a glue pen?
Cleaning the tip of a glue pen is a simple process that can be done with just a few materials. Here are the steps to follow:
| Materials: | Instructions: |
|---|---|
| – Warm water | 1. Dip the tip of the glue pen in warm water 2. Let it soak for a few minutes 3. Gently rub the tip of the pen with your fingers to remove any glue residue 4. Rinse the pen under running water 5. Wipe the tip of the pen with a clean cloth 6. Repeat the process if necessary |
| – Rubbing alcohol | 1. Soak a cotton swab in rubbing alcohol 2. Rub the tip of the glue pen with the cotton swab 3. Wipe the tip of the pen dry with a clean cloth 4. Repeat the process if necessary |
It is important to note that not all glue pens are created equal and some may require different cleaning methods. It is best to check the manufacturer’s instructions for specific cleaning recommendations.
How often should the tip be cleaned?
The tip of a glue pen should be cleaned after every use to ensure proper function. If the pen is not used frequently, it may be okay to clean it every few uses. However, if the pen is used frequently or for long periods, it should be cleaned more often to prevent glue buildup.
Cleaning the tip of a glue pen is a simple but important step in ensuring proper function and quality of the glue application. By following the steps and using the proper materials, you can avoid this common mistake and get the most out of your glue pen.
Conclusion
After reading through this ultimate guide on how to use a glue pen, you should now have a better understanding of what a glue pen is, the different types available, and the benefits they offer. You’ve learned the step-by-step process on how to use a glue pen effectively and some tips and tricks to make your experience even better.
Always remember to store your glue pen properly, apply with care, use in a well-ventilated area and clean up any excess glue pen. Avoid common mistakes such as overusing the glue pen, rushing the application, using on incompatible surfaces, and not cleaning the tip properly.
Using a glue pen can be a game-changer when it comes to your creative projects, as it allows for precision and control. Whether you’re a seasoned crafter or a beginner, a glue pen is a versatile tool that can help you achieve your desired results.
So, go ahead and pick up a glue pen for your next project, and feel confident in your ability to use it effectively. With the right technique, you’ll be amazed at the professional-looking results you can achieve. Happy crafting!
Frequently Asked Questions
What surfaces can I use a glue pen on?
A glue pen can be used on various surfaces such as paper, cardboard, foam, fabrics, and some plastics.
Can a glue pen be used for outdoor projects?
No, a glue pen’s bonding strength is not suitable for outdoor environments.
How long does a glue pen take to dry?
The drying time of a glue pen depends on the type of glue used. However, on average, it takes about 10 to 15 seconds to dry.
Are glue pens refillable?
Yes, some glue pens are refillable. You can check the product details on the packaging to determine refill options for your glue pen.
Do I need to clean the glue pen tip after each use?
It is advisable to clean the tip of the glue pen after each use to prevent clogging and ensure optimum performance.
Can a glue pen be used instead of a glue gun?
No, a glue pen does not have the same bonding strength and speed of a hot glue gun. However, a glue pen is perfect for small and delicate projects.
Is a glue pen safe for children to use?
Most glue pens are non-toxic and safe for children to use. However, always check the product details on the packaging to confirm safety precautions.
Can a glue pen be used on ceramic surfaces?
No, ceramic surfaces require a stronger adhesive such as ceramic glue or epoxy.
How long does a glue pen last?
The lifespan of a glue pen depends on the frequency of use. However, most glue pens last for several months when used correctly and stored properly.
Can a glue pen be used on metal surfaces?
Yes, certain types of glue pens can be used on metal surfaces. Always check the packaging to confirm compatibility with metal surfaces.