Have you ever struggled with finding the perfect facial glue for your beauty routine? Whether you’re a professional makeup artist or simply love experimenting with new looks, facial glue can be a game-changer. But with so many options available on the market today, it can be difficult to know which one to choose. That’s where this ultimate guide comes in. We’ll show you how to make your own facial glue at home, using simple, natural ingredients. Not only is it easy and cost-effective, but you can customize it to your specific needs. Say goodbye to store-bought solutions that are loaded with chemicals, and hello to a more natural beauty regimen. Let’s dive in.
Why Use Facial Glue?
Are you tired of struggling to keep false eyelashes, rhinestones, or other embellishments in place on your face? Look no further than facial glue! This versatile product can be used for a variety of beauty applications, and its holding power is unmatched. But with so many types of facial glue available, it can be hard to know which one is right for your needs. In this guide, we’ll explore the benefits of using facial glue and the different types available. We’ll also provide you with step-by-step instructions on how to make your own facial glue at home. And if you’re already familiar with facial glue but want to learn more about specific applications or troubleshooting, we’ve included helpful links to related articles. Let’s dive in!
Benefits
Using facial glue has numerous benefits that make it a popular choice for many people. Some of the benefits of using facial glue include:
| Benefit | Description |
| Long-lasting hold | The adhesive properties of facial glue make it perfect for holding makeup, prosthetics, or jewelry onto the skin for long periods. This is especially useful for special occasions, theatrical performances, or photo shoots where flawless makeup and accessories are required to stay in place. |
| Waterproof | Facial glue is often waterproof, which makes it an ideal choice for people who engage in activities that may cause sweat or water exposure, such as swimming or exercise. |
| Non-irritating | Facial glue is formulated to be non-irritating and gentle on the skin, making it suitable for people with sensitive skin or allergies. |
| Easy to apply and remove | Facial glue is easy to apply and remove when done correctly, making it a convenient option for those who don’t want to spend too much time on their makeup or facial accessories. |
These benefits make facial glue a must-have for those who require long-lasting, waterproof, and hassle-free holding of their makeup, prosthetics, or jewelry. With the right facial glue, you can achieve a flawless look that is sure to turn heads and keep your makeup and accessories in place all day.
If you want to learn more about other types of glue and their uses, check out our article on what glue is safe for skin.
Types of Facial Glue
When it comes to facial glue, there are several types available for use. Hair bonding glue is a common type of facial glue that can be used to bond lace wigs, hair extensions, and even false eyelashes. It is a strong adhesive that can last for weeks, but should not be used on sensitive skin. Skin glue, on the other hand, is a medical-grade adhesive that is safe for use on skin. It is commonly used to close wounds or incisions, but can also be used to hold down small hair extensions or false eyelashes. If you’re someone who likes to use false eyelashes often, you might be interested in learning how to keep eyelash glue from drying out to avoid wasting your products.
Another type of facial glue is lash glue. This type of glue is specifically designed for use with false eyelashes and comes in a variety of formulas, including clear, black, and even colored varieties. Some common ingredients in lash glue include cyanoacrylate, which helps the glue bond quickly and strongly, and rubber latex for flexibility. If you’re interested in learning about the ingredients in lash glue, you might want to check out what is lash glue made of.
For those who prefer a more natural approach to facial glue, there are also DIY options that you can make at home. Gelatin-based facial glue is a popular DIY option that is made using gelatin powder, water, and glycerin. Agar-based facial glue is a vegan alternative that is made using agar-agar powder, water, and vegetable glycerin. If you’re interested in making your own facial wax, you can try the DIY facial wax option, which is typically made using sugar, water, and lemon juice.
It’s important to note that not all facial glue is created equal, so it’s important to carefully consider which type of glue is best for your needs. Always follow the instructions carefully and perform a patch test on a small area of skin before using any new product. If you’re interested in learning more about facial glue, you may want to check out resources like why is my eyelash glue clumpy or how to apply skin glue.
Ingredients You Will Need
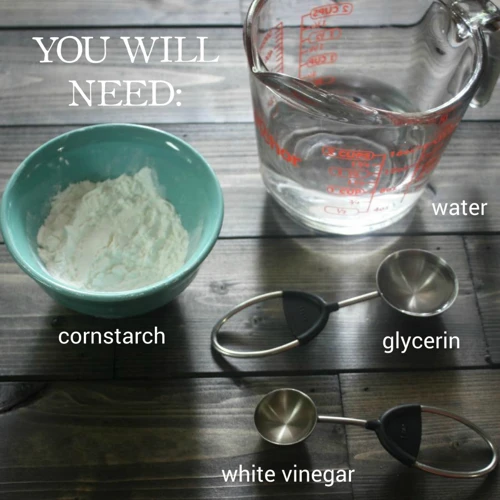
Are you ready to whip up some facial glue? Before getting started, you’ll need to gather a few key ingredients. The good news is that all the ingredients you need can easily be found either at your local grocery store or online. You might even have some of these items already on hand! Let’s take a look at what you will need to make your very own facial glue. And if you’re wondering how long hair bonding glue can last on eyelashes or what u-glue is, be sure to check out our related articles below.
Option #1: Gelatin-Based Facial Glue
Gelatin-based facial glue is one of the most commonly used types of facial glue. It is cost-effective, easy to make, and perfect for sensitive skin types. If you are planning to make gelatin-based facial glue at home, here are the ingredients you will need:
| Ingredients | Quantity |
|---|---|
| Gelatin powder | 1 tablespoon |
| Distilled water | 1 tablespoon |
| Honey | 1 teaspoon |
To make this glue:
1. In a microwave-safe bowl, add one tablespoon of gelatin powder and one tablespoon of distilled water.
2. Mix the ingredients well and microwave the bowl for ten seconds.
3. Add one teaspoon of honey to the solution and mix it well again.
4. Allow the solution to cool down to a lukewarm temperature, so it is not too hot to apply on your skin but not too cold that it is not sticky enough.
5. Apply the glue to the desired area and let it dry for five to ten minutes.
6. Once the glue is completely dry, gently peel it off, and you’re done.
Note: You can adjust the quantity of distilled water to make the gelatin-based glue thickness according to your preference.
Although gelatin-based facial glue is safe to use, it is crucial to remove it properly after use. You can use warm water and a gentle, oil-based makeup remover to remove any leftover glue from your skin. Also, make sure that you do not get the glue in your eyes, as it can cause irritation.
Pro Tip: Applying a small amount of petroleum jelly around the eyebrows or other areas where you are applying facial glue will make it easier to peel off the glue without causing any irritation or pain.
To extend the life of your glue, store it in an airtight container in a cool, dry place. Make sure to check the texture, color, and odor of your glue before using it. If it looks or smells off, do not use it as it may cause an allergic reaction.
Internal Link: If you’re using gelatin-based facial glue to attach false lashes, make sure to read our article on how long hair bonding glue last on eyelashes to ensure you choose the right adhesive.
Option #2: Agar-Based Facial Glue
Making Agar-Based Facial Glue can be another great option for those who want to avoid using gelatin. Agar is a substance that is derived from seaweed and is commonly used as a vegan alternative to gelatin. This glue will give a strong hold and works well for facial hair removal.
Ingredients:
To make agar-based facial glue, you will need the following ingredients:
| Ingredients | Amount Needed |
|---|---|
| Agar powder | 2 tablespoons |
| Water | 3 tablespoons |
| Chamomile tea bags | 2 |
| Essential oil (optional) | 1-2 drops |
Step-by-step Process:
- Take 2 tablespoons of agar powder and mix it with 3 tablespoons of water in a saucepan. Stir well.
- Add 2 chamomile tea bags to the mixture and bring it to a boil.
- Reduce the heat and let it simmer for 10-15 minutes until it thickens.
- Remove the tea bags and add 1-2 drops of essential oil (optional) to the mixture for added fragrance.
- Let the mixture cool down and pour it into a container for storage.
General Instructions:
It is important to apply this glue only on clean and dry skin. Also, make sure you are not allergic to any of the ingredients used. Always test the glue on a small patch of skin before applying it to a larger area.
Works wonderfully for removing facial hair, this glue can also be used as an eyelash glue alternative. However, if you are looking for a strong hold for eyelash extensions, it is recommended to use commercial eyelash glue.
Option #3: DIY Facial Wax
For those who prefer wax-based facial glue, you can easily make your own DIY facial wax at home with just a few ingredients. Here’s how:
Ingredients:
- 1 cup of granulated sugar
- 1/4 cup of water
- 1/4 cup of lemon juice
- 1 tablespoon of honey
To start, combine all the ingredients in a heavy-bottomed saucepan and heat over medium-high heat. Stir occasionally until the mixture starts to boil. Then, turn down the heat to medium-low and let it simmer until the mixture turns into a sticky and thick syrup. This should take around 15-20 minutes.
Once it reaches the desired consistency, remove it from the heat and let it cool down for a minute or two. Then, transfer the mixture into a clean container with a lid.
Pro Tip: You can test the consistency of the wax by taking a small amount of it on a spoon and placing it in cold water. If it forms a firm ball, it’s ready to use.
To use the DIY facial wax, apply a thin layer of the wax onto the area where you want to remove hair from using a spatula or popsicle stick. Then, place a strip of cloth or paper on top of the wax and smooth it out with your fingers, making sure it sticks to the wax. With a quick pulling motion, remove the strip in the opposite direction of the hair growth.
Warning: Waxing can be painful, so make sure you only use it on areas where you want to remove hair from. Avoid using it on sensitive areas such as the eyelids or eyebrows.
Why Use DIY Facial Wax?
Making your own facial wax at home has its perks. For one, it’s inexpensive and easy to make. You can also customize it to your liking by adding scents or essential oils to the mixture. DIY facial wax is gentle on the skin as it only contains natural ingredients, unlike store-bought facial waxes that may contain harsh chemicals.
Whether you choose gelatin-based, agar-based, or wax-based facial glue, it’s important to follow proper instructions and precautions when making and using them. This will ensure a safe and effective hair removal experience.
Step-by-Step Guide
Finally, the exciting part! You’ve gathered all the ingredients, and now it’s time to make your own facial glue. This process may seem intimidating at first, but with our step-by-step guide, you’ll be a pro in no time. We will be covering three options: a gelatin-based facial glue, an agar-based facial glue, and a DIY facial wax. Choose the option that appeals to you and let’s get started! But before we proceed, keep in mind the importance of remembering all the precautionary measures in handling hot liquids and tools. If you’re not familiar with any of the steps, you can check this guide on how to open lash glue for more information.
Option #1: Making Gelatin-Based Facial Glue
To make your own gelatin-based facial glue, you’ll need just a few ingredients that you probably already have in your kitchen. This is a great DIY option that doesn’t require any special equipment or hard-to-find materials.
Ingredients:
| Ingredients | Amount |
| Gelatin powder | 1 tablespoon |
| Water | 3 tablespoons |
| Honey | 1 teaspoon |
| Cornstarch | 1 teaspoon |
| Essential oil (optional for fragrance) | A few drops |
Instructions:
1. In a microwave-safe bowl or on the stove, mix together the gelatin powder and water until fully blended.
2. Microwave for 10-15 seconds or heat on the stove until the mixture is melted and smooth.
3. Add honey and cornstarch to the mixture and stir well.
4. If you’d like to add fragrance to your facial glue, now is the time to add a few drops of your favorite essential oil and stir well.
5. Transfer the mixture to a small container with a lid and let it cool and thicken for about five minutes.
6. Your gelatin-based facial glue is now ready to use!
It’s important to note that this glue may not work for everyone and may cause irritation or breakouts for some people. If you experience any discomfort, discontinue use immediately.
If you don’t have access to wig glue, you may be wondering what other options you have. Check out our article on what you can use if you don’t have wig glue for some helpful ideas.
Alternatively, you may have heard of a product called u-glue. Find out more about what u-glue is and how it can be used in our article on u-glue.
Option #2: Making Agar-Based Facial Glue
Agar-based facial glue is an excellent alternative to gelatin-based facial glue, especially for people who avoid animal products. Fortunately, this glue is also simple to make and only requires a few ingredients:
- Agar flakes: You can buy agar flakes at most health food stores. You’ll need half a cup of flakes to make the glue.
- Water: You’ll need two cups of water to dissolve the agar flakes.
- Essential oils: Adding a few drops of essential oils can make the glue more pleasant to use. Choose your favorite scent!
To make agar-based facial glue, follow these steps:
- Dissolve the agar flakes: Pour two cups of water into a saucepan and add half a cup of agar flakes. Let the mixture sit for a few minutes to allow the flakes to absorb the water.
- Heat up the mixture: Put the saucepan on medium heat and bring to a boil. Stir the mixture continuously for about ten minutes to ensure the agar flakes dissolve completely. Once dissolved, remove from heat.
- Add essential oils: If desired, add a few drops of essential oils, such as lavender or peppermint oil, to the mixture to make it more fragrant. Mix well.
Once you’ve made agar-based facial glue, you can use it in the same way as gelatin-based facial glue. Apply the warm glue to your face, let it dry, and then peel it off. It should remove any dirt, blackheads, and whiteheads, leaving your skin clean and smooth.
However, be cautious when using essential oils, as some people may be allergic or sensitive to them. It’s best to test a small patch of skin before applying the glue to your face. Also, be sure to use the glue immediately after making it, as it may lose its effectiveness if stored for an extended period.
Option #3: Making DIY Facial Wax
Making your own DIY facial wax can be a great way to ensure the ingredients are all natural and safe for your skin. Here’s a step-by-step guide to making your own facial wax:
Ingredients:
- 1 cup sugar
- 2 tablespoons lemon juice
- 2 tablespoons water
Equipment:
- Saucepan
- Thermometer
- Container for storage
Here are the steps to follow:
- In a saucepan, mix together the sugar, lemon juice, and water.
- Heat the mixture on low heat and stir continuously until the sugar dissolves.
- Keep stirring while increasing the heat to high and bringing the mixture to a boil.
- Reduce the heat to medium and insert a thermometer into the mixture.
- Wait until the mixture reaches 250°F (121°C) and then remove it from the heat.
- Pour the mixture into a container and let it cool down until it’s workable and not too hot to touch.
General Instructions:
- Before using the wax, test it on a small patch of skin to make sure you are not allergic to any of the ingredients.
- To use, apply a thin layer of the wax to the area where you want to remove hair using a spatula or wooden stick.
- Place a strip of cloth on top of the wax and smooth it down firmly.
- Hold the skin taut and quickly pull the strip off in the opposite direction of hair growth.
- After finishing, clean the area with water and apply some moisturizer to soothe the skin.
Precautions and Warnings:
- Be careful not to overheat the mixture as it may burn the skin.
- Make sure the mixture has cooled before applying it to the skin.
- Avoid applying the wax to sensitive areas like the eyebrows or genitals.
- Consult with a dermatologist if you have any skin conditions or allergies before using the wax.
Making DIY facial wax is a great way to remove unwanted facial hair naturally and safely. However, it’s important to follow the instructions carefully and take precautions to avoid any burns or allergic reactions.
General Instructions
Once you have made your facial glue or wax, here are some general instructions to follow before you start applying it to your face:
- Cleanse your face thoroughly: Make sure your face is clean and free of any oil or makeup before applying the facial glue or wax. This will help the glue or wax adhere better to your skin.
- Test the temperature: Always test the temperature of the glue or wax before applying it to your face. If it is too hot, it can burn your skin and cause irritation.
- Use a spatula or brush: Use a spatula or brush to apply the glue or wax to your face. This will help you apply it evenly and prevent any clumps or bumps from forming.
- Avoid the eye area: When applying facial glue or wax, make sure to avoid the sensitive eye area to prevent any irritation or damage to your eyes.
- Let it dry: Allow the glue or wax to dry completely before attempting to remove it. This will ensure that it sticks to your hair and removes it effectively.
- Remove carefully: When removing the glue or wax, be gentle and take your time. Pulling too hard or too fast can cause discomfort and even damage to your skin.
- Moisturize after: After removing the glue or wax, make sure to moisturize your skin to help soothe any irritation and prevent dryness.
By following these general instructions, you can ensure that your facial glue or wax application goes smoothly and effectively removes unwanted hair. Remember to always take the necessary precautions and test your glue or wax on a small patch of skin before applying it to your face to avoid any adverse reactions.
Application and Removal Tips
Once you have made your own facial glue, it’s important to know how to apply and remove it properly. Here are some helpful tips for both application and removal.
Application Tips:
1. Determine where you want to apply the glue. You can use it to remove facial hair or as a base for applying makeup.
2. Cleanse your face thoroughly before applying the glue. This will help to remove any dirt or oil that may interfere with the glue’s effectiveness.
3. Apply the glue evenly to the area you wish to remove hair or as a base for makeup. Use a small brush or applicator to carefully apply the glue.
4. Once the glue has been applied, allow it to dry completely. This usually takes around 10 minutes.
5. Once it’s completely dry, you can start peeling it off. Pull the glue off in one quick motion, in the opposite direction of hair growth.
Removal Tips:
1. Use warm water to help loosen the glue if it is too difficult to peel off.
2. Gently rub some facial oil or coconut oil onto the skin area where the glue was applied. This will help to dissolve any remaining glue on the skin.
3. Take a soft cloth or tissue and gently wipe off any remaining glue and oil from the skin.
4. After removing the glue, clean your skin with water and a gentle cleanser or face wash to remove any remaining residue.
5. It’s important to moisturize your skin after removing facial glue to prevent dryness and irritation.
Remember to always follow the instructions on the package when applying and removing facial glue. If you experience any discomfort or adverse effects, stop using it immediately and consult a dermatologist.
Precautions and Warnings
Before you start making and using facial glue, it’s important to keep in mind some precautions and warnings to prevent harm to your skin.
Allergy Test: It is essential to do an allergy test before using any facial glue. Apply a small amount of glue to a small part of your skin, such as behind your earlobe, and wait for at least 24 hours to check for any adverse reaction before using the glue on your face.
Hygiene: Maintaining good hygiene is critical while making or using facial glue. Always wash your hands and tools thoroughly before preparing or applying the glue.
Skin type: Different facial glues are suitable for different skin types. Determine your skin type and choose a facial glue that is compatible with it. If you have sensitive or allergy-prone skin, consider opting for milder facial glue and use it cautiously.
Consistency: The consistency of facial glue is crucial. The glue should not be too thick or too thin, as this could make it difficult to apply and remove.
Application: While using facial glue, avoid applying it too close to your eyes, nostrils, or lips. You should also avoid using glue on irritated, broken, or wounded skin.
Removal: Always remove facial glue gently to avoid any injury or damage to your skin. Never rip or pull the glue off forcefully, use natural oil-based removers, and wipe it off with a cotton pad or washcloth.
Storage: Store the facial glue in a sealed, airtight container in a cool and dry place. Avoid exposure to sunlight or other heat sources, as this could alter the consistency of the glue.
Caution: If you experience any redness, itching, burning, or swelling while using the facial glue, remove it immediately and seek medical help if symptoms persist.
By taking these precautions and being mindful of the warnings, you can use facial glue safely and effectively, achieving flawless results.
Conclusion
In conclusion, making your own facial glue can be a fun and cost-effective way to enhance your beauty routine. Whether you opt for the gelatin-based, agar-based, or DIY facial wax recipe, you’ll have the satisfaction of knowing exactly what ingredients are going onto your skin. Plus, by making your own glue, you can customize it to fit your preferences and specific skin type.
However, remember to take the necessary precautions when making and applying the glue to avoid any potential risks. It’s important to do a patch test first and be aware of any allergies you may have. Additionally, follow the instructions carefully and avoid leaving the glue on for too long or applying it to sensitive areas.
Overall, with the right ingredients and a bit of patience, you can create a high-quality facial glue that will help you achieve flawless makeup application and a radiant complexion. Happy crafting!
Frequently Asked Questions
1. Can facial glue cause skin irritation?
Yes, some people may experience skin irritation when using facial glue. It’s important to check the ingredients and do a patch test before using the glue on your face.
2. Can I use regular glue for facial hair removal?
No, it’s not safe to use regular glue for facial hair removal as it can cause skin irritation and damage. Only use facial glue made specifically for this purpose.
3. Can I make facial glue without gelatin or agar?
Yes, you can make a DIY facial wax without using gelatin or agar. There are many recipes that use natural ingredients such as sugar, honey, and lemon juice.
4. How long does facial glue last?
The duration of facial glue will depend on the type of glue used and how often you apply it. Generally, facial glue can last anywhere from a few hours to a few days.
5. Can I apply makeup over facial glue?
Yes, you can apply makeup over facial glue. Just make sure to apply the glue first, allow it to dry, and then apply your makeup as usual.
6. Can I use facial glue to remove body hair?
While it’s possible to use facial glue to remove body hair, it’s not recommended. Facial glue is designed for use on delicate facial skin and may not be suitable for coarser hair on other parts of the body.
7. Can facial glue be used for all skin types?
No, facial glue may not be suitable for all skin types. It’s important to check the ingredients and do a patch test before using the glue on your face, especially if you have sensitive skin.
8. Is it safe to make facial glue at home?
Yes, it’s safe to make facial glue at home as long as you follow the recipe instructions carefully and use clean, sanitized equipment.
9. Can I reuse facial glue strips?
No, it’s not recommended to reuse facial glue strips as they may lose their effectiveness and may also harbor bacteria.
10. What should I do if I experience skin irritation from facial glue?
If you experience skin irritation from facial glue, immediately remove the glue and wash your face with water. Apply a soothing cream or ointment to the affected area. If the irritation persists, seek medical advice.