Imagine this scenario: you just recently installed a beautiful engineered wood floor that you are absolutely in love with, but you realized a glue stain on it that takes away from its beauty. It can be frustrating and daunting, not knowing how to remove it without causing damage to the floor. But don’t fret! With the right tools and the correct steps, removing glue from an engineered wood floor can be done easily and effectively. In this complete guide, we’ll walk you through each step of the process, from identifying the type of glue to sanding and refinishing the area if needed. Let’s get started!
Step 1: Identify the Glue Type
It can be a daunting task to remove glue from engineered wood floors especially if you are not aware of the type of glue used. While some glues can be easily removed by simply scraping them off, with others, you need to be more careful in order to avoid damaging your floor. In this step, we will show you how to identify the type of glue on your engineered wood floor before taking any action. This will help you to choose the right removal method which will ensure your floor remains in excellent condition. So, before you start removing the glue, let’s first identify the type of glue used.
Types of Glue
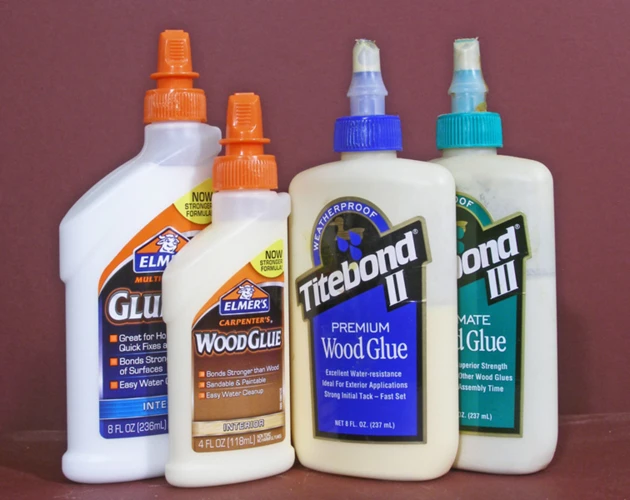
There are various types of glue that can be used on an engineered wood floor. It is important to know the glue type in order to select the appropriate method for removal. Here are some common types of glue used on an engineered wood floor:
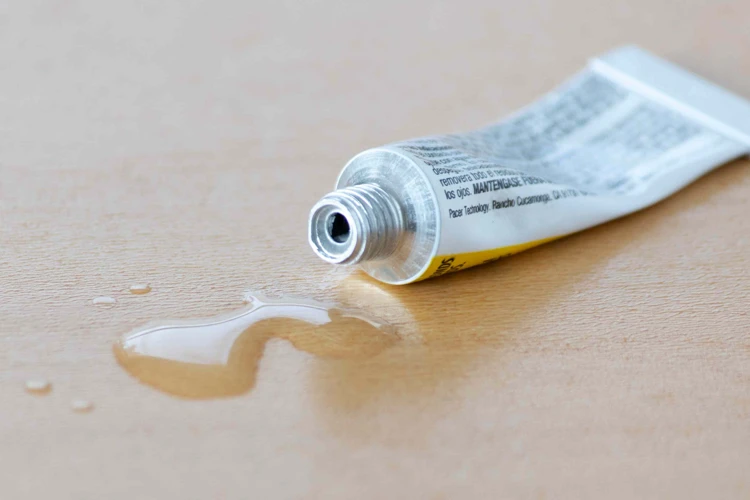
- Polyurethane glue: Polyurethane glue is a strong adhesive that cures by reacting with moisture. It creates a durable bond, which can make it difficult to remove.
- PVA glue: PVA (polyvinyl acetate) glue is a water-based adhesive that is commonly used in woodworking. It is easy to apply and dries clear.
- Epoxy glue: Epoxy glue is a two-part adhesive that is used for bonding materials that are difficult to join together.
- Cyanoacrylate glue: Cyanoacrylate glue, commonly known as super glue, is a fast-drying adhesive that is used for small projects and repairs. It can bond almost any materials in seconds.
Knowing the glue type is crucial because it determines the method for removal. For example, PVA glue can be removed using warm water and a scraper, while epoxy glue requires a solvent for removal. For more information on removing different types of glue, check out this guide on how to remove glue from different surfaces.
How to Identify the Glue Type
Different types of adhesive require different cleaning methods, so it is important to determine what type of glue you are dealing with. Here are some common types of glue that may be used on engineered wood floors, and how to identify them.
| Type of Glue | Description | How to Identify |
|---|---|---|
| Polyurethane glue | A strong adhesive that creates a permanent bond. It is waterproof, making it ideal for outdoor use, and can be difficult to remove once dry. | Look for a yellow or amber-colored glue. It may also have a foamy texture when wet, and will not dissolve with water. |
| Epoxy glue | A two-part adhesive that forms a very strong bond. It is often used to fill gaps or cracks, and can be sanded or painted once dry. | Epoxy glue usually comes in two separate components that need to be mixed before use. It may have a clear or opaque appearance, and will not dissolve with water. |
| Polyvinyl acetate (PVA) glue | Also known as white glue, this adhesive forms a strong bond and dries clear. It is often used for crafts and woodworking projects. | PVA glue has a white appearance when wet, but dries clear. It may dissolve with water. |
| Pressure-sensitive adhesive (PSA) | A tacky adhesive that creates a strong bond when pressure is applied. It is often used for flooring and carpeting. | PSA can be identified by its sticky texture. It is usually covered by a protective film that needs to be removed before installation. |
Identifying the type of glue on your engineered wood floor is crucial in choosing an effective cleaning method. If you are unsure about the type of glue on your floor, try consulting a professional for assistance.
Step 2: Gather the Tools and Materials
Before attempting to remove glue from your engineered wood floor, it is essential to gather the necessary tools and materials. The tools required for this task include safety goggles, gloves, a plastic scraper or putty knife, and a clean rag or cloth. Make sure that you wear appropriate safety gear to avoid any harm or injury while removing the glue.
In addition to the tools, you will also need to gather certain materials depending on the type of glue that needs to be removed. If you are using a commercial glue remover, read the instructions to ensure that you have all the necessary materials. Some of the materials that you may need include a commercial glue remover, denatured alcohol, vinegar, baking soda, a plastic bag, and tape.
It is also important to note that some natural remedies like vinegar or baking soda may require a longer waiting time than commercial glue removers. Make sure that you have enough time set aside to complete the task.
Properly preparing for the glue removal process will not only make the process easier but also ensure that your safety is prioritized. If you do not have the necessary tools or materials for the task, then you may not be able to remove the glue effectively. With that said, let us move on to the next step and understand how to test the glue remover on a small area.
Step 3: Test the Glue Remover on a Small Area
Before applying any glue remover on the stained area, it’s important to test it on a small, inconspicuous area of the engineered wood floor. This will help you determine whether the product will cause discoloration, swelling, or any other kind of damage to the floor.
To perform this test, choose a small area, preferably in a corner or under a piece of furniture. Apply a small amount of the glue remover to a clean, dry cloth, and then rub the cloth on the test area. Wait for a few minutes, and then check for any signs of damage or discoloration. If everything looks good, you can proceed with the cleaning process.
It’s important to note that different types of glue removers may work differently on different types of glue. For example, a glue remover that works well on a super glue stain may not be as effective on a vinyl glue stain. It’s best to choose a glue remover that’s specifically designed for the type of glue you’re dealing with.
If you’re unsure about the type of glue remover to use, consult the manufacturer’s instructions or seek advice from a professional. It’s always better to be safe than sorry, as using the wrong product could cause irreversible damage to your engineered wood floor.
Once you’ve tested the glue remover and ensured that it’s safe to use, you can move on to the next step of the cleaning process. If you notice any damage or discoloration during the test, stop using the product immediately and seek alternative solutions. There are many other ways to remove glue from engineered wood floor, and it’s better to try a few different methods than to risk damaging your valuable flooring.
If you’re dealing with other types of glue stains in addition to the ones on your engineered wood floor, check out our guides on how to remove decal glue from RV, how to get wrap glue off car, how to get super glue out of your mouth, or how to get nail glue off wood.
Step 4: Apply the Glue Remover on the Stain
After identifying the type of glue and gathering the necessary tools and materials, it’s time to apply the glue remover on the engineered wood floor. Before doing so, it’s important to wear gloves, and ensure that the room is well-ventilated.
The glue remover should be applied directly on the stain using a brush or a clean, white cloth. It’s important to follow the instructions provided by the manufacturer of the glue remover regarding the amount of product to be used. Some removers require dilution with water, so it’s important to check the label and mix accordingly.
It’s recommended to start from the edges of the stain and work your way toward the center. This will prevent the glue remover from spreading to unaffected areas, which can lead to further damage of the floor.
If there are stubborn glue spots that won’t come off, it can be helpful to use a plastic scraper or an old toothbrush to gently scrub the affected area while the glue remover is still wet. It’s important to be gentle to avoid scratching the surface of the floor.
Be patient and wait. Once the glue remover is applied and scrubbed, it’s vital to wait for the specified amount of time provided by the manufacturer. This usually ranges from a few minutes to a few hours, depending on the type of glue remover and the amount of glue present.
While waiting, it’s good to keep an eye on the area to ensure that the floor surface is not getting too wet. If necessary, remove the excess glue remover with a clean cloth or towel.
In case of using a glass glue remover or a rat glue remover, it’s important to handle these products with caution to avoid potential risks. Additionally, when removing a hair glue stain, such as a 30-second hair glue, ensure that you follow the steps that usually are taken to get it off from clothes.
In conclusion, applying the glue remover on the stain requires focus and patience. By following the manufacturer’s instructions and being gentle in scrubbing, the glue can be effectively removed. In the next step, we’ll discuss how to remove the glue residue after waiting for the specified amount of time.
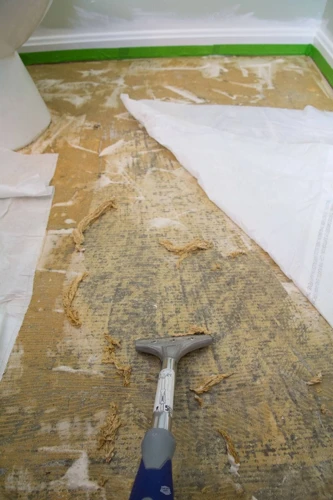
Step 5: Wait and Scrape Off the Glue Residue
After applying the glue remover, it’s time to wait and let the solution do its job. The amount of time required for the glue to soften and become removable will vary depending on the type and amount of glue present. Refer back to the label of the glue remover to determine how long to wait before attempting to scrape off the residue.
It’s important to note that scraping off glue residue too soon can result in extra damage to the wood surface. Be patient and wait for the glue remover to fully penetrate the glue.
Once the appropriate amount of time has passed, use a plastic scraper or putty knife to gently scrape off the softened glue. Be sure to use a plastic scraper instead of a metal one as metal can potentially scratch or damage the surface of the engineered wood floor.
If there is still some stubborn residue left behind, applying more glue remover and waiting a bit longer can help break down the glue for easier removal. It’s important to avoid vigorously scrubbing at the residue as this can lead to more damage.
After successfully removing all the glue residue, wipe the area clean with a damp cloth and allow it to completely dry before moving on to the next step.
If there are any remaining hazy spots or discoloration on the engineered wood floor from the glue remover, use a neutralizer or consult a professional for appropriate cleaning methods and solutions. Neutralizers can be effective at combating the effects of glue residue and restoring the appearance of the affected area.
It’s important to note that some glue removers can be too harsh for certain types of flooring, such as tile. If you ever need to remove glue from tile, it’s important to research and use appropriate methods to avoid causing damage. Check out our guide on how to get glue off tile for more information.
Step 6: Clean the Area
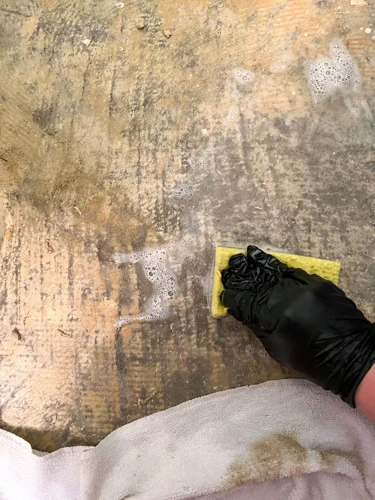
After successfully removing the glue residue, it is important to clean the area thoroughly to make sure that there is no remaining adhesive. This step is especially crucial if you plan on refinishing the area.
1. Use a clean cloth: Start by wiping the area with a clean cloth and warm water. This will help remove any residue left behind by the glue remover.
2. Avoid using harsh chemicals: Avoid using harsh chemicals or detergents that may damage the engineered wood floor. Instead, use a gentle cleaner or soap specifically designed for hardwood floors.
3. Rinse with clean water: After cleaning, rinse the area with clean water and dry it with a clean towel. Be sure to remove any standing water as it can cause damage to the engineered wood floor.
4. Let the area dry completely: Allow the area to dry completely before walking on it or applying any further treatments.
5. Inspect the area: After the area is completely dry, inspect it for any remaining residue. If you notice any leftover adhesive, repeat the glue remover process until the area is completely clean.
By following these steps, you can ensure that your engineered wood floor is clean and free of any remaining glue residue. It is important to note that failure to clean the area thoroughly can lead to damage or discoloration of the floor surface.
Step 7: Repeat if Needed

After allowing the recommended amount of time for the glue remover to work, you may find that the sticky residue isn’t lifting off as easily as you’d hoped. In this case, it’s often necessary to repeat the entire process.
Apply More Glue Remover: If the glue residue remains stubborn, apply a fresh layer of glue remover. Be sure to allow enough time for it to sit before attempting to scrape it off again.
Try a Different Glue Remover: If the glue seems impervious to the initial glue remover, try a different, more potent product. Be sure to follow all safety instructions and test a small area first to make sure it doesn’t damage the wood’s finish.
Use More Force: If all else fails, you may need to apply more pressure when scraping. This doesn’t mean using a metal scraper or other harsh tool that could damage the floor. Instead, use a plastic scraper and be careful not to scratch the surface.
It’s important to remain patient and persistent during this process. Removing glue from an engineered wood floor can be a tedious task, but taking the time to do it properly will pay off in the end. Remember to always test a small area first and avoid using harsh chemicals or tools that could damage your flooring.
Step 8: Sand and Refinish the Area (Optional)

After removing the glue from your engineered wood floor, you may notice that the affected area looks dull and damaged. If this is the case, you may want to consider sanding and refinishing the area. Sanding and refinishing will restore the original shine and appearance of your wood floor, making it look as good as new.
Sanding involves using a sanding machine, or sandpaper, to gently remove the top layer of the damaged hardwood. Sanding should be done only to the affected area, and not the surrounding areas of the floor. Start by sanding the floor using low-grit sandpaper, moving up to a higher-grit sandpaper until the flooring is smooth to the touch.
Refinishing is the process of applying a new coat of finish to your sanded flooring. You will need to select the appropriate finish for your flooring based on its type and color. There are several different types of finishes available, including oil-based, water-based, and acid-cured finishes. You can choose from a range of colors to match your flooring, from natural to darker shades.
Before starting to refinish your flooring, be sure to thoroughly clean the area with a broom or vacuum to ensure there is no sawdust or debris on the surface. Apply a thin coat of the finish with a brush or roller, being careful to avoid applying too much. Allow the coat to dry completely before applying additional coats, if needed.
It is important to note that sanding and refinishing your engineered wood floor is an optional step. If the affected area is small and the floor is still in good condition, you may not need to perform this step. However, if the damage is extensive, sanding and refinishing may be necessary to restore your floor to its original appearance.
Note: It is recommended to hire a professional if you are not experienced in sanding and refinishing wood floors, as improper techniques can cause damage to your flooring.
Tips and Warnings
As you tackle the task of removing glue from your engineered wood floor, there are a few tips and warnings to keep in mind. Taking the proper precautions will ensure that your floors remain in good condition and do not sustain any further damage during the removal process. Here are some important things to consider:
Tips for Removing Glue from Engineered Wood Floor
When it comes to removing glue from an engineered wood floor, it’s essential to follow some tips and tricks to ensure your floor remains in optimal condition. Here are some tips to help you remove glue safely and effectively:
- Protect the Floor: Before you start removing glue, make sure you cover the surrounding part of the floor with protective materials, like old towels or newspapers, to prevent any damage to your floor or accidental staining from the glue remover.
- Work in Sections: To avoid the glue remover from drying up, work in small sections, and remove one section at a time. This will help you to prevent an oversaturation on the surface and help keep the removal process manageable.
- Choose the Right Glue Remover: Different glue types require different solvents to remove them effectively. Choose the right glue remover based on the glue type you want to remove. Always read the label and follow the instructions carefully.
- Test on a Small Spot First: Testing the glue remover in a small spot first can help you gauge its effectiveness without causing any significant damage to your floor. Apply a small amount of the solvent to a small spot, and wait for the recommended time to assess how it interacts before using it on a larger area.
- Use the Right Tools: To ensure successful glue removal, be sure to use the right tools, including a scraper, plastic putty knife, or a soft-bristled brush. Also, avoid using metallic tools that can cause gouging, damaging your floor.
- Be Patient: Removing glue from an engineered wood floor can be a tedious and time-consuming process. Be patient and take your time with the task at hand to avoid damaging your floor.
By following these helpful tips, you can remove glue from your engineered wood floor safely and effectively, leaving it looking its best for years to come. Remember to always treat the floor with care and handle any necessary procedures with caution and a gentle touch.
Warnings
It’s important to be cautious when removing glue from an engineered wood floor. Here are some warnings to keep in mind before attempting to remove glue from your flooring:
- Avoid using harsh chemicals: Using harsh chemicals can cause damage to your engineered wood floor. It’s important to use a product specifically designed for use on engineered wood.
- Protect your skin: Glue removers can cause irritation to your skin. Always wear gloves and avoid contact with your skin as much as possible.
- Work in a well-ventilated area: Some glue removers can release fumes that can be harmful if inhaled. Work in a well-ventilated area or wear a mask to protect yourself from harmful vapors.
- Avoid using excessive moisture: Engineered wood can be sensitive to moisture. Avoid using excessive moisture while removing glue residue, as this could cause warping or other damage to your flooring.
- Take precautions when sanding: If you choose to sand and refinish the area where the glue was removed, take precautions to avoid inhaling dust. Wear a mask and protective eyewear.
- Be patient: Removing glue from an engineered wood floor can take time, especially if the stain is deep or old. Don’t rush the process and be patient as you work to remove the glue residue.
By following these warnings and taking the necessary precautions, you can successfully remove glue from your engineered wood floor without causing any damage to the flooring.
Conclusion
After following the steps outlined in this guide, you should be able to remove glue from your engineered wood floor with ease. Remember to always identify the type of glue first and gather all the necessary tools and materials before beginning the process. It’s important to also test the glue remover on a small area to ensure it doesn’t damage the floor, and to be patient when waiting for the remover to work.
If necessary, repeat the process until the glue is completely removed, and be sure to clean the area thoroughly afterwards. It’s also important to keep in mind any warnings, such as avoiding the use of heat or harsh chemicals that could damage the floor.
With a bit of time and effort, your engineered wood floor can look good as new again. Keep in mind that refinishing the area is an optional step that can be taken to achieve an even greater result. Thanks for reading this guide and we hope it helps you successfully remove glue from your engineered wood floor!
Frequently Asked Questions
Can I remove glue from an engineered wood floor by using hot water?
No, hot water can damage the finish of your floor, making it more difficult to remove the glue. It’s better to use a specialized glue remover.
Can I use a scraper to remove the glue residue?
Yes, but be careful not to damage the underlying wood. Use a plastic or wooden scraper instead of a metal one.
Can vinegar remove glue from my engineered wood floor?
Vinegar is not recommended for removing glue from an engineered wood floor. It’s better to use a specialized glue remover.
Can I use bleach to remove glue from my engineered wood floor?
No, bleach can damage the finish of your floor and make the stain worse. It’s better to use a specialized glue remover.
Can I use mineral spirits to remove glue from my engineered wood floor?
Yes, mineral spirits can be effective in removing glue from an engineered wood floor. However, it’s important to test it on a small, inconspicuous area first to make sure it won’t damage the finish of your floor.
How long should I wait after applying the glue remover?
The time you need to wait depends on the product you’re using. Check the label for specific instructions.
How do I know if the glue remover is working?
You’ll notice the glue starting to soften and change its appearance. It’s important to be patient and let the glue remover work its magic.
Can I use a hairdryer to speed up the process of removing the glue?
No, using a hairdryer can damage the finish of your floor and make the glue harder to remove. It’s better to be patient and let the glue remover work on its own.
Can I use a buffing machine to remove the glue residue?
No, a buffing machine can damage the finish of your floor and make the glue residue harder to remove. It’s better to use a scraper or a towel to remove the residue.
Can I apply a new finish after removing the glue?
Yes, after removing the glue and cleaning the area, you can apply a new finish to the affected area to restore the look of your engineered wood floor.