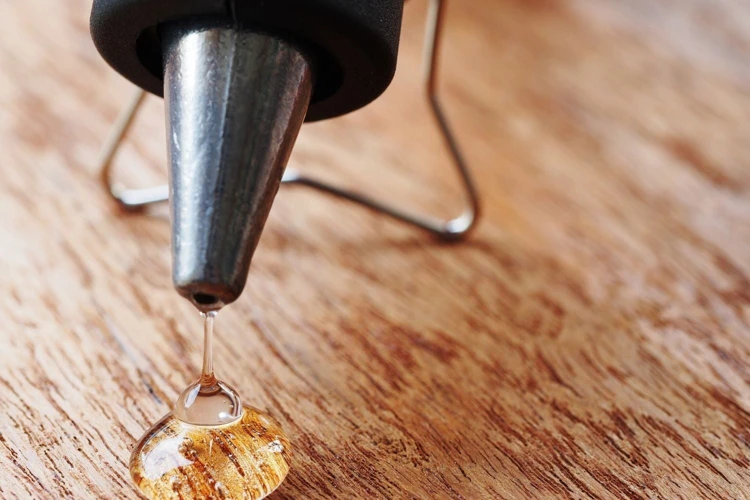
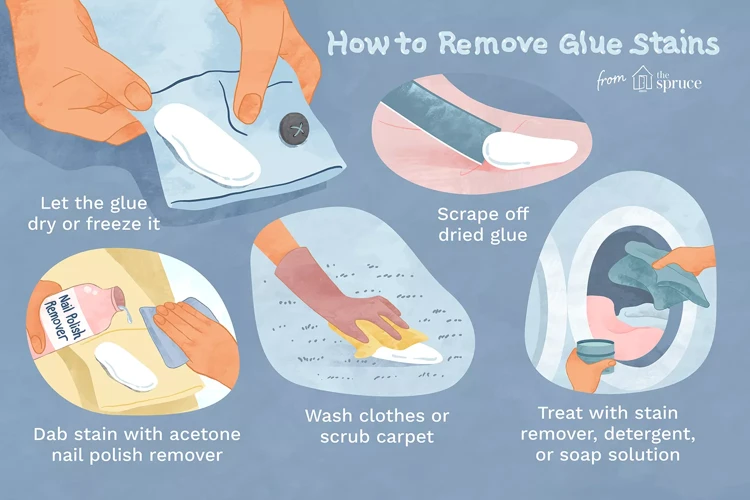
Have you ever accidentally spilled glue in your dryer? It can be frustrating and seem like a nightmare to clean up. But fear not, as we’ve got the complete guide for you to remove glue from your dryer drum. With the proper tools and techniques, you’ll have your dryer looking good as new in no time. From petroleum jelly to rubbing alcohol, we’ll explore the best methods for removing glue from a dryer drum step-by-step. So let’s get started and say goodbye to any unwanted adhesive traces on your dryer.
Tools You’ll Need
You can’t remove glue from a dryer drum without the proper tools. Fortunately, there are several items that you may already have around the house that can help you do the job, including Vaseline, Rubbing Alcohol, Goo Gone, Magic Eraser, and WD-40. But what’s the best way to use these tools to remove the glue from the dryer drum? Keep reading to find out. And if you’re dealing with other types of glue, we’ve got you covered too. Check out our articles on removing super glue from rubber, undoing wood glue, removing contact glue, and much more.
1. Vaseline
Removing glue from your dryer drum can seem like a daunting task, but there are several methods you can try. One of the most effective ways to remove glue is by using Vaseline.
| Materials: | Instructions: |
|---|---|
|
|
Using Vaseline is a safe and effective way to remove glue from your dryer drum without damaging the surface. However, it’s always a good idea to test any cleaning solution on a small area of your dryer drum first to ensure it doesn’t cause any damage.
If Vaseline doesn’t work, don’t worry – there are several other cleaning solutions you can try, such as rubbing alcohol, Goo Gone, Magic Eraser, and WD-40. Each solution has its own unique properties and may work better on certain types of glue or stains. For more information on removing different types of glue, check out our guide on how to remove tacky glue or how to remove glue from stone.
2. Rubbing Alcohol
Rubbing alcohol, also known as isopropyl alcohol, is a powerful solvent that can be used to remove glue from a dryer drum. It is a common household item that can be purchased at most drugstores or supermarkets. Rubbing alcohol is effective in removing glue because it dissolves the adhesive properties of the glue, making it easier to wipe away.
To use rubbing alcohol to remove glue from a dryer drum, you’ll need to gather the following tools:
| Tools You’ll Need: | Rubbing alcohol | A soft cloth |
Step 1: Dampen a soft cloth with rubbing alcohol.
Step 2: Gently rub the cloth over the glue in the dryer drum.
Step 3: Continue rubbing until the glue begins to loosen and dissolve.
Step 4: Wipe away the loosened glue with the cloth.
Step 5: Repeat steps 1-4 as necessary.
It’s important to note that rubbing alcohol can be flammable, so be sure to let the dryer drum air out and dry completely before using it again. Additionally, be sure to avoid getting rubbing alcohol on any electrical components of the dryer.
If the glue is particularly stubborn and won’t come off with rubbing alcohol alone, you can try using a scraper or spatula to gently lift and loosen the glue before applying the rubbing alcohol.
For more information on removing different types of glue from various surfaces, check out our guides on how to get polyurethane glue off hands or how to remove glue off metal.
3. Goo Gone
Goo Gone is a popular cleaning solution that is also effective in removing glue from a dryer drum. It is formulated with citrus power and can dissolve adhesives, making it an ideal option for removing any sticky residue left on your dryer drum.
To use Goo Gone to remove glue from your dryer drum, follow these steps:
- Step 1: Apply Goo Gone to a soft cloth or paper towel. Be sure to use enough to saturate the area of the drum with glue residue.
- Step 2: Rub the cloth or paper towel onto the affected area of the drum. Be sure to apply pressure and use a circular motion to help break down the glue.
- Step 3: Let the solution sit for a few minutes. This will give the Goo Gone ample time to penetrate the glue and break it down.
- Step 4: Use a clean cloth or paper towel to wipe away the Goo Gone and the dissolved glue.
It’s important to note that Goo Gone is a strong solution, so it’s recommended to test it on a small, inconspicuous area of your dryer drum first before applying it to the entire glue residue.
If you don’t have Goo Gone on hand, you can also try using rubbing alcohol, Vaseline, or a Magic Eraser to remove the glue. Additionally, if you’ve accidentally gotten glue on your fingers, you can check out our article on how to get jet glue off your fingers, or if you need to remove signwriting glue, read our article on how to remove signwriting glue or how to remove asbestos tile glue for specific instructions.
4. Magic Eraser
One of the most effective tools for removing glue from your dryer drum is a Magic Eraser. These erasers are made with a special micro-abrasive material that allows them to effectively scrub away stubborn grime and adhesive residue.
Here is how you can use a Magic Eraser to remove glue from your dryer drum:
- Wet the Magic Eraser with warm water.
- Gently scrub the affected area with the eraser, applying firm but not excessive pressure.
- Rinse the eraser frequently to remove any accumulated debris.
- Continue to scrub until the glue is fully removed.
It is important to note that Magic Erasers are abrasive, so use caution when applying pressure. Excessive pressure can damage the finish on your dryer drum. For especially stubborn stains, you can also try using a little bit of baking soda or vinegar on the Magic Eraser. These substances can help to break down the glue and make it easier to remove.
Remember to discard the Magic Eraser after it has been used, as it will quickly become clogged with debris and lose its effectiveness. You may need to use multiple erasers to fully remove all of the glue from your dryer drum.
In addition to being effective at removing glue, Magic Erasers can also be used to remove other types of stains and grime from your dryer drum. They are a versatile tool to have on hand for all sorts of cleaning tasks around the home.
5. WD-40
WD-40 is a very popular and effective solution for removing glue from the dryer drum. Follow these steps to use it properly:
- Step 1: Spray a small amount of WD-40 onto the glue stain.
- Step 2: Let it sit for a few minutes for the solution to penetrate the glue stain.
- Step 3: After the allotted time, take a clean cloth and wipe the glue stain in circular motions.
- Step 4: If the glue stain is still there, you can repeat the process one more time until the glue is completely removed.
WD-40 is a versatile product that can be used for a variety of other purposes, such as removing adhesives from other equipment and removing rust from metal surfaces. However, it is important to remember that this product may be flammable, so be sure to keep it away from heat sources and use it carefully.
Preparation
Before jumping right into removing the glue from your dryer drum, it’s important to take a few precautions and do some preparation to ensure the process goes smoothly. To avoid any damage to your dryer and to ensure the cleaning solution is effective, there are a few important steps you need to follow first. Let’s take a look at the essential preparations you need to make before getting started.
1. Unplug Your Dryer
One of the crucial steps before starting any cleaning process for your dryer drum is to unplug it. This is extremely important to ensure your safety and avoid any accidents. Always make sure to unplug your dryer before attempting to clean it.
To make sure you unplug your dryer safely, follow these steps:
| Step 1 | Locate the power cord at the back of the unit. |
| Step 2 | Gently pull the power cord from the socket. |
| Step 3 | Wrap the cord neatly and store it in a safe place until the cleaning process is complete. |
Do not proceed with the cleaning process until your dryer is completely unplugged. Make sure to keep the power cord away from any water or liquids to avoid the risk of electrocution.
By following this simple yet crucial step, you can ensure that your cleaning process goes smoothly and safely without any accidents. Remember to always prioritize your safety when dealing with any electrical appliances, especially your dryer.
2. Test Cleaning Solution on a Small Area
Before using any cleaning solution on the entire surface, it is important to test it on a small and inconspicuous area of the dryer drum first. This will ensure that the cleaning solution does not damage the dryer’s finish or cause any discoloration. Here are the steps to follow when testing a cleaning solution on a small area:
- Choose a small, hidden area on the dryer drum to test the cleaning solution. This can be behind the door, on the back wall of the drum, or near the lint trap.
- Apply a small amount of the cleaning solution onto a soft cloth.
- Gently rub the cloth onto the test area using circular motions.
- After a few minutes, check the tested area for any discoloration or damage.
- If there is no adverse reaction, then the cleaning solution is safe to use on the entire surface of the dryer drum.
By performing this precautionary step, you can ensure that the cleaning process is safe for your dryer and will not cause any further damage. Remember to use caution and follow all safety instructions when working with cleaning solutions.
Removing the Glue
So, you’ve discovered glue in your dryer drum and it’s time to take action. Don’t worry, with the right tools and approach, you can get your dryer drum looking clean and functioning properly once again. It’s time to roll up your sleeves and get ready to remove that pesky glue. Here is a step-by-step guide on how to do it effectively and efficiently.
1. Apply the Cleaning Solution
Step 1: Get your cleaning solution ready. You can use any of the five cleaners mentioned above, as they will all effectively remove glue from a dryer drum. Take a look at the table below to see which cleaning solution may work best for you.
| Cleaning Solution | Pros | Cons |
|---|---|---|
| Vaseline | Non-toxic, gentle on skin, inexpensive | May require multiple applications, can leave greasy residue |
| Rubbing Alcohol | Dries quickly, effective on most adhesives, widely available | Strong odor, can damage certain surfaces |
| Goo Gone | Specifically designed for removing adhesives, works quickly | Contains petroleum distillates, can cause skin irritation |
| Magic Eraser | No additional cleaning products needed, reusable and effective | Can wear down over time, may not be able to remove all stains |
| WD-40 | Easy to use, multi-purpose, removes most adhesives | Strong odor, can damage certain surfaces, may require multiple applications |
Step 2: Apply a small amount of the cleaning solution to the glue stain. You can either use a cloth or a cotton swab to apply the solution. Be sure to apply the solution directly to the glue and avoid spreading it to other areas of the dryer drum.
Step 3: Gently rub the cleaning solution into the glue stain using a circular motion. Make sure you do not scrub too hard, as this may damage the drum of the dryer. Take your time and be patient, as some glue stains may take longer to remove than others.
Step 4: Once the cleaning solution has been applied and rubbed in, let it sit for a few minutes. This will give the solution time to break down the glue and make it easier to remove.
Now that you have applied the cleaning solution, let’s move on to the next step in removing glue from your dryer drum.
2. Let the Solution Sit for a Few Minutes
After applying the cleaning solution to the glue stains on your dryer drum, it’s important to let it sit for a few minutes before attempting to remove it. This will give the solution enough time to break down the glue and make it easier to wipe away. There are a few things you can do while you wait for the solution to work its magic.
- Set a timer: To ensure that you let the solution sit for the correct amount of time, set a timer for at least five minutes. This will give you enough time to tend to other tasks while you wait.
- Check the solution: After a few minutes have passed, check the solution to see if it has started to dissolve the glue. If it appears to be working, let it sit for a few more minutes. If not, try applying a bit more of the solution and wait another five minutes.
- Avoid touching the solution: While waiting for the solution to work, avoid touching or rubbing the affected area. Agitating the solution may cause it to become less effective, and could even spread the glue around, making the situation worse.
- Prepare for wiping: While you wait, grab a soft cloth or rag that you will use to wipe away the glue. This way, you’ll be ready to go as soon as the solution has done its job.
By letting the solution sit for a few minutes, you’ll give it time to dissolve the glue and make it easier to wipe away. Just be patient, and don’t rush the process. With a little bit of time and effort, you’ll be able to remove the glue from your dryer drum and get it looking like new again.
3. Wipe with a Soft Cloth
After letting the cleaning solution sit for a few minutes, it’s time to wipe away the glue residue with a soft cloth. Be sure to wear gloves to avoid getting any cleaning solution on your skin. A soft cloth will prevent any damage to the dryer drum’s surface. Choose a cloth that won’t leave any lint or residue behind.
To properly wipe away the glue, use a gentle back-and-forth motion with moderate pressure. Ensure that you wipe away all the glue residue, as well as any cleaning solution that may have been left behind. Use a fresh section of the cloth for each wipe, while making sure that the cloth remains damp enough to pick up the glue.
If the glue residue is particularly stubborn, you may need to apply more cleaning solution and leave it to sit for a few more minutes. Persistence is key, so don’t be afraid to repeat the process until all the glue residue has been removed.
Tip: Avoid using any harsh chemicals, such as bleach or acetone, as they can damage the dryer drum’s surface. Water should suffice for wiping away the excess cleaning solution and glue residue.
| Do: | Don’t: |
|---|---|
| Use a soft cloth | Use a rough or abrasive cloth |
| Apply moderate pressure | Apply too much pressure |
| Use a fresh section of the cloth for each wipe | Continue to use the same section of the cloth |
| Be persistent | Give up too easily |
| Use water to wipe away excess cleaning solution | Use harsh chemicals that can damage the dryer drum’s surface |
By following these steps, you can successfully remove glue from your dryer drum and avoid any damage to the surface. Remember to take your time and be persistent when dealing with stubborn stains.
4. Repeat as Necessary
After wiping with a soft cloth, check to see if all the glue has been removed from the dryer drum. If you still see glue residue, don’t worry, this is common. You simply need to repeat the previous steps until all the glue has been removed.
- Apply the cleaning solution: Reapply the chosen cleaning solution to the affected area.
- Let the solution sit: Allow the solution to sit on the glue for a few more minutes.
- Wipe with a soft cloth: Take a soft cloth and wipe away the glue residue.
- Repeat: Continue this process until all the glue has been removed from the dryer drum.
It’s important to note that patience and persistence are key when trying to remove glue from the dryer drum. You may need to repeat these steps several times before achieving the desired results. It’s also important to avoid using harsh chemicals or abrasive materials, as these can damage the dryer drum and leave it vulnerable to future problems. Stick to the gentle but effective methods outlined in this guide, and you’ll have your dryer drum looking like new in no time.
Dealing with Stubborn Stains
Removing stubborn stains can be a difficult and frustrating process, especially when dealing with glue on a dryer drum. But don’t worry, there are effective solutions to get rid of those stubborn stains. In this section, we will explore a couple of methods that will help you tackle even the toughest glue stains on your dryer drum. So, grab your tools and let’s get to work!
1. Use a Magic Eraser
When dealing with stubborn glue stains on your dryer drum, a Magic Eraser can come in handy. Made of melamine foam, this cleaning tool is highly effective in removing tough stains and marks.
Step 1: Wet the Magic Eraser with water.
Step 2: Gently apply the Magic Eraser to the glue stain on the dryer drum and begin scrubbing.
Step 3: Continue scrubbing until the stain is no longer visible. For tough stains, you may need to apply more pressure or use multiple Magic Erasers.
Step 4: Once you’ve successfully removed the glue stain, rinse the dryer drum with water to remove any residue left behind by the Magic Eraser.
It’s important to note that Magic Erasers are abrasive and can wear down the finish on your dryer drum. It’s recommended to use them sparingly and only when other cleaning solutions have failed.
If you’re hesitant about using a Magic Eraser on your dryer drum, you can always perform a test on a small, inconspicuous area before proceeding with the entire cleaning process.
2. Apply WD-40
If the glue on your dryer drum is particularly stubborn, don’t worry – you can still remove it with some extra effort and a powerful cleaning agent like WD-40. Here’s how:
- Place a towel or rag underneath the affected area: This is to prevent any excess WD-40 from dripping onto the ground or causing damage to the flooring beneath your dryer.
- Spray WD-40 directly onto the glue: Make sure to apply a liberal amount of WD-40 onto the glue stain, so that it can fully penetrate and loosen the glue from the dryer drum surface.
- Let it sit for about 15 minutes: Be patient and give the WD-40 some time to work its magic and dissolve the glue. Avoid touching the area during this time.
- Gently scrub the area: After 15 minutes, use an old toothbrush or scrub brush to gently scrub the area. Be cautious not to apply too much pressure as it could be damaging to the dryer drum surface.
- Wipe clean with a soft cloth: Once you have thoroughly scrubbed the area, use a clean, soft cloth to wipe away any residue left behind by the glue. Repeat steps 2-5 as needed until the glue is fully removed.
Remember to take caution while using WD-40 and to avoid excessive use as it can be harmful to the dryer drum and the environment. It’s best to use this method only if the glue stain is stubborn and cannot be removed with the other cleaning agents mentioned in this guide.
Cleaning the Dryer Drum
As the glue is removed from the dryer drum, it’s crucial to clean the drum thoroughly to ensure that it doesn’t become a breeding ground for germs and bacteria. Thus, the final step in this complete guide on how to remove glue from the dryer drum is cleaning the dryer drum. Keeping your dryer drum clean not only helps to prevent fires but also extends the life of your dryer while enhancing its performance. In this section, we will discuss how to clean the dryer drum after removing the glue.
1. Wipe with Soap and Water
When it comes to cleaning your dryer drum, wiping it down with soap and water is a great way to ensure it’s free of any glue residue. Here’s how to do it:
- Gather your materials: To clean your dryer drum, you’ll need a soft cloth, warm water, and a mild soap. Dish soap or laundry detergent will work just fine.
- Dampen the cloth: Wet the cloth with warm water and then squeeze out any excess water. The cloth should be damp but not dripping.
- Add soap: Apply a small amount of soap to the damp cloth. You don’t need much – just a dime-sized amount should be enough.
- Start cleaning: Begin wiping down the inside of the drum with the soapy cloth. Focus on any areas where you see glue residue or stains. Use gentle pressure and be sure to cover all areas of the drum.
- Rinse: Once you’ve wiped down the entire drum, rinse the cloth in warm water and repeat the process. This time, however, skip the soap and just use warm water to rinse the drum. Make sure to rinse the cloth frequently to avoid spreading any remaining glue residue.
Remember, it’s important to be gentle when cleaning your dryer drum to avoid any damage to the surface. By using a soft cloth and a mild soap, you can effectively remove any glue residue and leave your dryer drum looking clean and like new again.
2. Dry the Drum
Once you have cleaned the glue from the dryer drum, it is important to ensure that it is completely dry before using it again. Here are the steps to properly dry the drum:
- 1. Remove any excess moisture: Use a clean, dry cloth to wipe down the inside of the drum. This will help to remove any excess moisture that may be left over from the cleaning solution.
- 2. Leave the dryer door open: Leaving the dryer door open will allow any remaining moisture to evaporate quickly. This will also help to prevent the growth of mold or mildew inside the drum.
- 3. Let the drum air dry: Once you have wiped down the drum and left the door open, allow the drum to air dry for at least 30 minutes. This will give it enough time to dry completely.
- 4. Check for moisture: After 30 minutes, check the inside of the drum for any remaining moisture. If it still feels damp, repeat step 3 until the drum is completely dry.
- 5. Plug the dryer back in: Once the drum is completely dry, plug the dryer back in and it is ready to use again.
Remember to always take the time to properly dry the dryer drum after cleaning to prevent any damage to the machine and to ensure that it continues to work efficiently.
Conclusion
Wrap-Up: Removing glue from your dryer drum can be frustrating, but thankfully, there are several effective solutions available. Using the tools listed in this guide, such as Vaseline, rubbing alcohol, Goo Gone, Magic Eraser, and WD-40, can help you remove glue stains from your dryer drum.
Remember, it’s important to follow the preparation steps by unplugging your dryer and testing the cleaning solution on a small area before proceeding. Once you’ve removed the glue, wipe down the dryer drum with soap and water to clean any residue left behind.
If you encounter stubborn stains, like those caused by super glue, a Magic Eraser can come in handy. You can also apply WD-40 for tougher stains, but be sure to follow up with soap and water to clean the residue.
Overall, with these simple steps and tools, you can remove glue from your dryer drum and keep it running smoothly. Taking care of your dryer will not only help it function properly but also extend its lifespan, saving you time and money in the long run.
Frequently Asked Questions
1. Can glue damage my dryer drum?
Yes, glue can damage the dryer drum by leaving behind sticky residue that can trap lint and cause a fire hazard. It is important to remove any glue as soon as possible.
2. Can I use nail polish remover to remove glue?
It is not recommended to use nail polish remover as it can damage the finish of the dryer drum. Instead, try using one of the recommended cleaning solutions in this article.
3. How often should I clean my dryer drum?
You should clean your dryer drum at least once a year to remove any built-up lint or residue that can cause a fire hazard. Additionally, clean your dryer drum after any spills or accidents occur.
4. Can I use a scouring pad to remove glue?
No, it is not recommended to use a scouring pad as it can scratch the surface of the dryer drum. Use a soft cloth or a Magic Eraser instead.
5. Is it safe to use Goo Gone on my dryer drum?
Yes, Goo Gone is safe to use on a dryer drum. However, always test it on a small area first to ensure it does not damage the finish.
6. Can I use vinegar to remove glue from my dryer drum?
No, vinegar is not strong enough to remove glue from a dryer drum. Use one of the recommended cleaning solutions in this article.
7. What should I do if the glue won’t come off?
If the glue is stubborn and won’t come off, try using a Magic Eraser or WD-40 as recommended in this article. If the problem persists, seek professional help.
8. Can I clean my dryer drum with bleach?
It is not recommended to clean your dryer drum with bleach as it can damage the finish of the drum. Use soap and water instead.
9. Is it necessary to unplug the dryer before cleaning it?
Yes, always unplug the dryer before cleaning it to ensure your safety. Additionally, follow any other safety precautions recommended in your dryer’s manual.
10. Can I use a hairdryer to dry my dryer drum?
No, do not use a hairdryer or any other heat source to dry your dryer drum as it can damage the finish. Instead, let it air dry or use a soft towel to dry it manually.