Starting a home renovation project can be both exciting and daunting at the same time. While replacing your old flooring with new hardwood may sound like the perfect idea, removing the old glue-down wood floor can be quite a task. It can be a tough job to do on your own, but with some patience, the right tools, and techniques, any DIYer can successfully complete this job. In this step-by-step guide, we will show you how to remove glue down wood floor effortlessly and efficiently, without damaging the subfloor or your health. So, let’s get started!
Step 1: Safety First
Before beginning the process of removing glue down wood floor, it’s important to prioritize safety measures. Taking adequate precautions can prevent accidental injuries and ensure the process is completed without any harm. We’ve put together a list of safety guidelines to follow to make the removal process safe and successful. Don’t forget to check out our guide on removing super glue from skin if it accidentally gets on you.
Protective Gear
During the process of removing glue down wood floors, it’s important to keep safety at the forefront. To do this, it’s necessary to wear the appropriate protective gear to prevent injuries. The right gear will help keep you safe from any risks that may arise during the process. Here are some gear you’ll need to wear before removing glue down the wood floor:
Safety goggles: Safety goggles should be put on to protect your eyes from any debris that may fly up during the process of removing the glue. It’s important to find the correct fit for your face to make sure they stay in place and prevent debris from entering your eyes.
Work gloves: Work gloves should be worn to protect your hands against any accidental cuts or scrapes. Gloves will help you grip tools better and ensure you’re in complete control of the process.
Dust mask: A dust mask will help protect you from breathing in dust, debris, and other tiny particles that could be released when the glue is being removed. This mask will also protect you from toxic fumes that may be released by the adhesive, which could cause respiratory issues if inhaled.
To ensure the entire process is safe, it’s important to follow all the instructions and procedures for removing the glue. Additionally, if you’re using any chemicals to remove the glue, make sure to read the instructions thoroughly and follow all safety precautions mentioned on the package.
Once the safety gear is in place, the process of removing the glue down wood floor can begin. If you’re looking for ways to remove other types of glue, such as super glue, construction glue, nail glue, or wine label glue, visit our website and learn how to remove them easily.
Ventilation
Proper ventilation is crucial when working with adhesives and solvents. Inhaling vapors from these chemicals can cause dizziness, headaches, and even respiratory problems. Before starting the removal process, make sure to ventilate the room properly.
Here are some ways to ensure adequate ventilation:
- Open Doors and Windows: Open as many doors and windows as possible to create a cross-flow of air. This will help to disperse any fumes or vapors that may be present.
- Use Fans: Place a fan in the room to help circulate the air. This will help to blow any fumes or vapors out of the room.
- Wear a Mask: In addition to proper ventilation, it’s also a good idea to wear a mask to prevent inhalation of any chemicals. A dust mask or respirator should be sufficient.
Remember, even after you’ve removed all the glue, there may still be residue that needs to be cleaned off the floor. Check out our guide on removing super glue residue for tips on how to get rid of any remnants of adhesive left on the floor.
Step 2: Prepare the Work Area
Before beginning the glue down wood floor removal process, it’s important to prepare the work area properly. This will help ensure that the task is done efficiently and without causing any damage to surrounding surfaces or items. Follow these next steps to get started. And if you need to remove glue from other surfaces, such as blanket, wall or clothes, check out our guides on how to get mouse trap glue off blanket, how to get fly trap glue off wall, or how to get crazy glue out of clothes.
Clean the Floor
Prior to removing the glue down wood floor, it is essential to prepare the work area, starting with the floor cleaning process. This is a crucial step in ensuring that the flooring underneath is not damaged during the removal process. Begin by removing any debris, dust, or dirt from the surface of the floor. Use a broom and dustpan or a vacuum cleaner to clean the area thoroughly. It is important to ensure that the surface is completely clean before proceeding to the next steps.
Once the floor surface has been cleaned, use a cleaning solution to remove any remaining dirt or residue that may be present on the surface. There are different types of solutions available in the market, but a simple solution made up of water and vinegar will suffice.
To make this solution, mix equal parts of water and vinegar in a bucket. Dip a mop or sponge in the solution and gently scrub the floor surface. It is important to avoid using too much water, as excess water can cause damage to the wood flooring. After scrubbing, rinse the area with clean water and allow it to dry completely.
Cleaning the floor surface before removing the glue ensures that the area is free from dirt and debris, which can affect the efficiency of the removal process. It ensures that the flooring underneath is not damaged during the process, and it guarantees that the remaining glue will not stick to residual dirt, making the removal process easier.
Now that the floor surface is clean, it is time to move to the next step of covering adjacent areas to prevent any damage during the removal process. If you want more information on how to remove construction glue, you can read our detailed guide for a step-by-step process.
Cover Adjacent Areas
When removing glue down wood floors, it is important to protect adjacent areas from any damage or debris that may be created during the removal process. Covering adjacent areas will save you from a lot of trouble later on.
Here are some tips for protecting adjacent areas during the glue down wood floor removal process:
- Use drop cloths or plastic sheeting to cover the floors and any nearby furniture. This will protect them from any dust or debris that may be created during the removal process.
- If you are removing glue from a wall, use painter’s tape to cover any baseboards or molding around the area.
- Make sure that any electrical outlets, light switches, or other fixtures in the area are covered with plastic and secured with tape to prevent any damage or debris from getting inside them.
- Consider closing off the work area with plastic sheeting or temporary walls to prevent dust and debris from spreading to other parts of the house.
By taking these simple precautions, you can help minimize the mess and potential damage that can be caused during the glue down wood floor removal process.
Note: If you need advice on how to remove glue from specific surfaces, such as carpet or nail glue, be sure to check out our other articles, such as How to Remove Carpet Glue, How to Remove Nail Glue, or What Dissolves Glue Stick. Additionally, once you have removed the glue down wood floor, you may need to remove any remaining adhesive residue from the surface. You can find more information on how to do this in our article, How to Remove Wine Label Glue.
Step 3: Begin the Removal Process
Now that you have taken all necessary safety precautions and prepared your work area, it’s time to dive into the removal process. This step requires a bit more physical effort but will result in significant progress in removing the glue down wood floor. Don’t worry if the process seems daunting at first, we will break it down into two sub-steps to make it easier to follow. So, roll up your sleeves, put on your gloves and let’s get started!
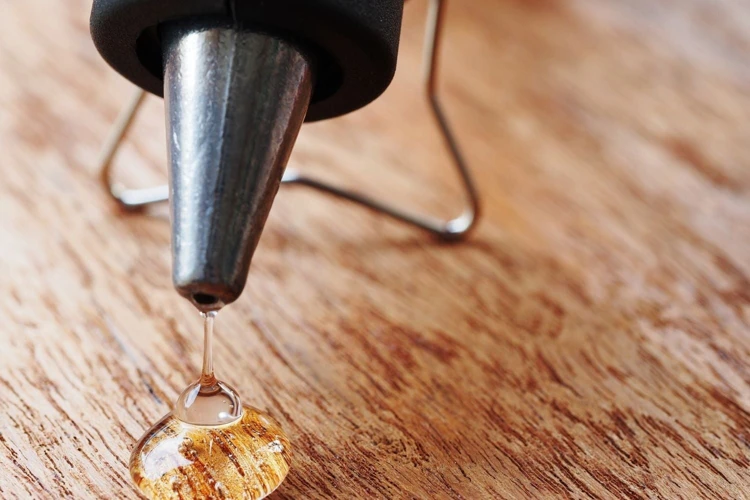
Use a Heat Gun
When it comes to removing glue down wood flooring, using a heat gun can be an effective method. Follow these steps to use a heat gun safely and efficiently:
- Plug in heat gun and set it on high heat: Make sure the heat gun is plugged in and set on a high heat setting before use.
- Hold the heat gun over the glued area: Hold the heat gun two to three inches above the glued area and move it back and forth in a slow motion.
- Heat the glue for several seconds: Keep the heat gun steadily moving over the glued area for several seconds until the glue softens.
- Use a scraper to remove the softened glue: Once the adhesive has softened, use a scraper to gently pry up the flooring at a 45-degree angle, being careful not to gouge or damage the subfloor.
- Repeat the process: Work in small sections and repeat the process until all of the flooring has been removed.
Remember to take breaks as necessary to allow the heat gun to cool down. Also, be sure to wear proper protective gear and work in a well-ventilated area to avoid inhaling fumes. Using a heat gun can be an effective way to remove glue down wood flooring, but it can also be time-consuming. If you have a large area to remove, you may want to consider hiring a professional to do the job for you.
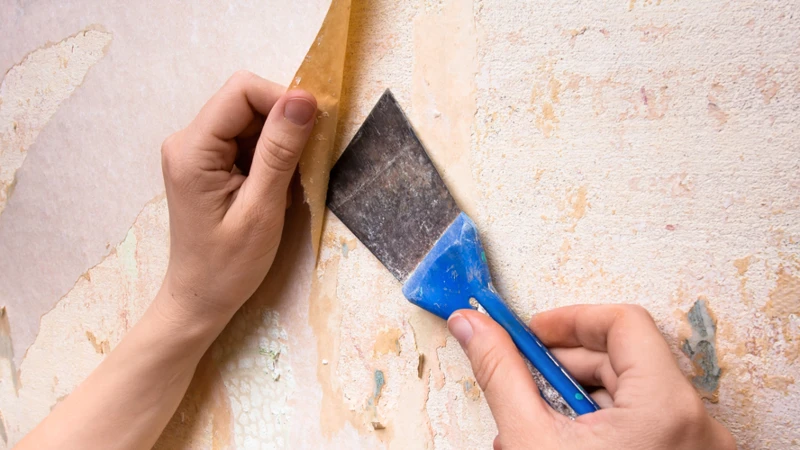
Scrape the Floor
Once you have used the heat gun to loosen the adhesive, it’s time to move on to scraping the floor. This process requires a bit of elbow grease, but with the right tools, you can make the job much easier. Here are the steps you need to follow to scrape the floor:
- Choose the Right Tool: There are a few different tools you can use to scrape the floor, but the most effective one is a flooring scraper. This tool typically has a flat metal blade with a long handle, making it easy to use while standing up. You can also use a putty knife or a paint scraper if you don’t have a flooring scraper on hand.
- Scrape in the Right Direction: When scraping the floor, it’s important to work in the direction of the wood grain. This will help prevent the scraper from digging into the wood and causing damage. Use long, sweeping motions to remove the adhesive, and be sure to overlap your strokes to ensure that you’re removing all of the glue.
- Keep the Blade Sharp: As you work, the blade of your scraper will become dull. Make sure to sharpen it periodically to make the job easier and more efficient.
- Remove Any Residue: After you have scraped the floor thoroughly, use a damp cloth or a sponge to wipe away any remaining adhesive. This will help ensure that the floor is clean and ready for the next step in the process.
Remember to take breaks frequently and keep yourself hydrated. Scraping the floor can be tiring work, but with the right tools and technique, you’ll be able to remove the glue down wood flooring efficiently.
Step 4: Get Rid of Any Remaining Glue
As you progress through the glue down wood floor removal process, you may encounter stubborn patches of glue that refuse to budge. Don’t fret, this is a common occurrence. In step three, you used a heat gun and scraper to remove as much glue as possible, but some glue may still remain. It’s important to get rid of any remaining glue before moving on to the final step of the process. In this step, we will explore two methods for removing any last traces of glue; using a solvent-based adhesive remover, or utilizing mechanical methods. Let’s get started!
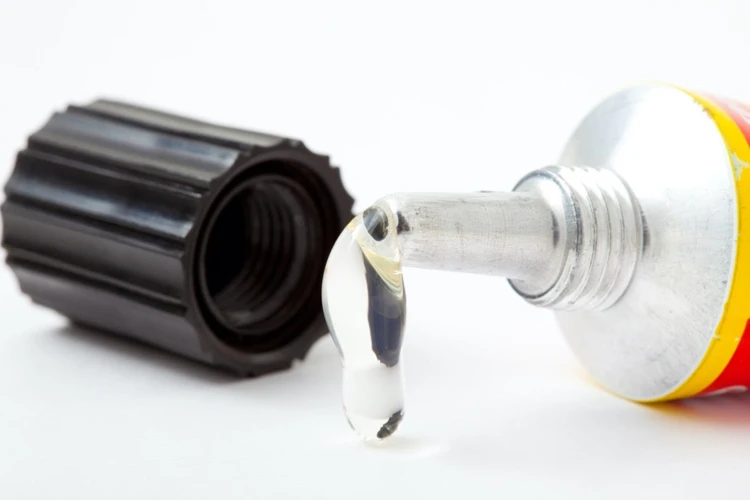
Use Solvent-Based Adhesive Remover
When it comes to removing glue down wood floor, a solvent-based adhesive remover is one of the most effective solutions you can use. However, before using any adhesive remover, it’s important to read and understand the instructions printed on the product label.
Here are the steps to safely and effectively use a solvent-based adhesive remover:
| Step | Instructions |
|---|---|
| Step 1 | Ventilate the Area: Open all windows and doors to allow proper ventilation. Use fans or air movers to increase airflow and keep the area well-ventilated. It’s important to avoid inhaling fumes from the adhesive remover, as it can cause respiratory problems. |
| Step 2 | Apply Adhesive Remover: Using a paintbrush or roller, apply the adhesive remover in small sections. Avoid applying too much of the remover at once as it can damage the wood floor. Start from the corner of the area and work your way outwards. |
| Step 3 | Allow Time to Soak: Leave the adhesive remover to soak for the recommended time on the product label. This will give the remover enough time to dissolve the adhesive and make it easier to remove. |
| Step 4 | Scrape the Adhesive: Using a scraper or putty knife, gently scrape the adhesive from the wood floor. Be careful not to damage the wood floor underneath. If the adhesive is difficult to remove, apply more adhesive remover and repeat the process. |
| Step 5 | Clean the Area: Once all the adhesive has been removed, clean the area with a damp cloth or mop to remove any residue. Ensure that there are no traces of adhesive remover left on the surface. Allow the area to dry completely before proceeding with any further steps. |
Remember, when using a solvent-based adhesive remover, always wear protective gear such as gloves and goggles to prevent any skin or eye irritations. Additionally, it’s important to test a small, inconspicuous area of the wood floor before applying the adhesive remover on a larger area. This will help you ensure that the remover won’t cause any damage to the wood floor.
Use Mechanical Methods
When all else fails in removing stubborn glue down wood floor, mechanical removal may be necessary. This method involves grinding or sanding the glue off the floor surface. While it’s a more aggressive approach, it’s an effective way to get rid of any remaining glue residues. Here are some mechanical methods you can use:
| Method | Description |
|---|---|
| Grinding | Grinding is a technique that uses a floor grinder equipped with a special diamond abrasive disc to remove the glue from the floor’s surface. This method can be time-consuming and require a bit of skill to avoid any damage to the wood floor. |
| Sanding | Sanding involves using a drum sander or sanding pads to remove the glue off the floor manually. This method requires more physical effort than grinding, but it allows for more control over the process. To avoid damaging the wood surface, it’s important to use a fine-grit sandpaper and to sand the surface evenly. |
| Scraping | Scraping is done using a scraper or a chisel to remove any remaining glue on the floor surface. It’s a labour-intensive method that requires a lot of patience. Be careful when using a scraper or chisel to avoid damaging the wood surface. |
Remember to always wear protective gear when using mechanical methods, including gloves, goggles, and a respirator mask. These methods can create a lot of dust, debris and noise, so it’s important to ensure adequate ventilation by opening windows and using a fan.
Step 5: Clean and Inspect the Floor
Now that all the glue has been removed from the floor, it’s time to give it a thorough cleaning and inspection. This step is crucial to ensure that the floor is safe to use and that there is no damage that needs to be repaired. A clean floor will also be easier to work with if you plan on installing a new floor in the future. Let’s dive into the final step of the glue-down wood floor removal process.
Vacuum the Area
After all the glue has been removed, the next step is to clean and inspect the floors. The first step in cleaning is vacuuming the area thoroughly to remove any debris, dust, or small glue particles left on the surface. It is essential to do this step before wiping or mopping the floor because wiping or mopping may push debris and dirt into the floor, making it difficult to clean further. To ensure that all residues and particles are removed, it is best to use a vacuum with a hose attachment and a soft-bristled brush.
Here are some tips to follow when vacuuming:
- Start at one end of the area and work your way across, ensuring that each area is cleaned thoroughly before moving to the next section
- Make sure to use the vacuum’s crevice tool to clean around baseboards and corners where dirt and debris may accumulate.
- If the floors have deep grooves or crevices, use a specialized attachment to clean them effectively and avoid scratching or damaging the floor.
- Check the vacuum’s filter regularly and replace it if necessary to ensure maximum suction power and prevent clogging.
Keep in mind that vacuuming the floor is an essential step in the cleaning process that ensures all debris and residues are removed. After vacuuming, the floor is ready for inspection. This step helps to uncover any damages that may have occurred during the removal process.
Inspect for Damage
After removing the glue down wood floor, your next step is to closely inspect the area for any signs of damage. This is an important step because it helps you determine if the floor is ready for the new installation process. Follow these simple steps to properly inspect for damage:
- Start by thoroughly examining the entire floor surface, paying close attention to any areas that may have undergone physical damage during the removal process.
- Look out for cracks, scuffs, and stains, which may be a sign of water damage. Address any water damage issues and apply wood filler to any cracks or gaps on the floor surface.
- Check for discoloration on the surface of the floor. If any discoloration is present, it may be indicative of mold growth. Use a mold removal solution to address this issue.
- If any boards were damaged during the removal process, it is essential that you replace them before carrying out the installation process. Inspect each board closely to determine if it needs to be replaced.
- Ensure that the surface is completely free of any debris, glue, or solvent residue that may have been left behind during the removal process. Any residue left behind can affect the performance of the new flooring material and may also reduce its lifespan.
- After completing a thorough inspection of the floor surface, clean up the area and allow it to dry completely before proceeding to the next step.
By following these simple steps, you can ensure that your new flooring installation process is performed on a surface that is free of any damage or debris. If you notice any significant damage that cannot be repaired, consider consulting a professional installer.
Conclusion
After following the step-by-step guide for removing glue down wood flooring, you should have a clean and glue-free floor surface that is ready to be refinished or have new flooring installed. It is important to remember that the removal process can be time-consuming and labor-intensive, but with the right techniques and equipment, it can be done efficiently and effectively.
Always remember to prioritize safety by wearing protective gear and ensuring good ventilation in the work area. The first step is to prepare the work area by cleaning the floor and covering adjacent areas with protective materials. Then, begin the removal process by using a heat gun to loosen the adhesive and scraping the floor surface.
After removing the bulk of the glue and wood flooring, you can use solvent-based adhesive remover or mechanical methods to get rid of any remaining adhesive. Once the glue is removed, vacuum the area to remove any debris and inspect the floor for damage.
Overall, removing glue down wood flooring is a challenging task, but it can be accomplished with careful planning and proper execution. By following the guidelines in this step-by-step guide, you can successfully remove glue down wood flooring and prepare your floor for a new look or finish.
Frequently Asked Questions
What type of protective gear should I wear when removing glue down wood floor?
It is recommended to wear gloves, eye protection, and a respirator mask to protect your skin, eyes, and lungs from glue fumes.
Why is ventilation important during the glue down wood floor removal process?
Ventilation helps to prevent inhaling glue fumes and allows fresh air to circulate in the work area.
How can I clean the floor before removing the glue down wood floor?
You can use a vacuum cleaner or broom to remove dirt and debris from the floor before beginning the removal process.
What should I use to cover adjacent areas during the glue down wood floor removal?
Cover adjacent areas with plastic sheeting or drop cloths to protect them from debris and dust created during the removal process.
How do I use a heat gun to remove glue down wood floor?
Hold the heat gun several inches away from the floor and move it in a back-and-forth motion. The heat will soften the glue, making it easier to scrape off.
What is the best tool to use for scraping the floor during the glue down wood floor removal?
A handheld floor scraper or a floor scraper attachment for a reciprocating saw are effective tools for removing the glue and wood floor.
What is solvent-based adhesive remover?
Solvent-based adhesive remover is a chemical solution that dissolves glue and adhesive residue from surfaces.
Can I use mechanical methods to remove glue down wood floor?
Yes, you can use mechanical methods such as sanding or grinding to remove any remaining glue and adhesive residue. However, these methods can be time-consuming and require special equipment.
Can I reuse the removed wood floor?
It depends on the condition and quality of the wood. If the floor is in good condition, it can be reused. However, if the floor is damaged, warped, or rotted, it may need to be replaced.
What should I do if the glue down wood floor removal process damages the concrete underneath?
If the concrete underneath is damaged during the removal process, it may need to be repaired or resurfaced before installing new flooring.